


How to Integrate Your Custom VoIP Service
To integrate your custom VoIP service, follow these steps:1
Go to Phone Numbers Settings
Start by clicking your profile card at the bottom-left corner of the sidebar, then open Settings.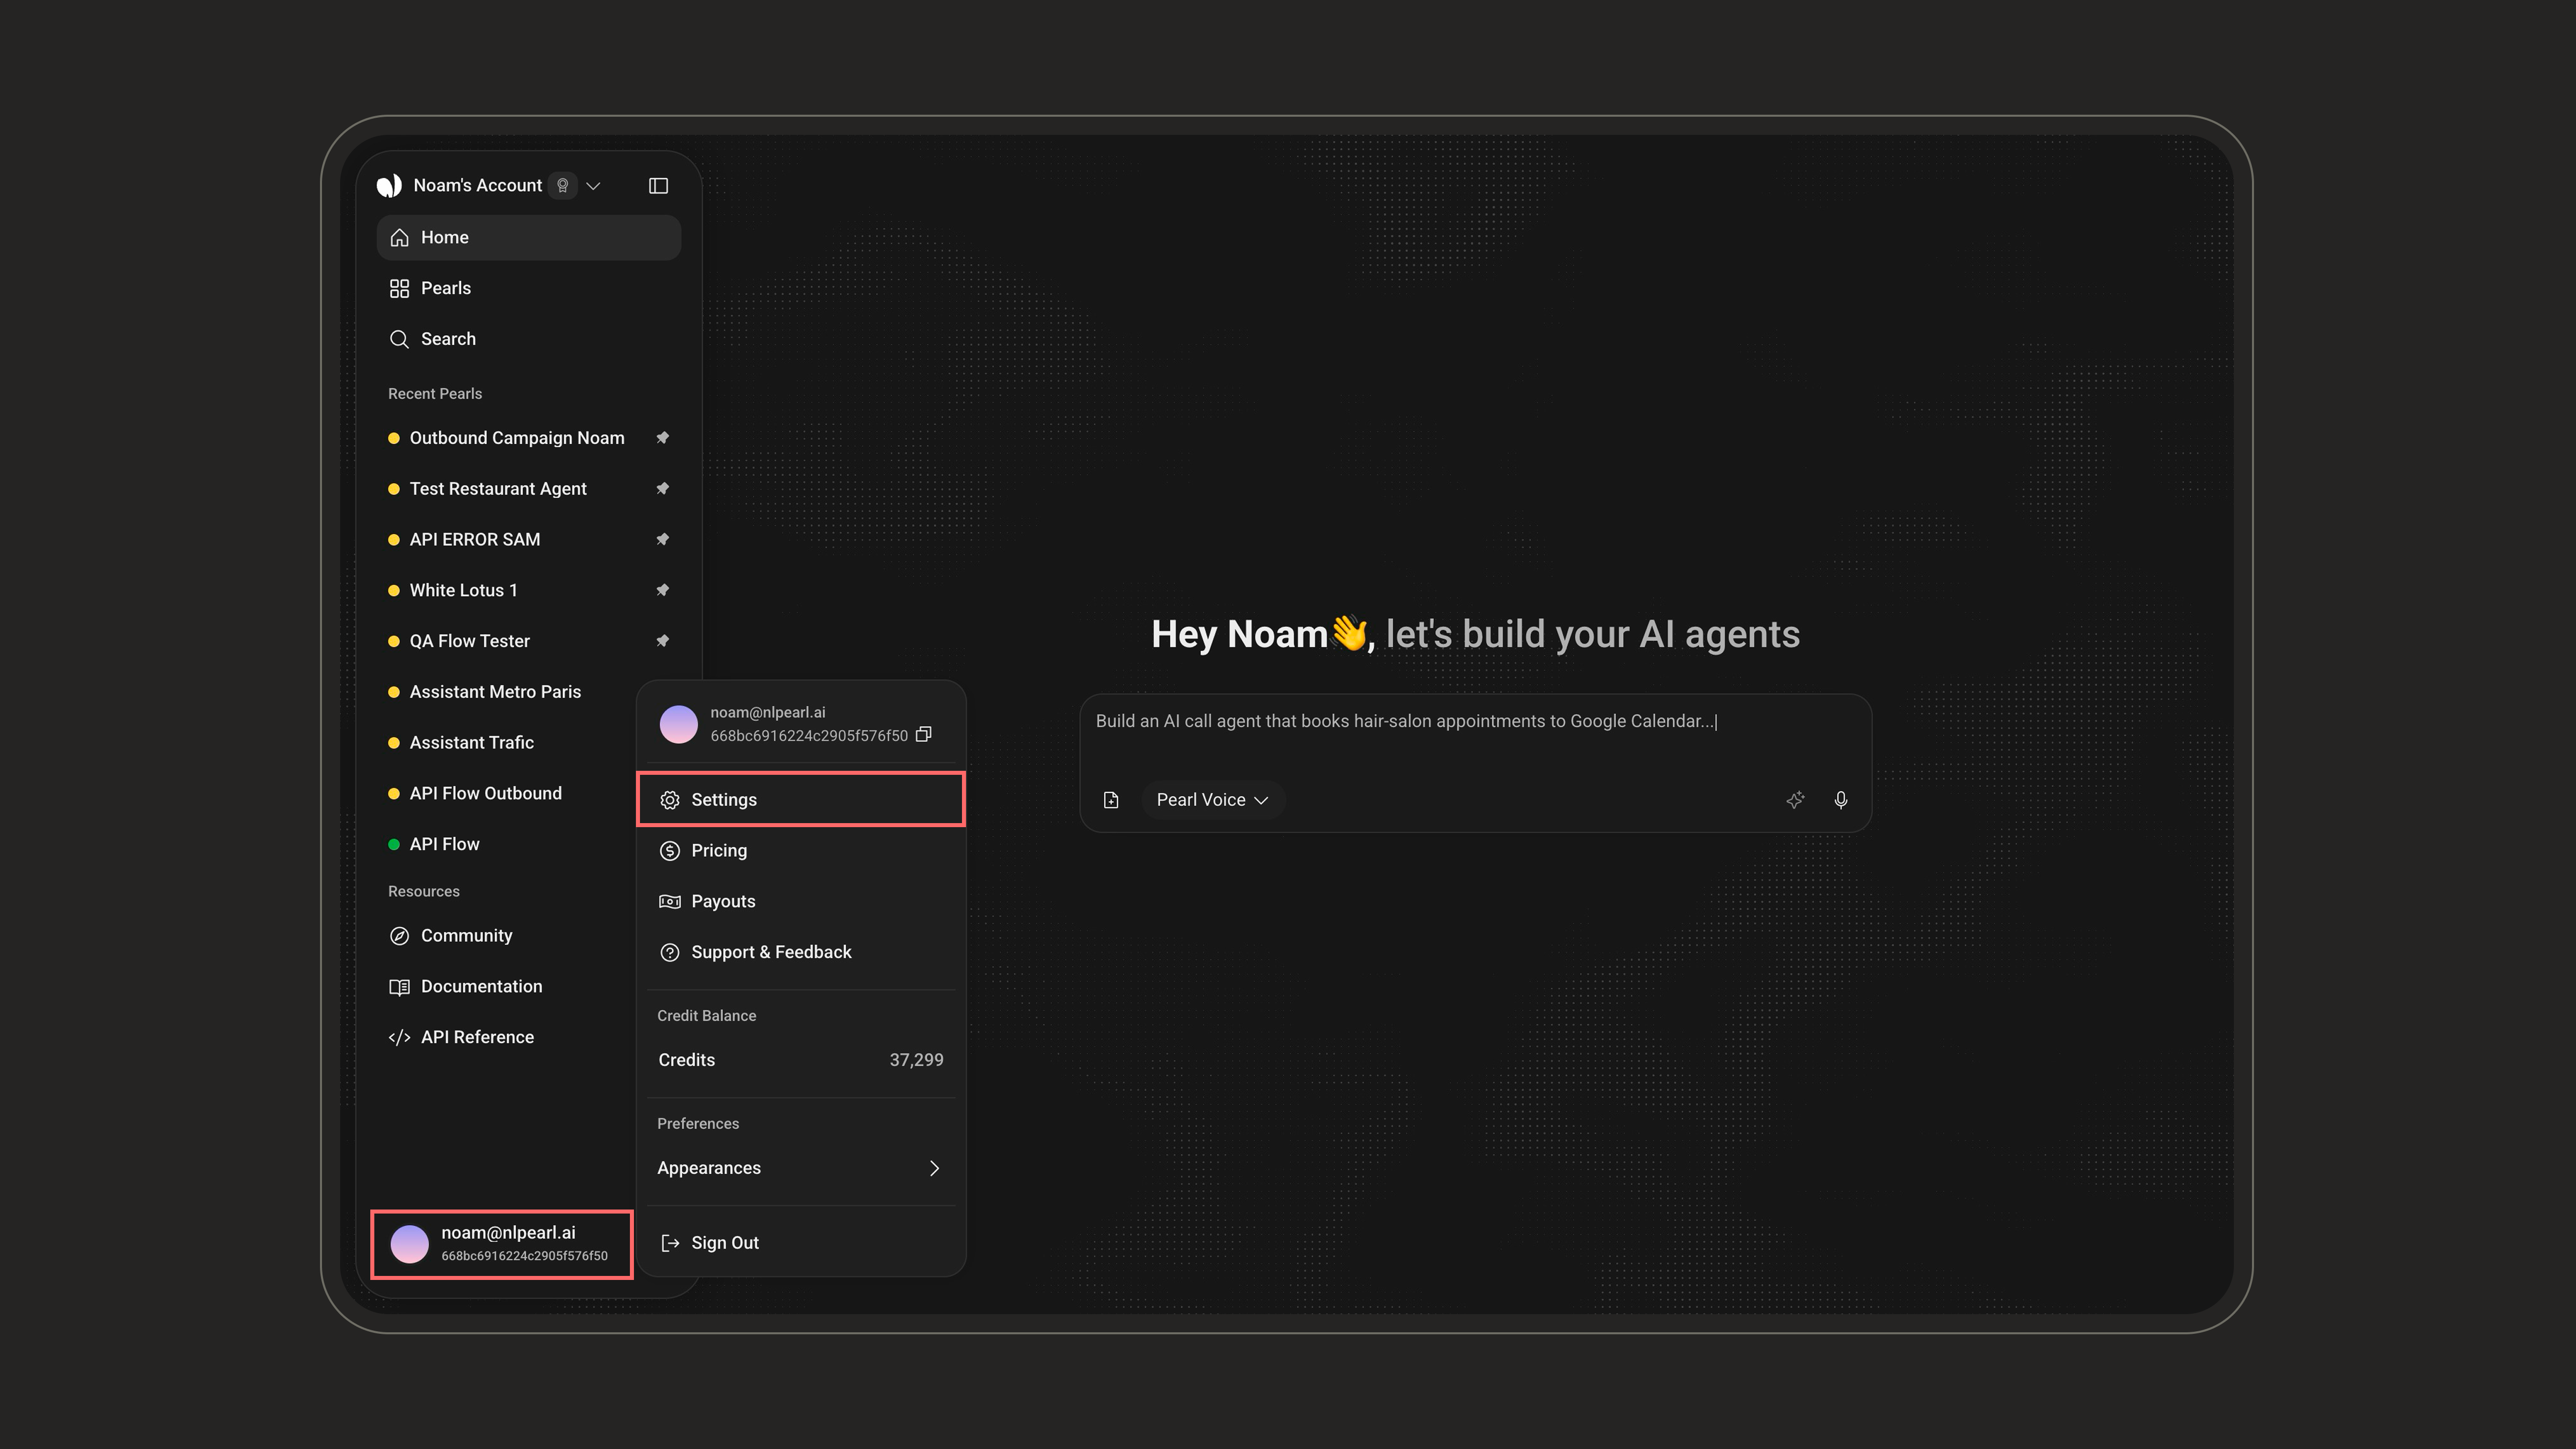
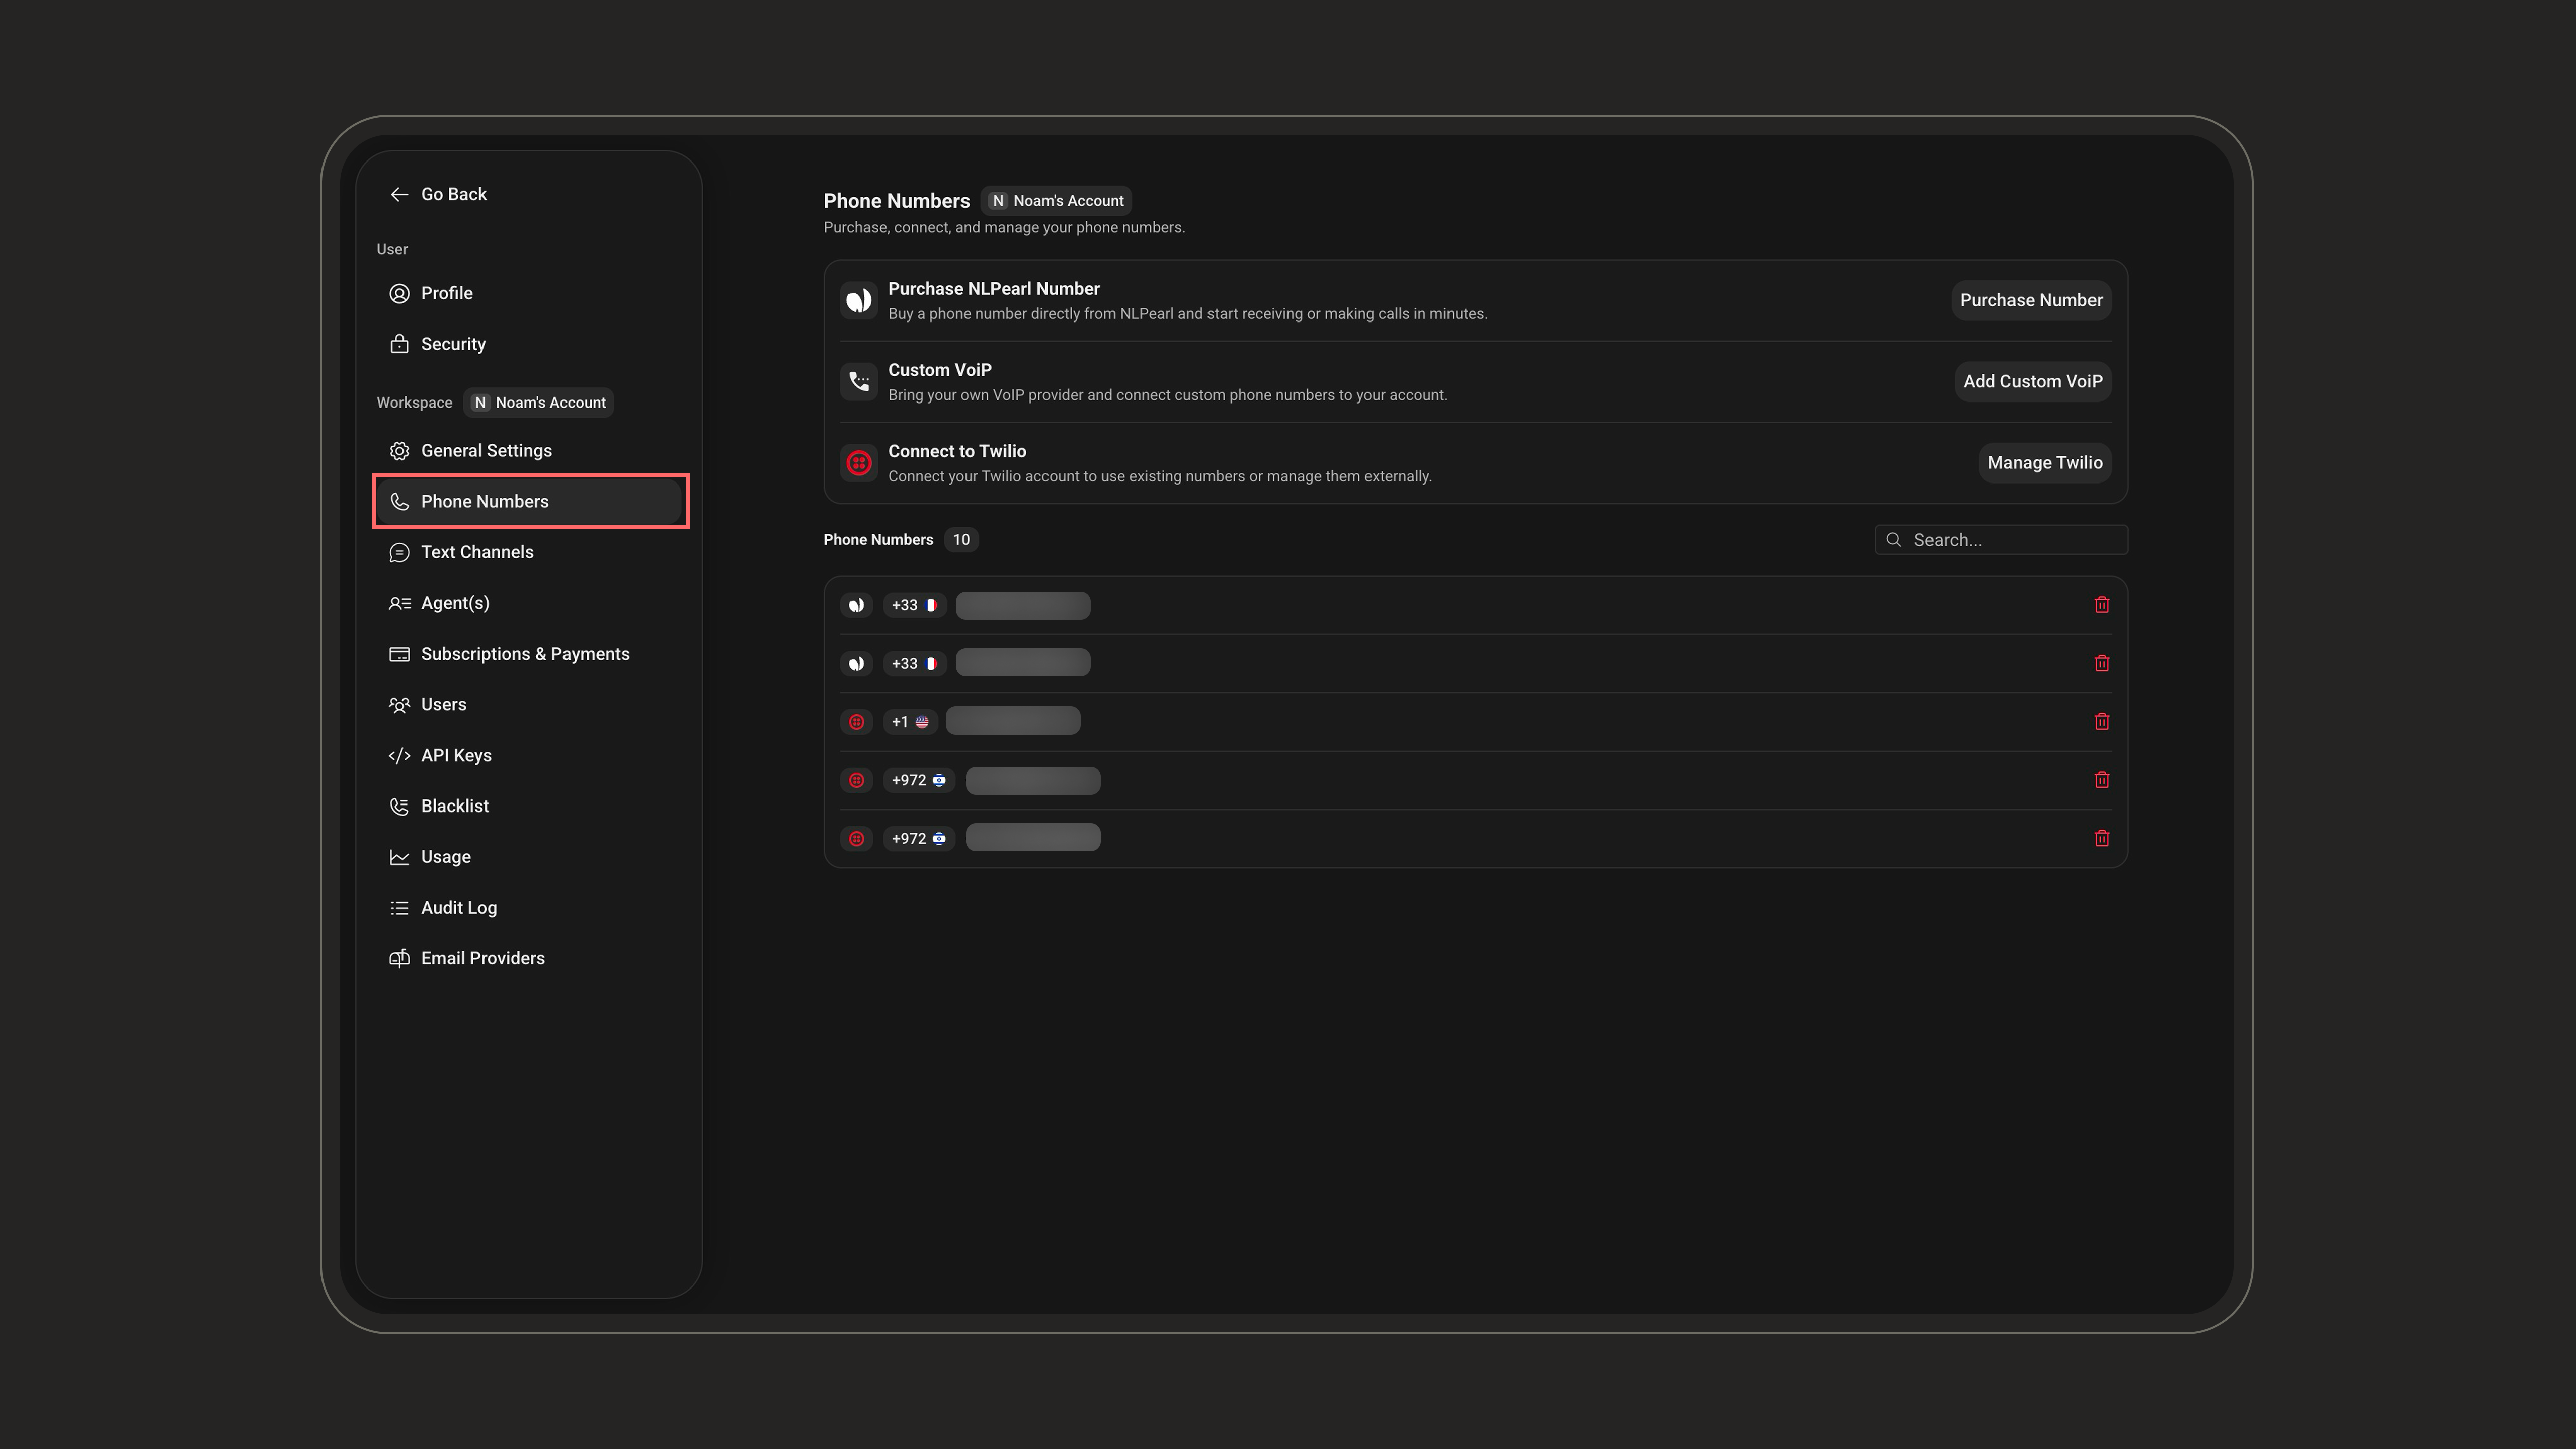
2
Click on Custom VoIP
In the Phone Numbers tab, locate the Custom VoIP row and click Add Custom VoIP to start setting up your own provider.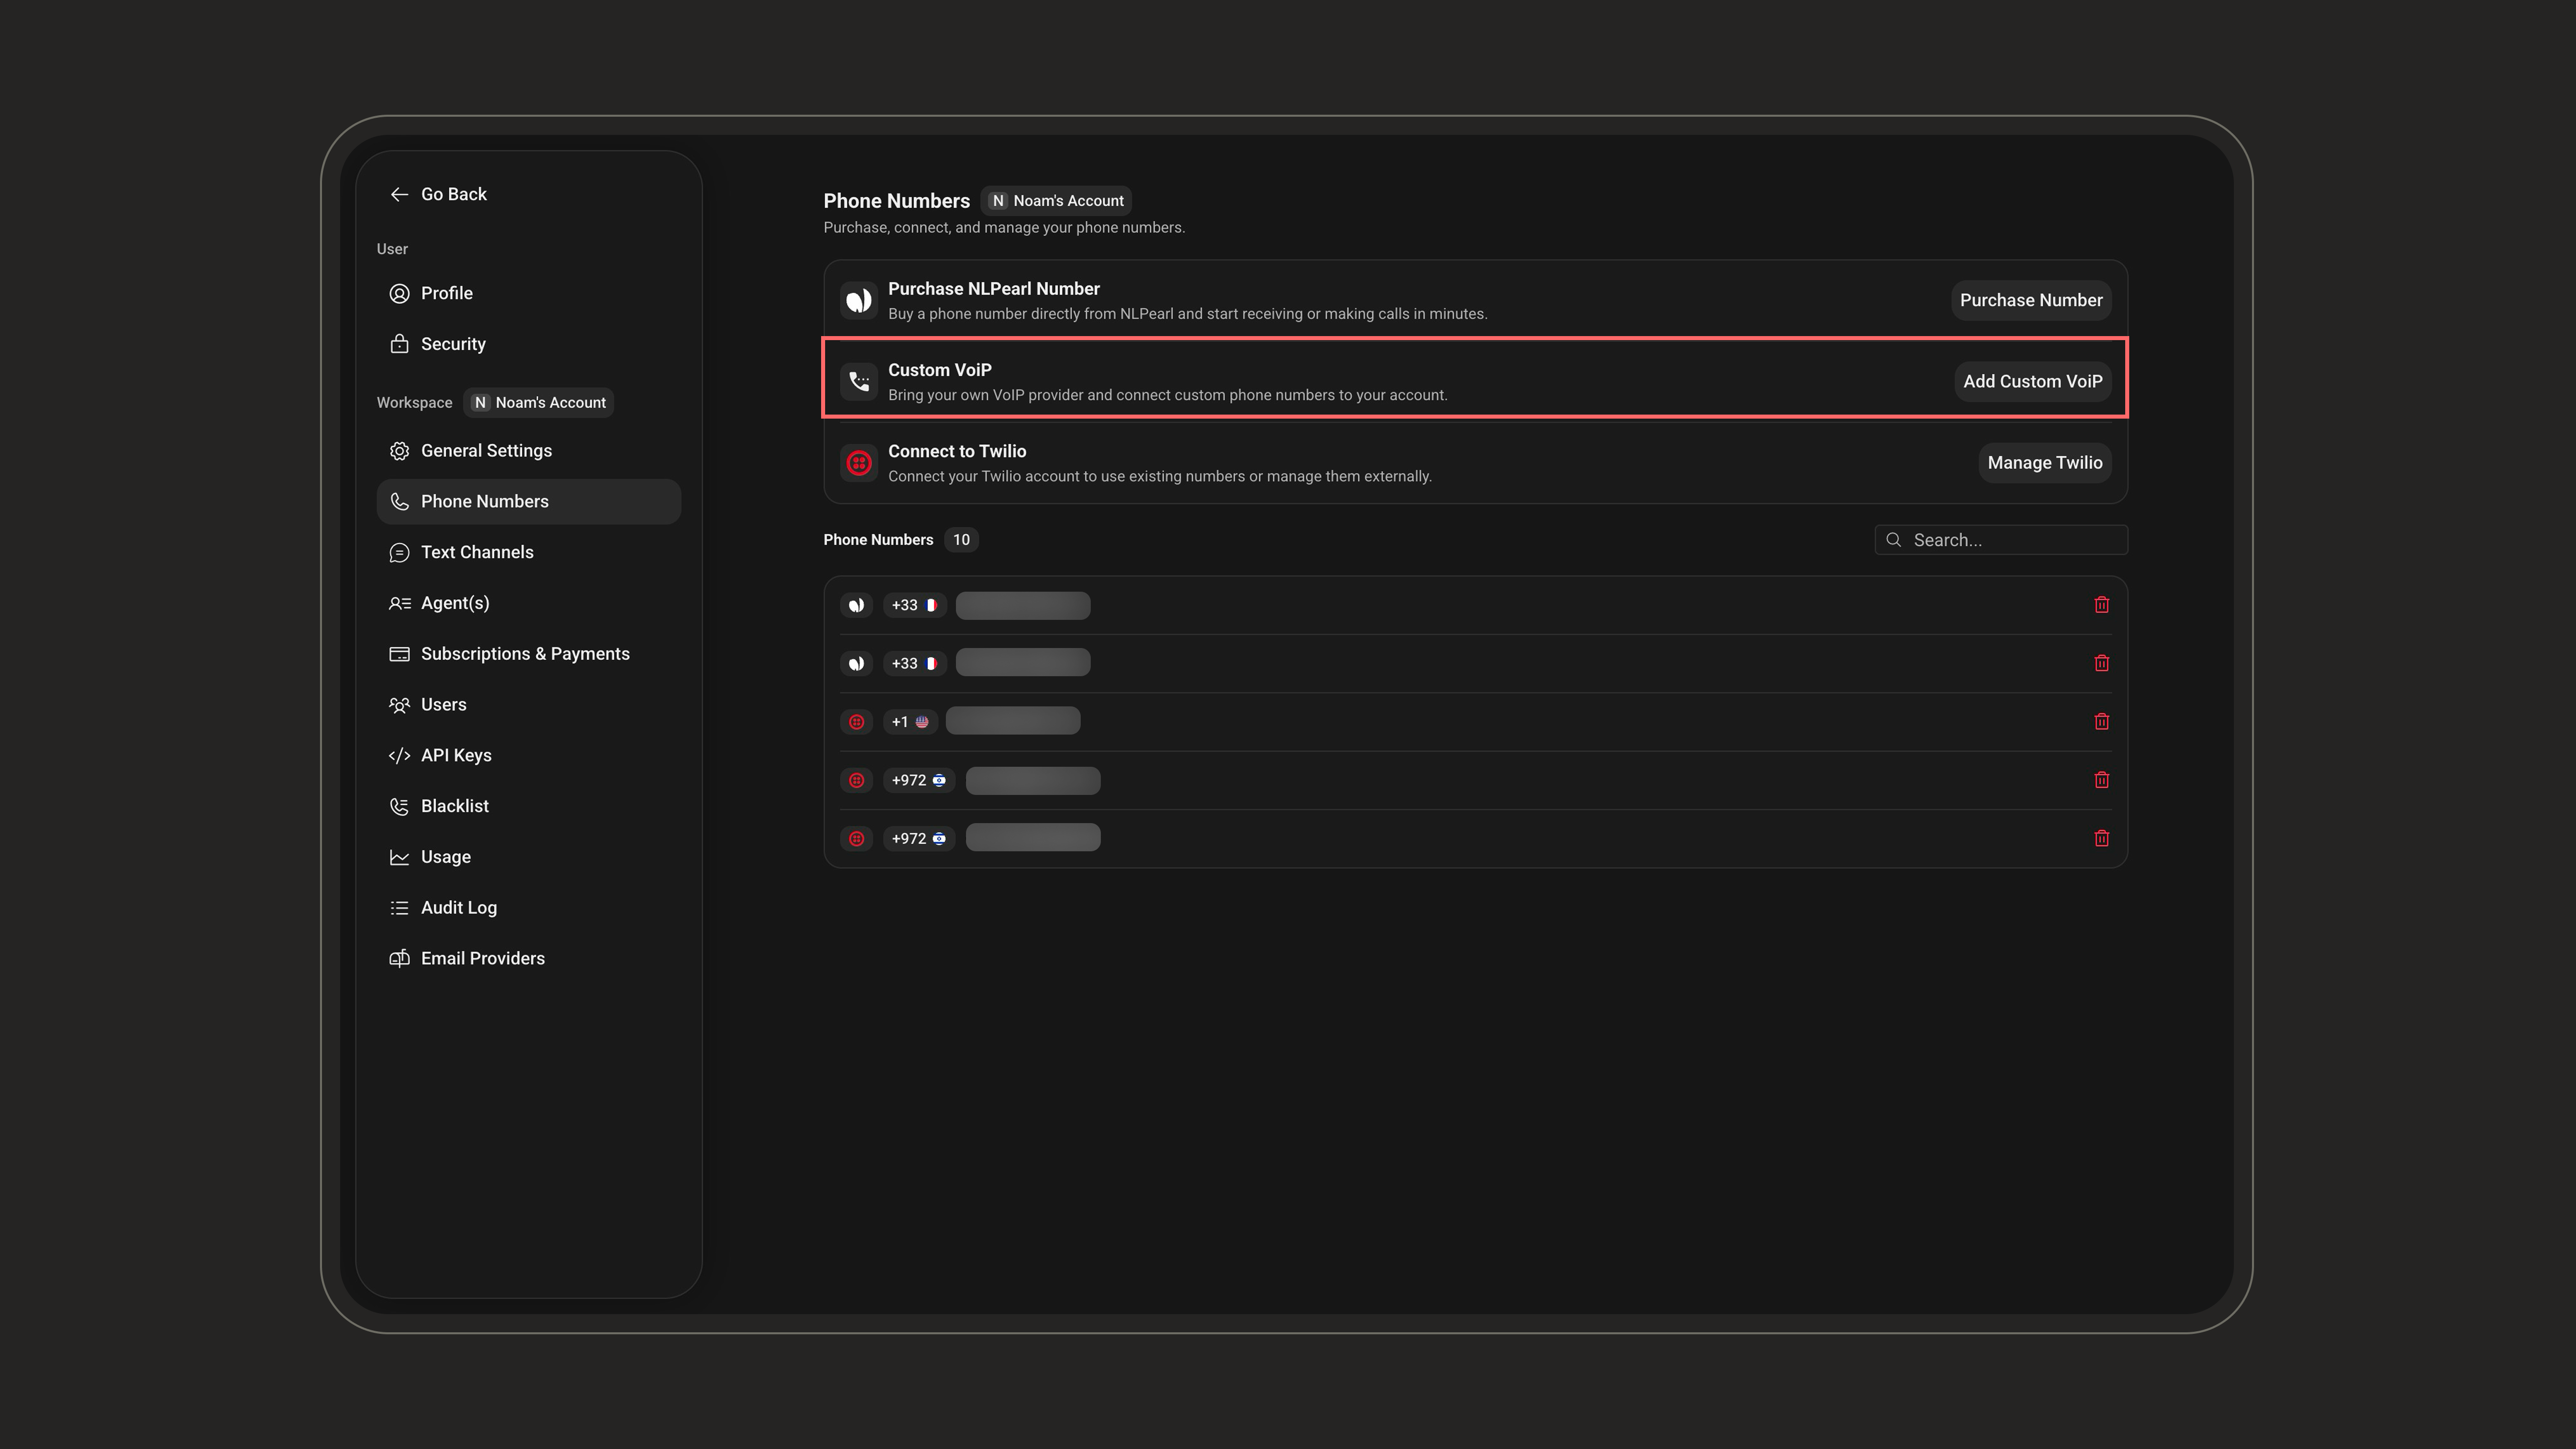
3
Add Phone Number
Enter the phone number you want to associate with this custom VoIP configuration.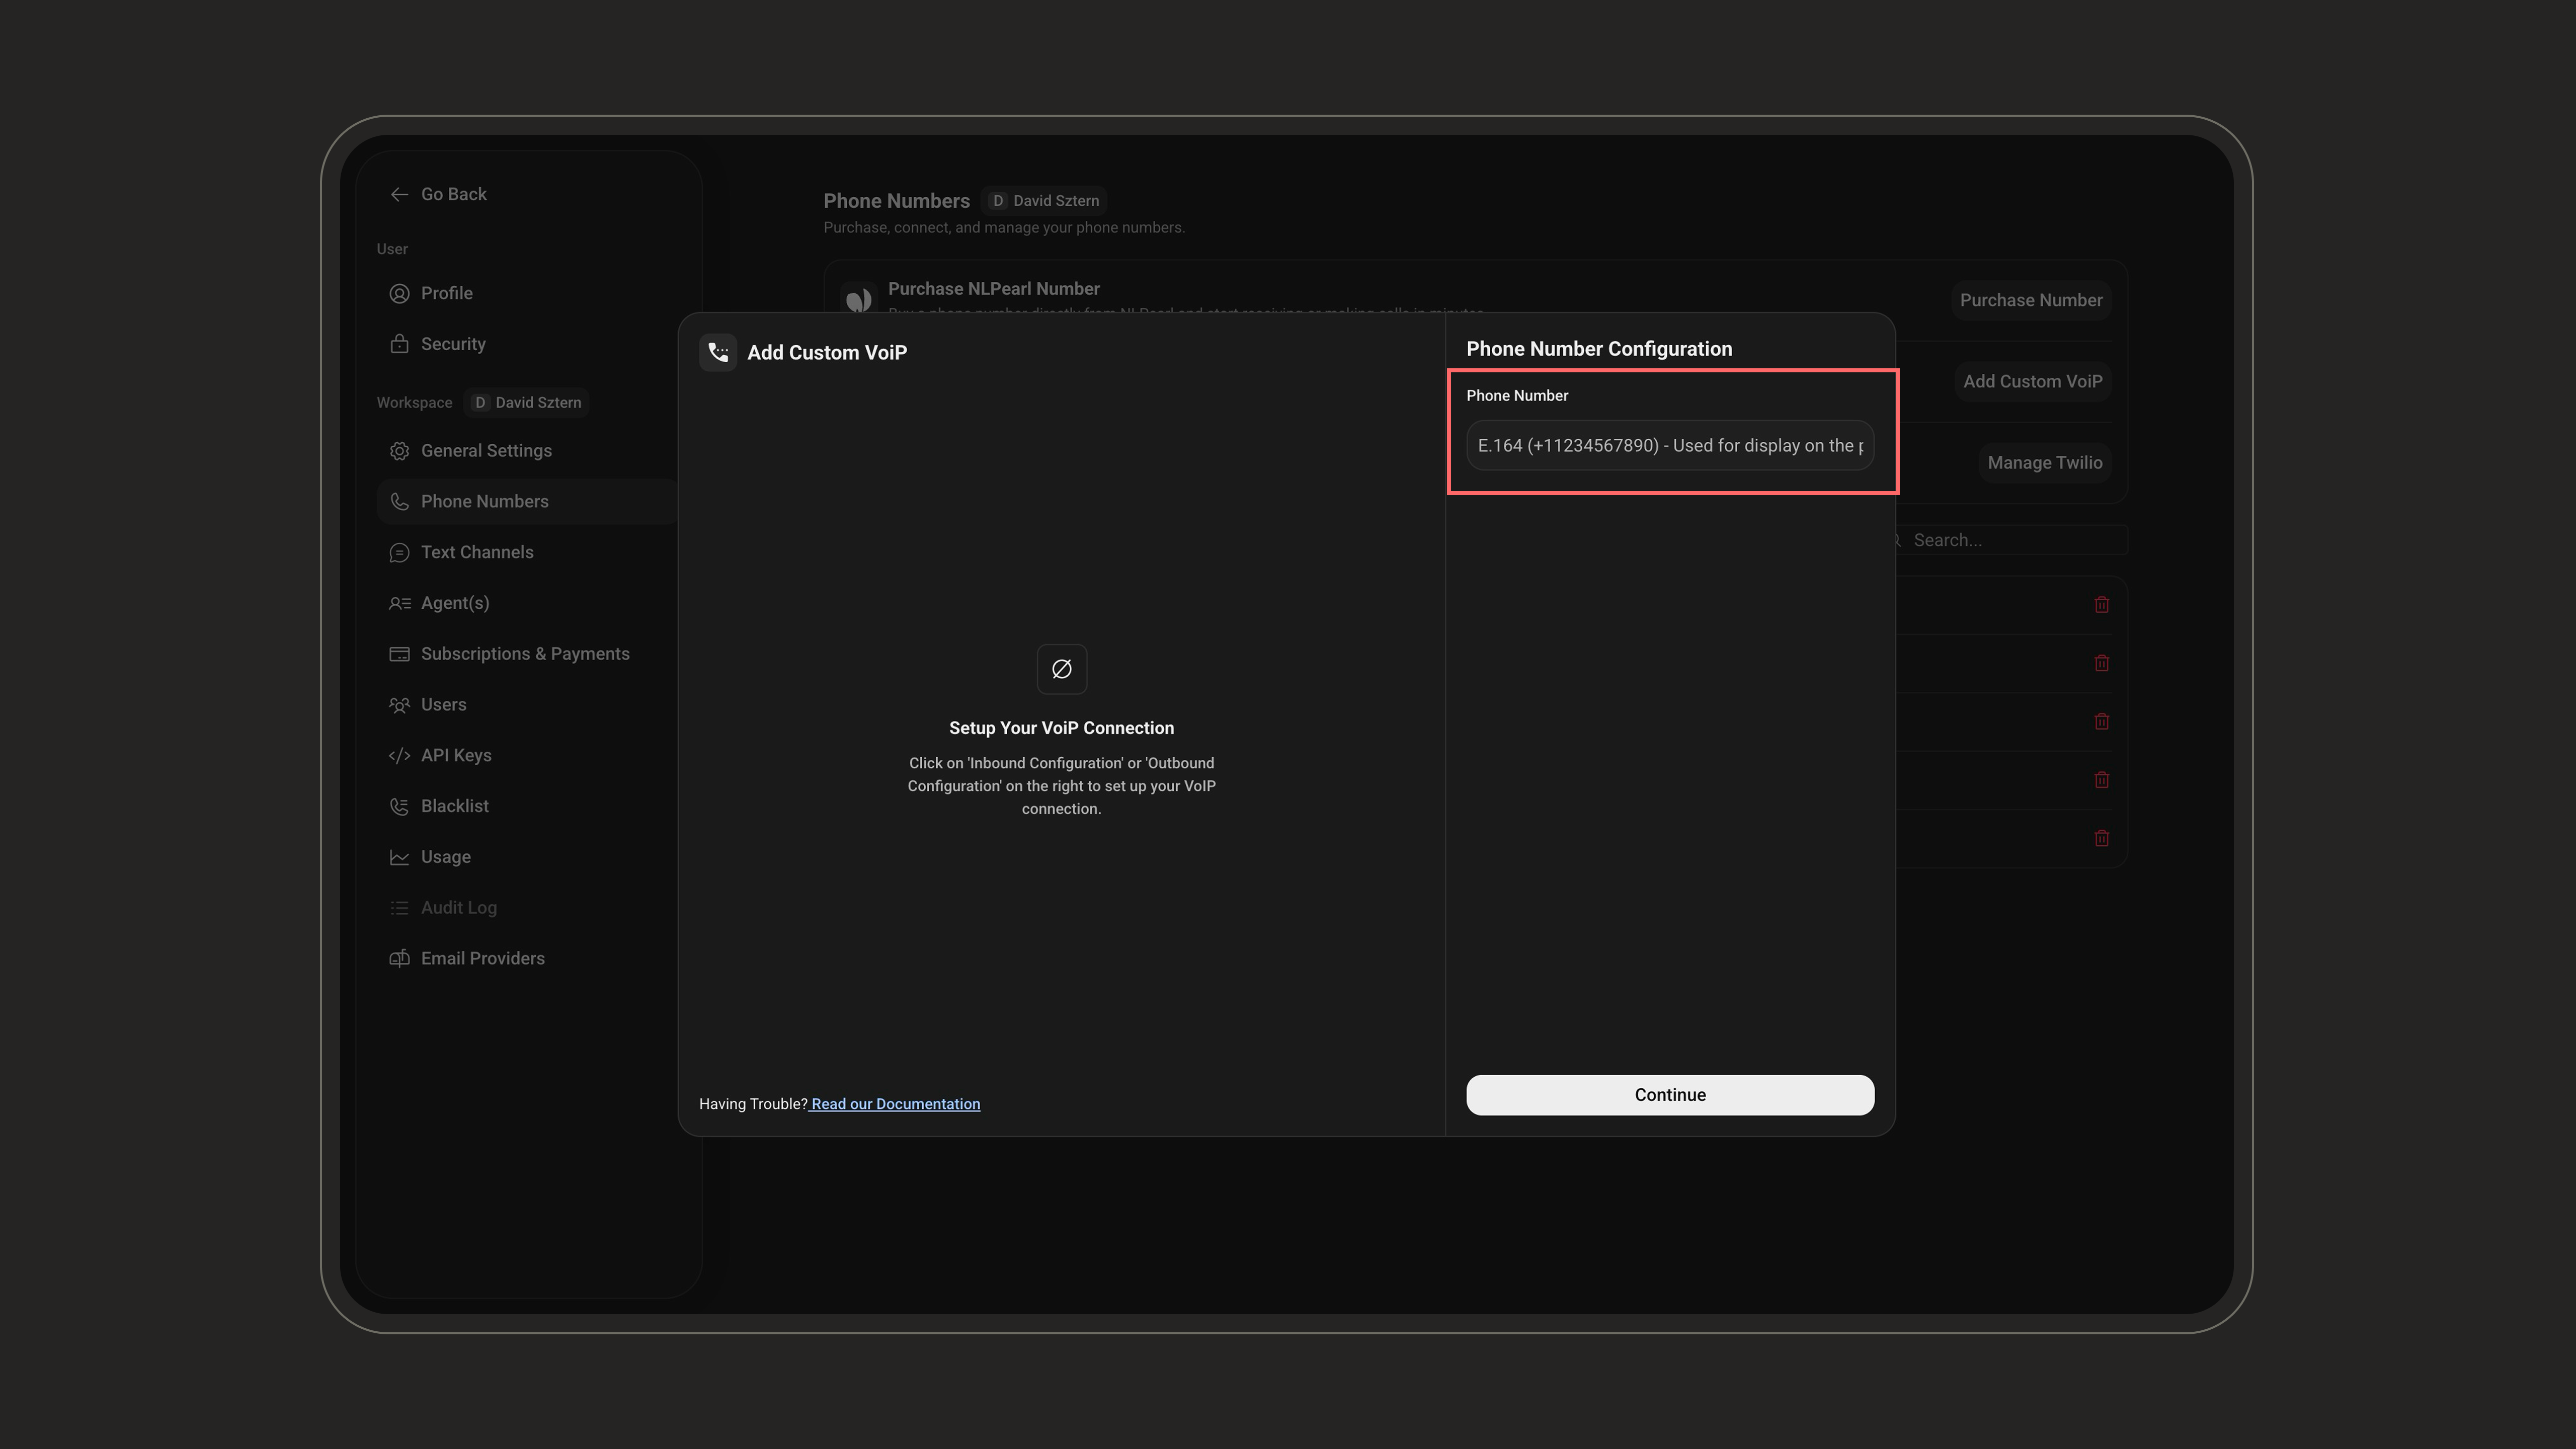
Enter it in E.164 format (digits only, with an optional leading
+). This label is mainly for display (DID number, extension, etc.) and doesn’t have to be a routable number, but it must be numeric.4
Configure Inbound and/or Outbound
After adding the number, you land on a setup screen with two cards — Inbound Configuration and Outbound Configuration — each showing a Configured / Not Configured badge. Configure the direction(s) you need (one or both), then click Finish Setup.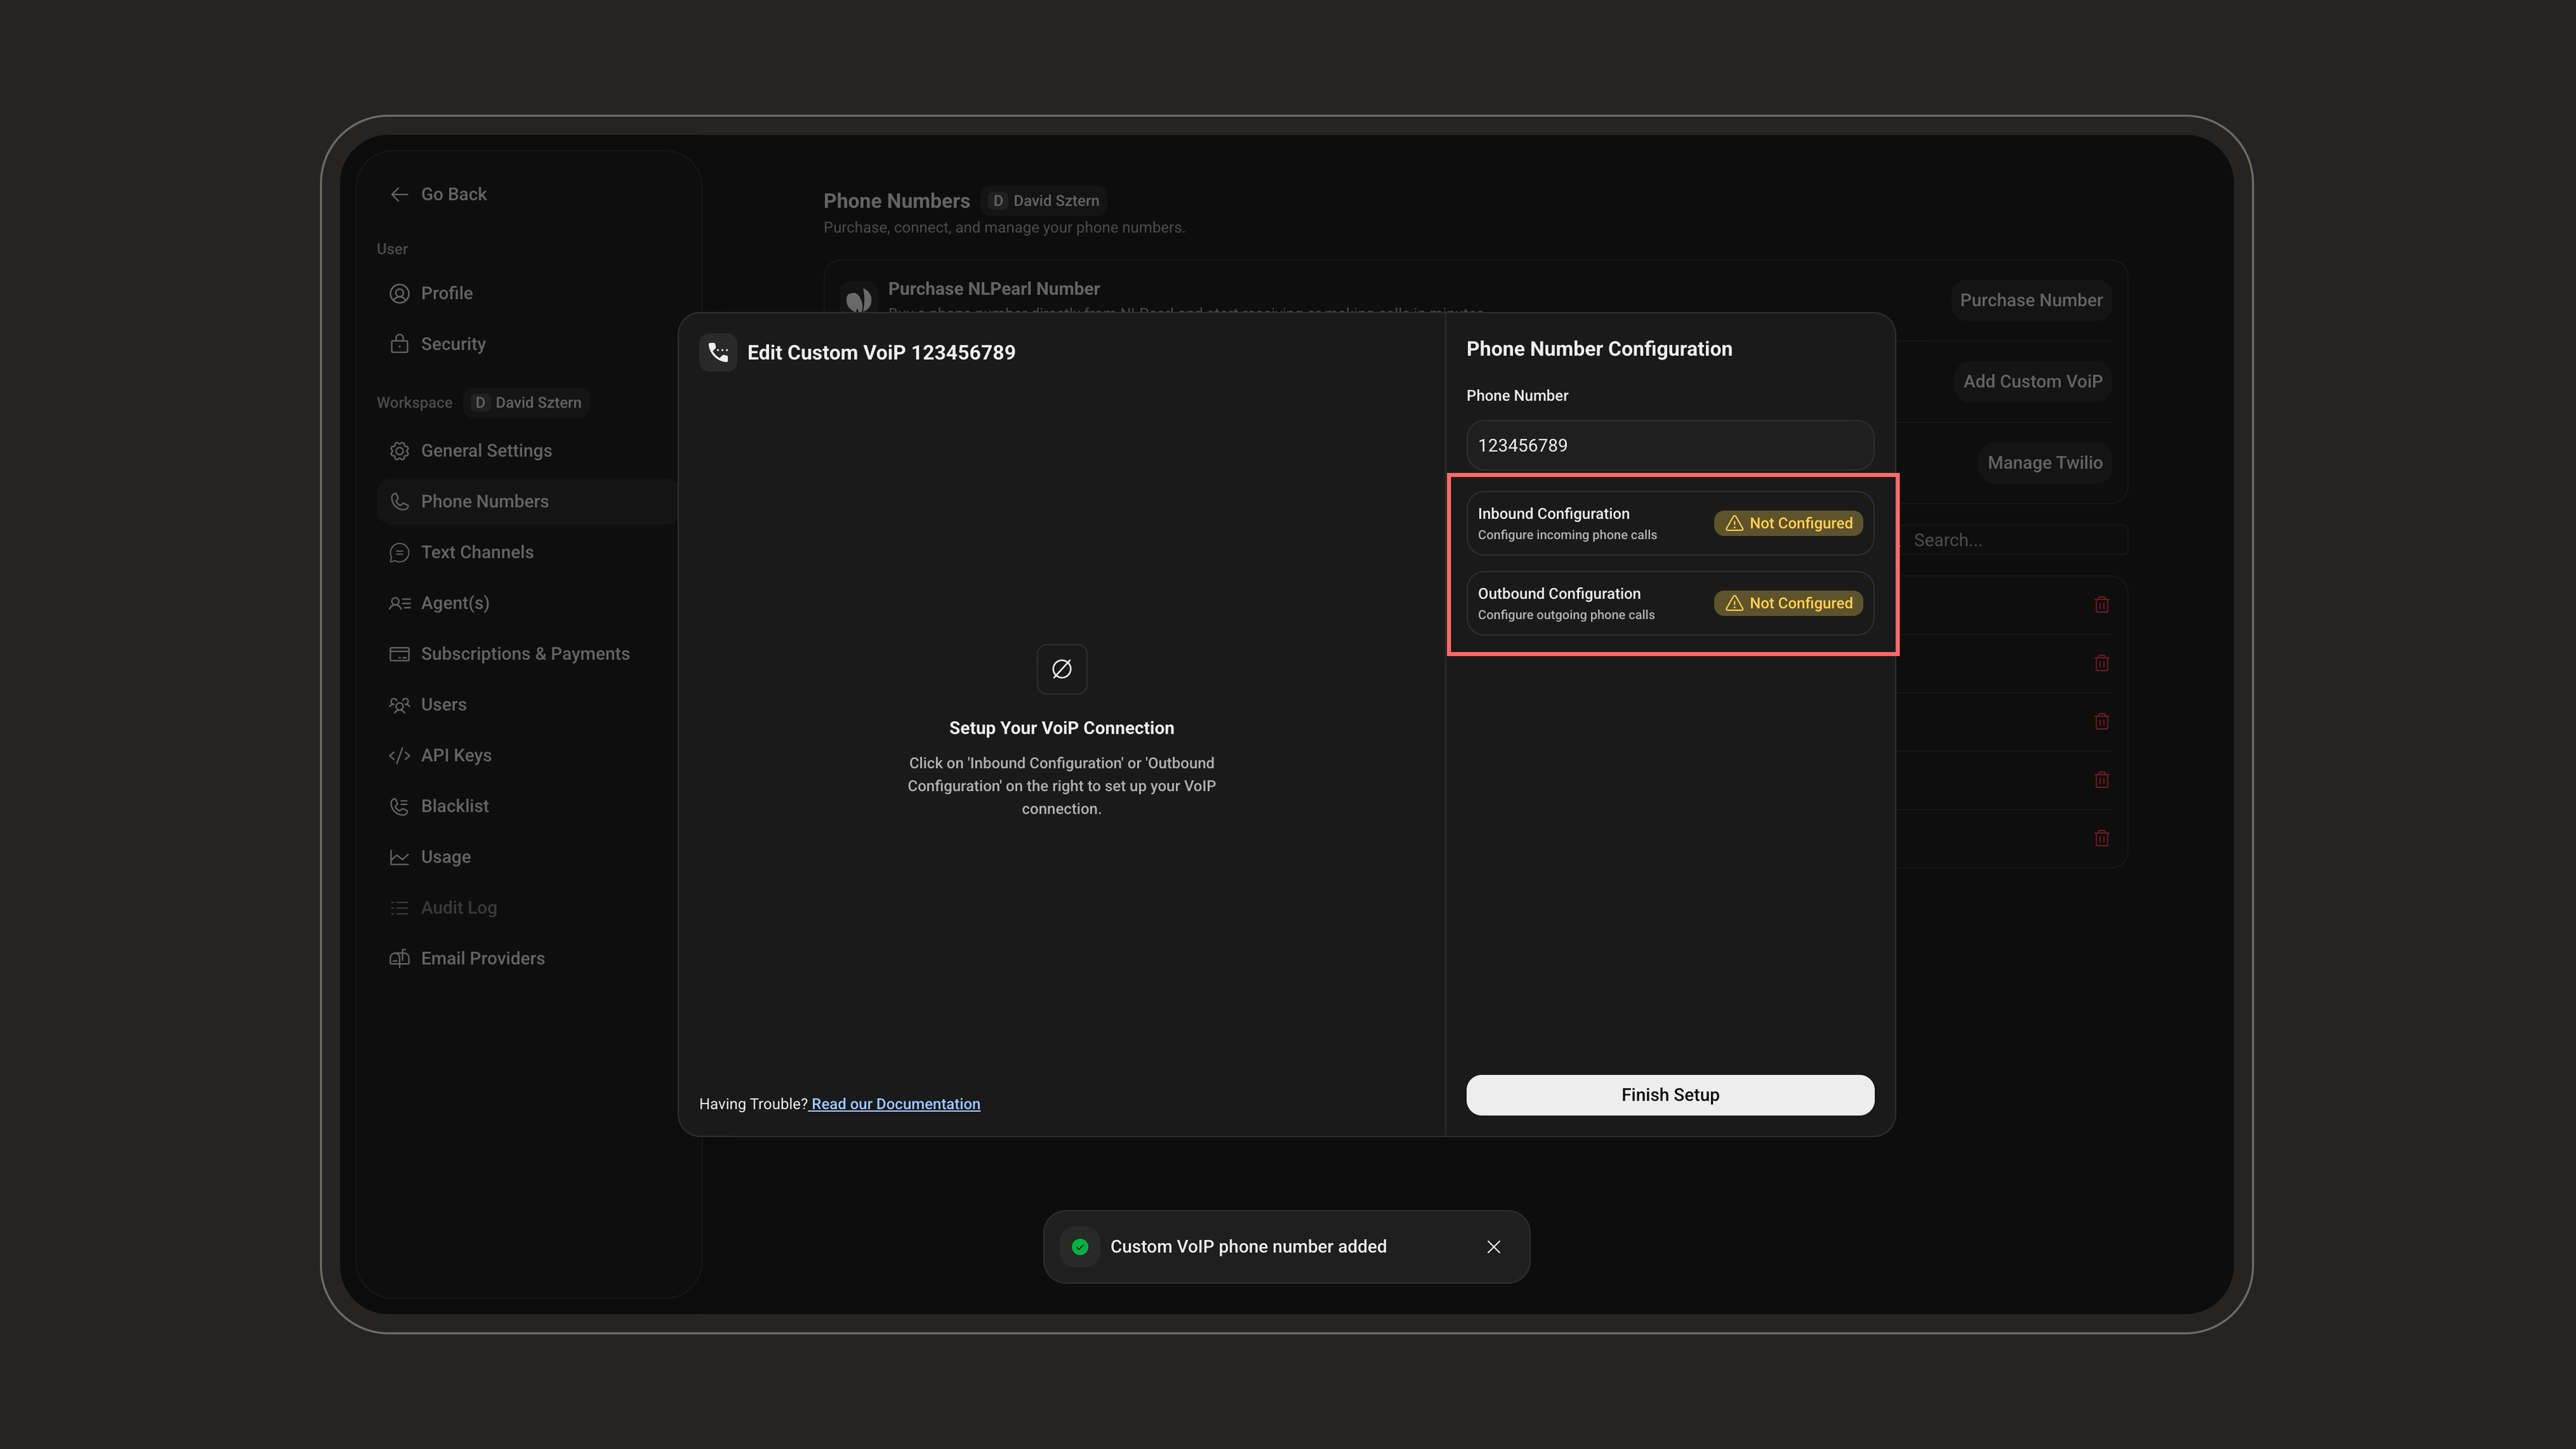
5
Configure Your VoIP Settings
Inbound Configuration Settings
1
TLS (SRTP) Encryption
Secures your VoIP traffic by encrypting both the signaling (via TLS) and media (via SRTP). Activate this toggle only if your VoIP provider requires it.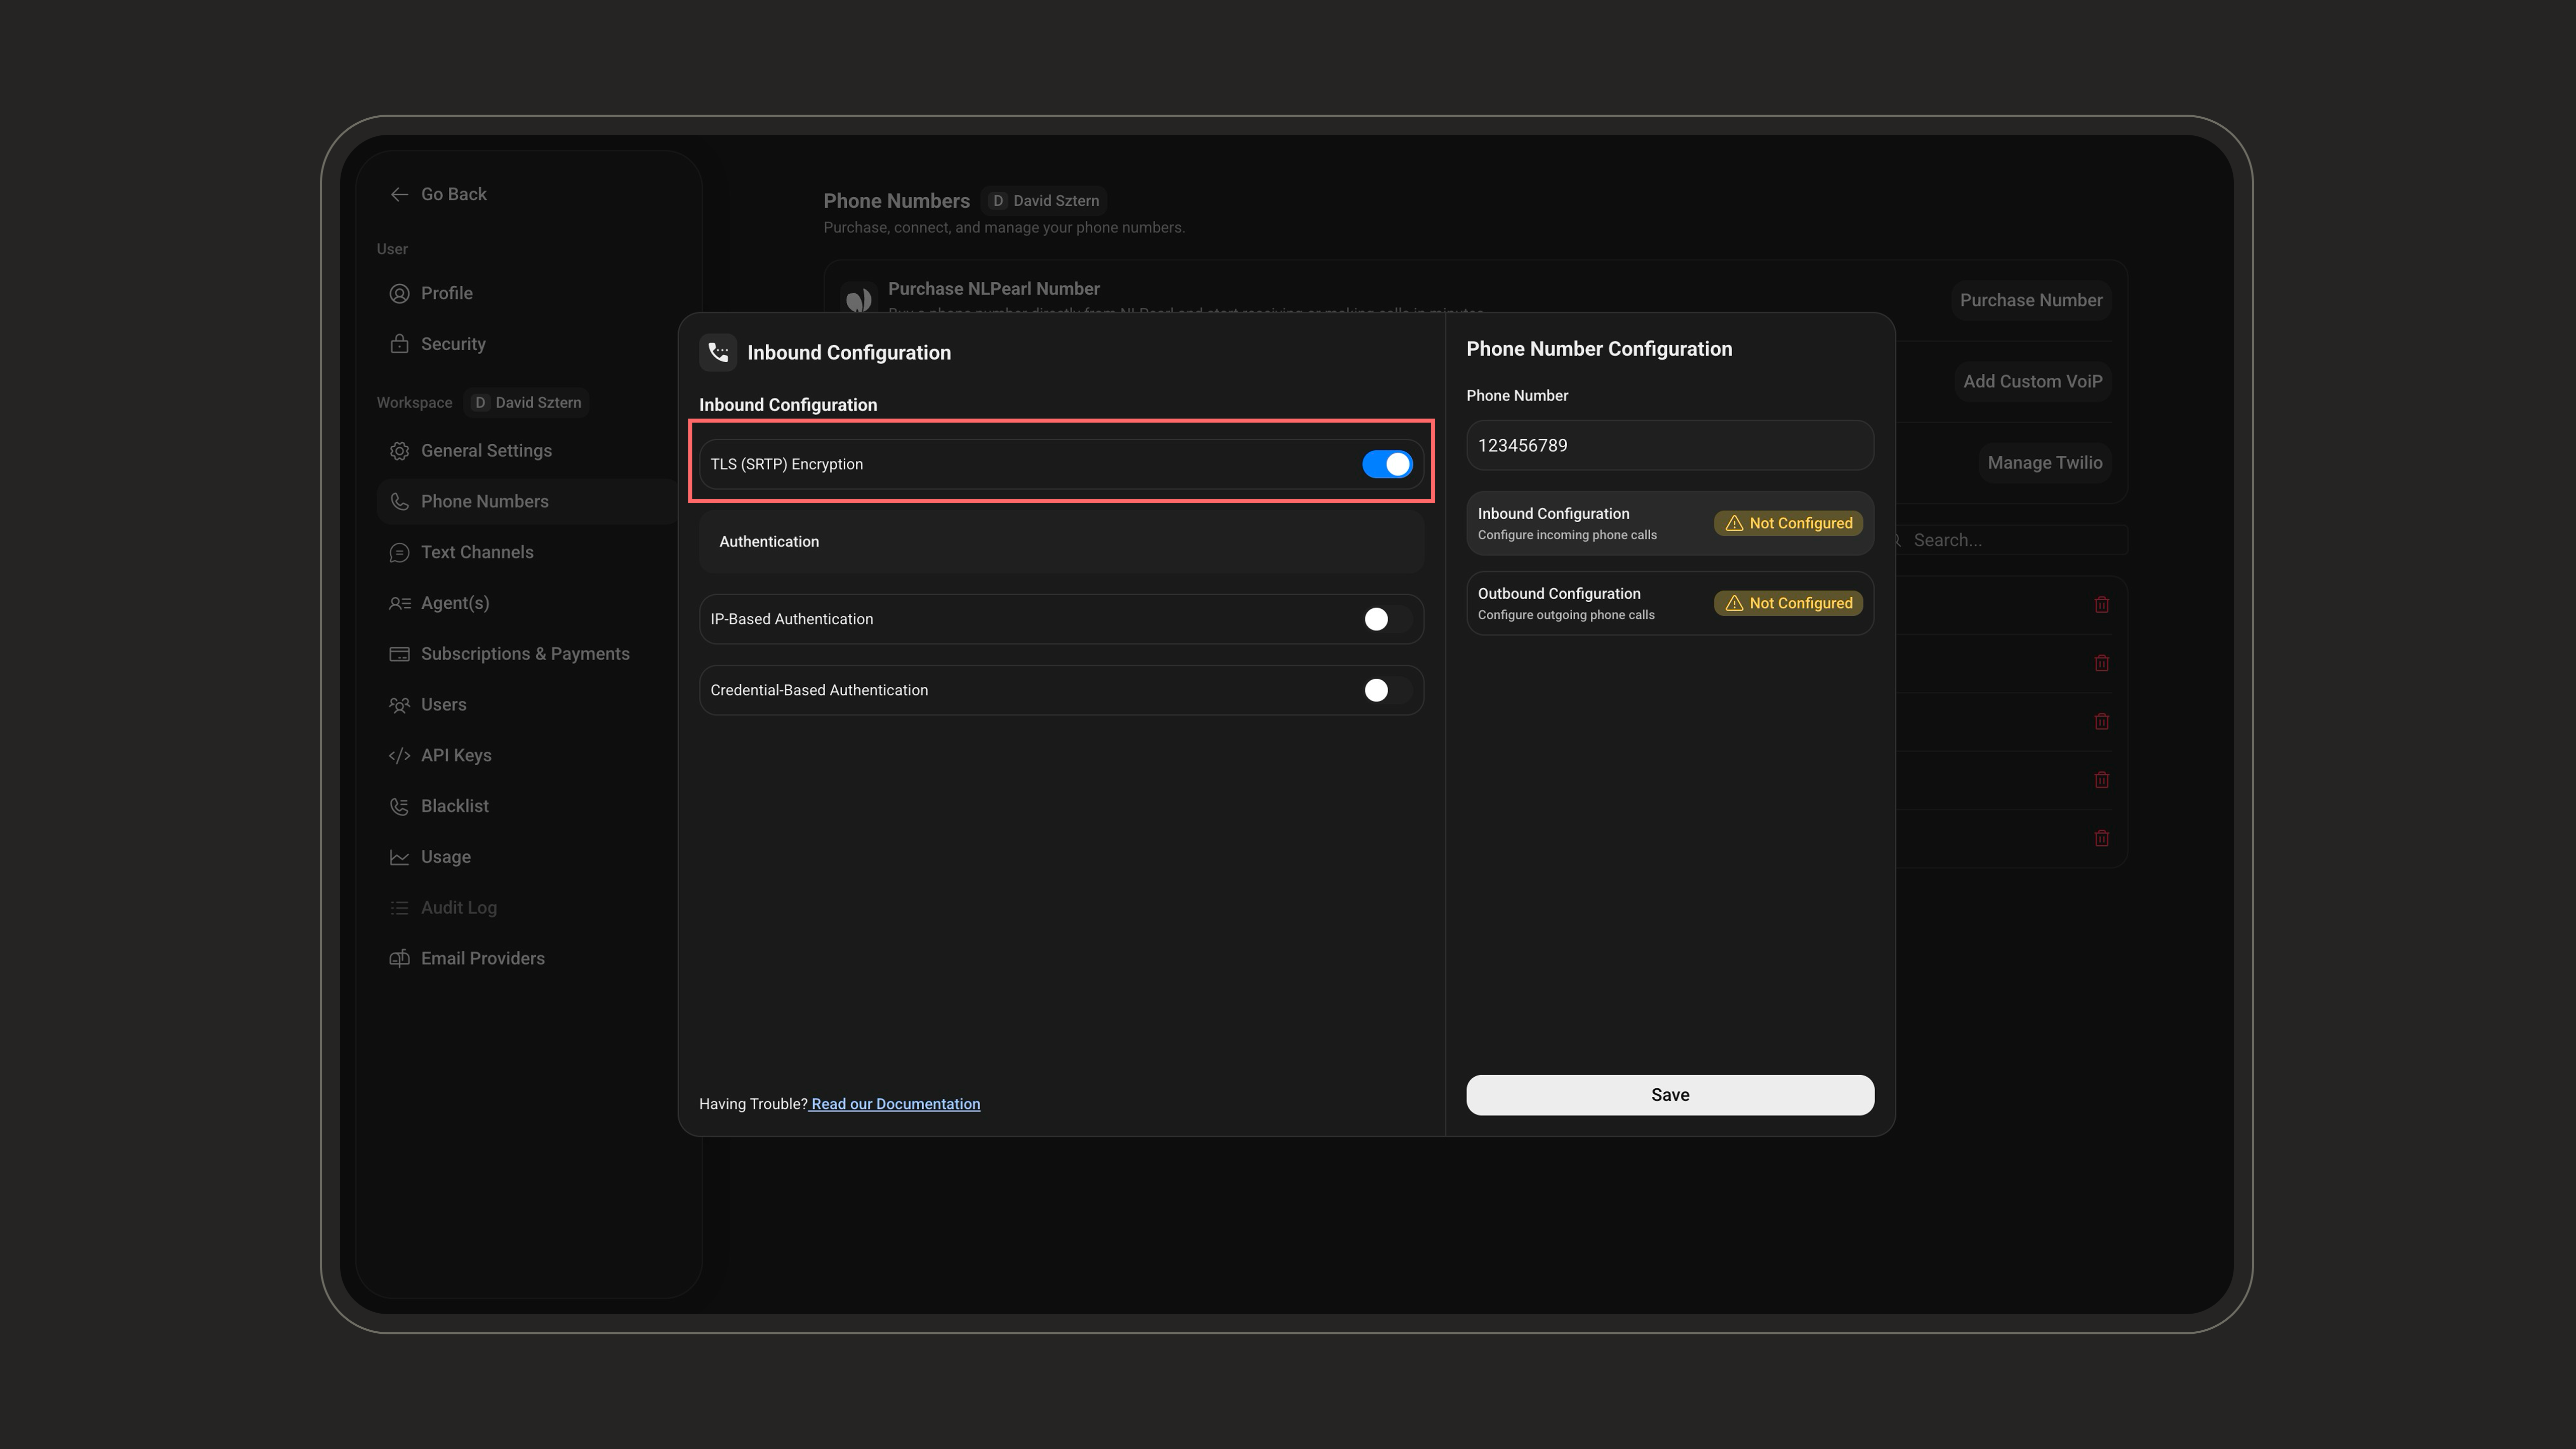
2
Authentication Methods
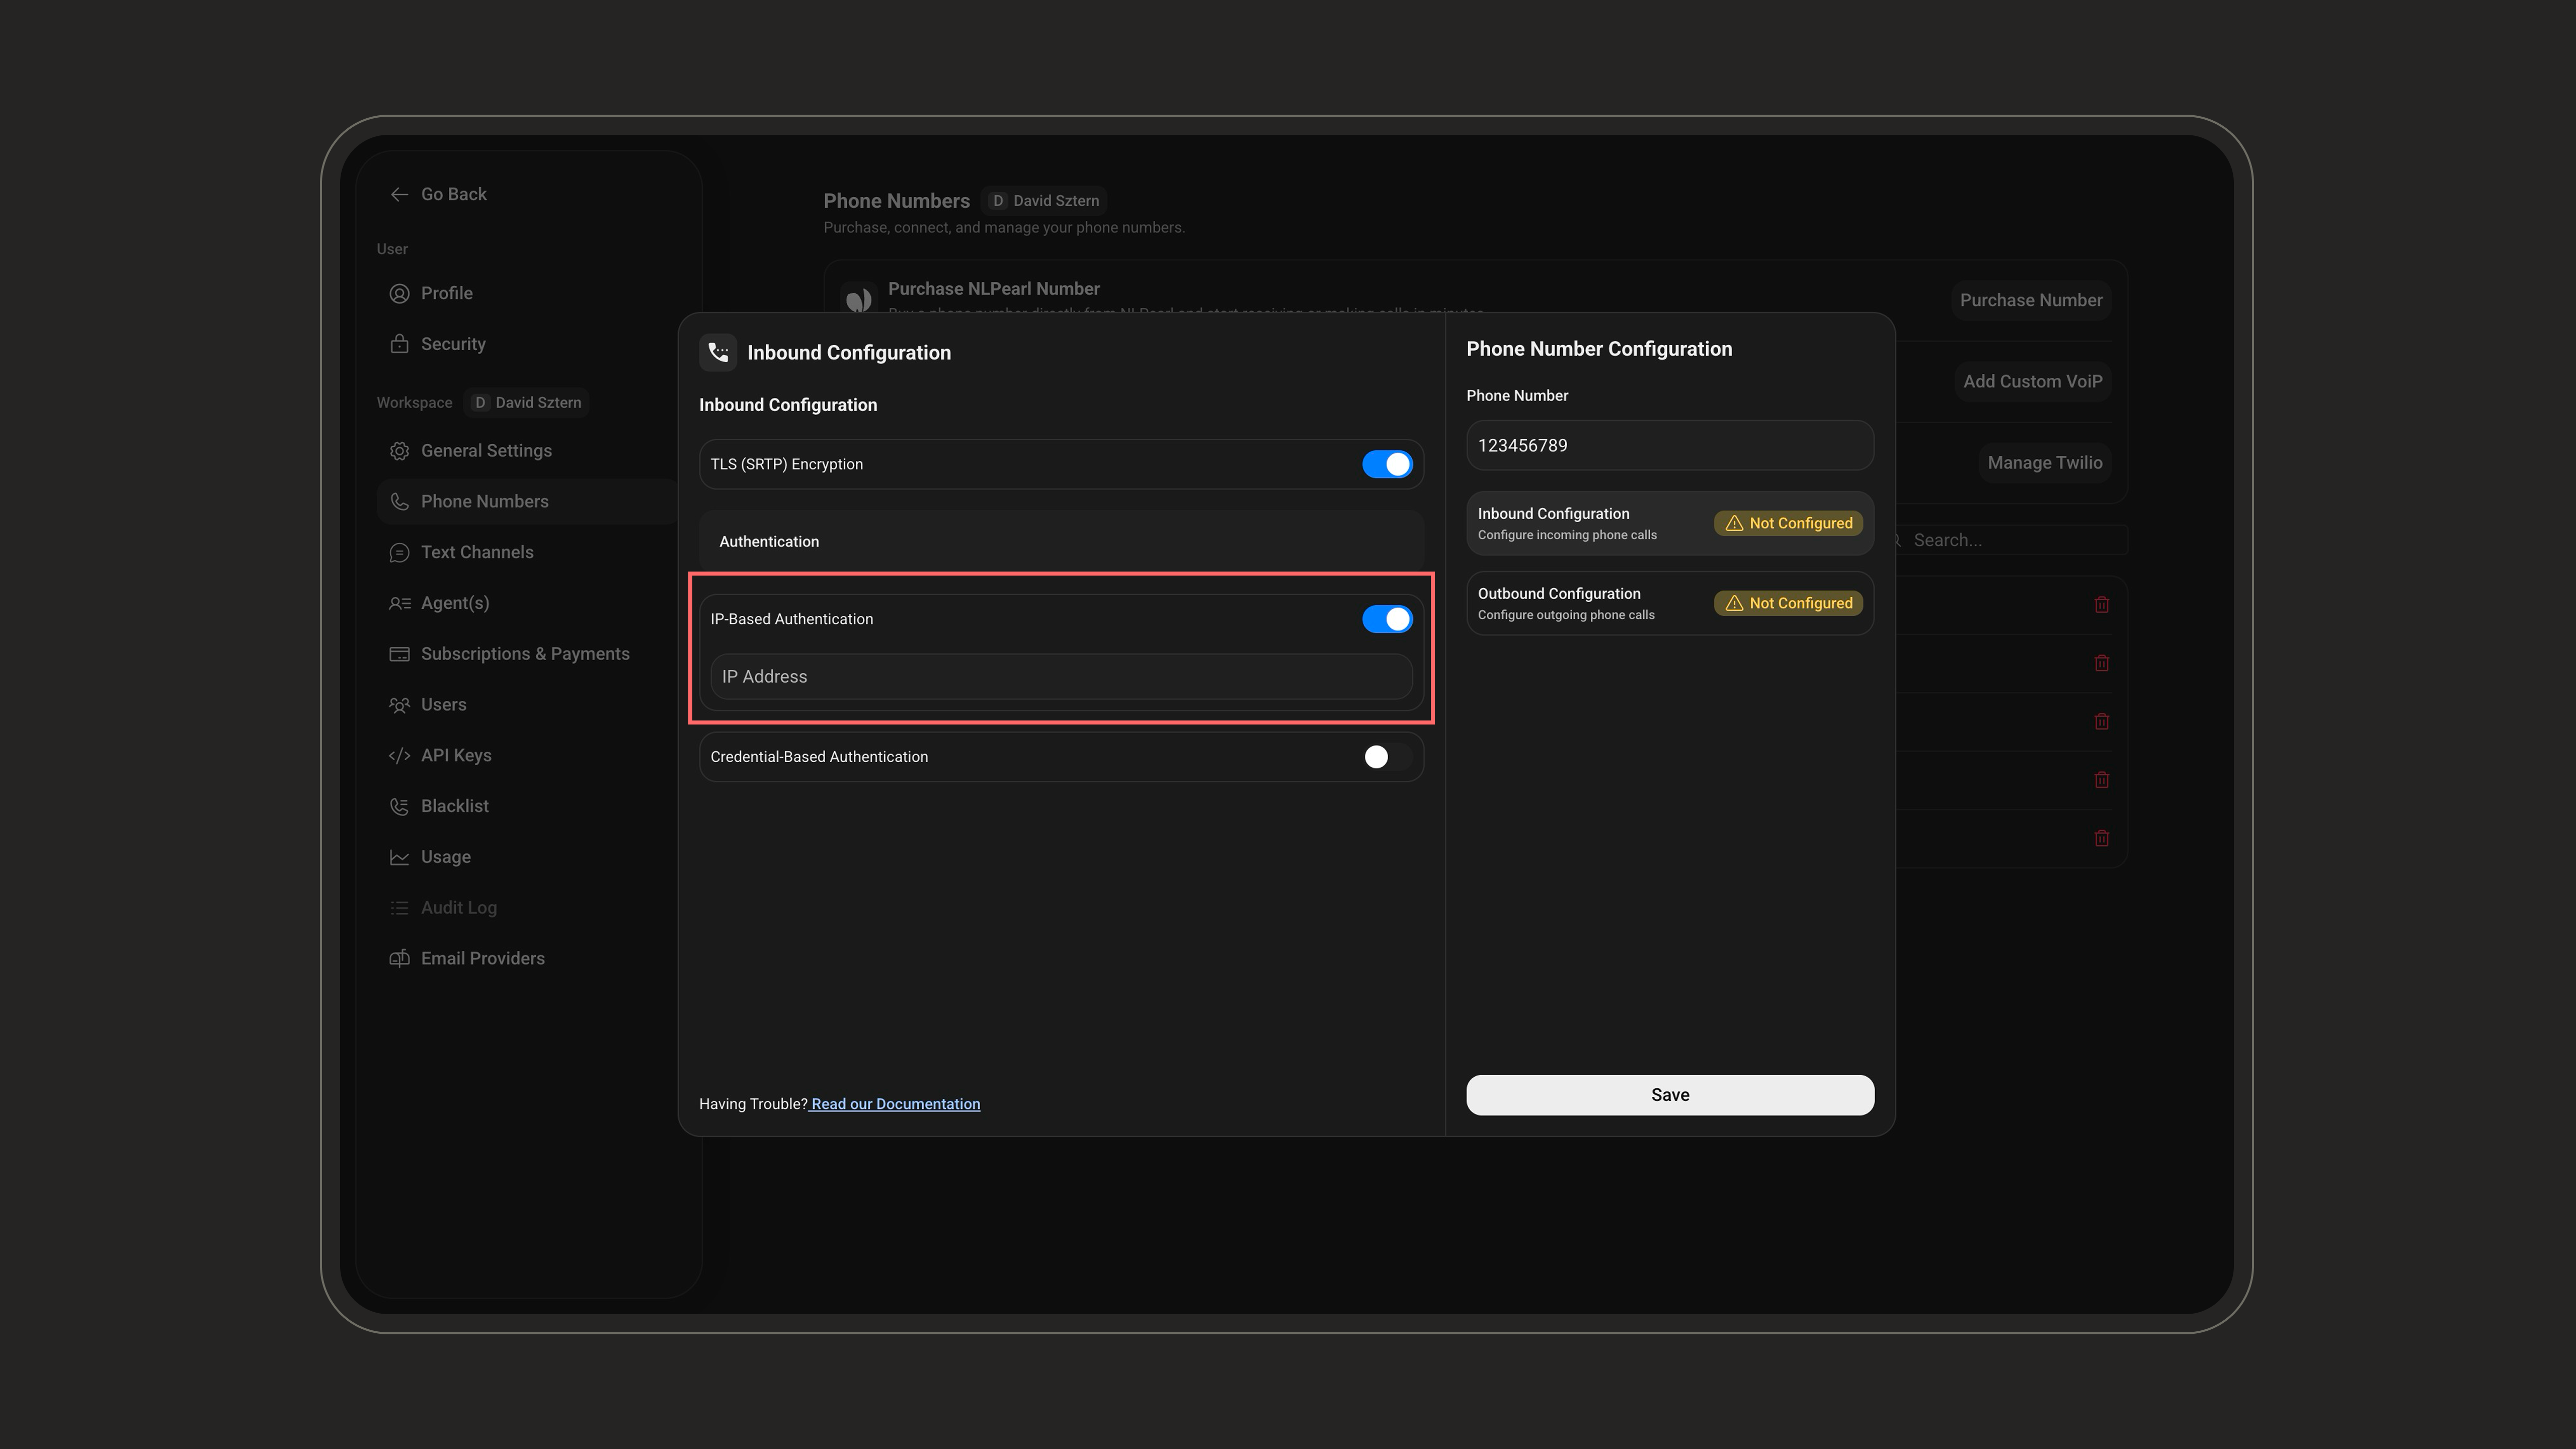
Inbound calls require at least one authentication method. Enable IP Address and/or Credentials authentication (you can use both).
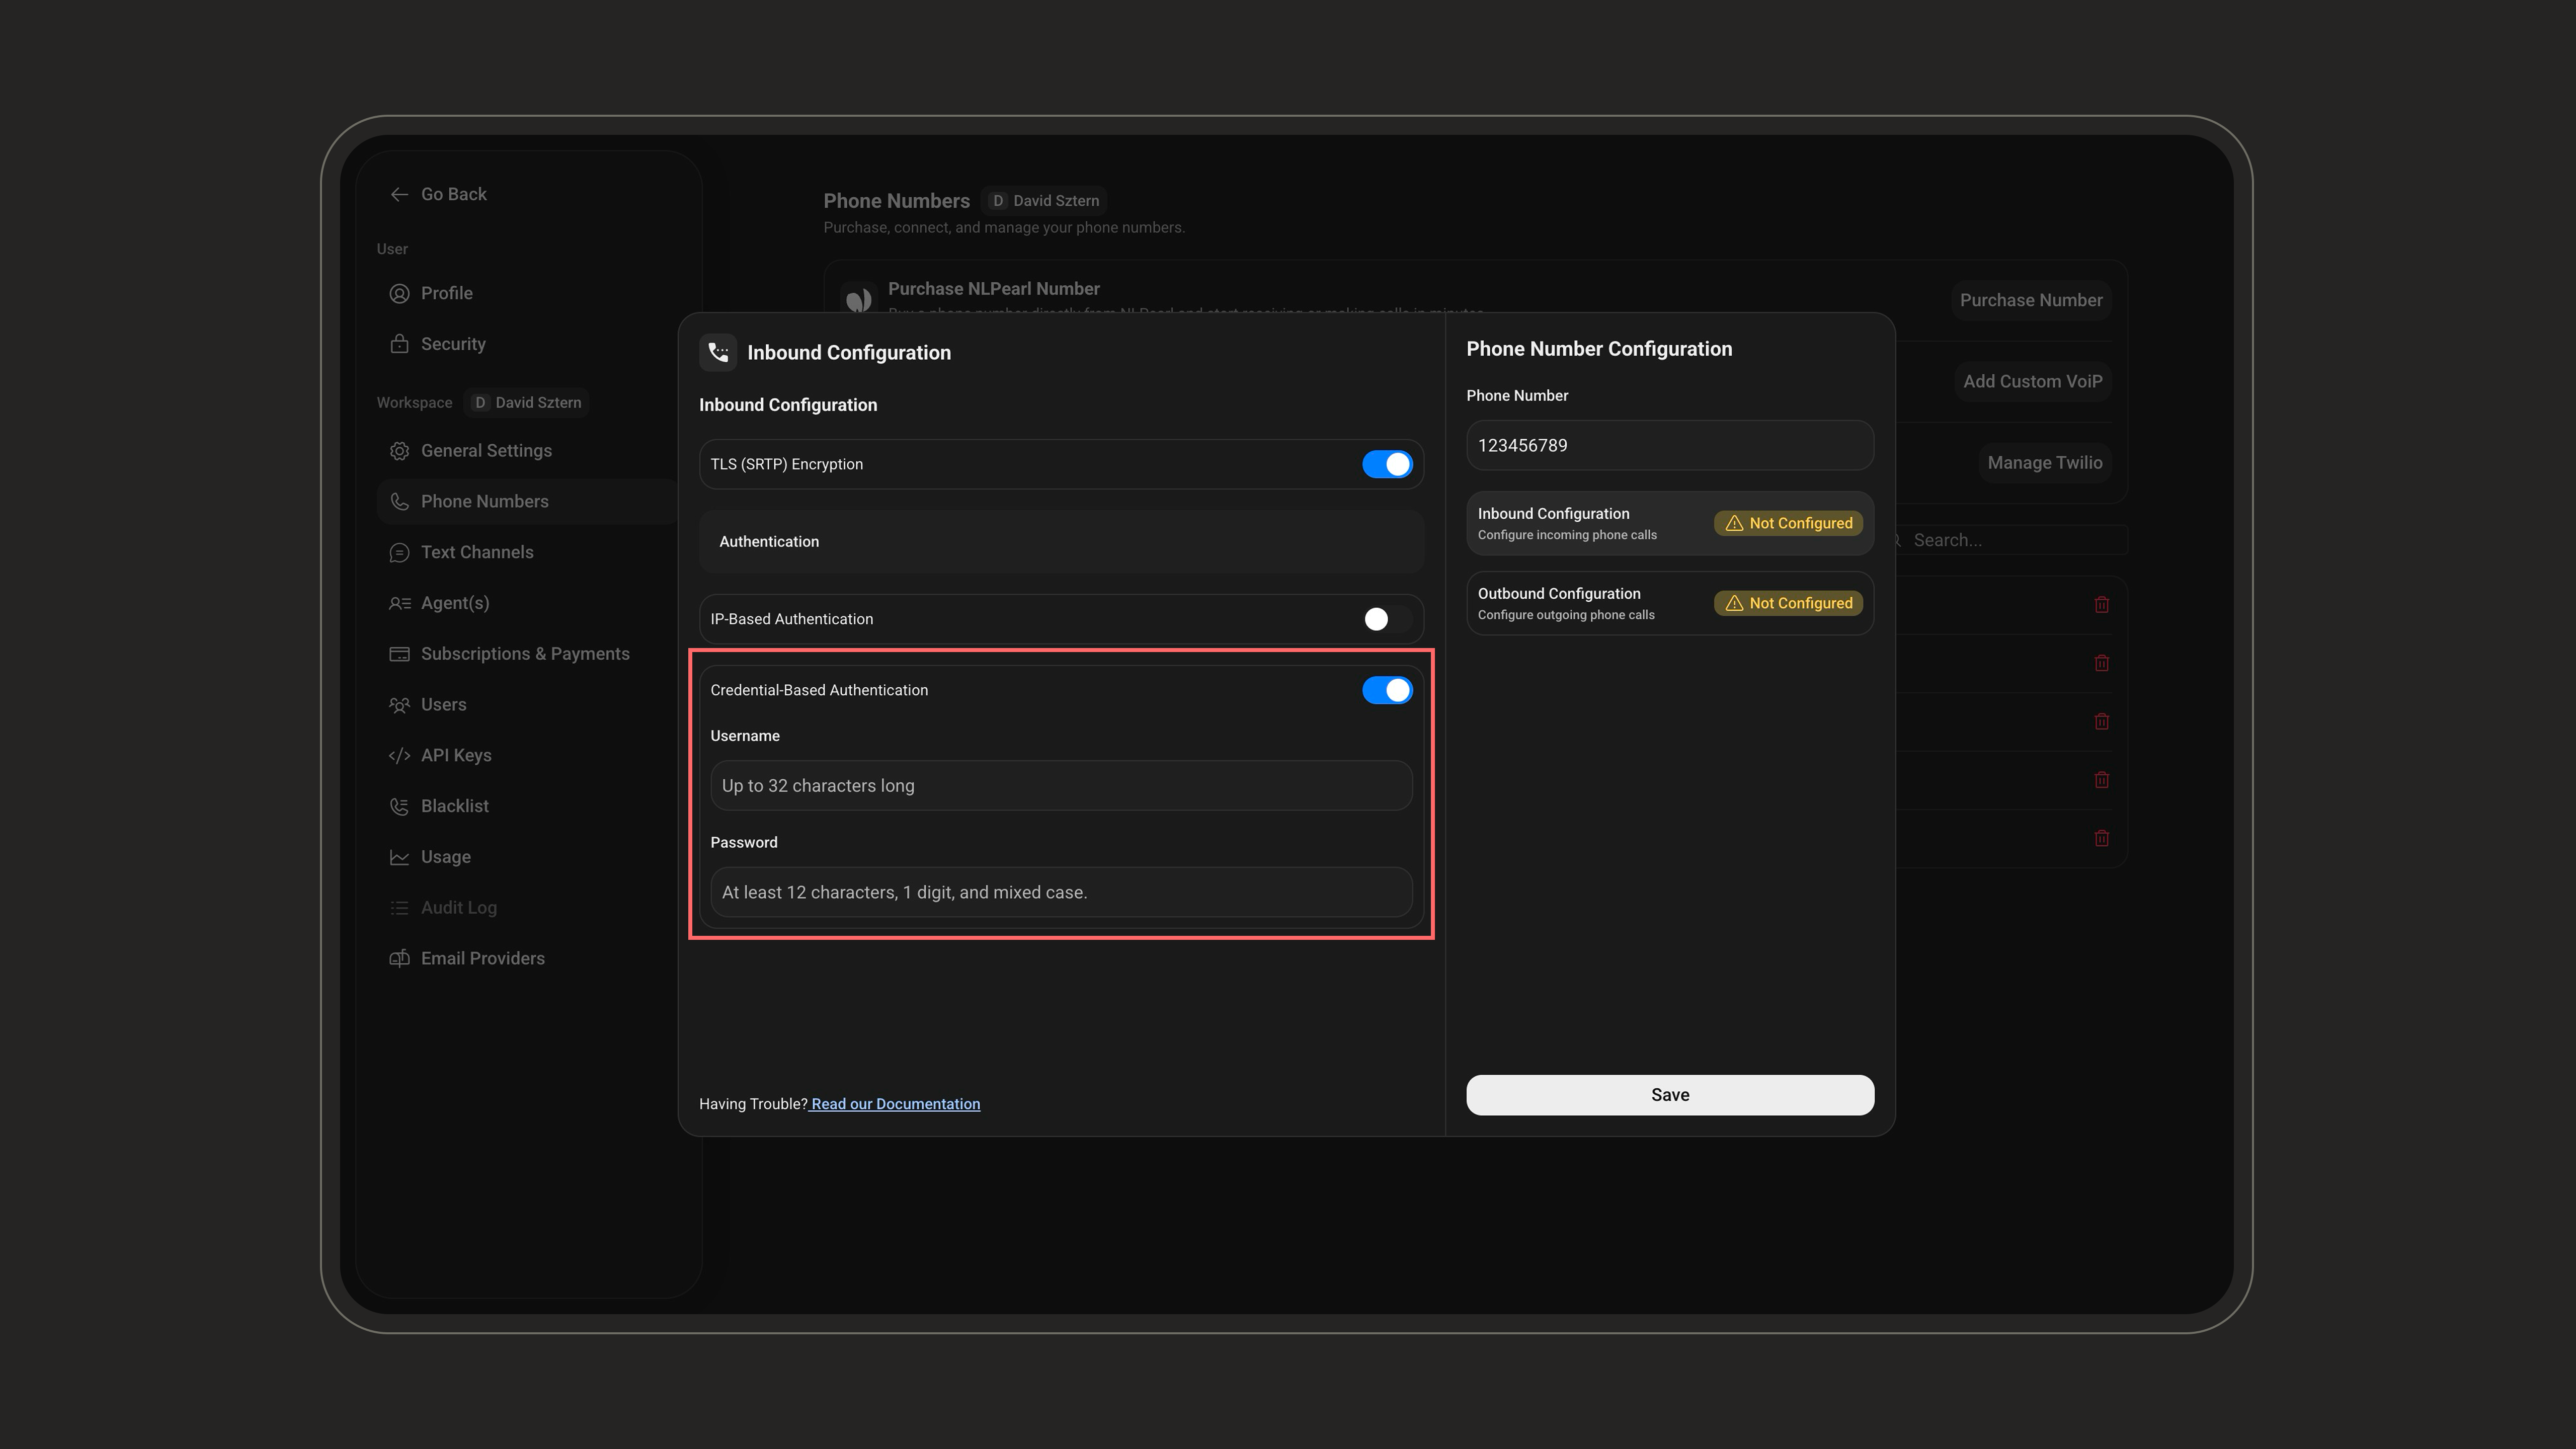
Credentials Authentication:Use a username and password to authenticate each incoming SIP request.Username: 2–32 characters, using letters, digits, hyphens (
-) and underscores (_) only. Password: At least 12 characters, with at least one uppercase letter, one lowercase letter, and one digit. Letters and digits only — special characters are not allowed.
3
Copy Your SIP Domain
After you save the inbound configuration, NLPearl generates a SIP Domain for this number. This is what tells your provider where to send incoming calls so they reach the platform.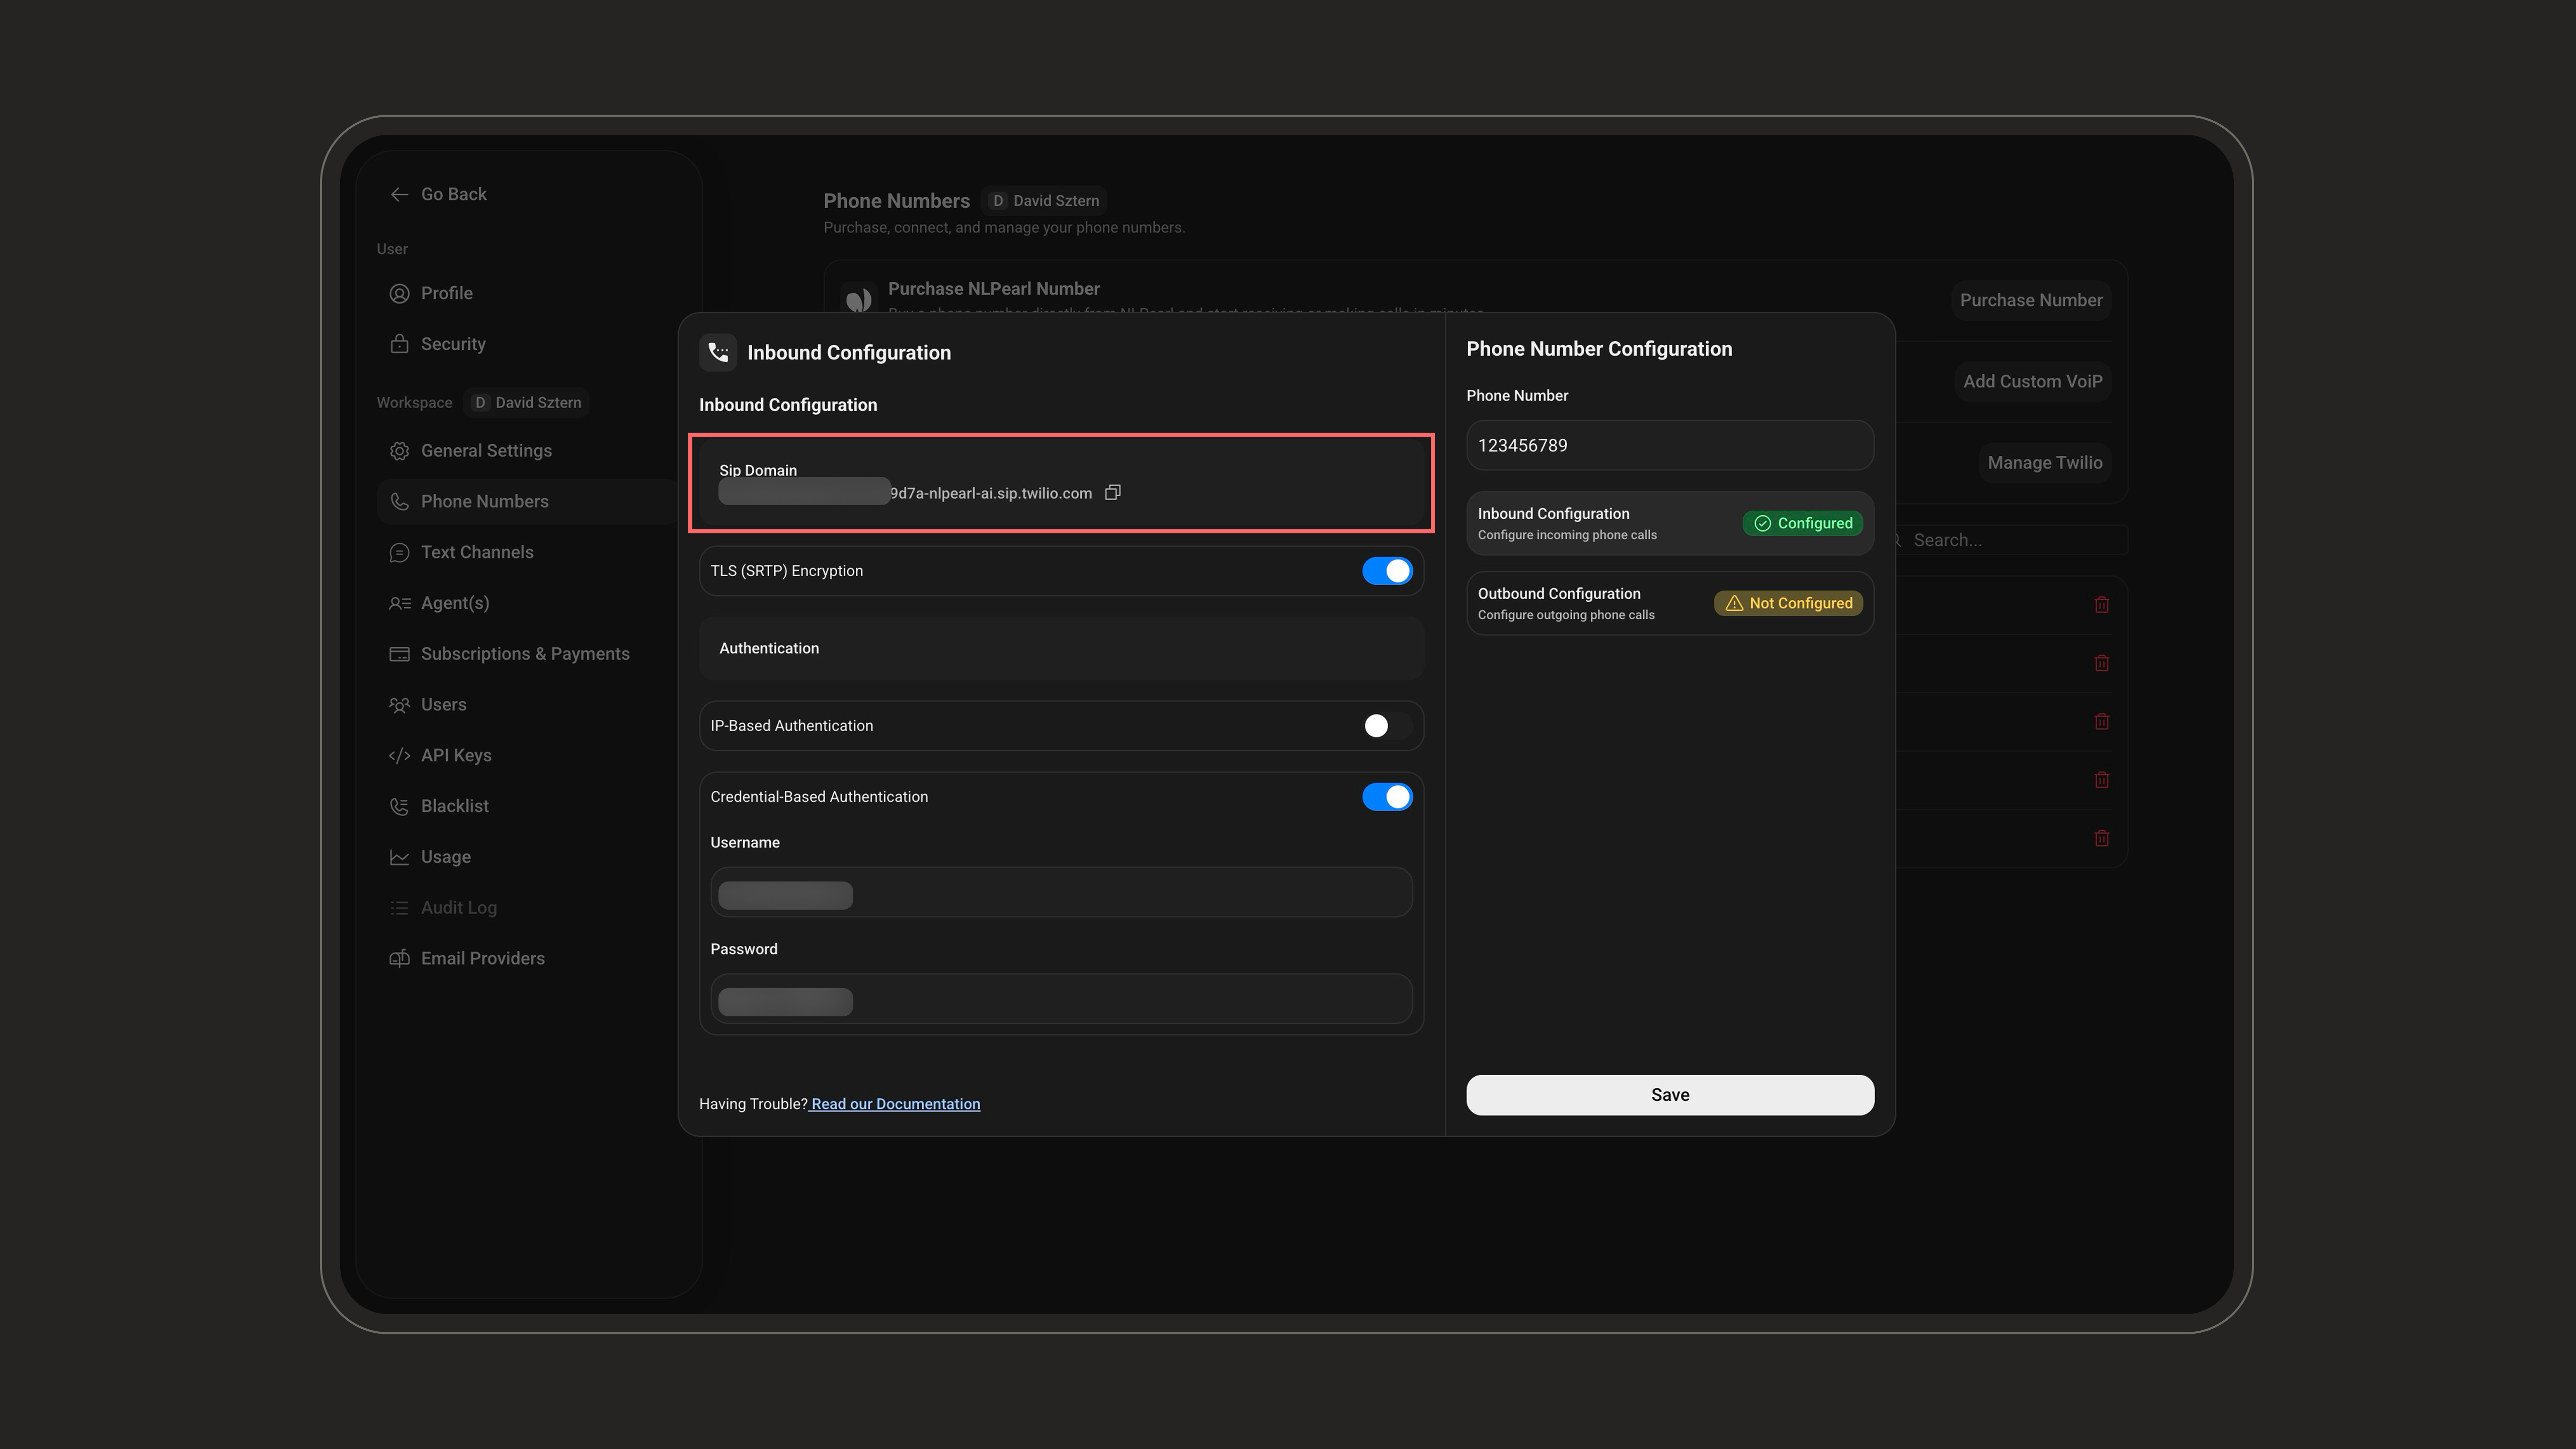
The SIP Domain isn’t something you type. It’s created automatically and shown read-only at the top of the Inbound Configuration card, with a Copy button. It only appears once the inbound configuration has been saved, so reopen the card afterward to retrieve it.
Outbound Configuration Settings
1
TLS (SRTP) Encryption
Secures your VoIP traffic by encrypting both the signaling (via TLS) and media (via SRTP). Activate this toggle only if your VoIP provider requires it.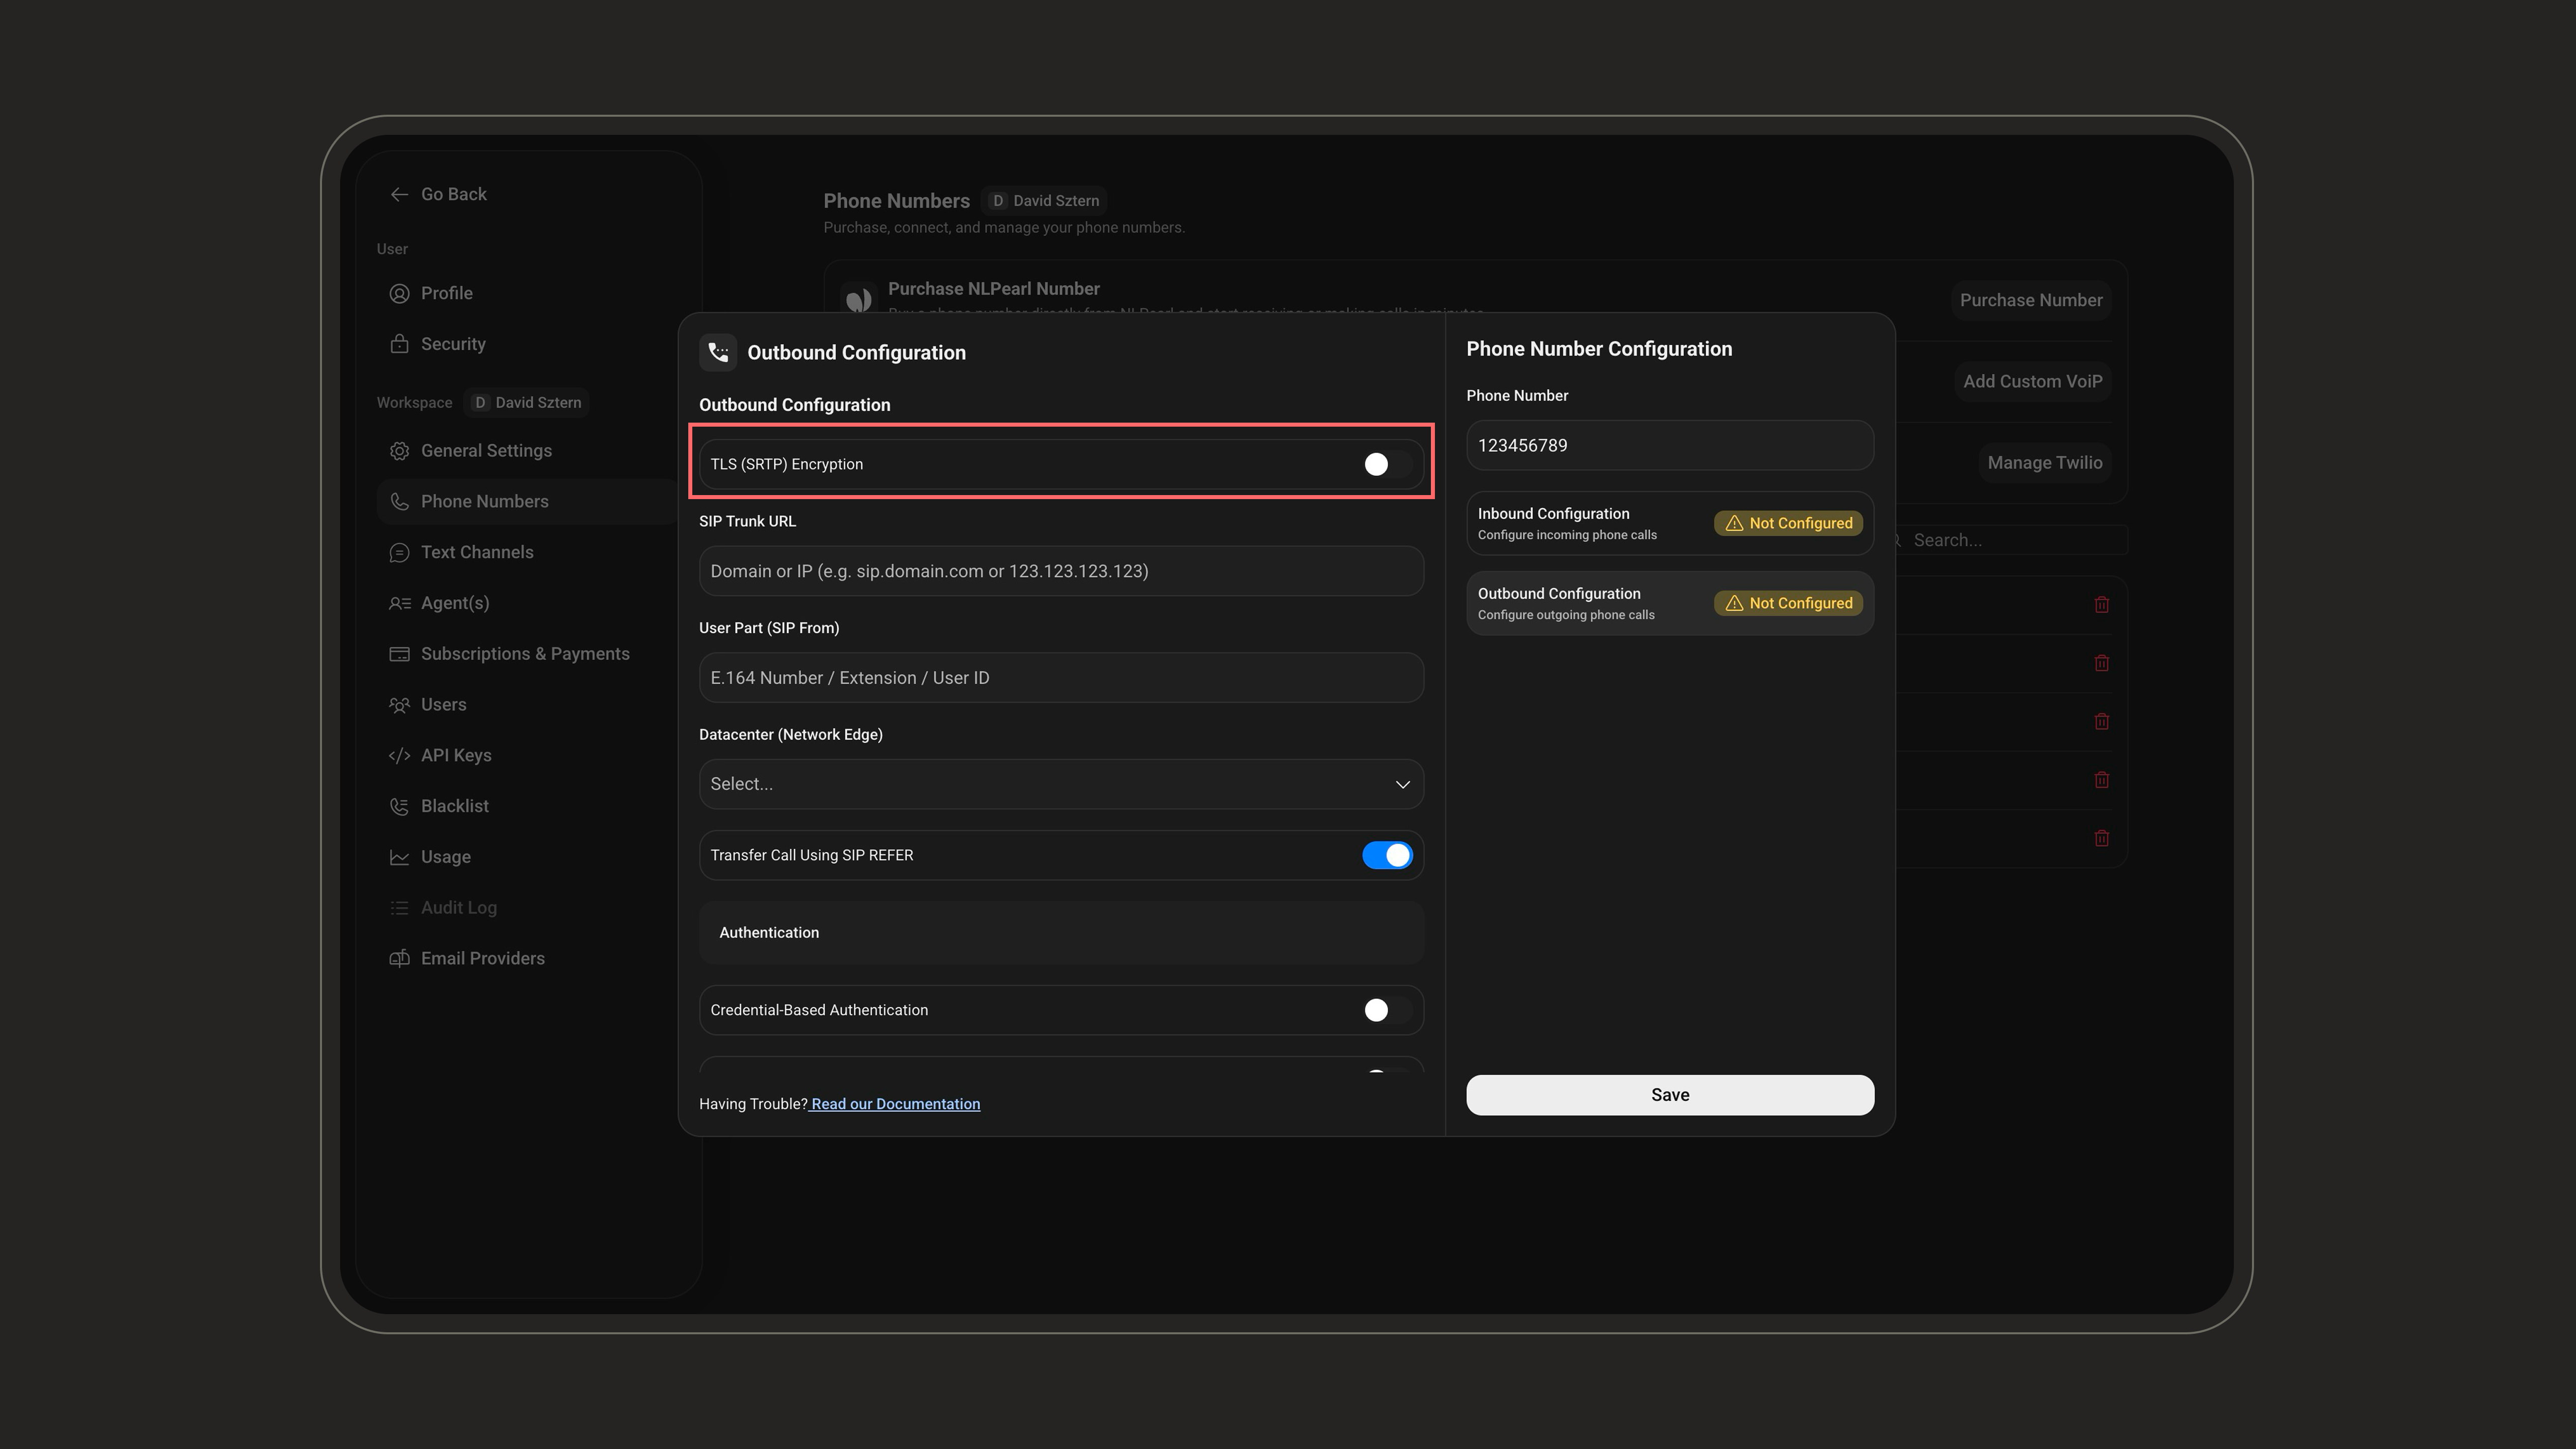
2
SIP Trunk URL
This is the address your outbound calls will be sent to, typically provided by your VoIP provider. Enter it as a domain or IP address (this is where your calls will be routed).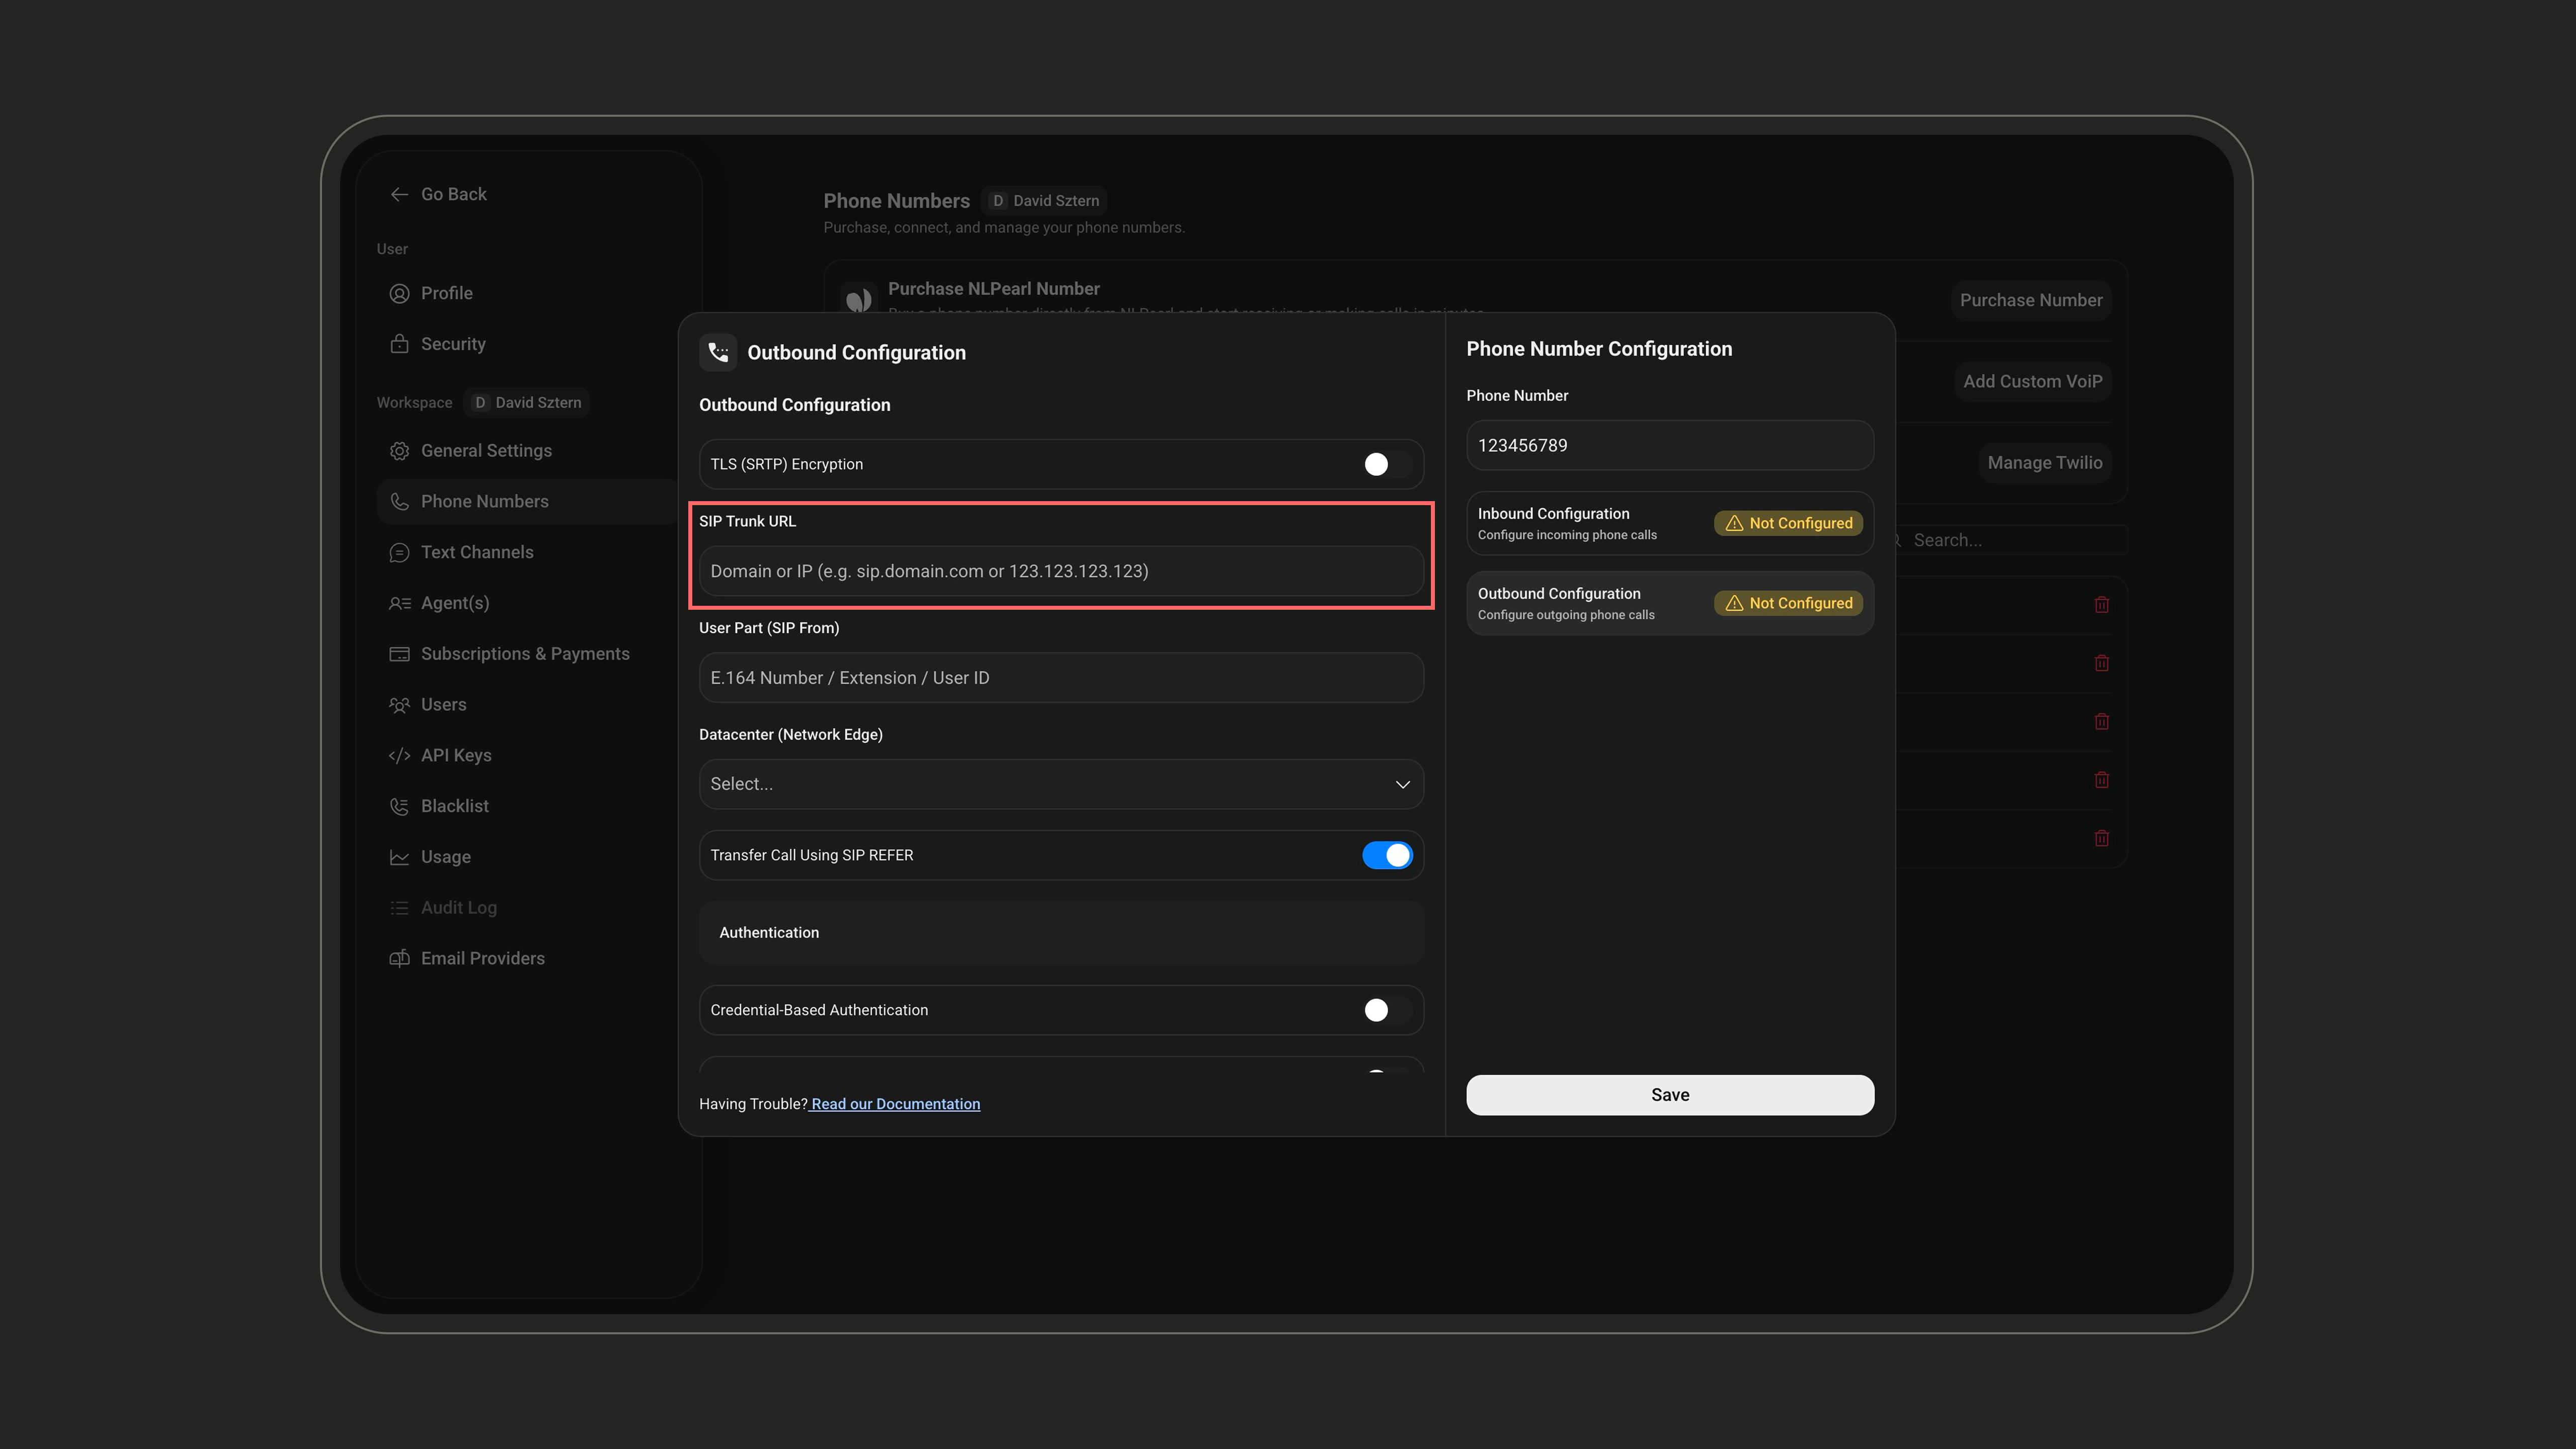
3
User Part
This is the SIP user identity used in the “From” header of your outbound SIP requests. It’s how your VoIP system identifies the origin of the call.What to enter:
You can use one of the following formats depending on your provider: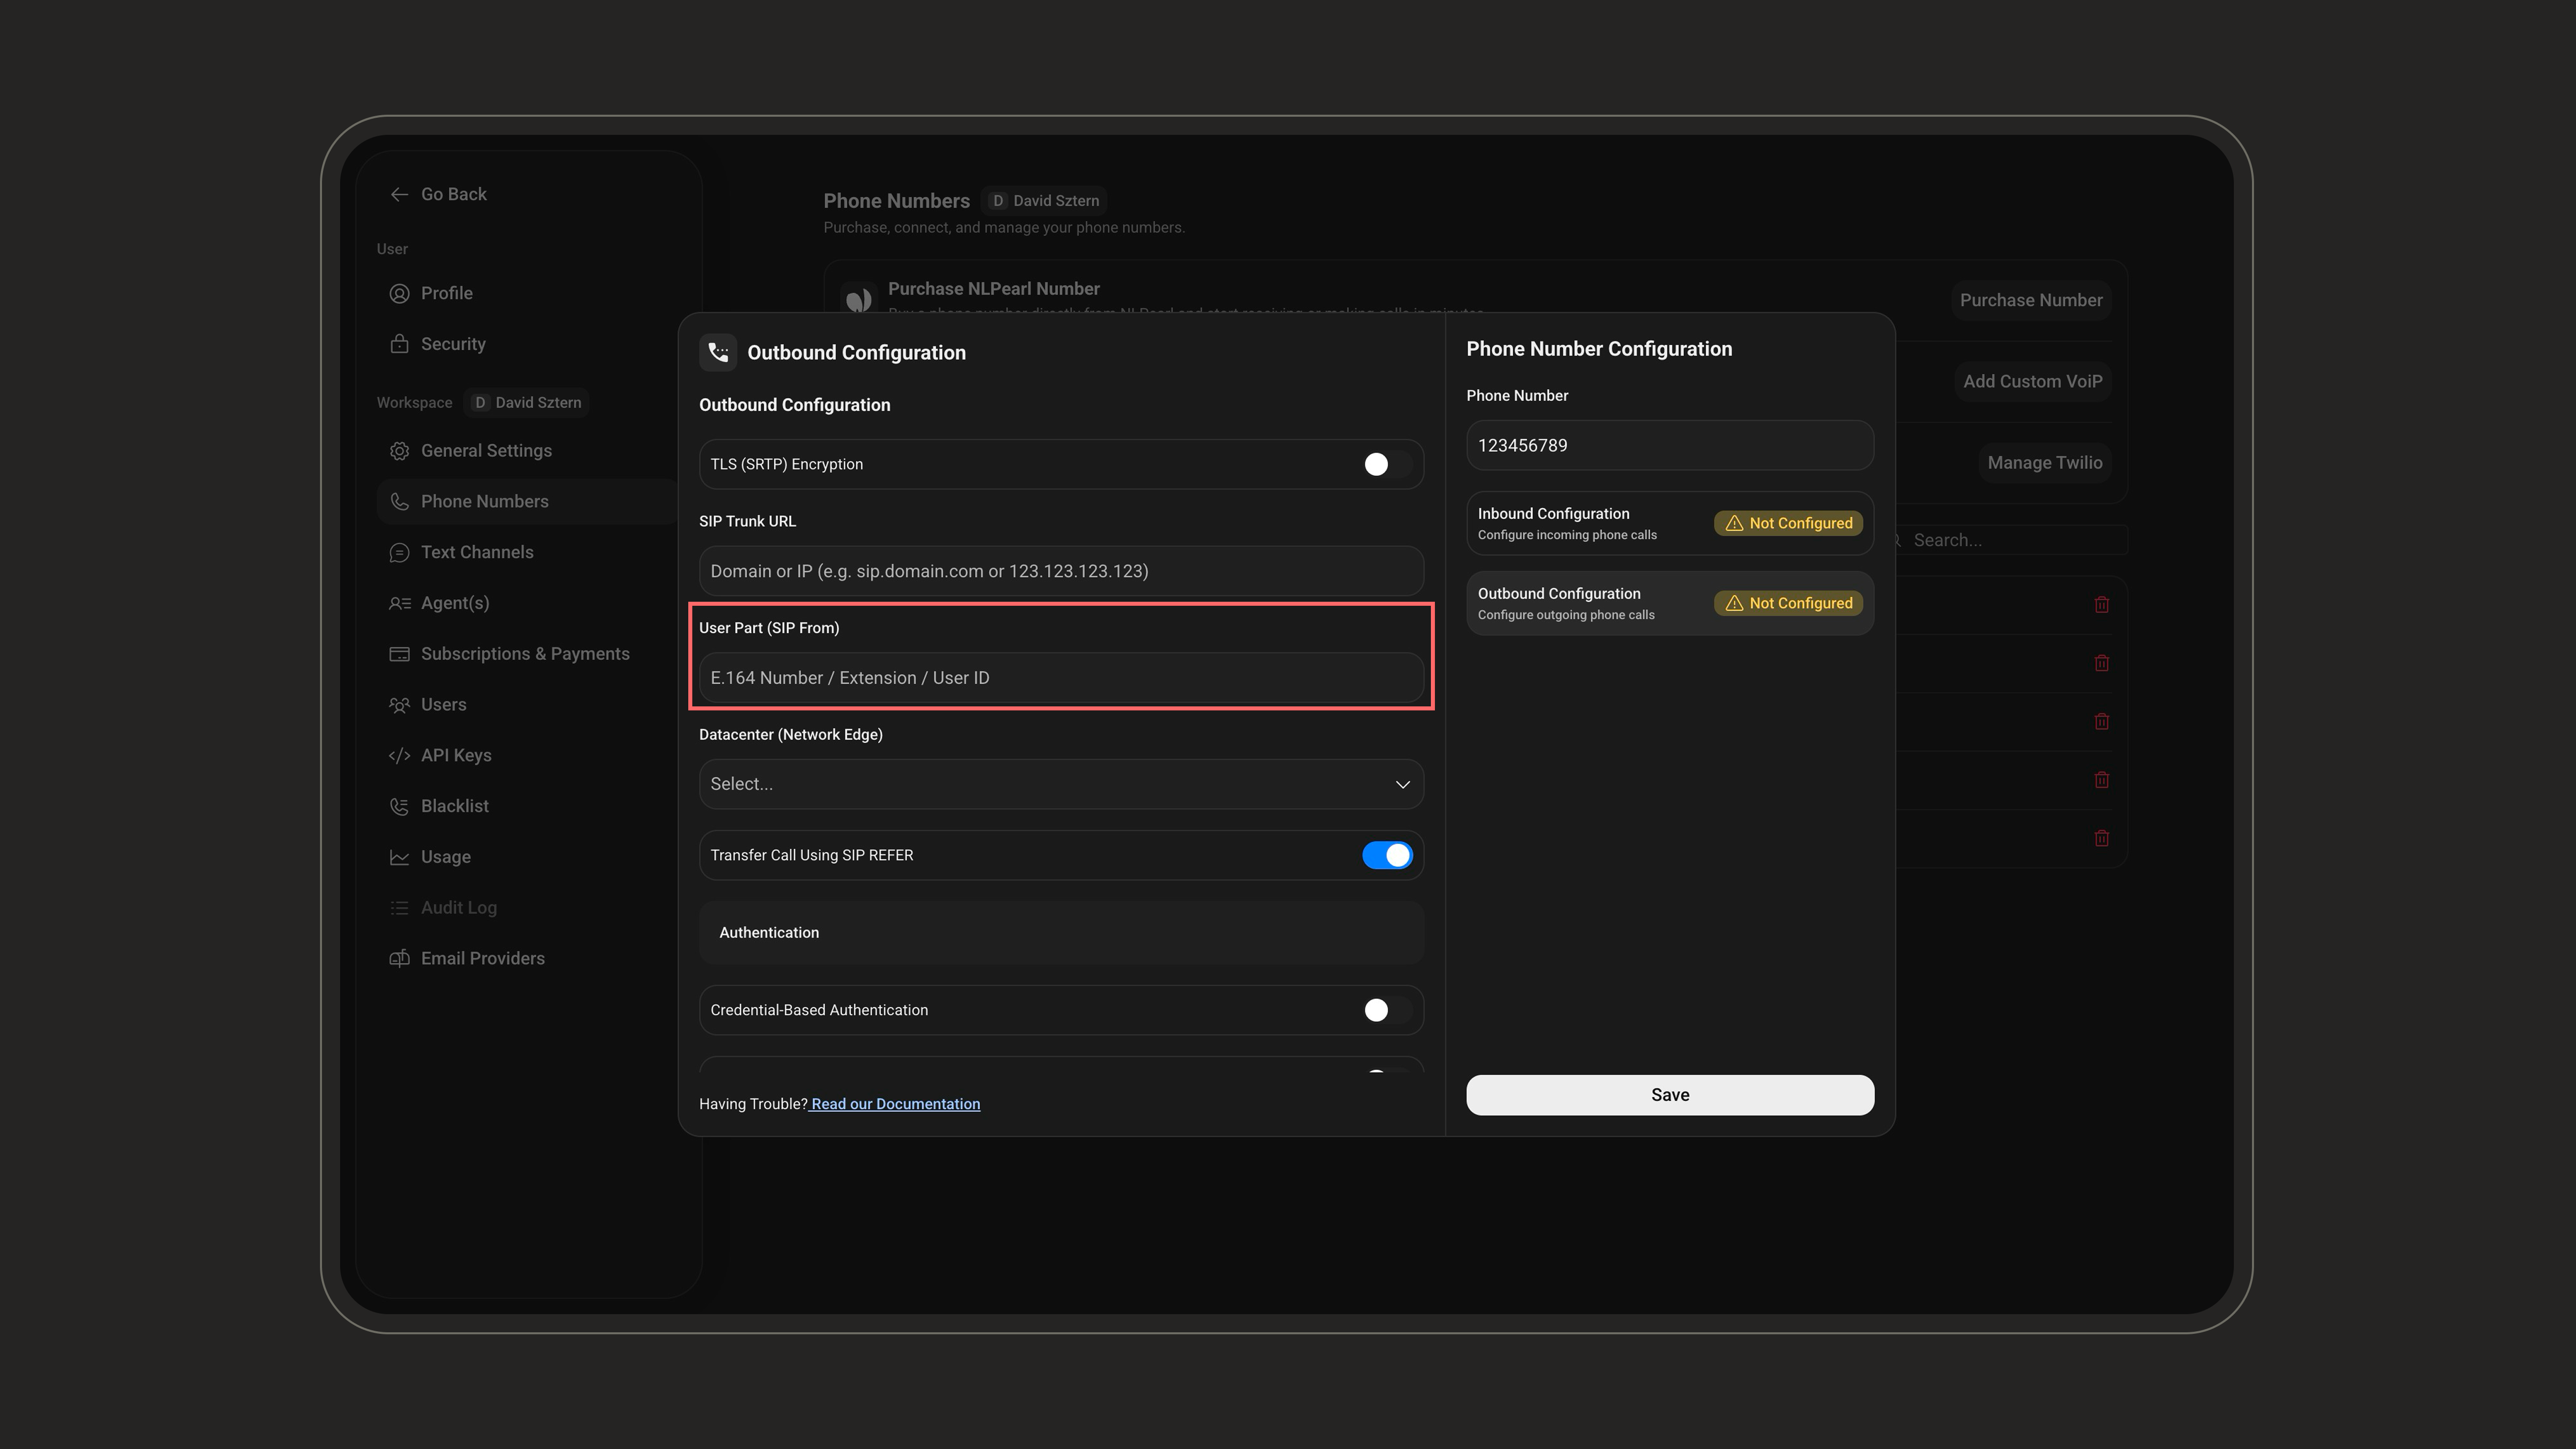
- A SIP username (e.g.
caller01) - A DID or phone number in
E.164format (e.g.+1234567890) - An extension (e.g.
201) - A SIP URI (e.g.
caller01@example.com), less common
4
Data Center
Select the network edge closest to your VoIP infrastructure to optimize call routing and reduce latency. Eight regions are available: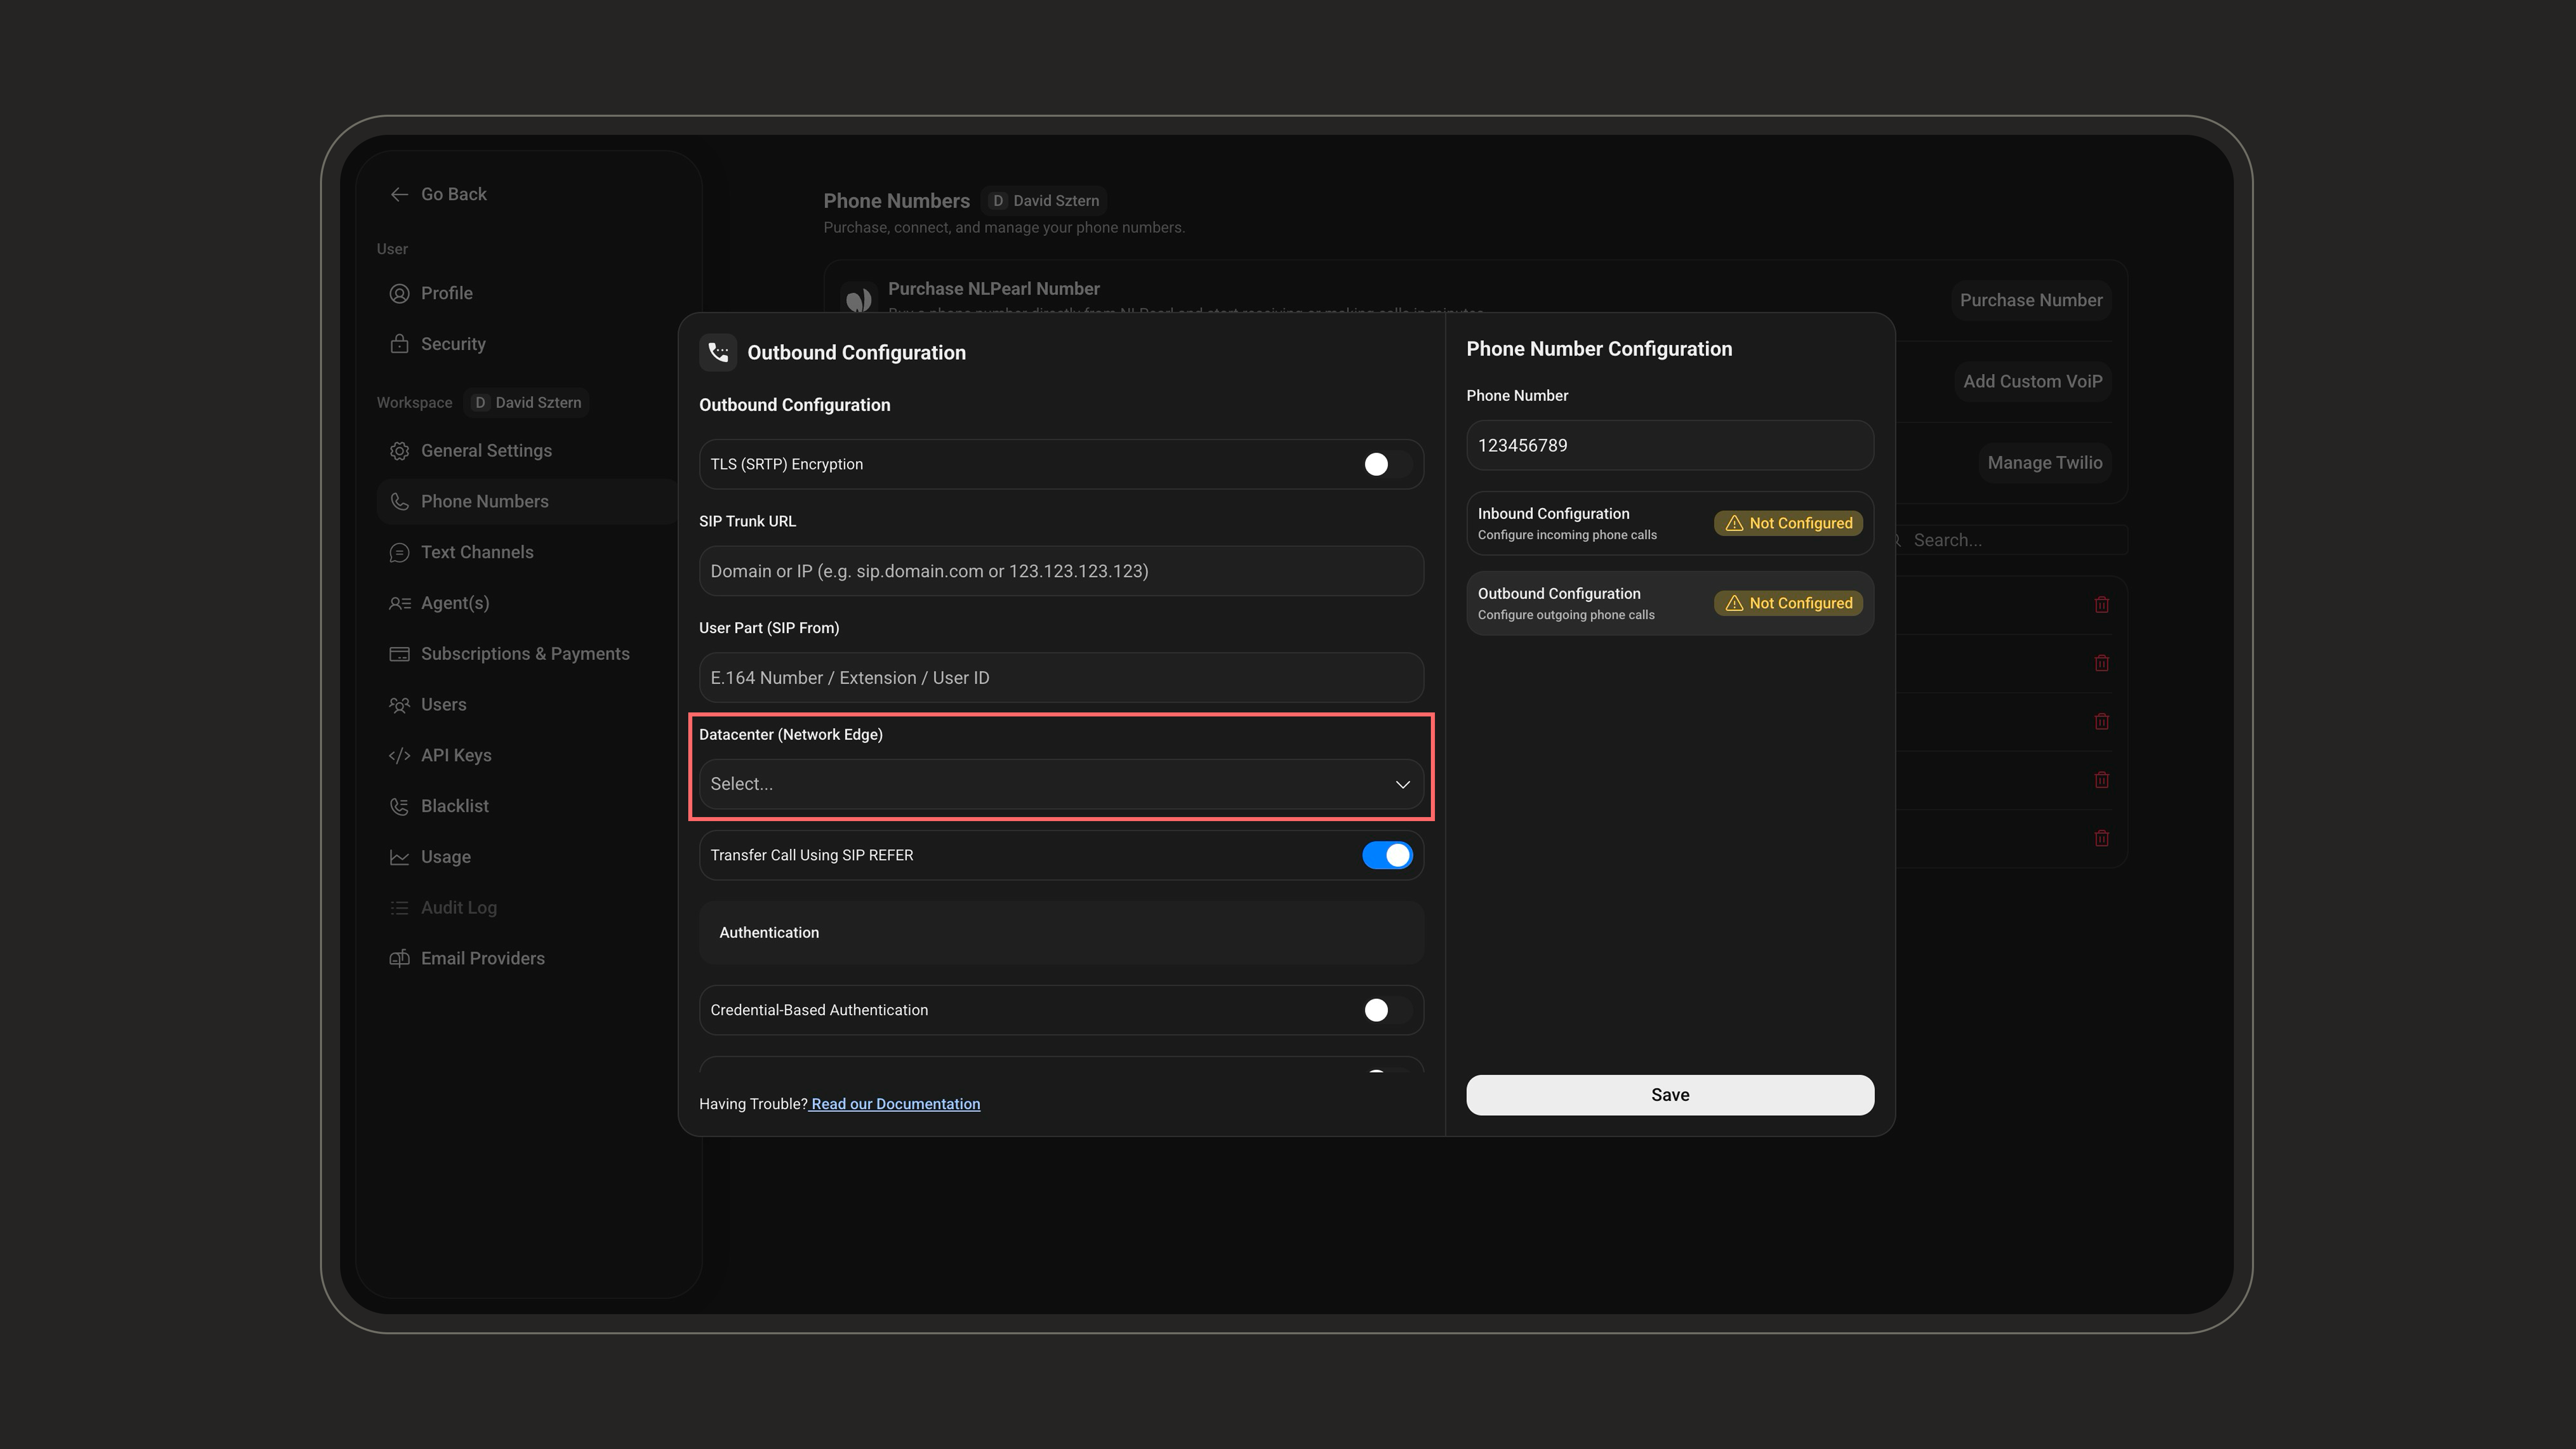
5
Transfer Call Using SIP Refer
This toggle enables or disables call transfers using the SIP REFER method. It is enabled by default.When enabled, it allows: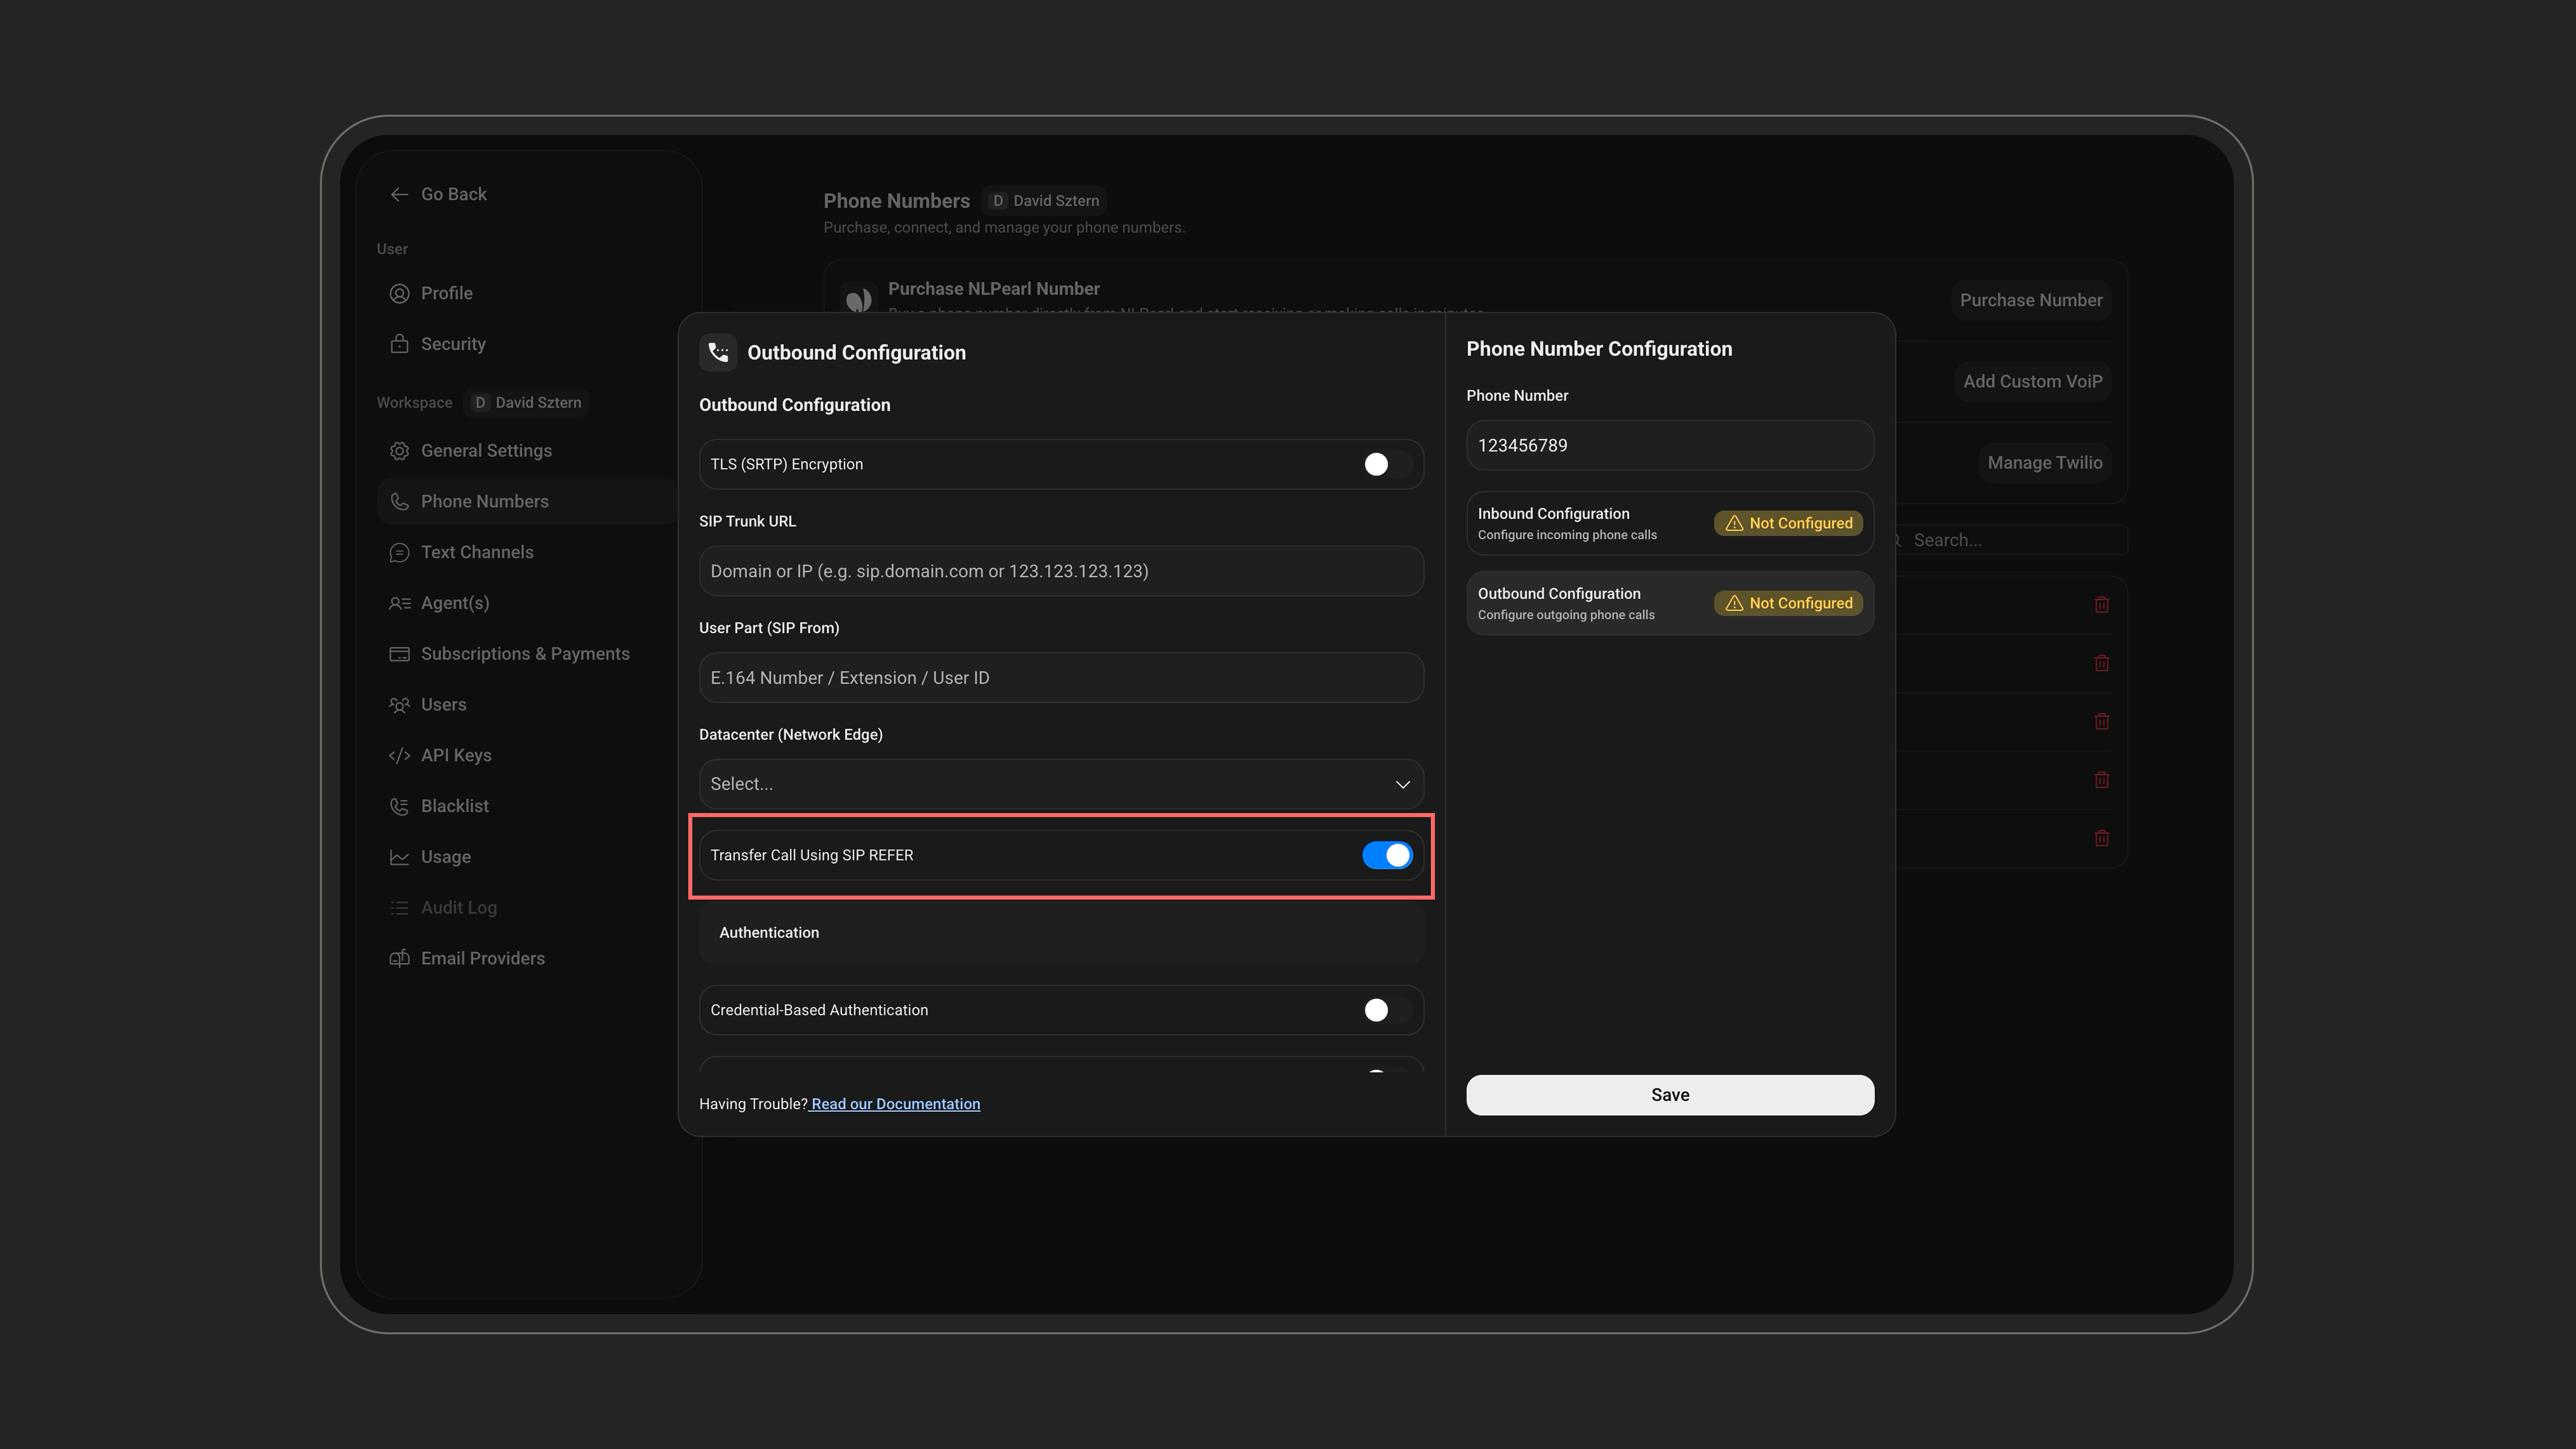
- Transferring a live call from one destination to another without media proxying
- Offloading media streams directly between endpoints
- Reducing latency and server load
6
Authentication Methods (optional based on your VoIP)
Credentials Authentication:Use this method if your VoIP provider requires username/password credentials to authenticate outbound calls.Username:
This is the identifier associated with your SIP account.Password:
A secure password used to authenticate the SIP user.
Make sure it meets your provider’s security requirements (e.g. minimum 12 characters, including upper/lowercase letters, a number, and a special character).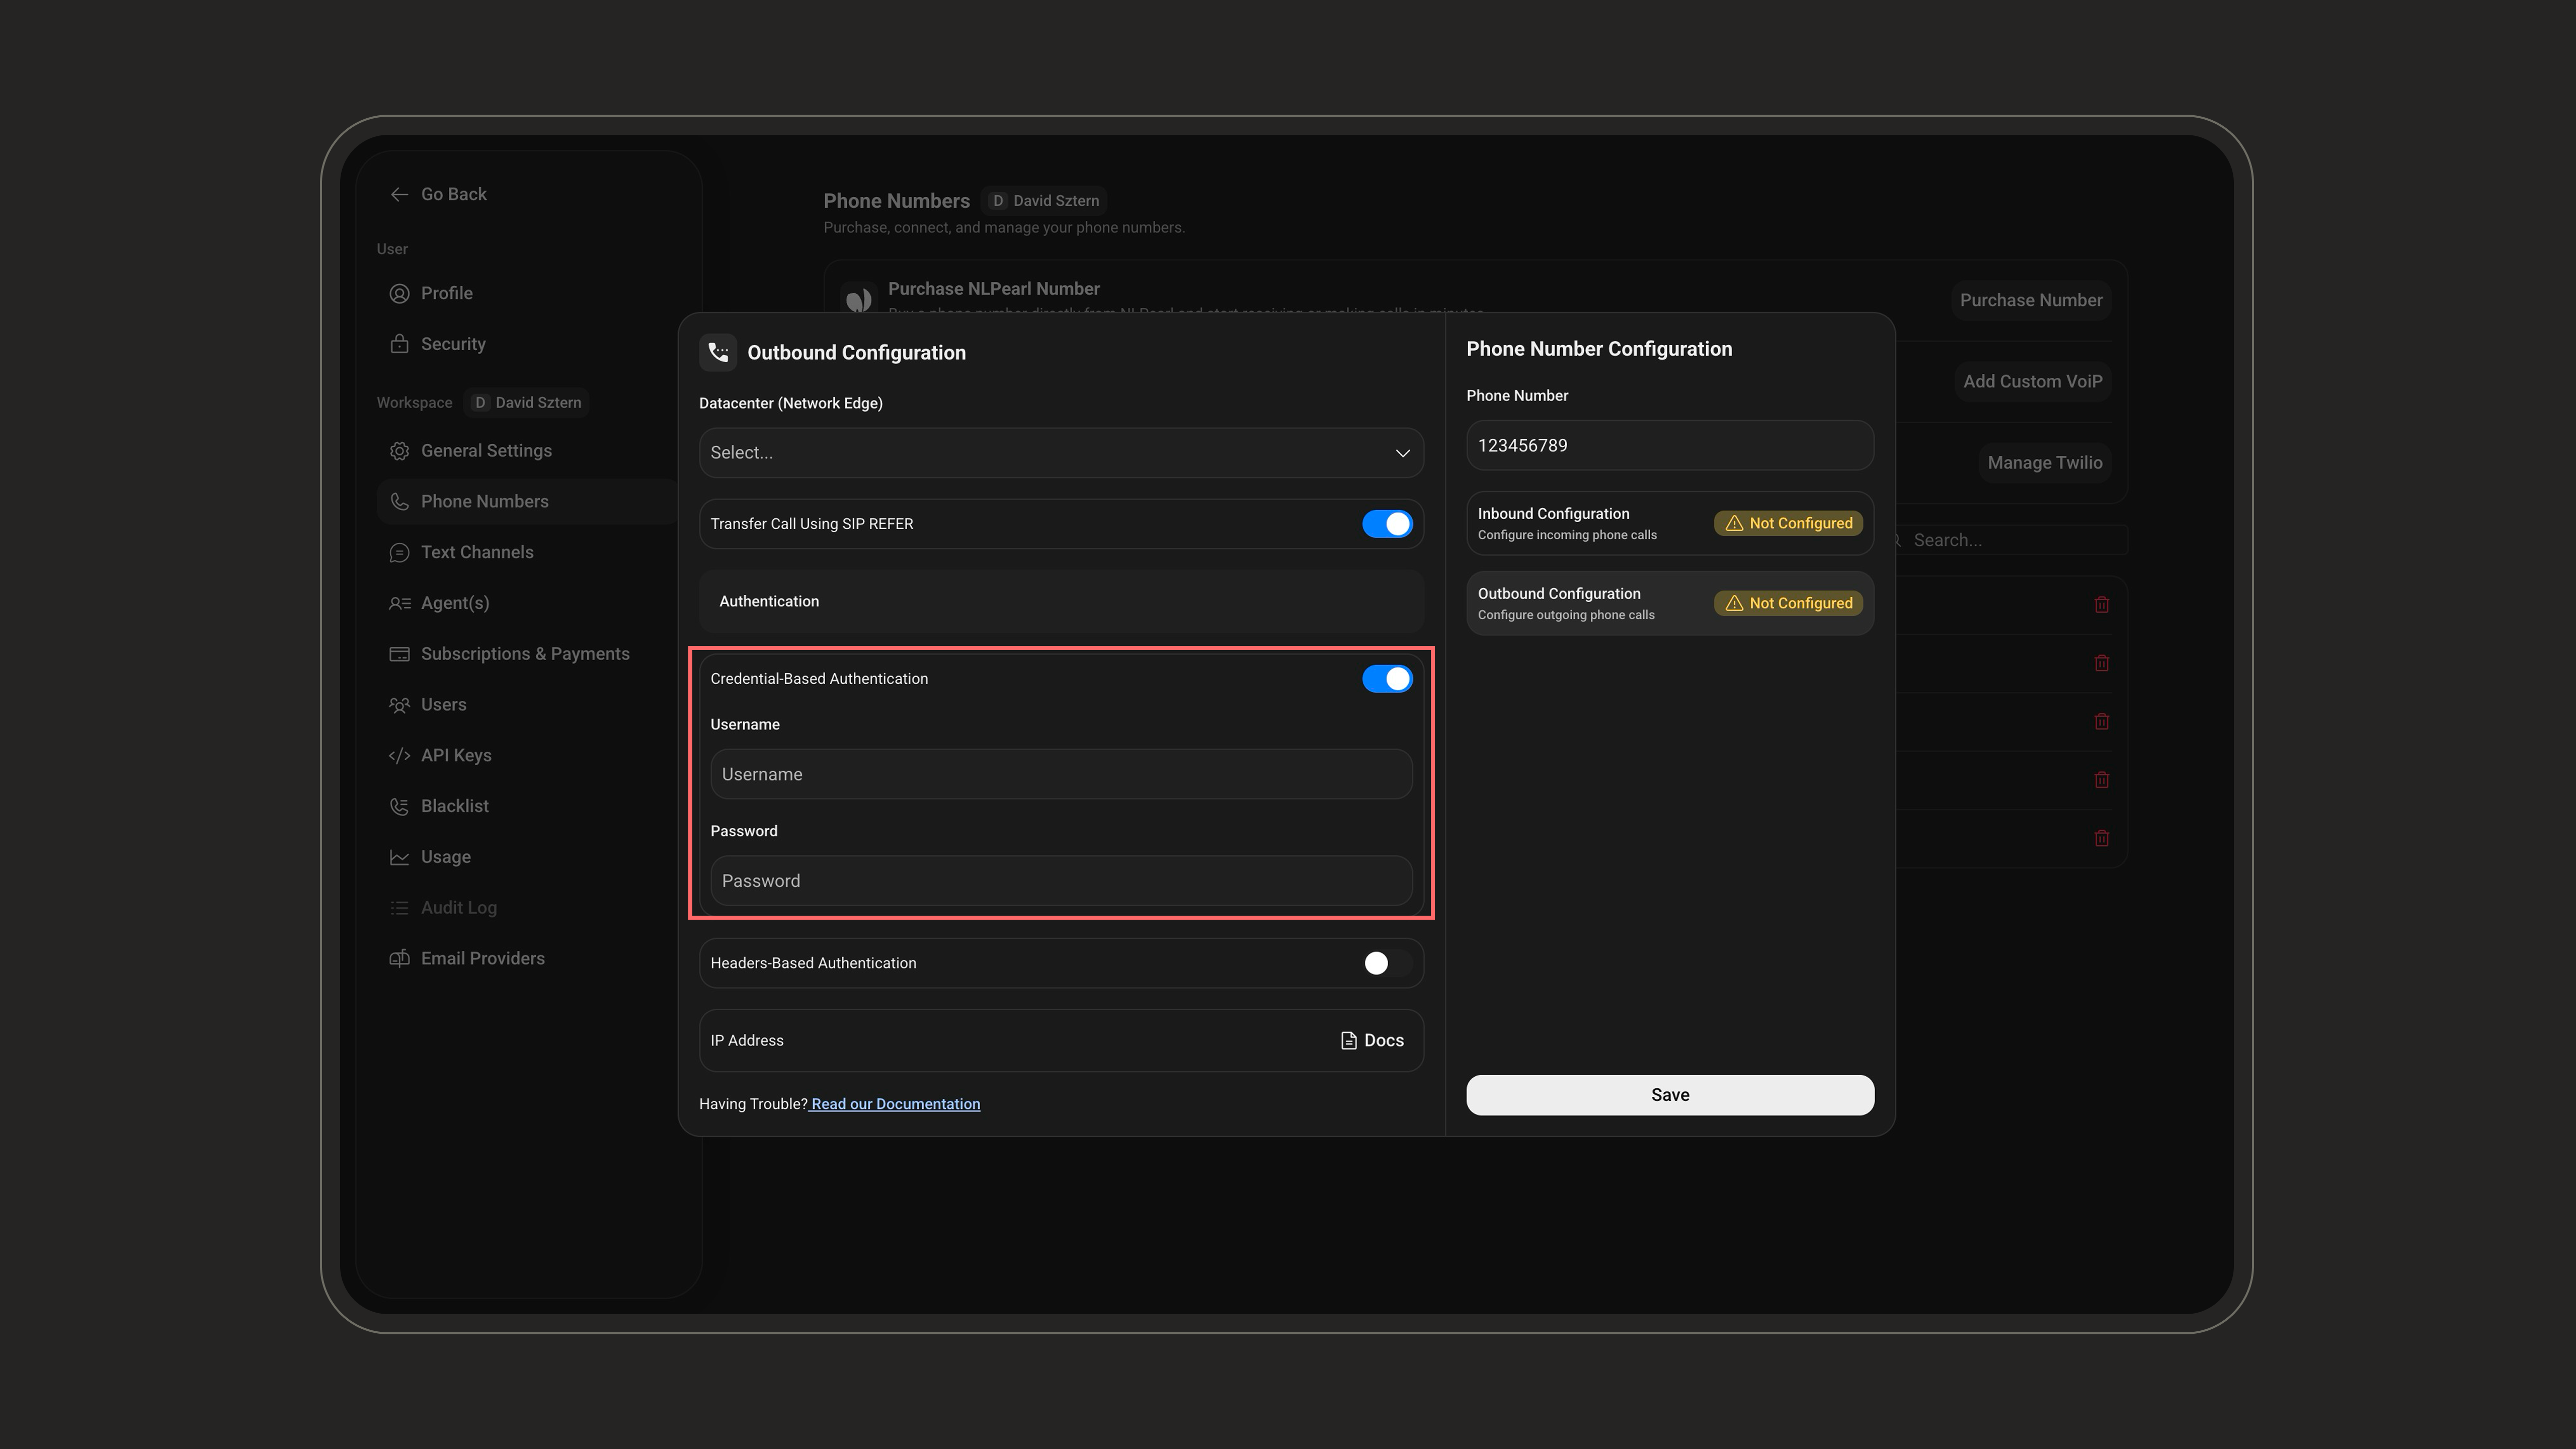
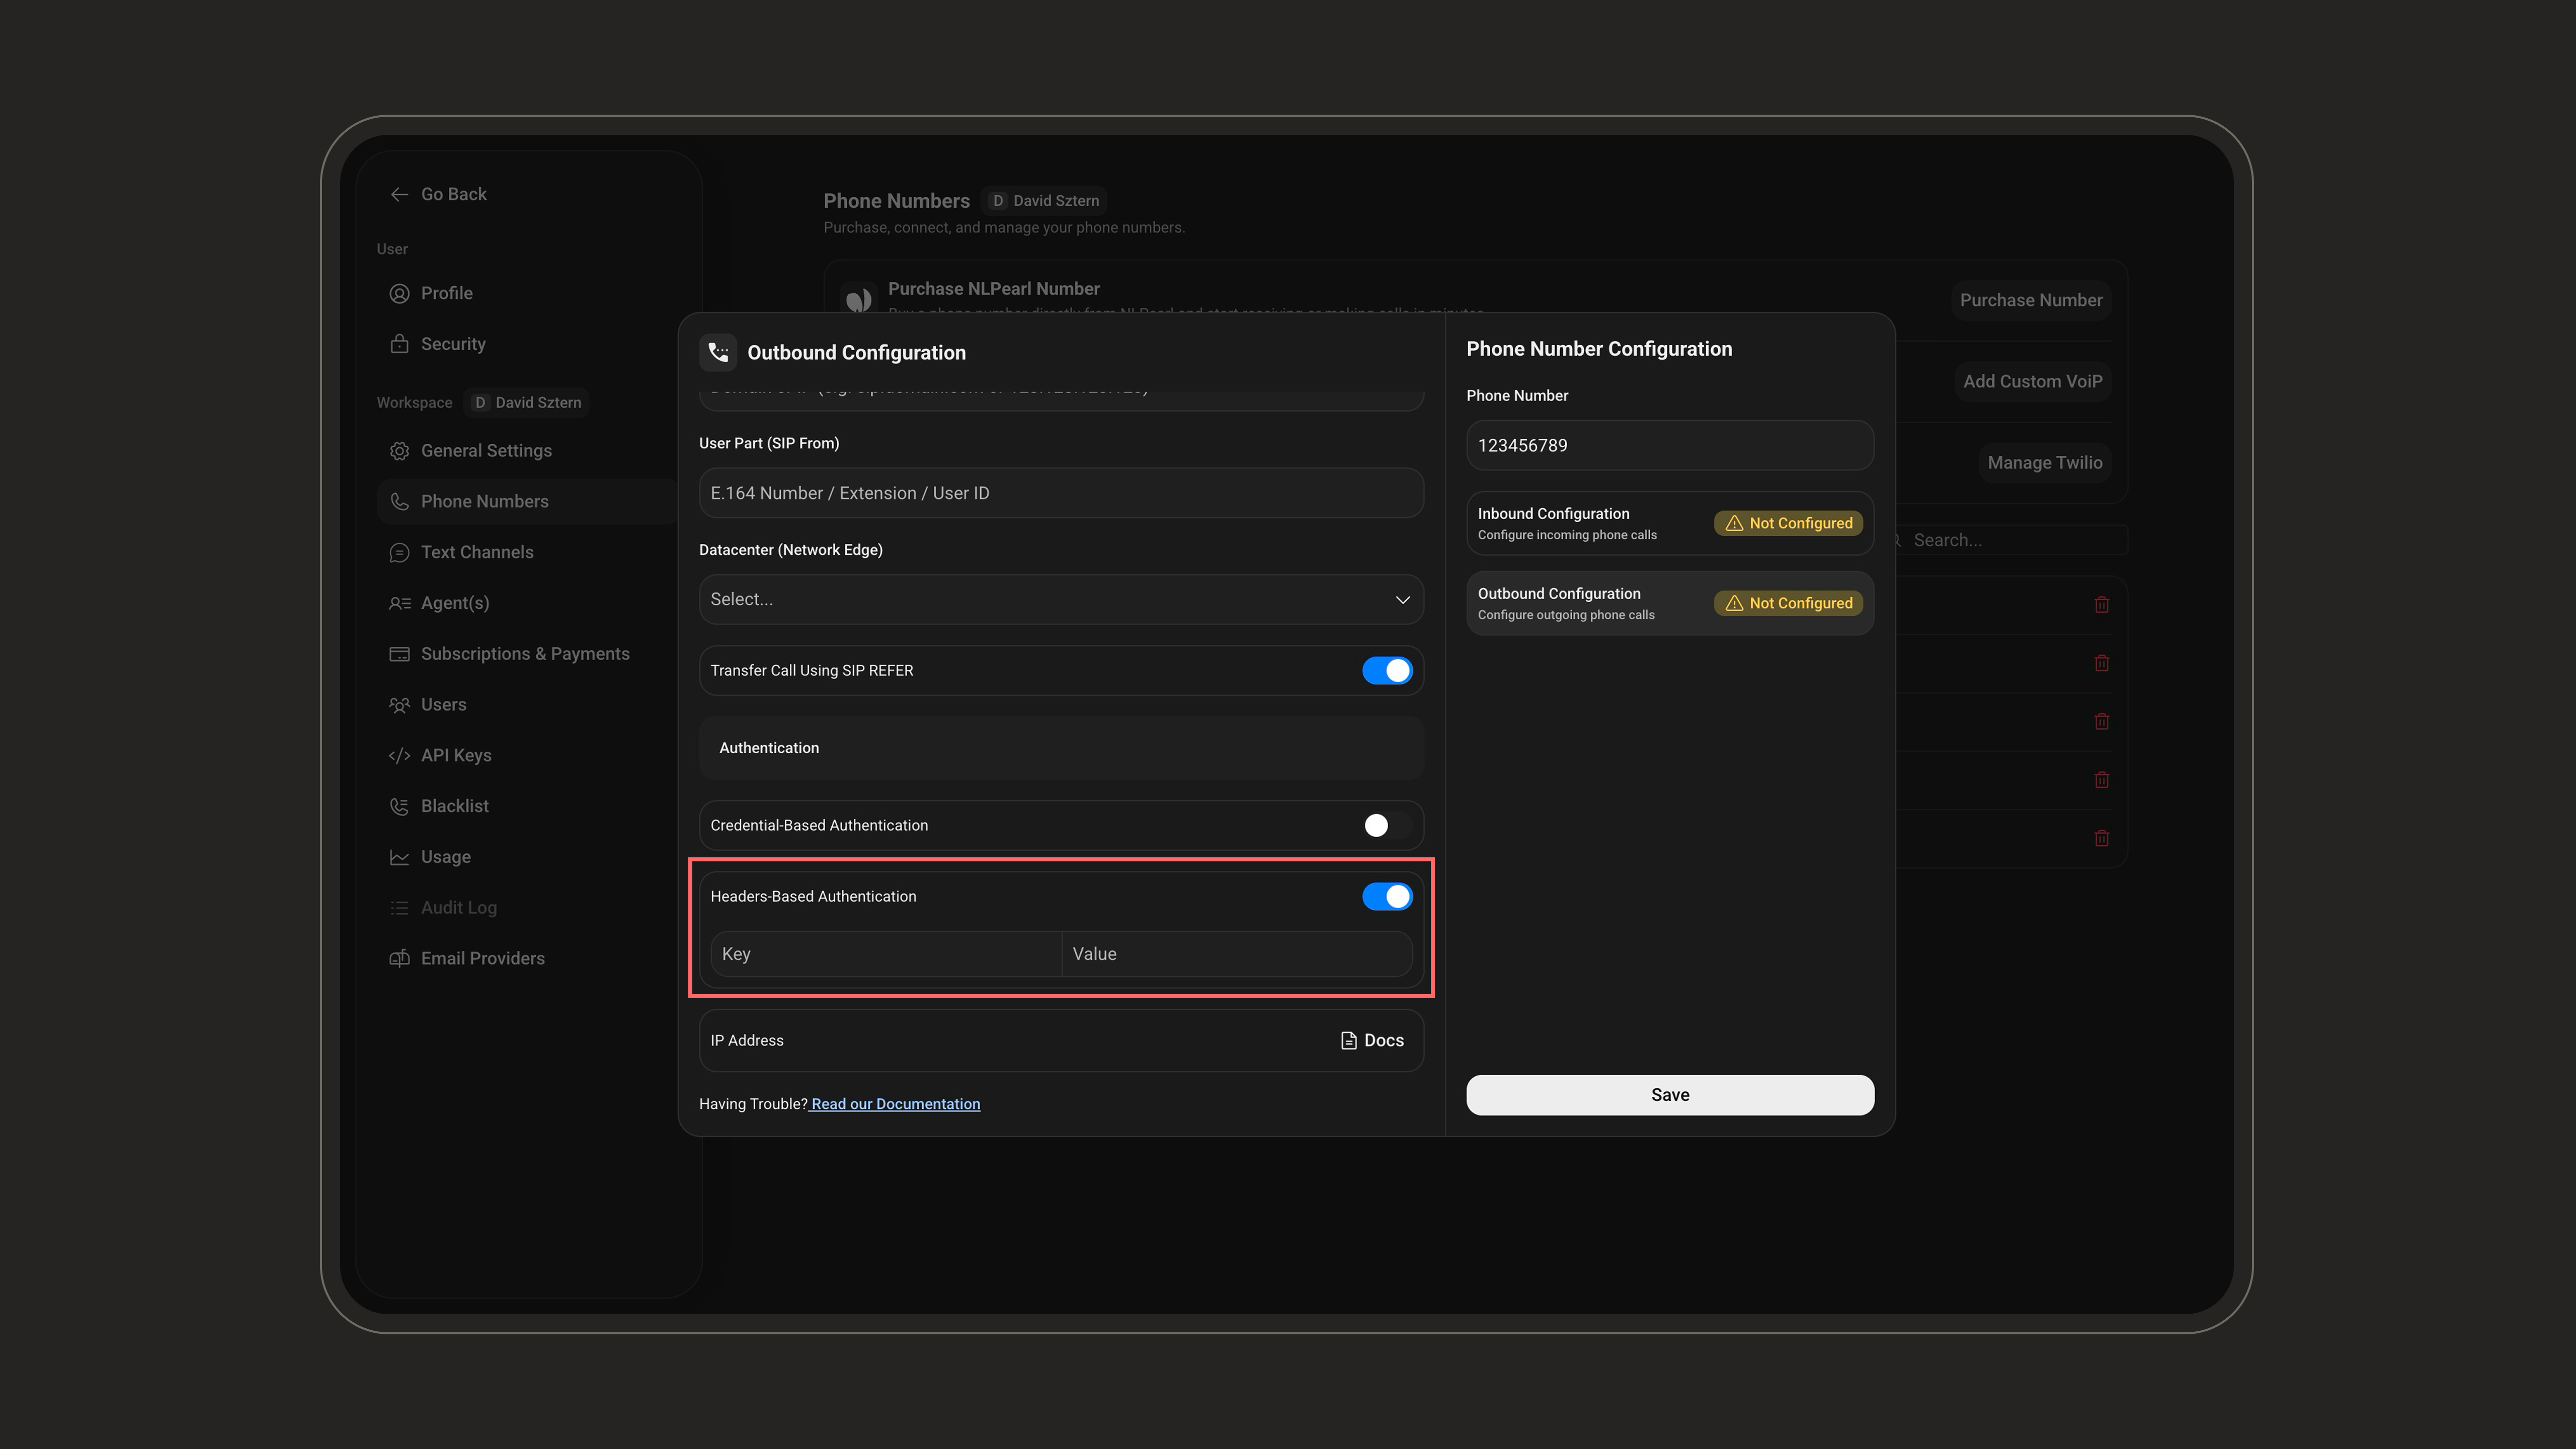
Header-based auth is typically used for advanced integrations or when SIP gateways are behind proxies/firewalls that don’t support IP or credential-based auth.
Ensure this matches exactly what your provider expects, as even small typos (like case or symbols) can lead to rejections.
You can add several key-value pairs if needed, for example, to meet multi-token security policies.
- IP Address Allow List:
IP Address: See Twilio’s SIP Trunking IP Addresses.
6
Managing Your Custom VoIP Phone Numbers
Once integrated: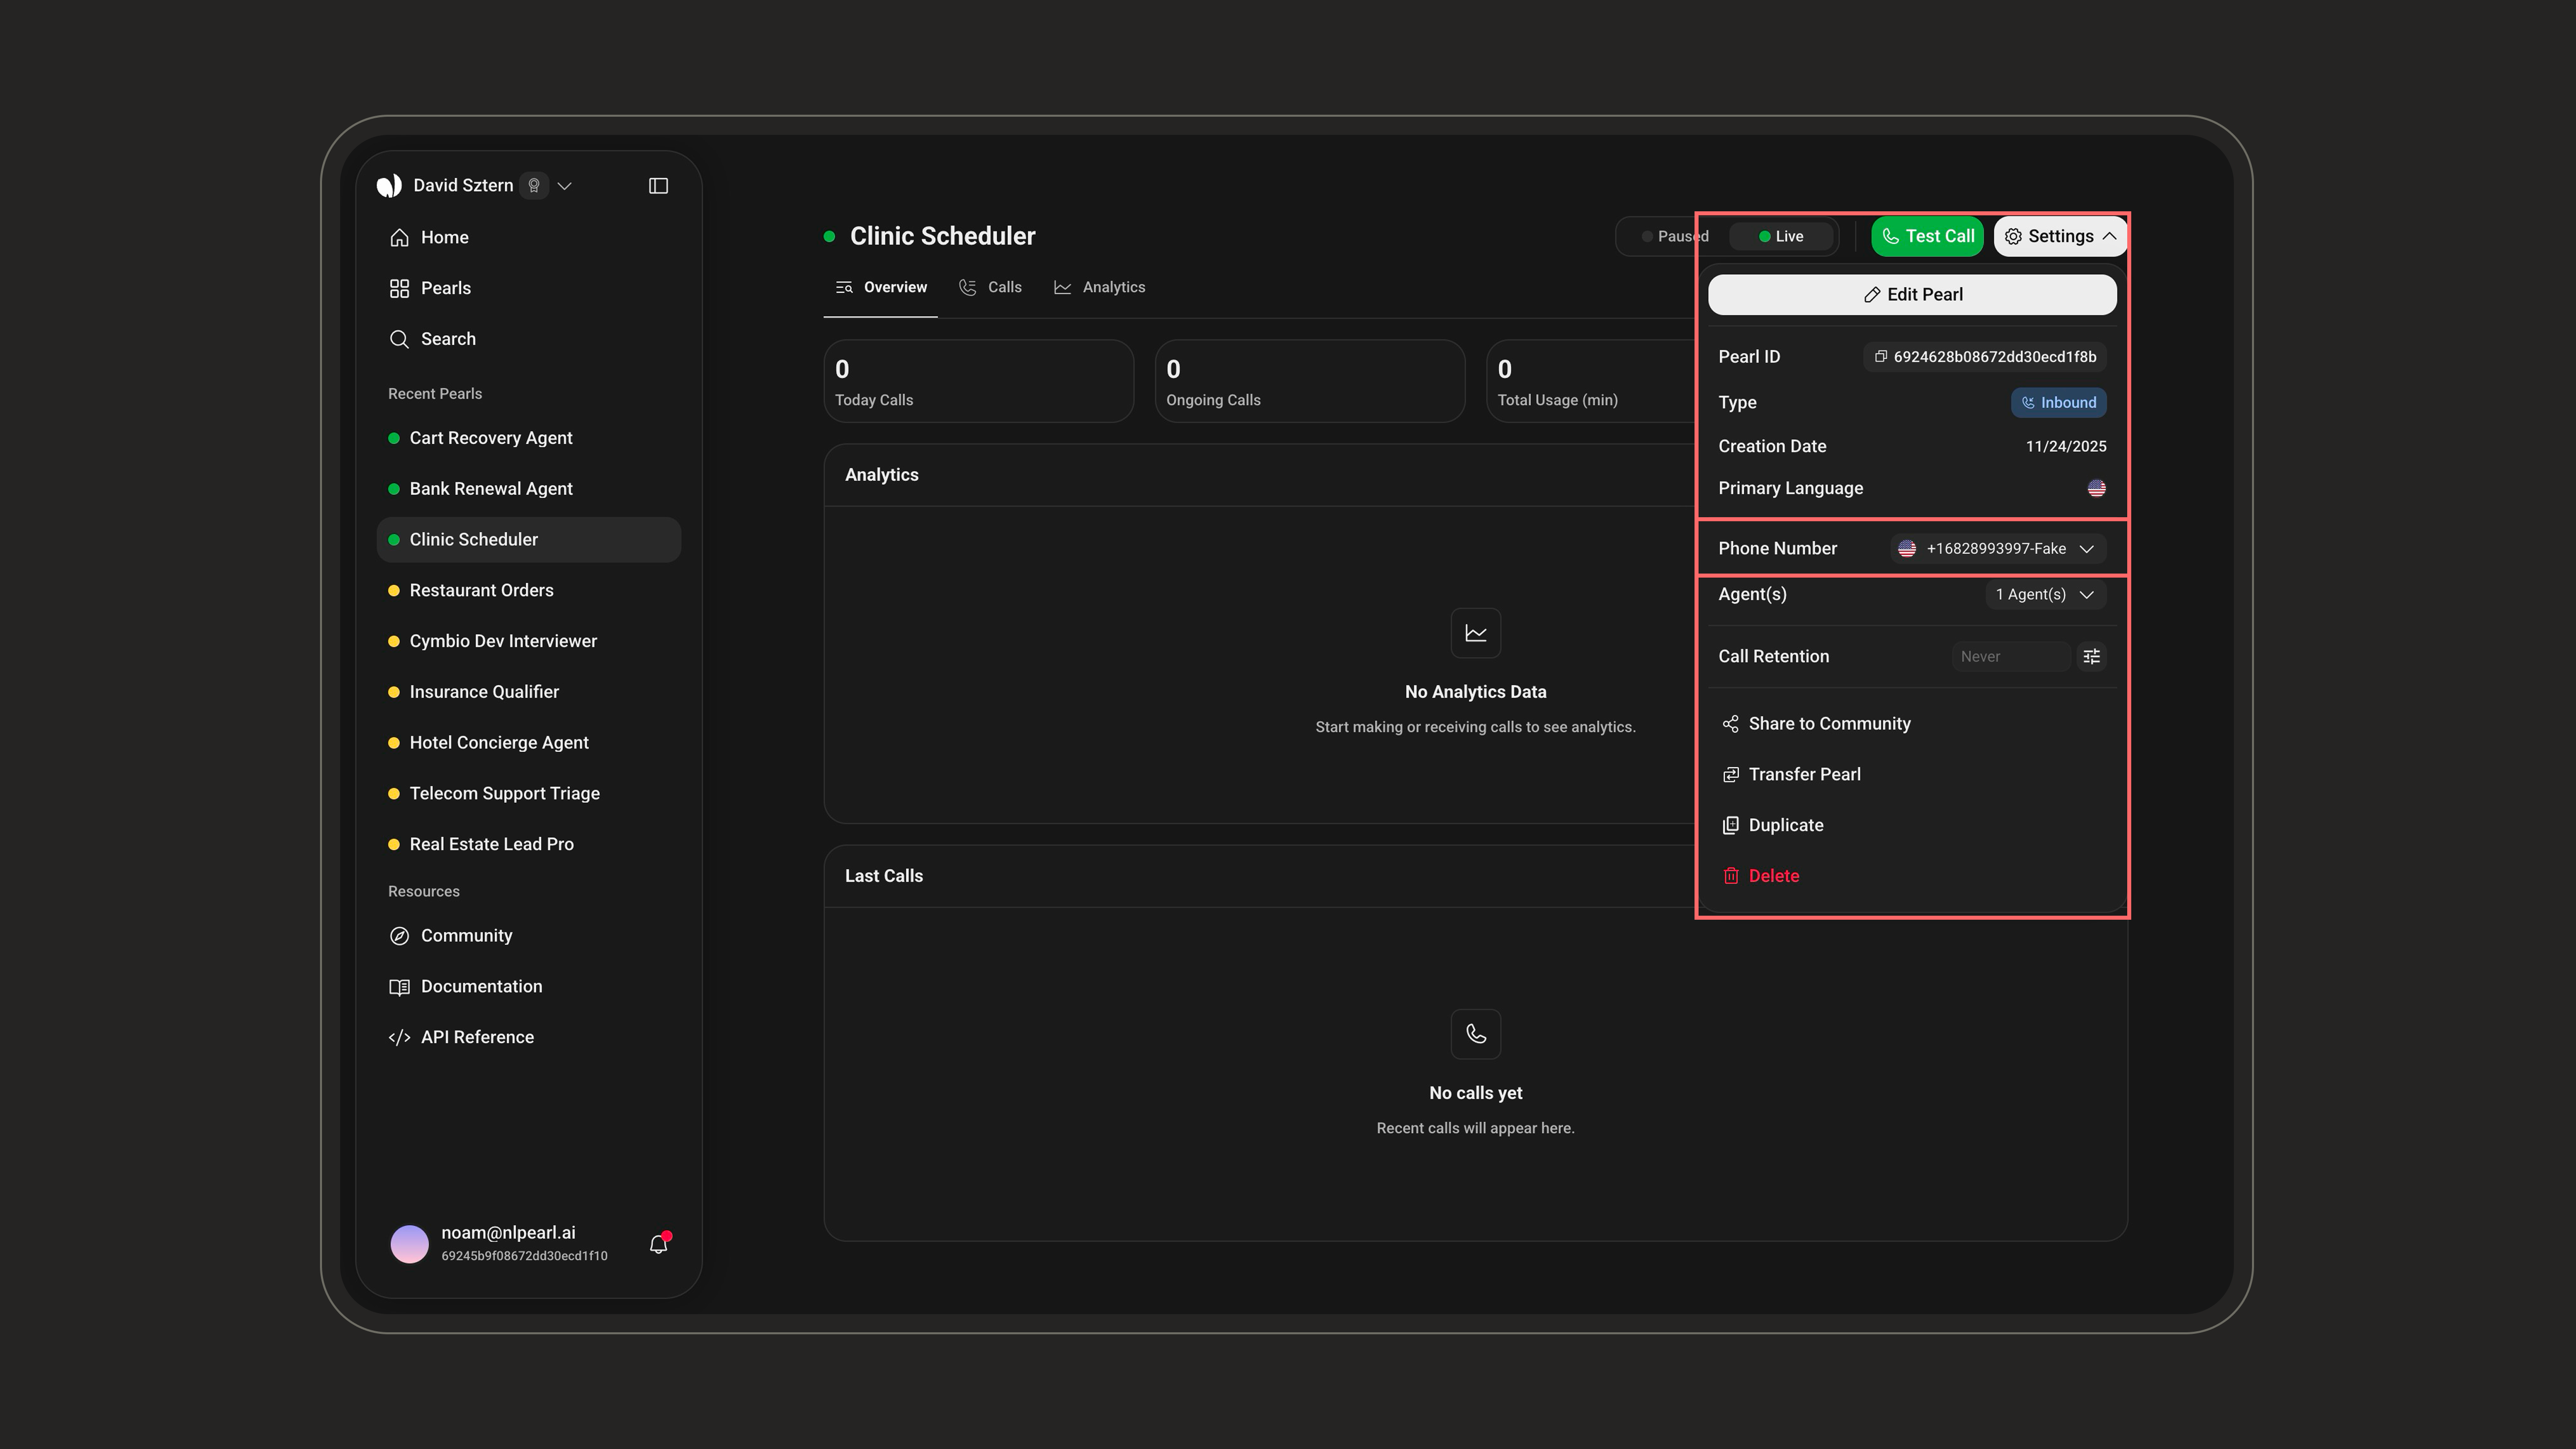
- Assign to Inbound/Outbound:
You can assign your custom VoIP phone numbers to inbound or outbound campaigns within NLPearl.AI.
- Update Configuration:
If any changes are needed, you can edit the VoIP settings by accessing the phone number in the Phone Numbers tab.
Advantages of Custom VoIP Integration
Flexibility: Leverage your existing VoIP infrastructure without switching providers or modifying your current setup.Global Reach: Access phone numbers and make calls in any region your VoIP provider supports, ideal for international teams.Caller Context: Pass data to your Pearl on inbound calls with custom SIP headers (X- prefix). Each value lands in the matching Pre-call variable. Learn how.Explore Other Options
NLPearl Phone Numbers
Purchase and manage your NLPearl-hosted phone numbers directly, with instant activation and native support.
Twilio Integration
Explore our Twilio Integration to access a broader range of international phone numbers.
Need Assistance?
If you require help with the integration process, please refer to our support resources or contact our support team for guidance.
If you require help with the integration process, please refer to our support resources or contact our support team for guidance.