
Setting Up Outbound Campaigns
Once you have created a Pearl, you can use it to run outbound campaigns. Outbound settings are configured inside your Pearl, under Outbound Settings, so your Pearl calls your leads following the conversational flow you defined.What are outbound campaigns?Outbound campaigns let your Pearl make outgoing calls to a list of leads, following the conversational logic you defined for consistent and effective outreach.
Attach a Phone Number
To place calls, your Pearl needs a phone number. Numbers are purchased and connected from Settings → Phone Numbers, not from the Outbound Settings screen. Start by clicking your profile card at the bottom-left corner of the sidebar, then open Settings.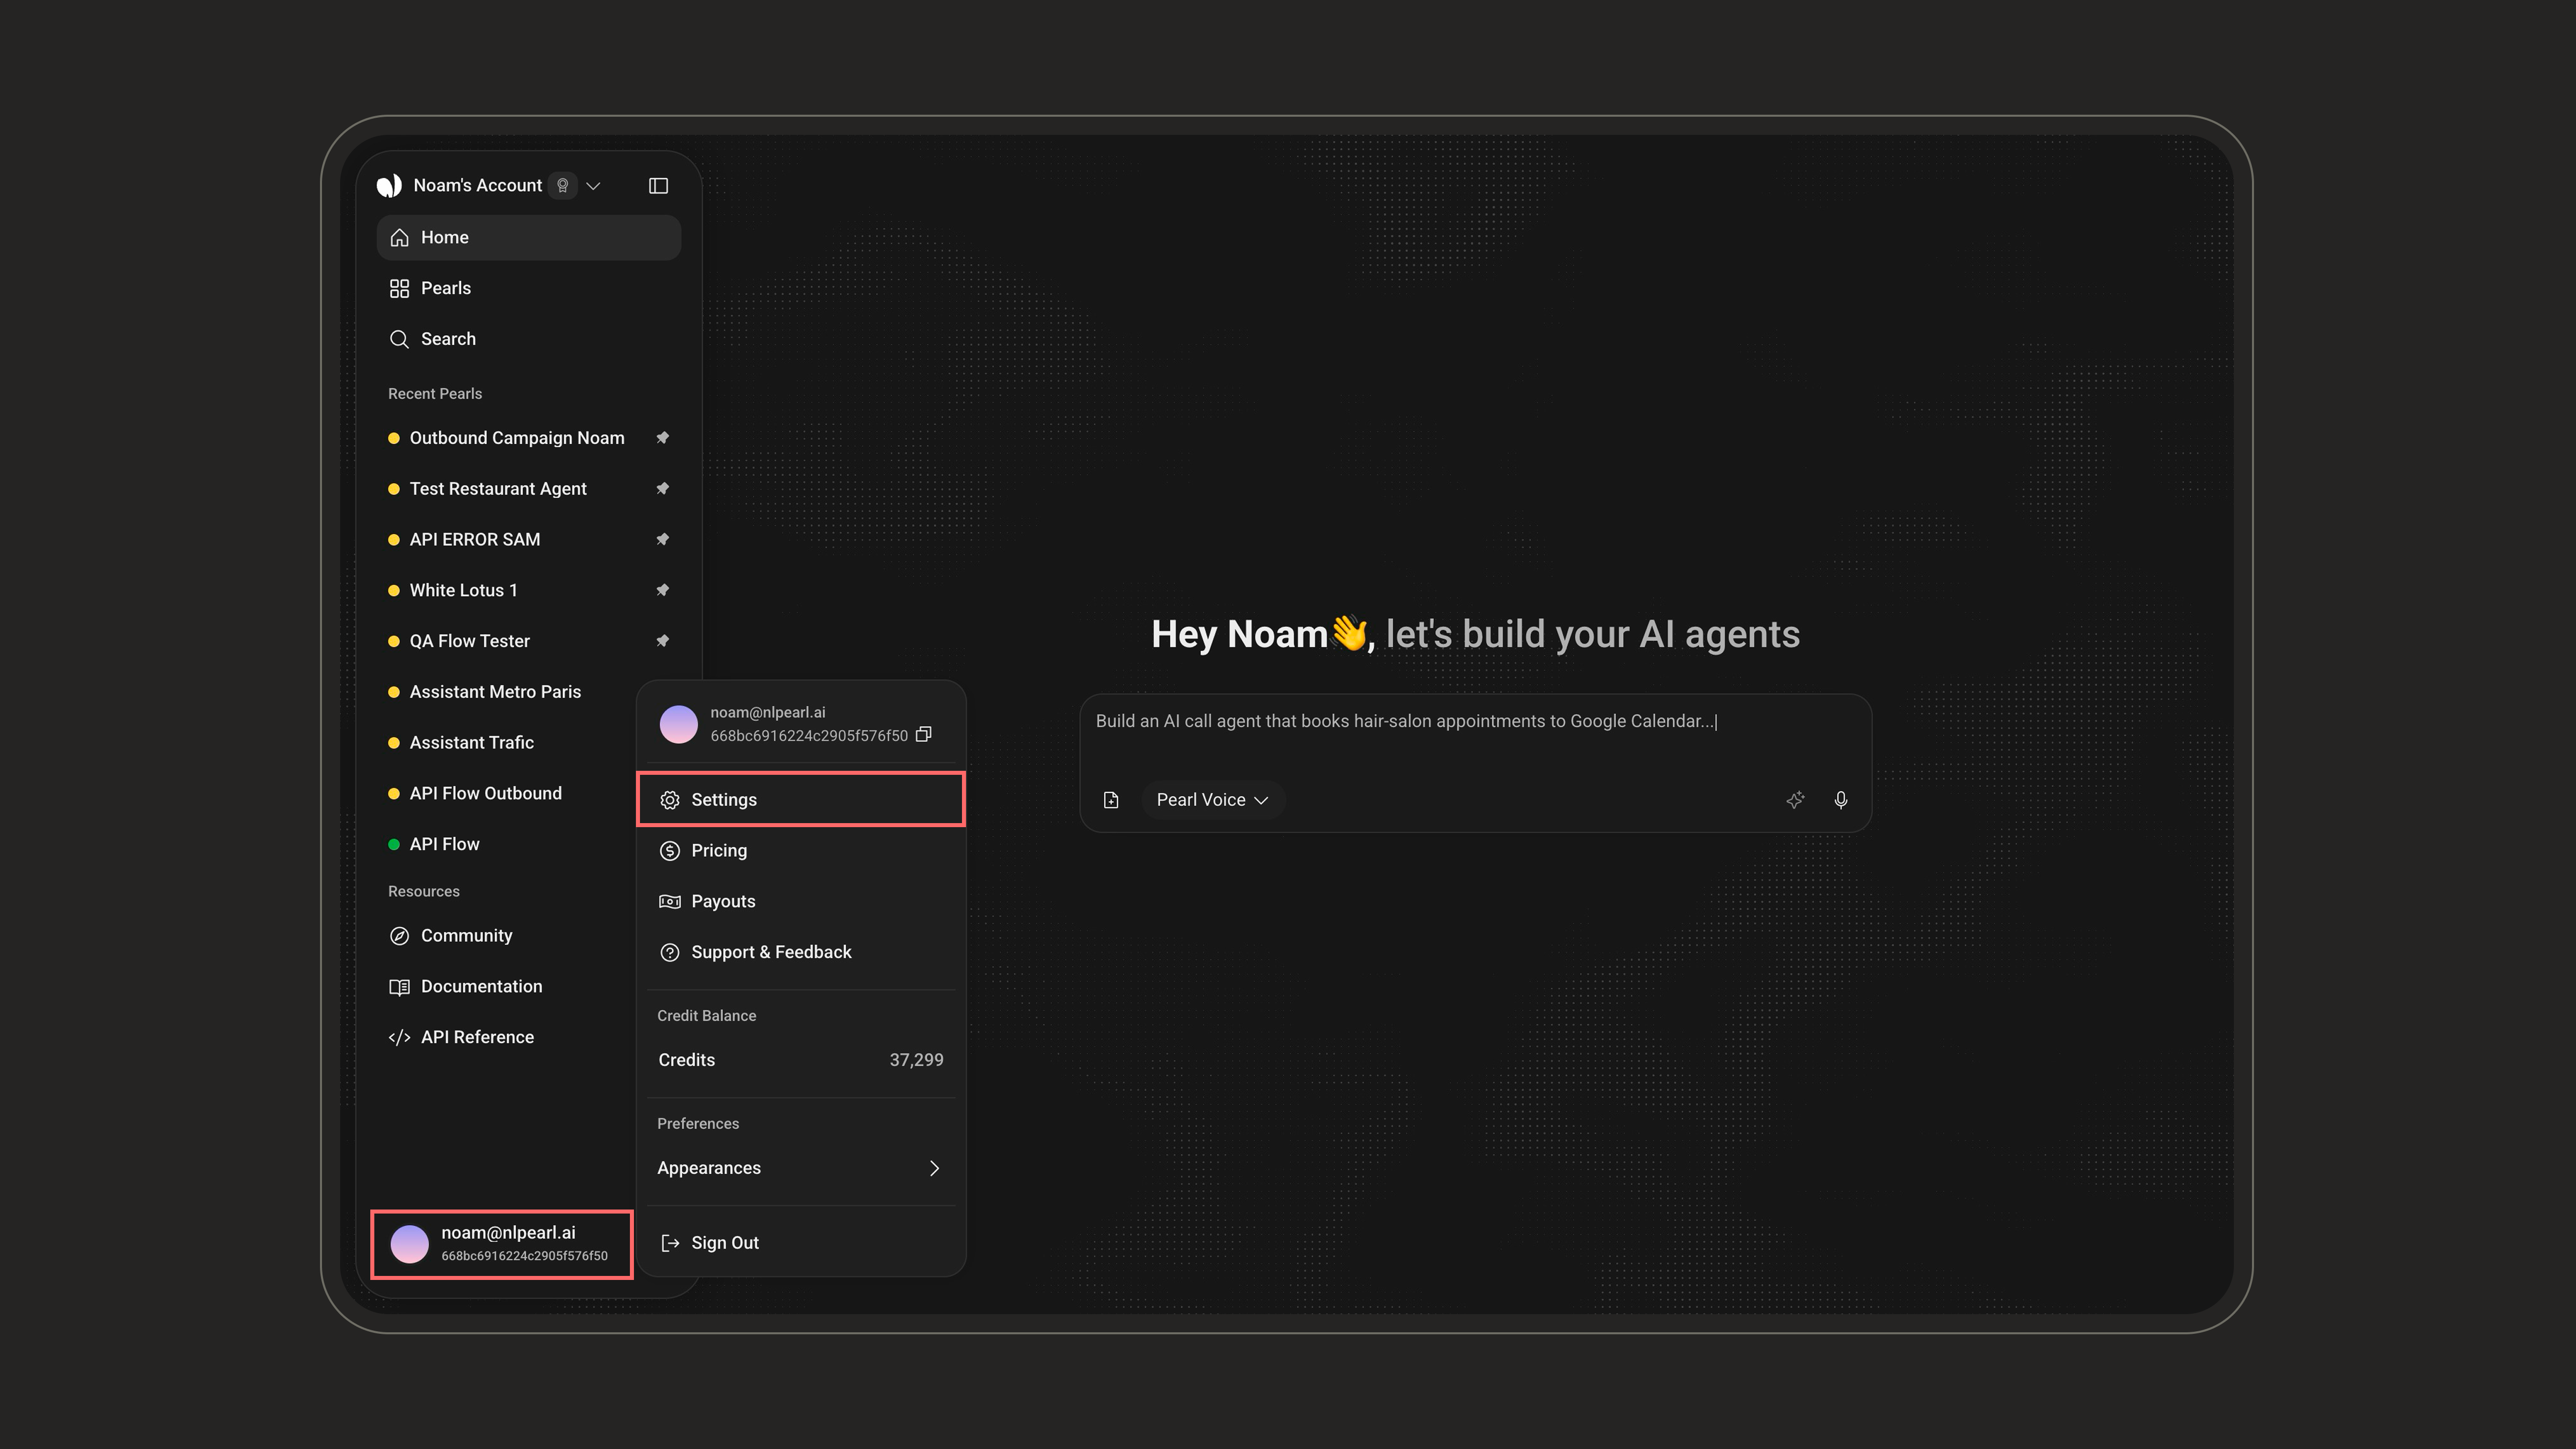
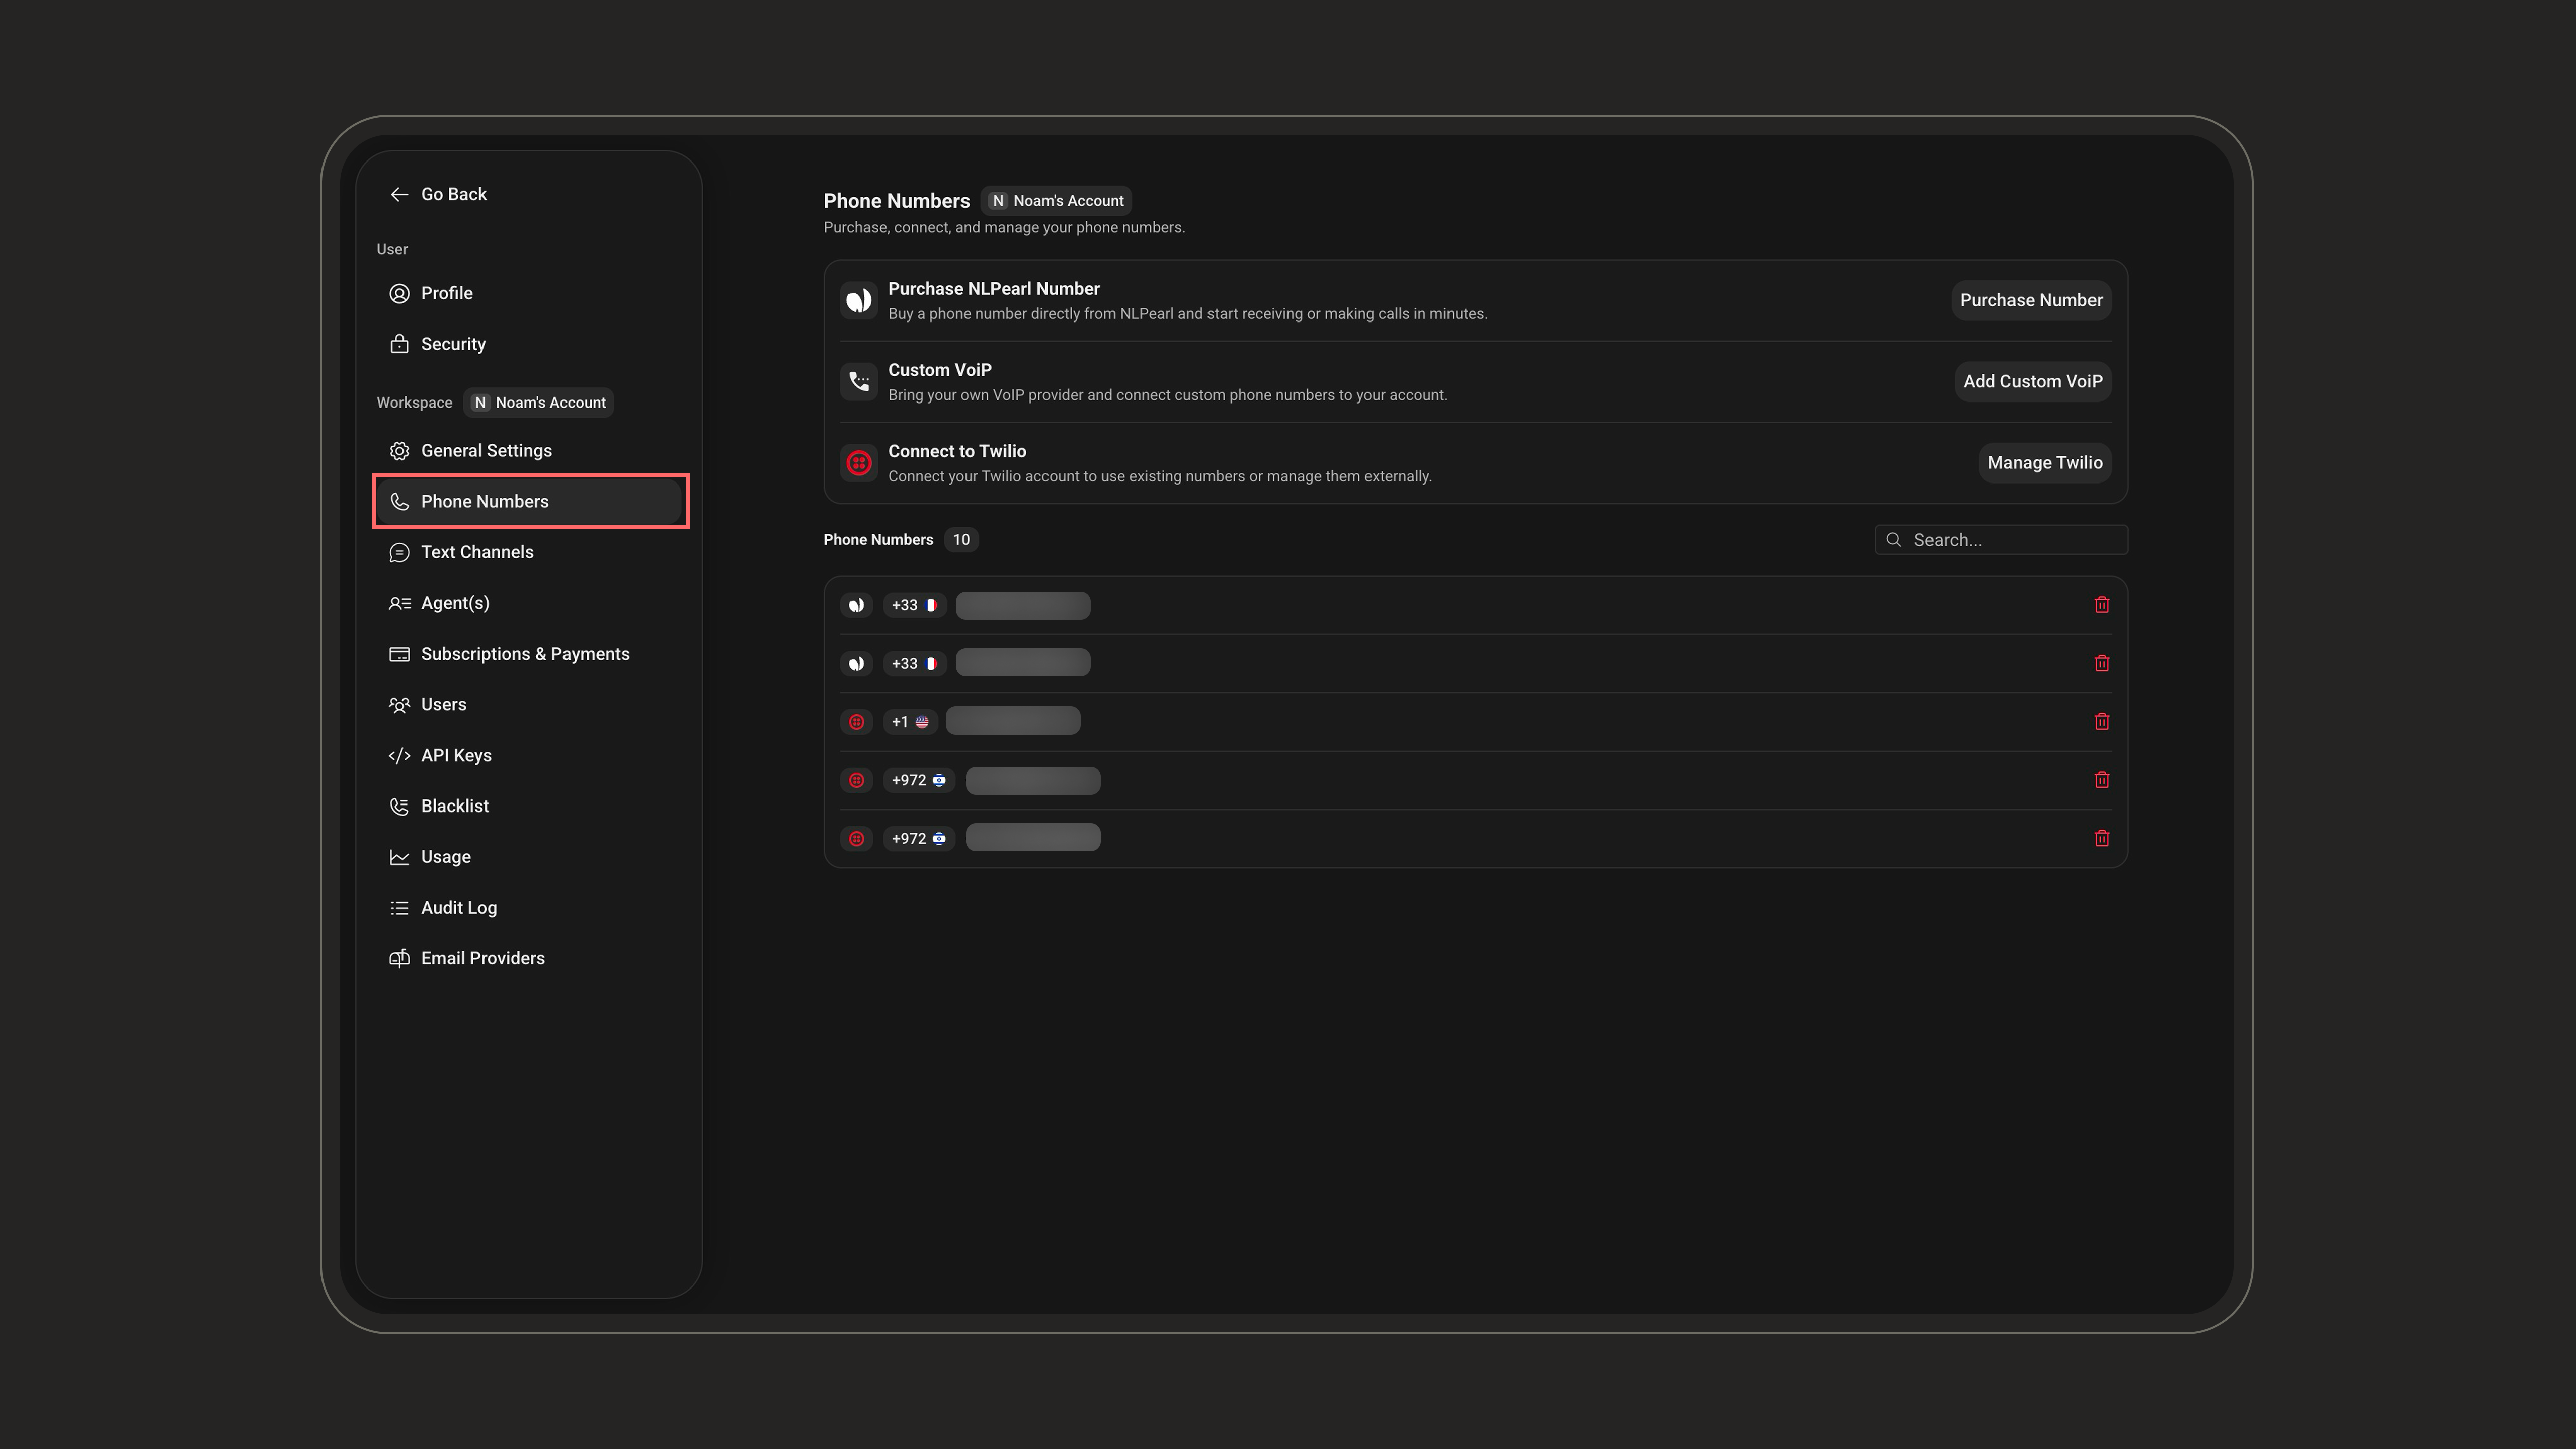
For more details, visit the NLPearl Phone Numbers page.
Visit Twilio Integration for details on how to import and manage your Twilio phone numbers.
To learn more about integrating your own VoIP service, check out Custom VoIP Integration.
Country codes — each campaign is tied to a single country code, set automatically by the number you attach:
- One country code per campaign: you can only call leads whose phone numbers match it.
- Cannot be changed: you can switch to another number within the same country code, but to use a different one you must create a new campaign.
- Multiple countries: create a separate campaign for each country code.
Outbound Settings
Configure your campaign from the Outbound Settings tab of your Pearl, in the PearlVibe flow editor. The tab groups the settings below into Campaign Settings (how calls are scheduled, managed, and recorded) and Lead Settings.Budget
Set an optional spending cap for the campaign, in dollars. Once the budget is reached, Pearl stops making calls for that campaign. You can increase it at any time as long as you have enough credit on your account.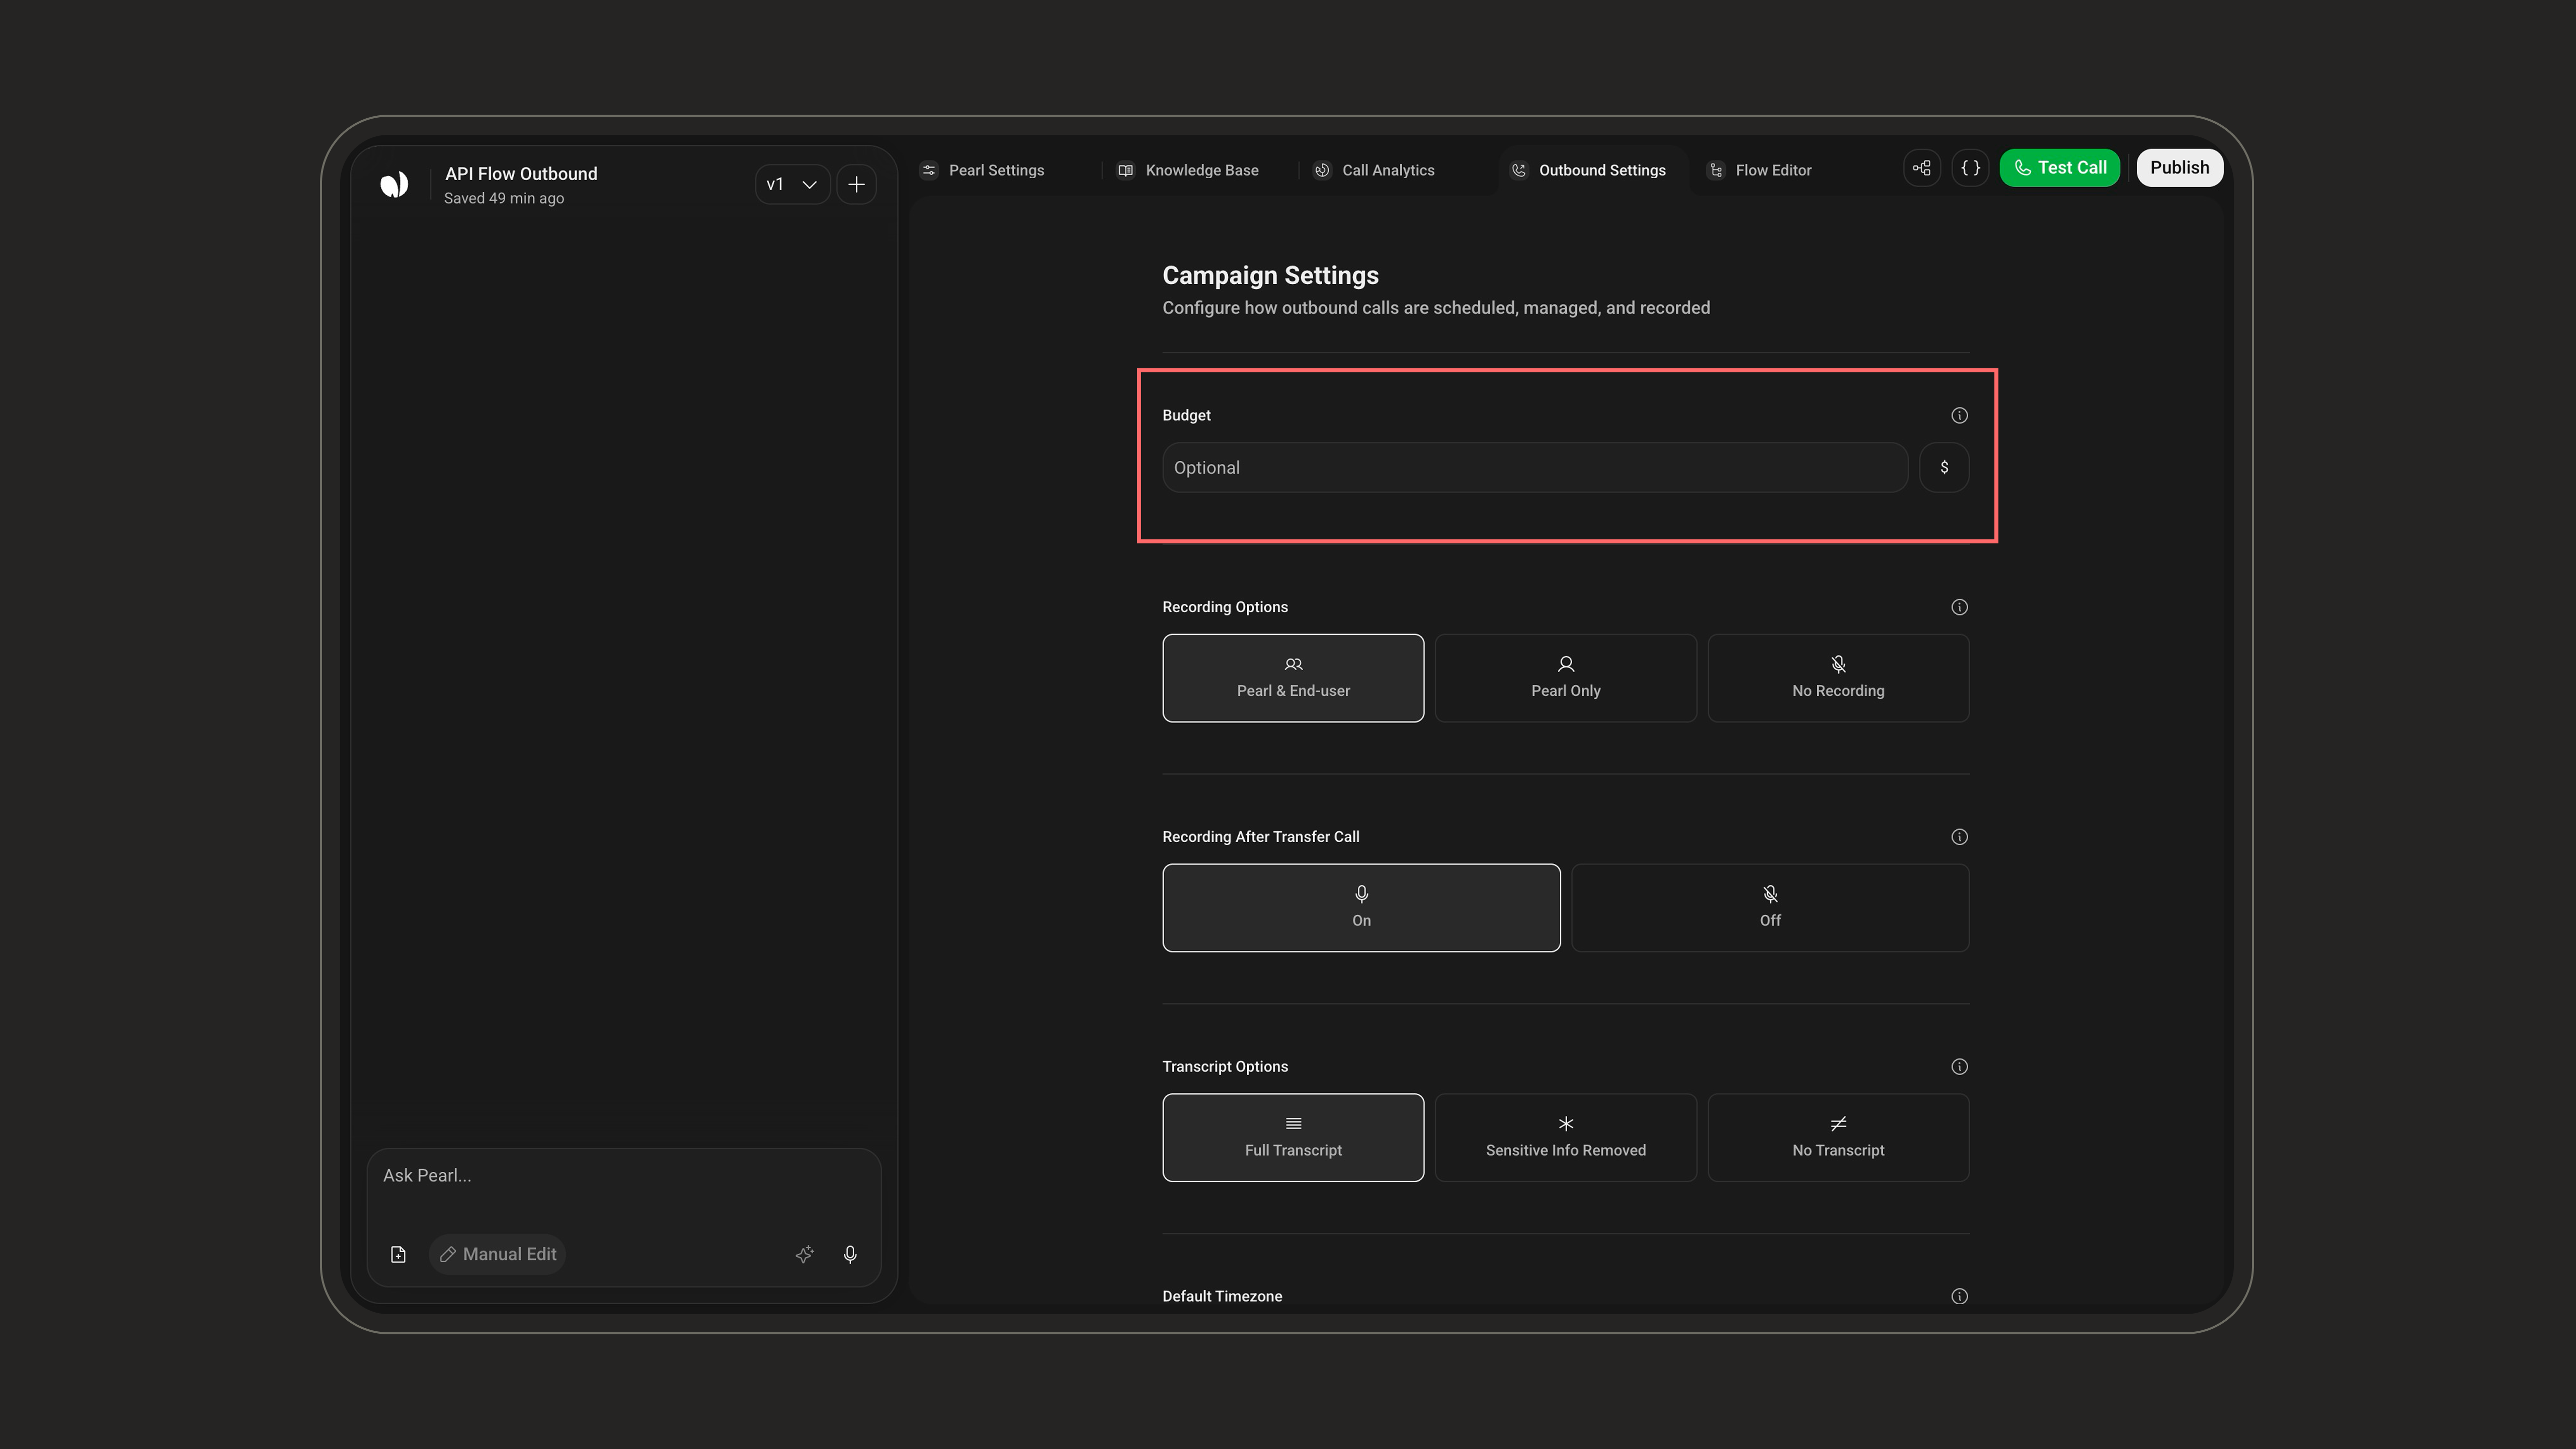
Recording Options
Choose whether and how calls are recorded. Recorded calls are available afterwards from your call logs.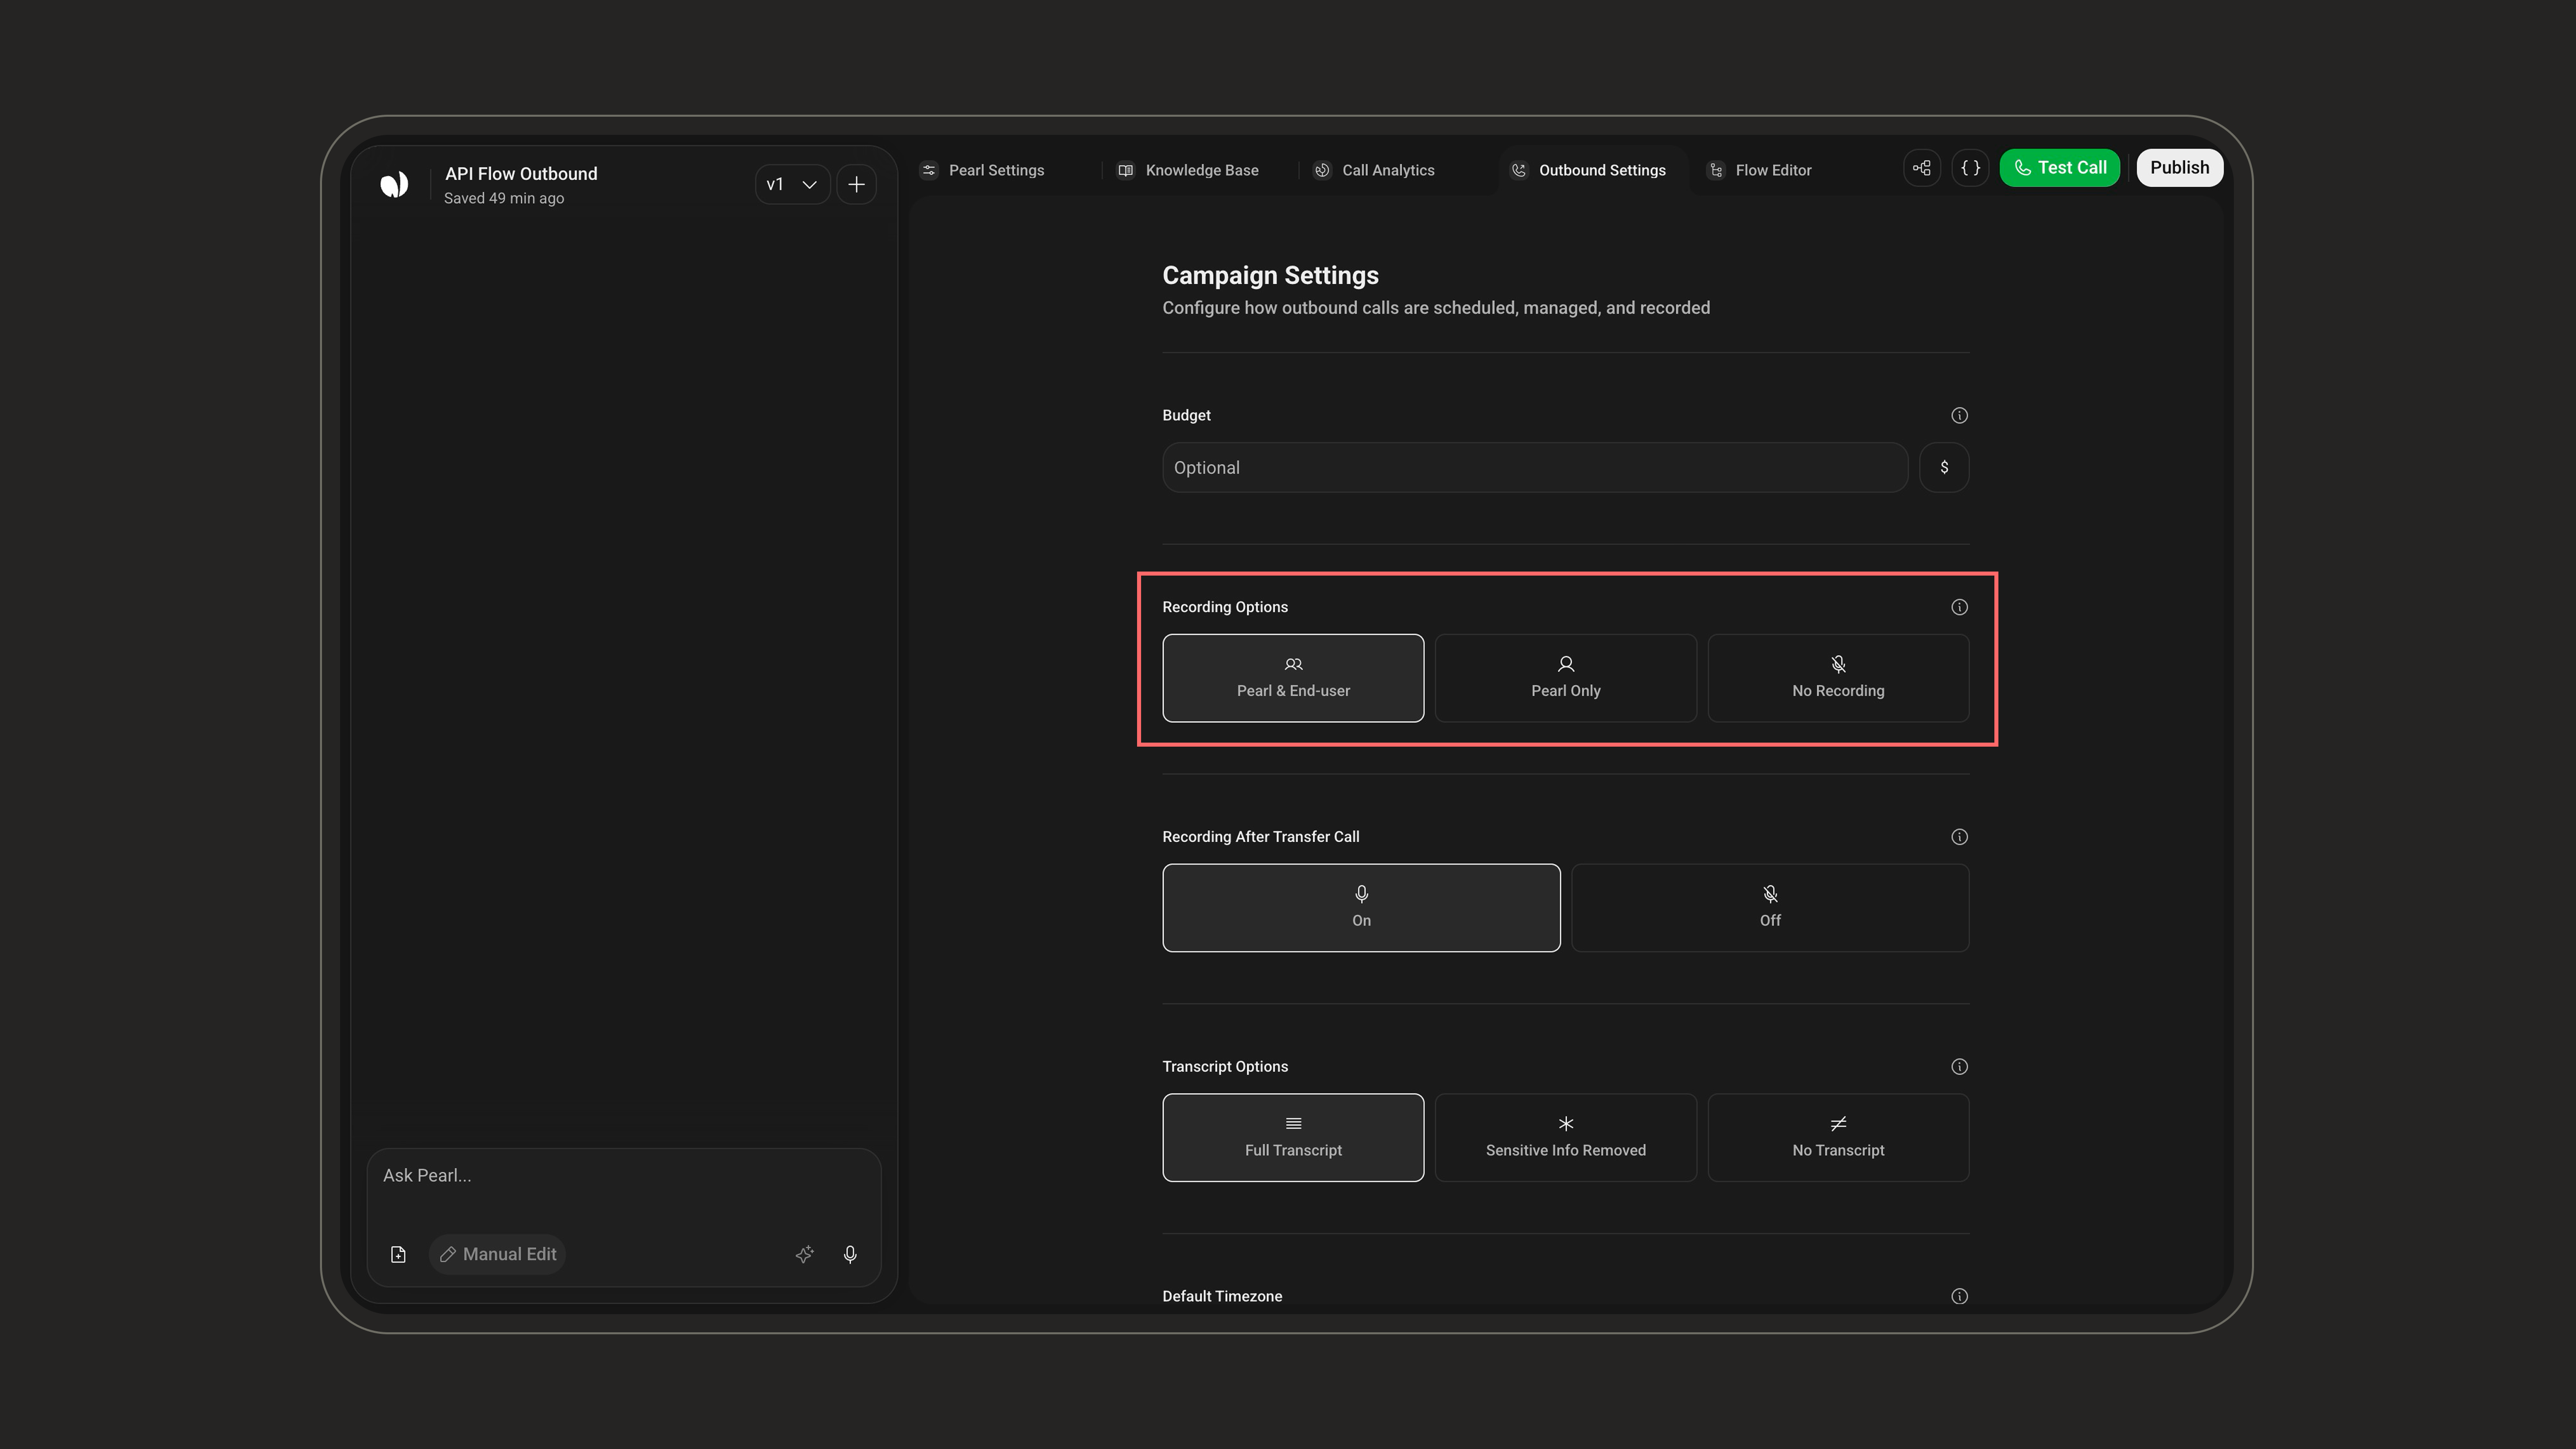
Recording After Transfer Call
If enabled, recording continues after the call is transferred to a human agent or external number, so you capture the full conversation.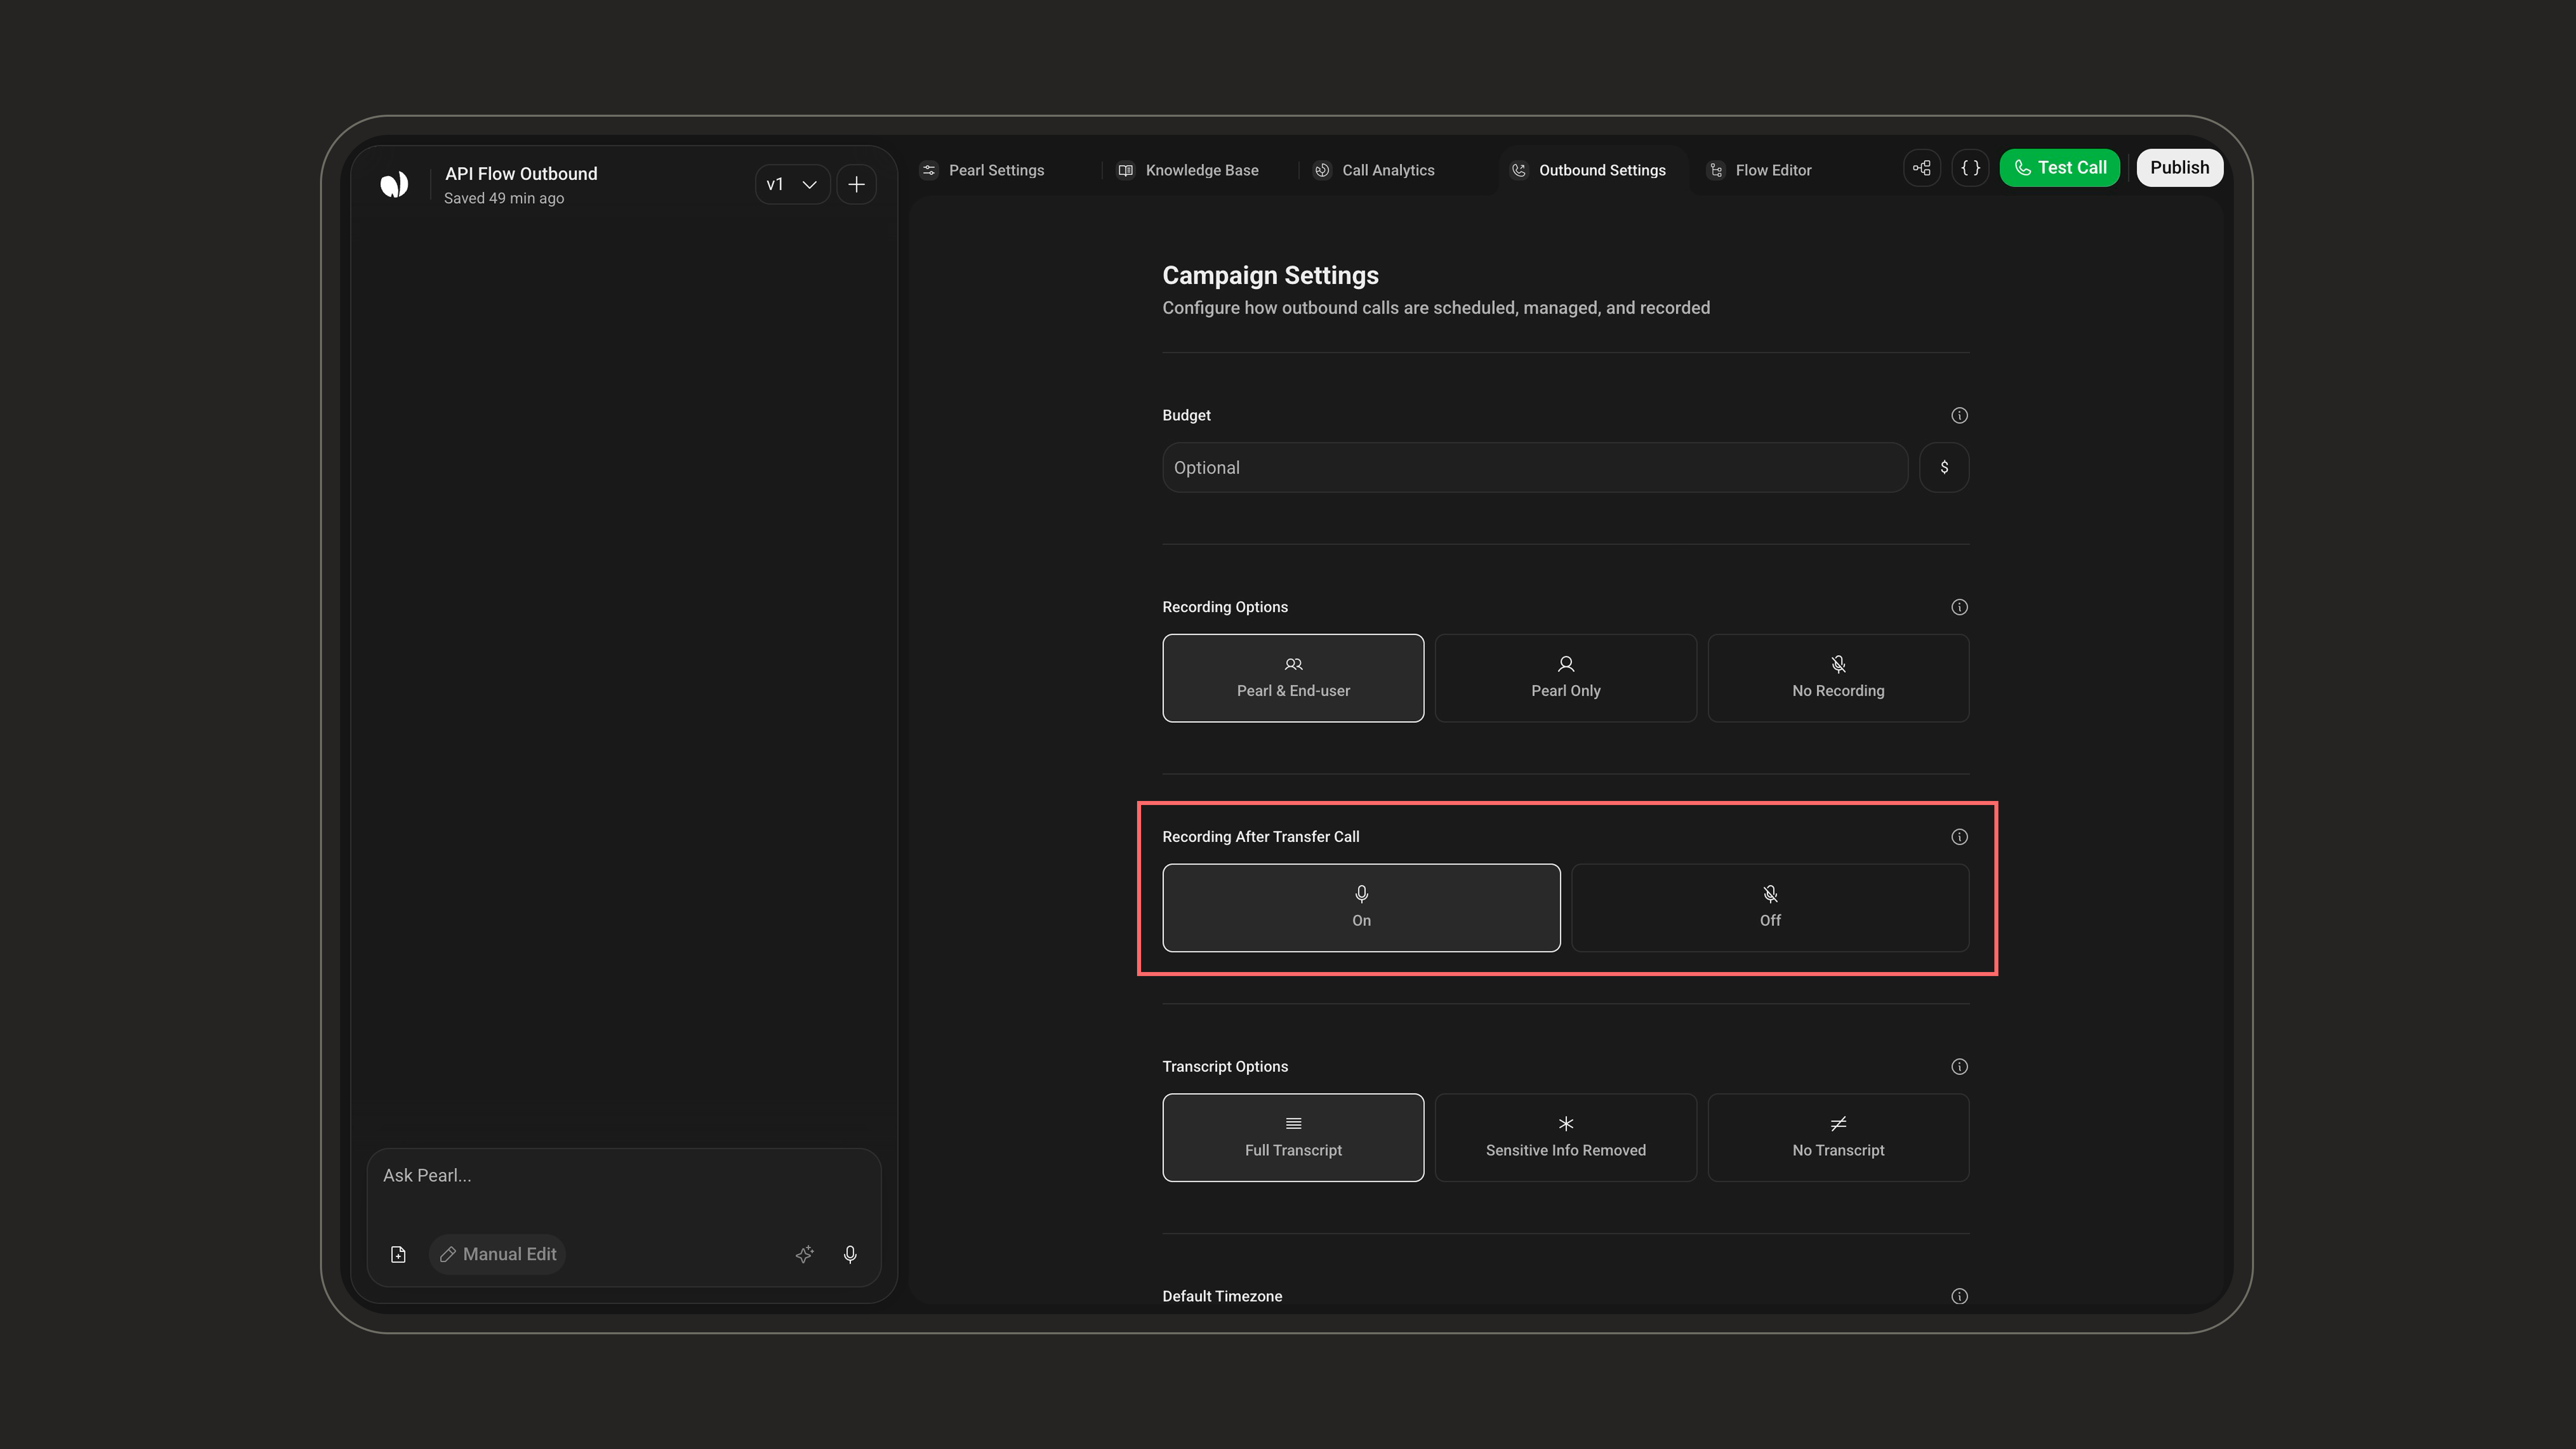
This option only appears when Recording Options is set to Pearl & End-user. See the Transfer Call Node to learn how call transfers work.
Transcript Options
Choose what is kept from the call transcript. Transcripts appear in your call logs alongside the recording.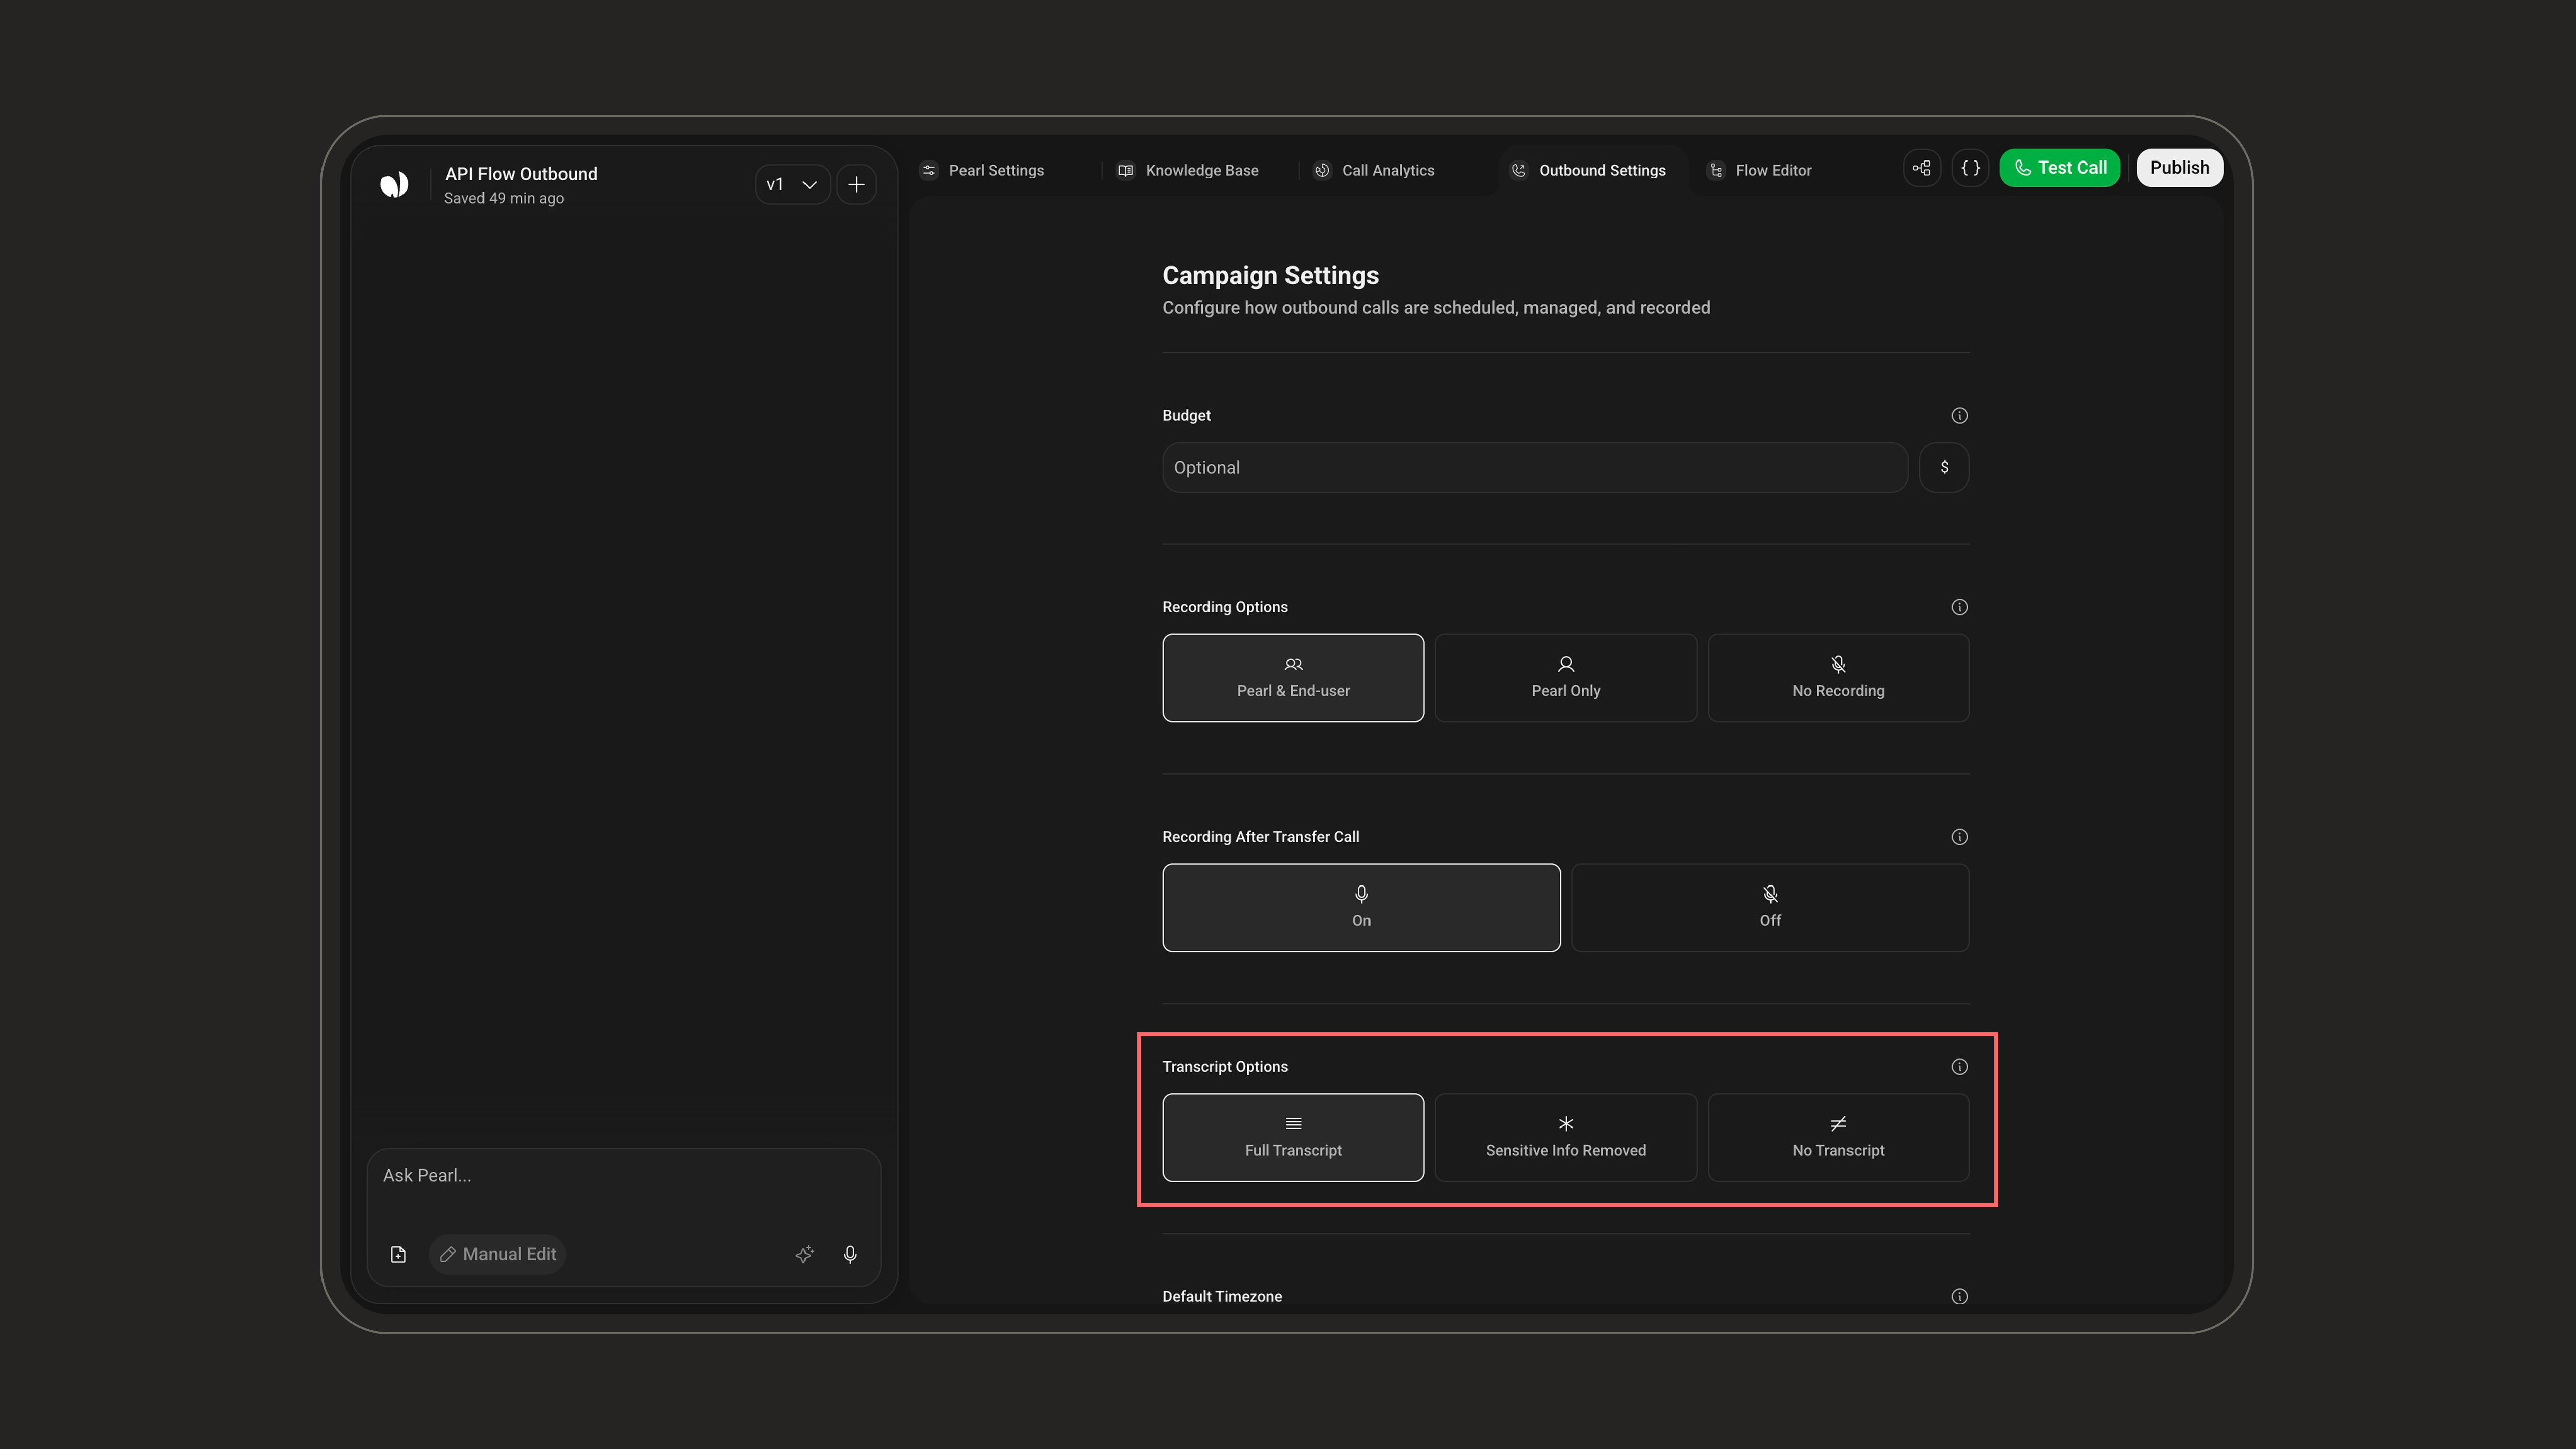
With Sensitive Info Removed, if a customer says “My credit card number is 1234-5678-9012-3456”, the transcript stores it as “My credit card number is ****-3456”, so you can review interactions safely without exposing sensitive data.
Default Timezone
Set the timezone for the campaign so that calling hours and scheduling are applied at the right local time.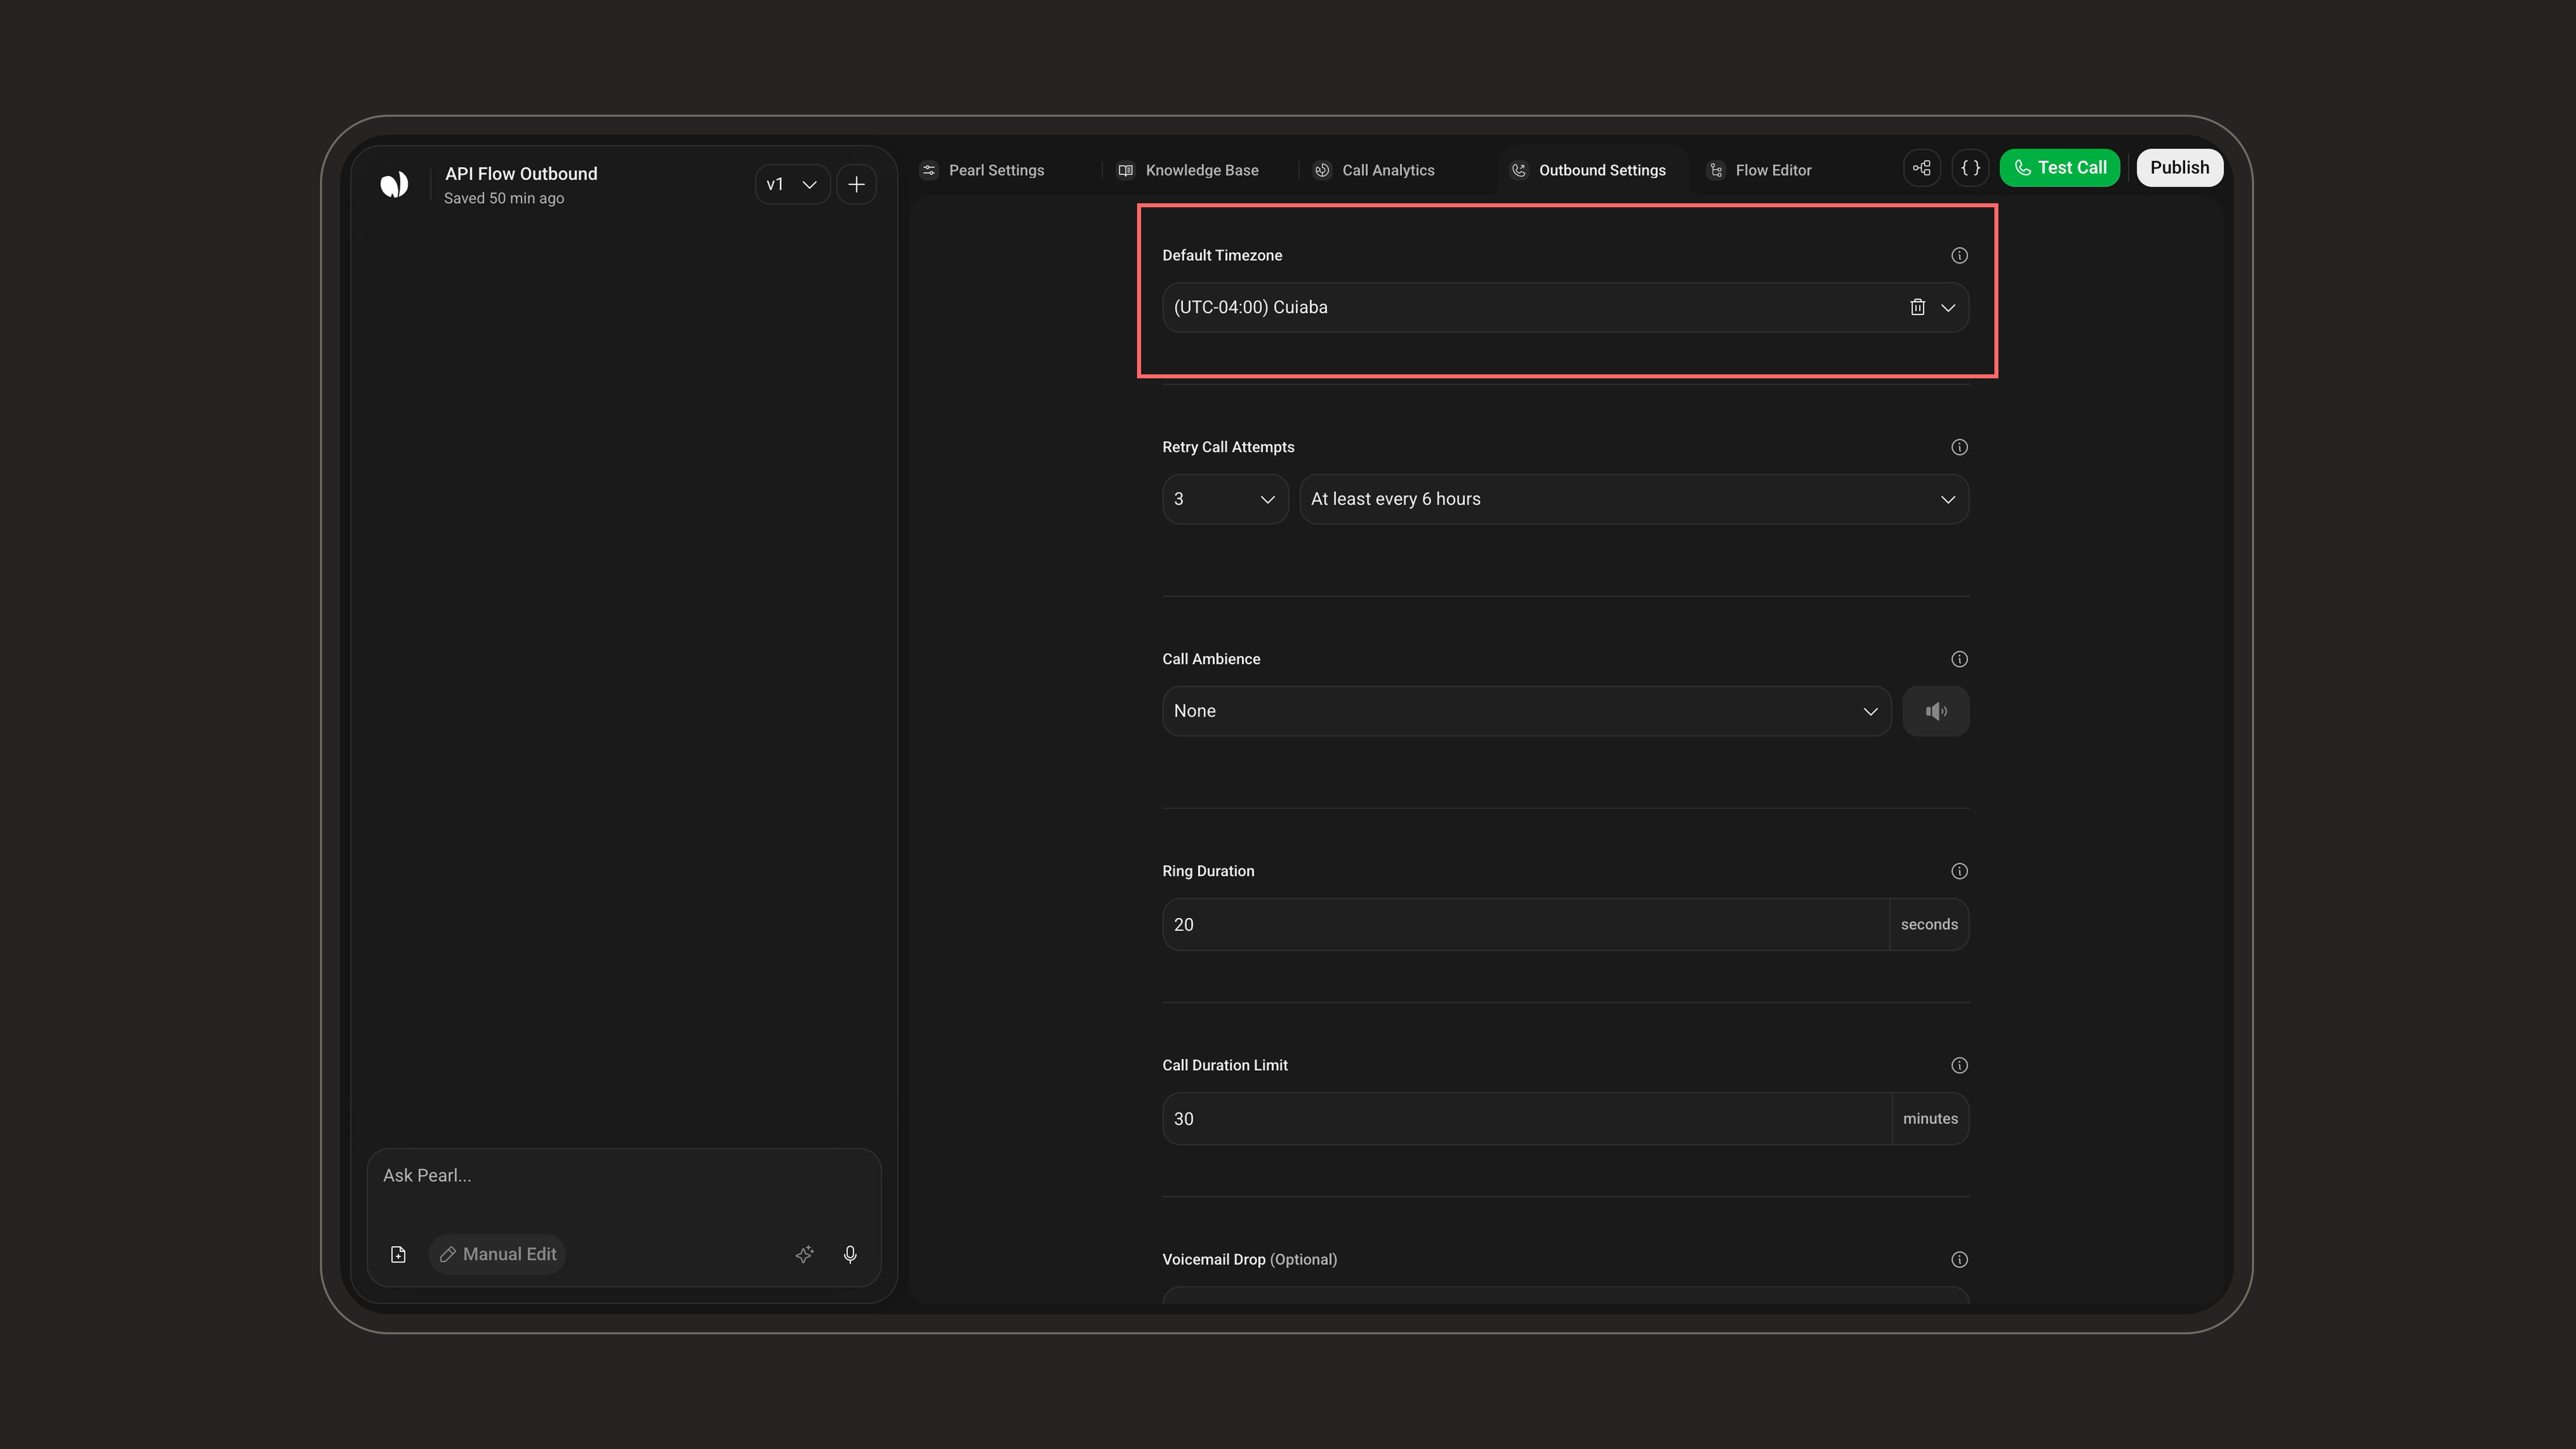
Retry Call Attempts
Define how many times Pearl retries a lead when the initial call fails (default 3). You can choose up to 11 attempts, depending on your account. You then choose the minimum interval between retries (default every 6 hours).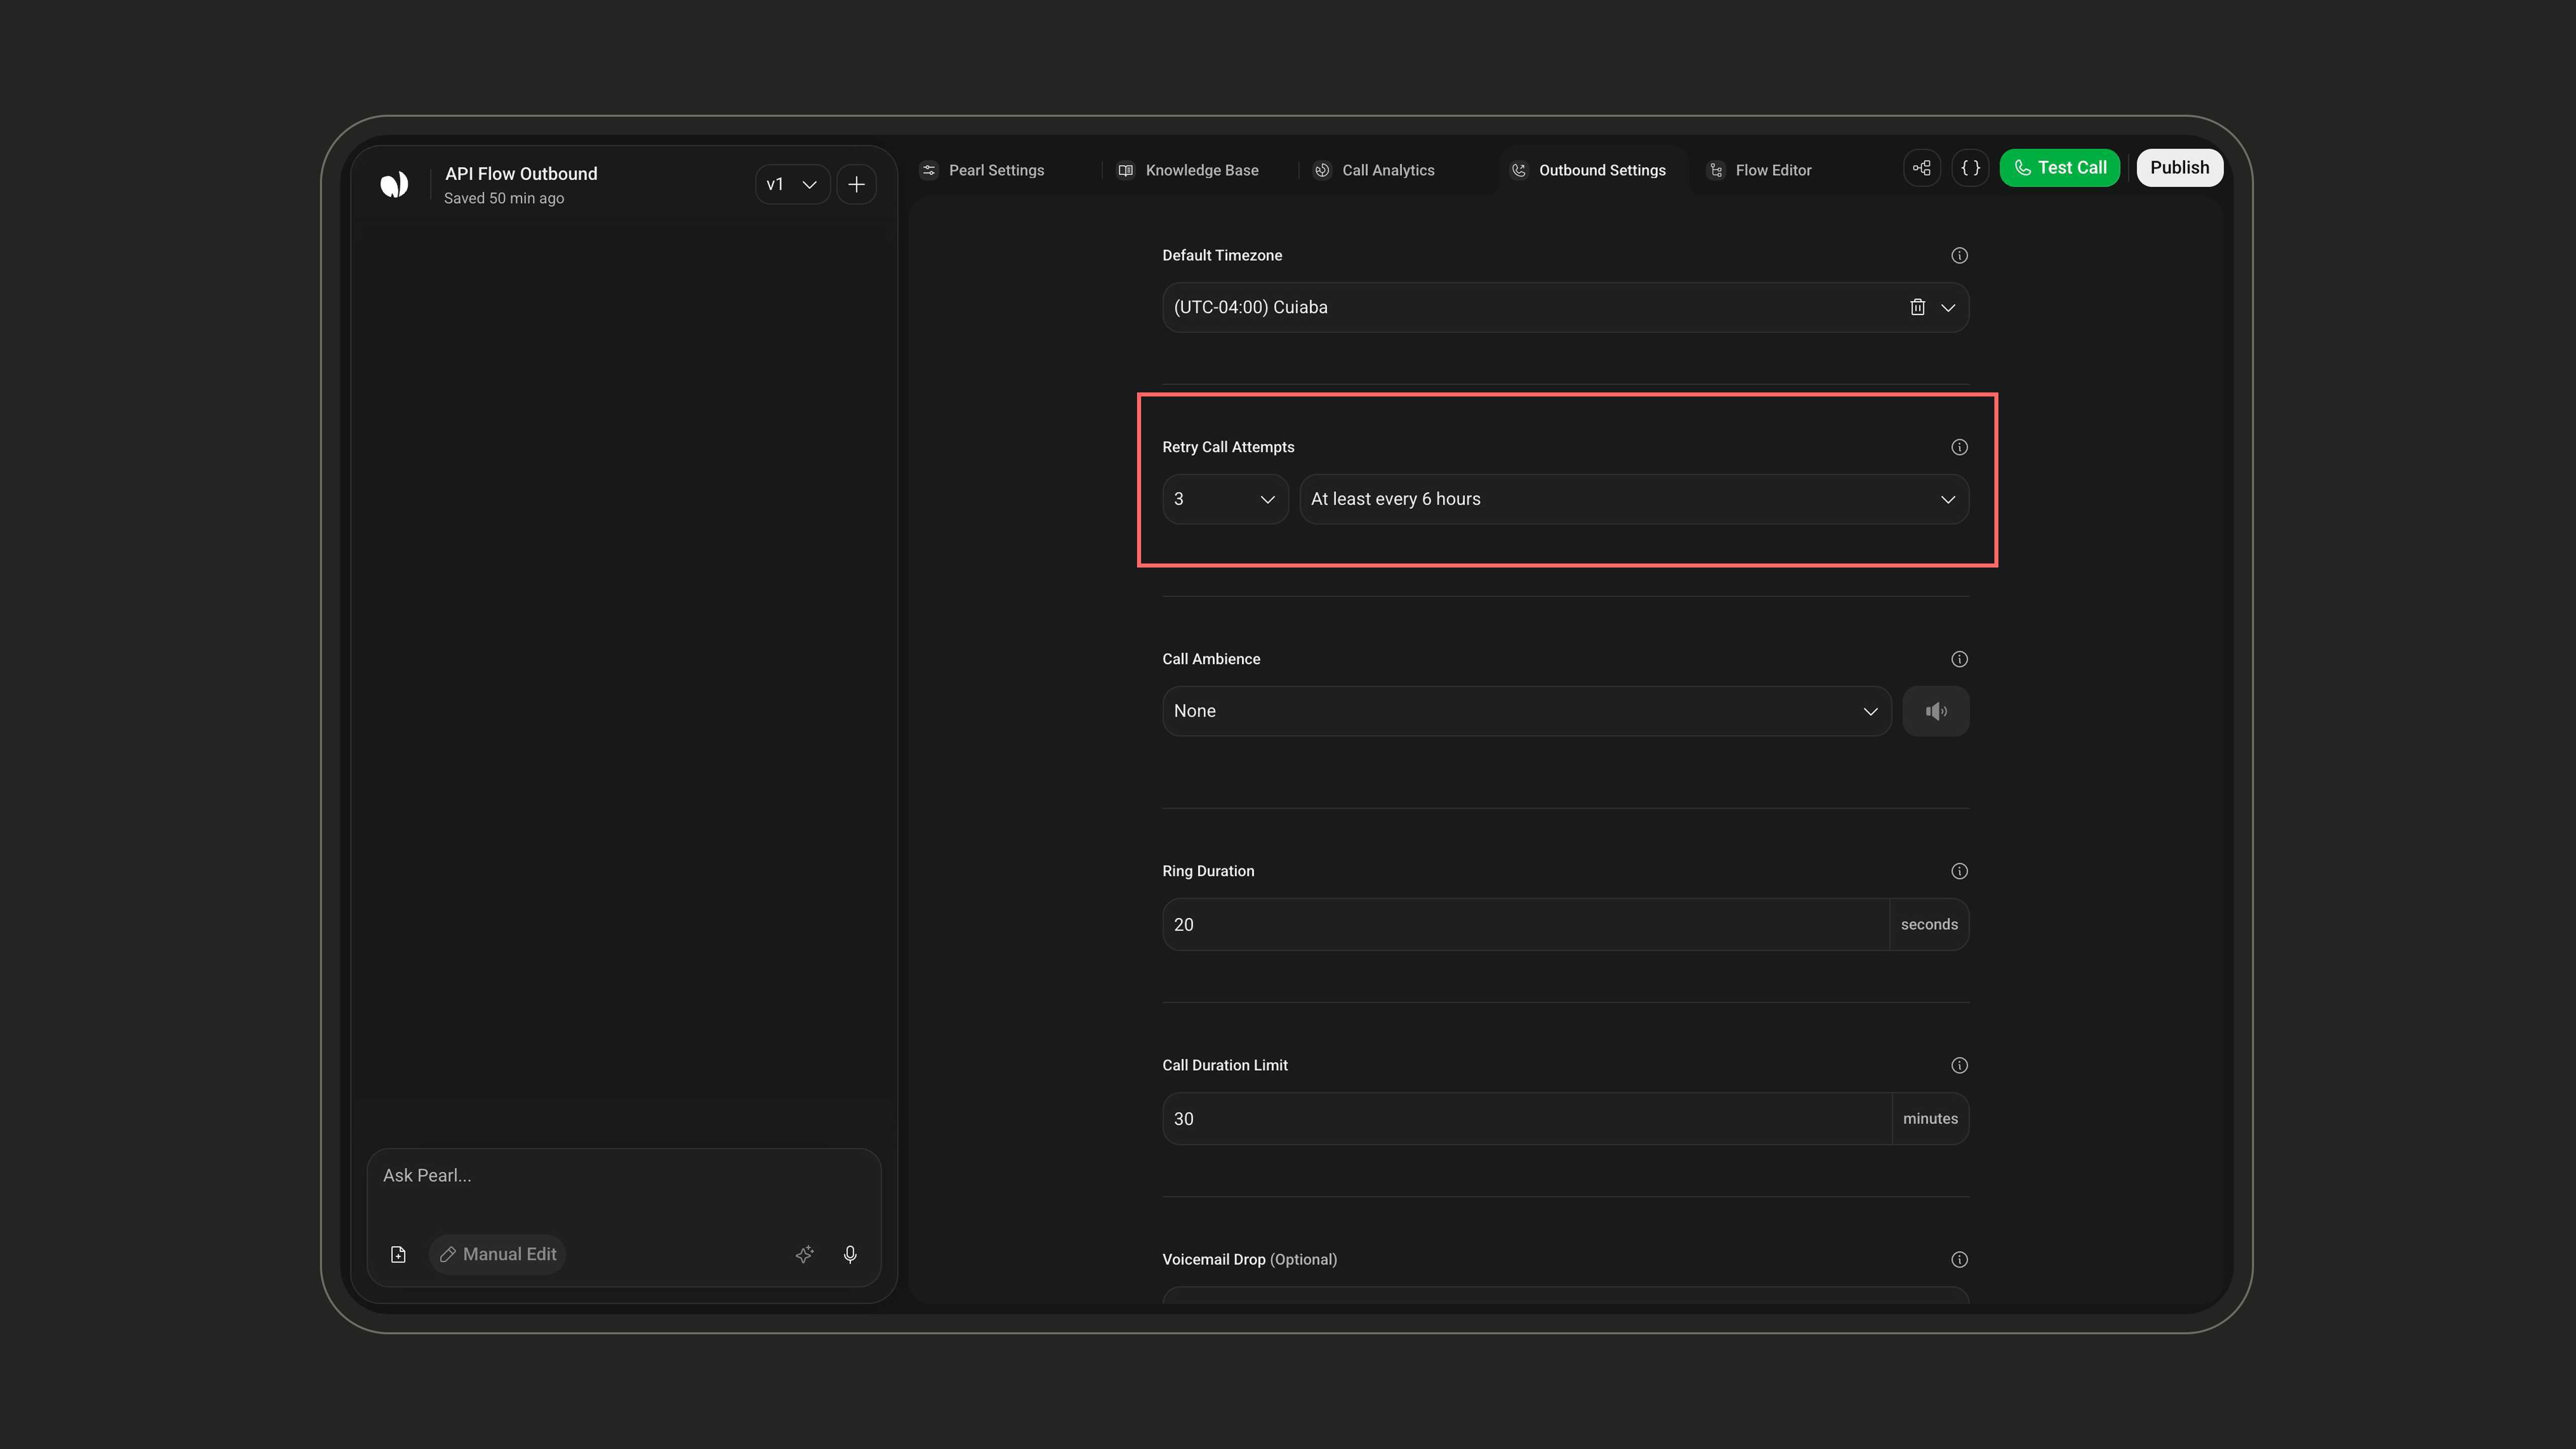
The interval is a minimum — Pearl waits at least this long between attempts, respecting the lead’s calling hours. Setting the right value keeps follow-ups persistent without overwhelming the lead.
Call Ambience
A subtle background environment (office, call center, outdoor…) played during the live conversation to make the call sound more natural and human. Defaults to None. Pick an ambience from the dropdown, then fine-tune its volume (0–100) with the slider. A preview plays automatically so you can hear the result before saving.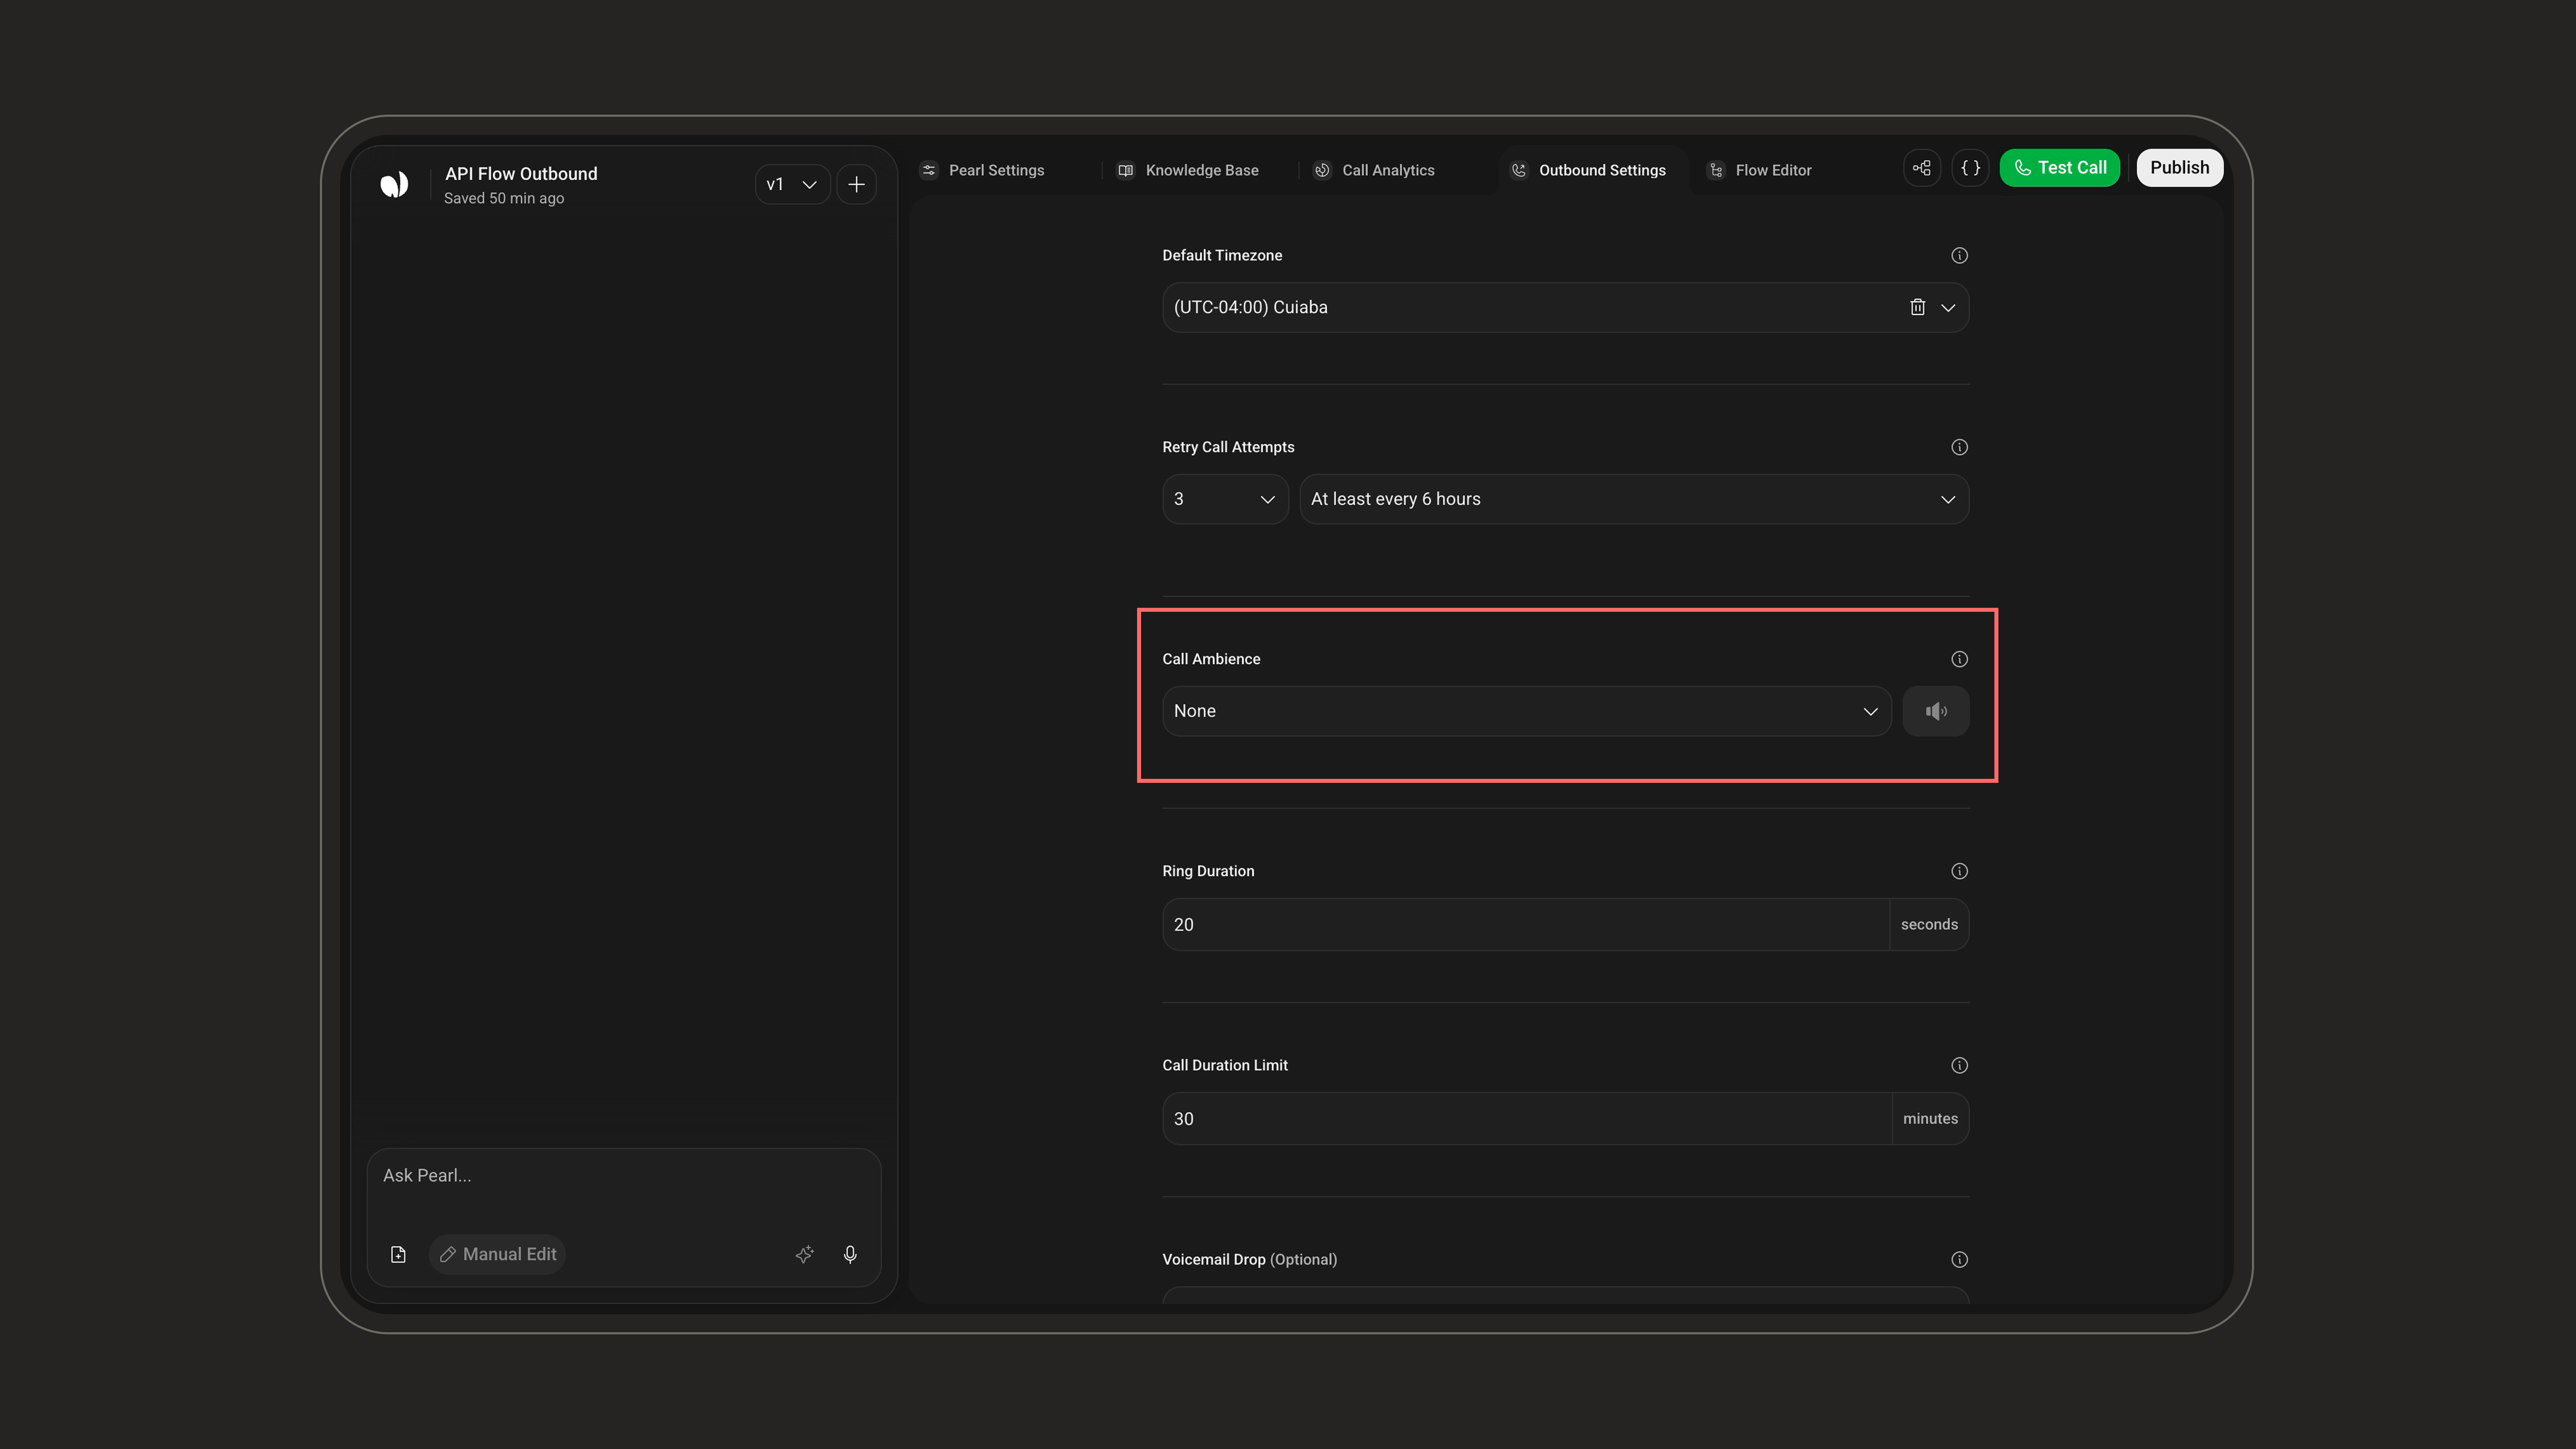
Ring Duration
Define how long Pearl lets the phone ring before ending the call. You can choose between 10 and 50 seconds (default 20). If the lead doesn’t answer within this time, the call is marked as No Answer. Shorter durations save time, longer ones increase answer rates.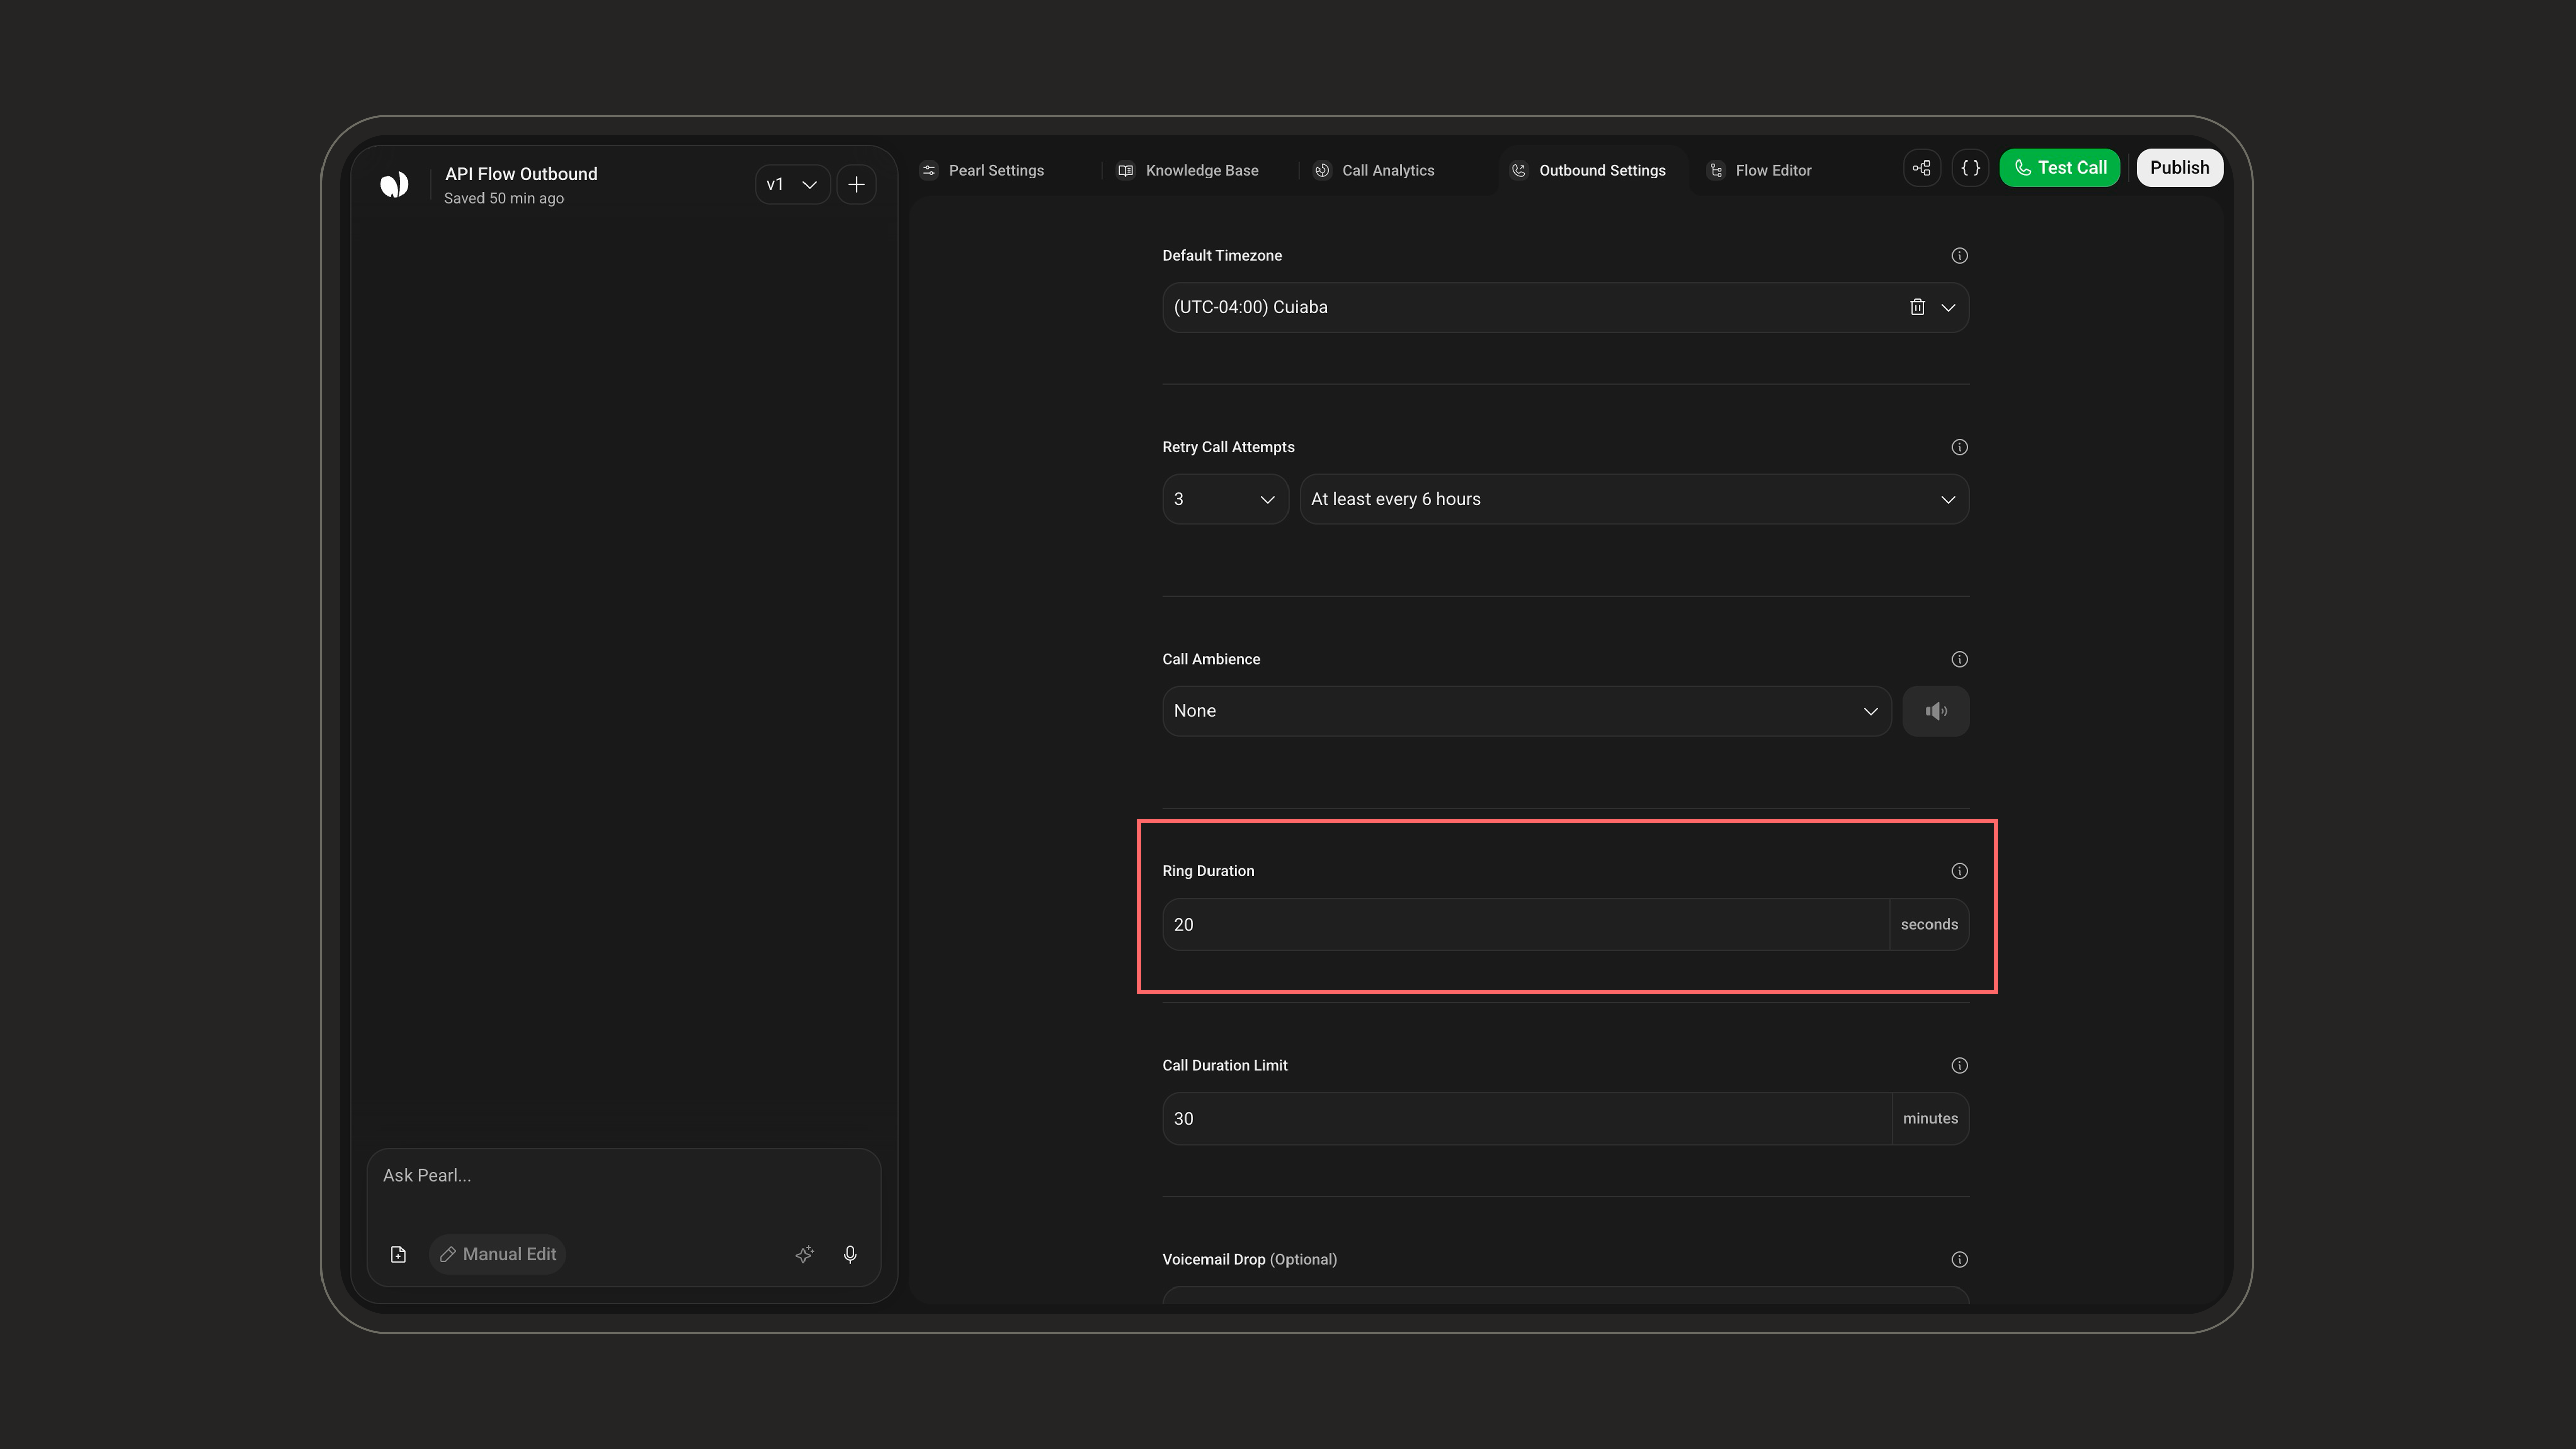
Call Duration Limit
Set the maximum length of a call, between 1 and 120 minutes (default 30). If the conversation goes beyond this limit, the call is automatically disconnected.
Voicemail Drop
When Pearl reaches voicemail, she can leave a personalized message (optional, up to 500 characters) using variables like the lead’s first name, for a more human interaction even when the lead doesn’t pick up.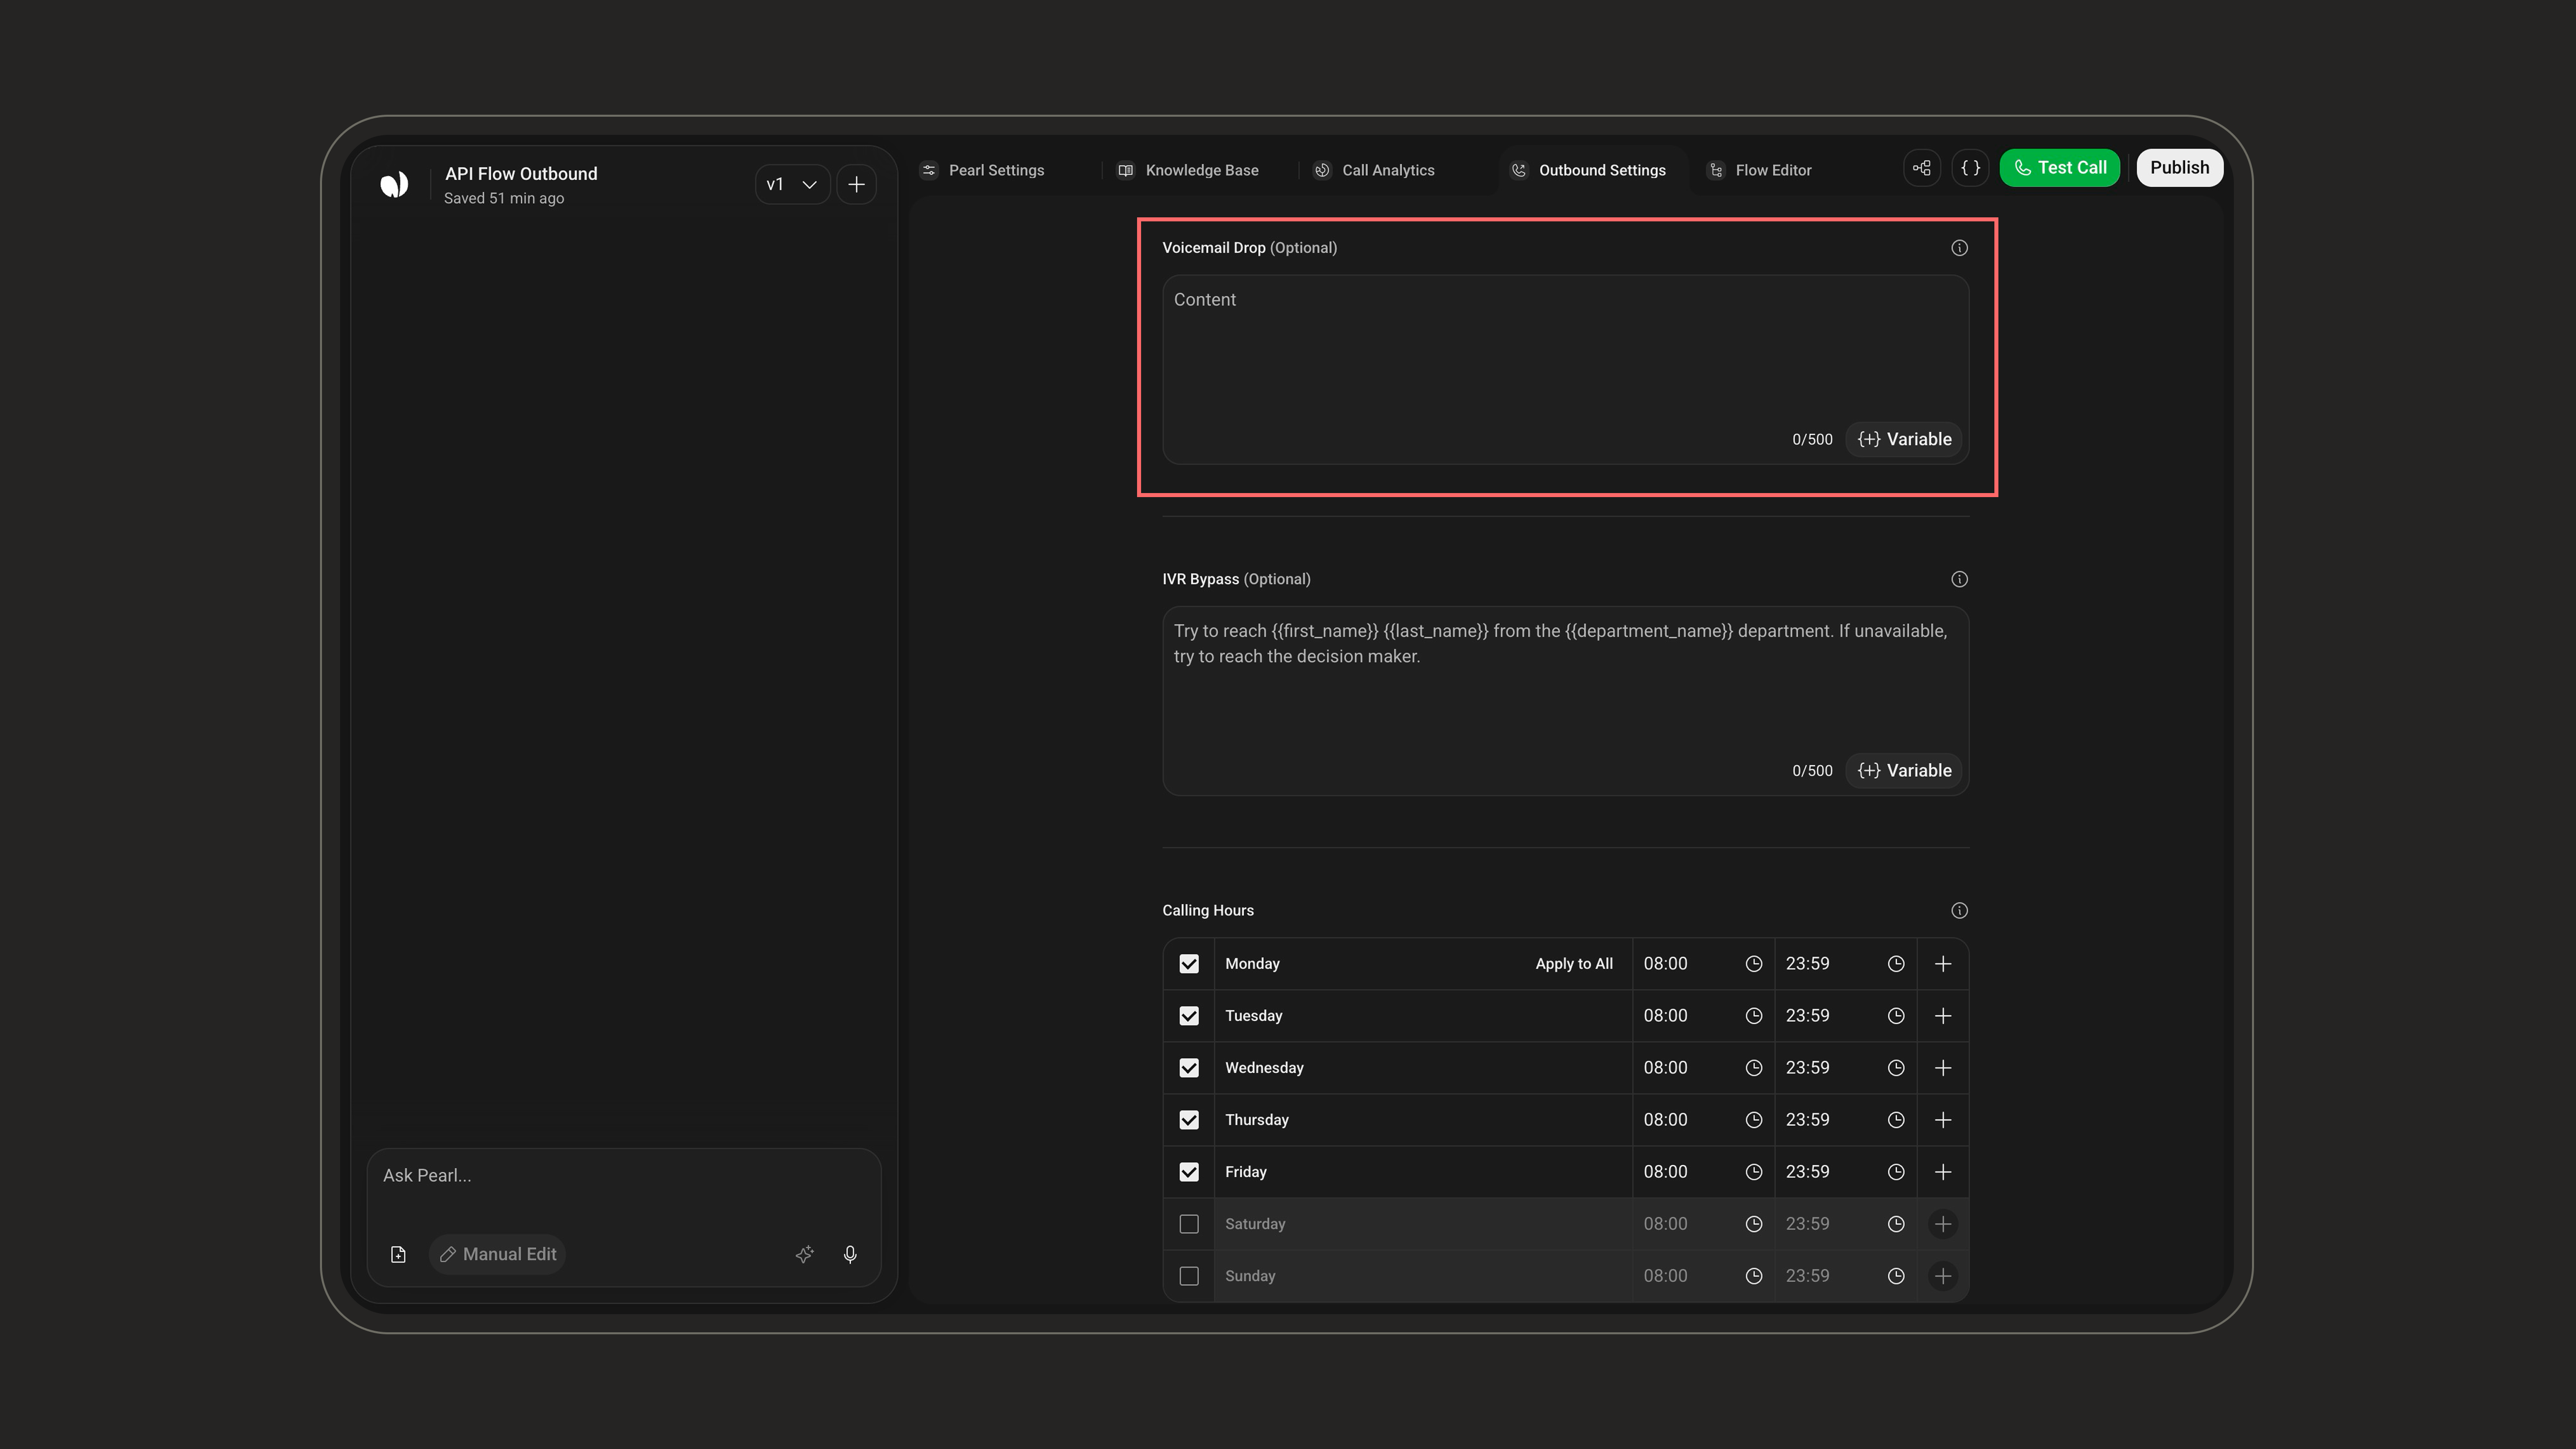
Only Pre-Call variables can be used in the voicemail drop.Example:
“HiFirst Name, this is Pearl calling on behalf ofYour Company. I just tried reaching you but missed you this time! Feel free to call me back atYour Callback Number. Looking forward to speaking with you soon!”
IVR Bypass
Provide instructions (up to 500 characters, variables supported) so Pearl can navigate external phone menus (IVR) using DTMF tones and reach the right person or destination automatically.Example: “If you hear a menu, press 2 for the sales department, then press 1 to speak with a representative. If asked for an extension, enter
Extension.”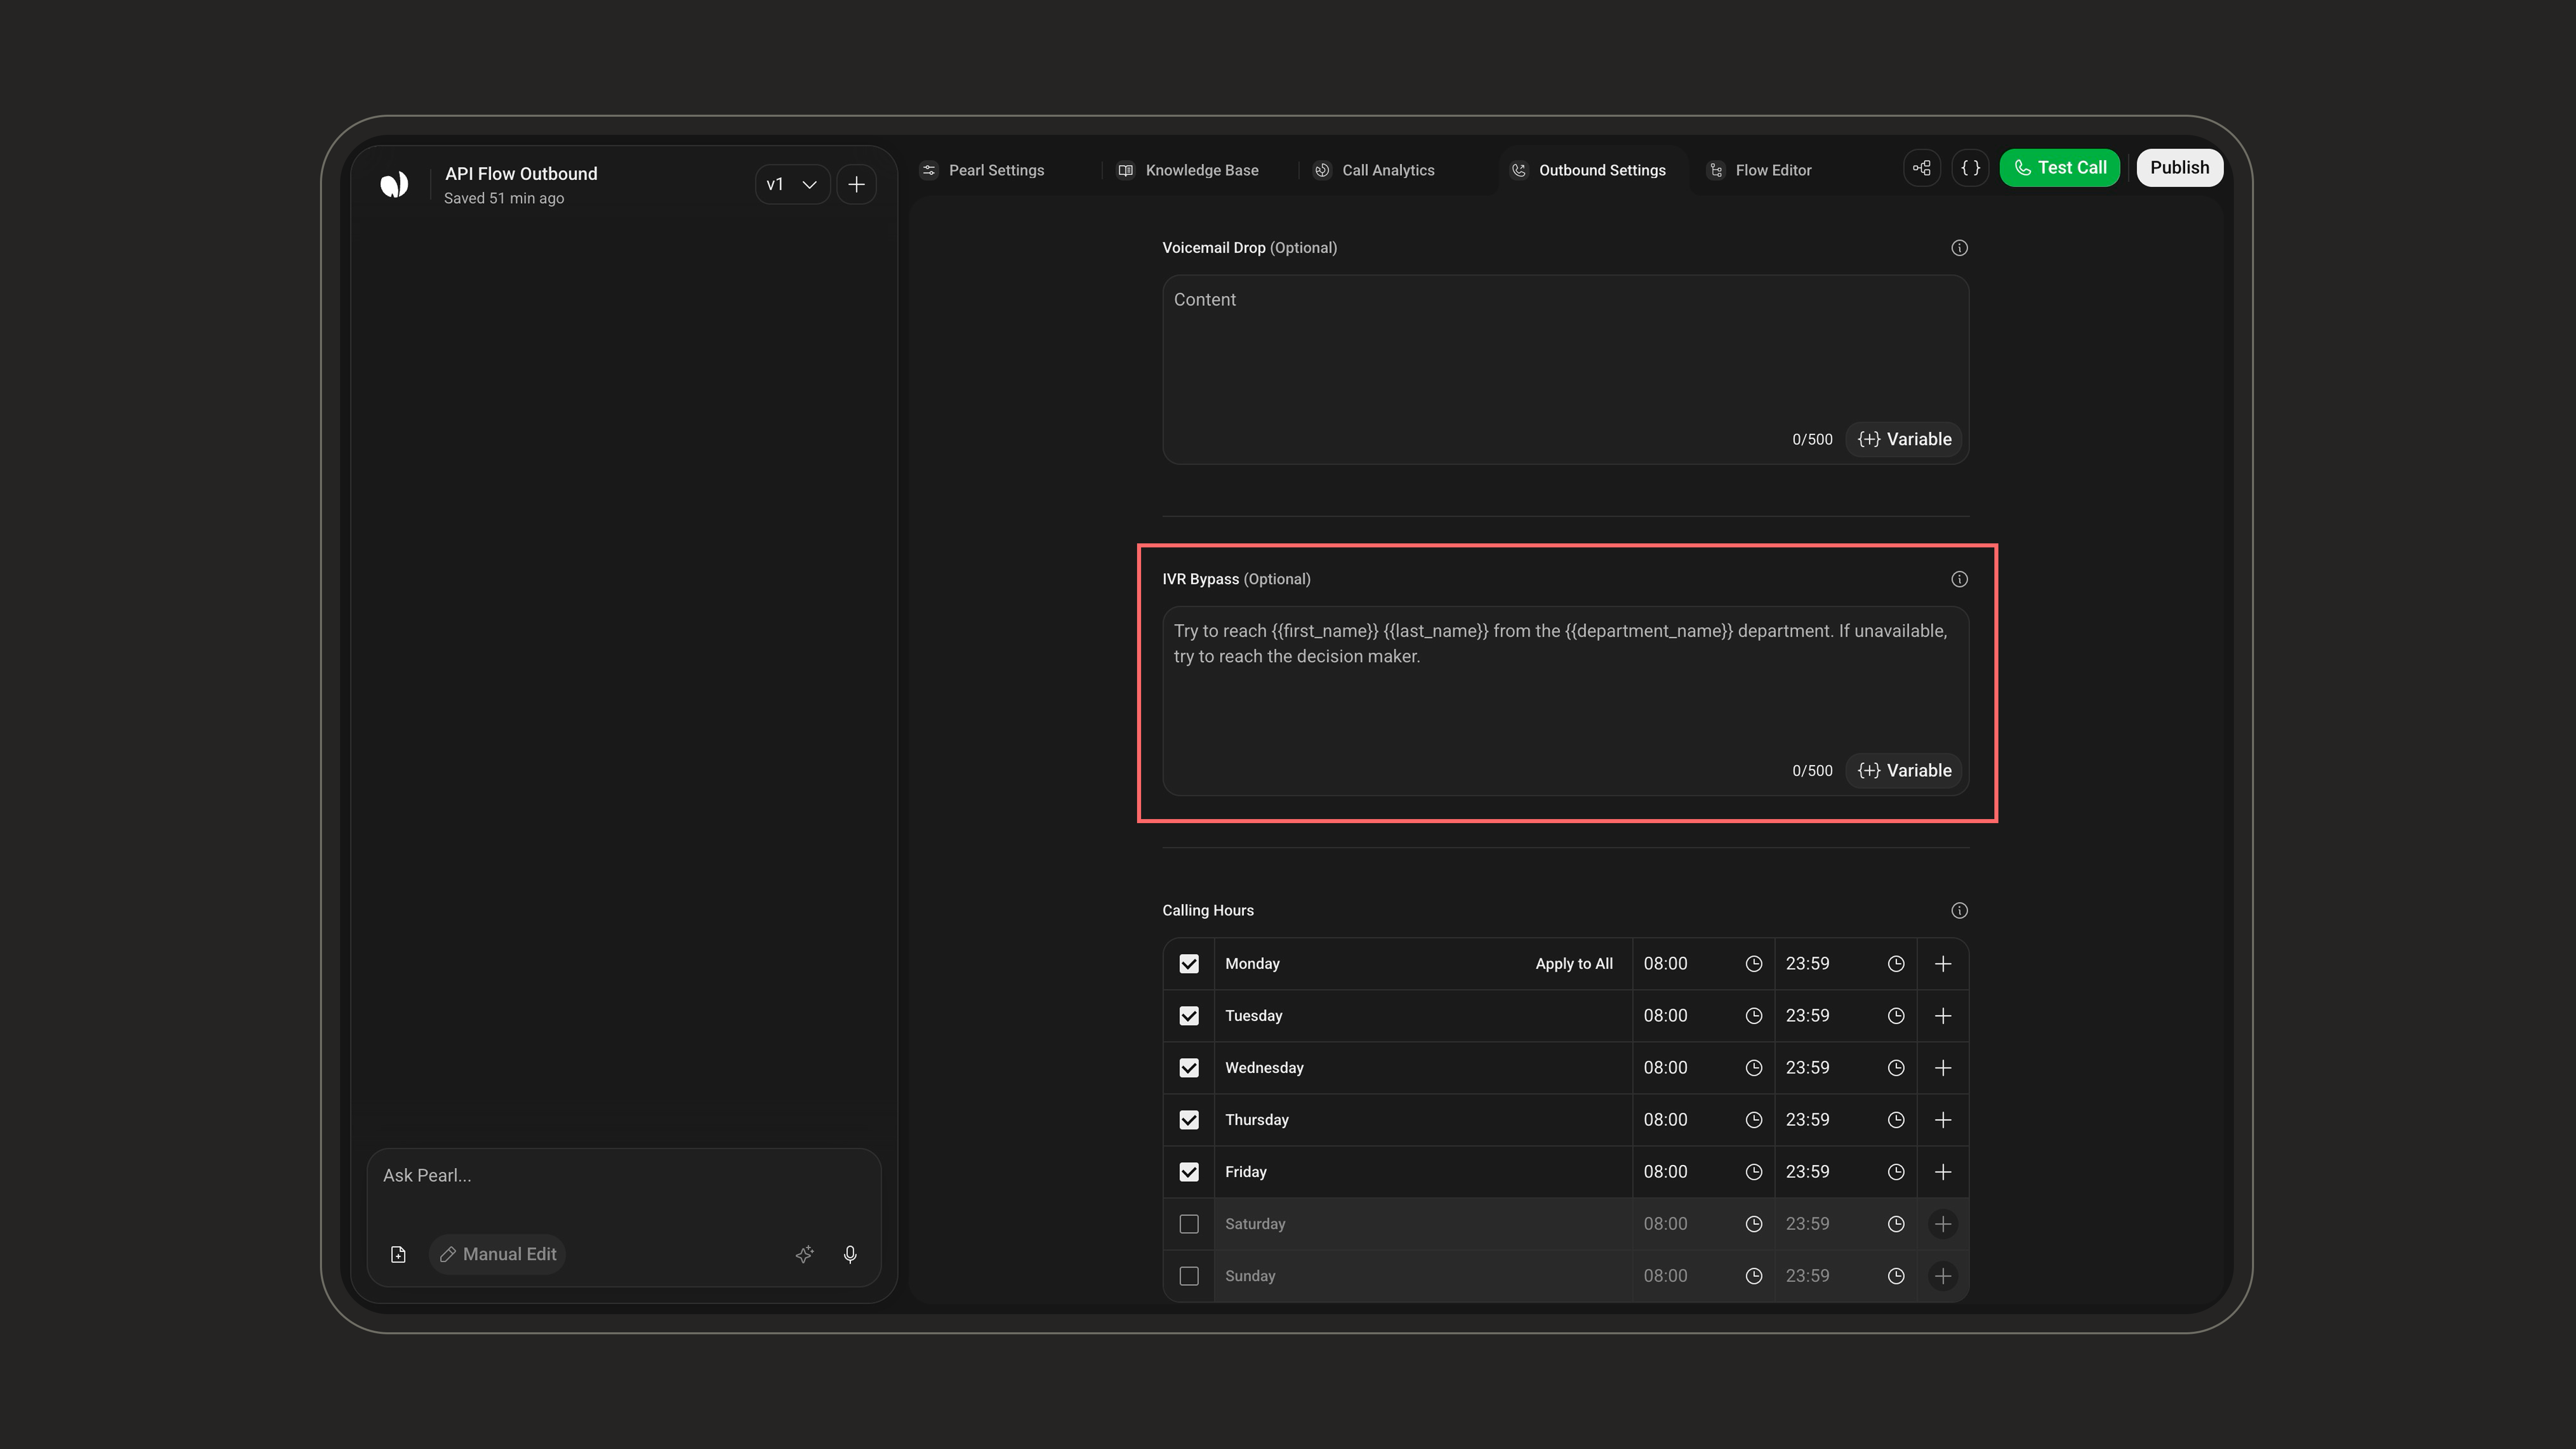
Calling Hours
Define the working hours during which Pearl is allowed to place calls. By default, calls run Monday to Friday, 08:00–18:00. Calling hours respect each lead’s timezone, so everyone is contacted at an appropriate local time.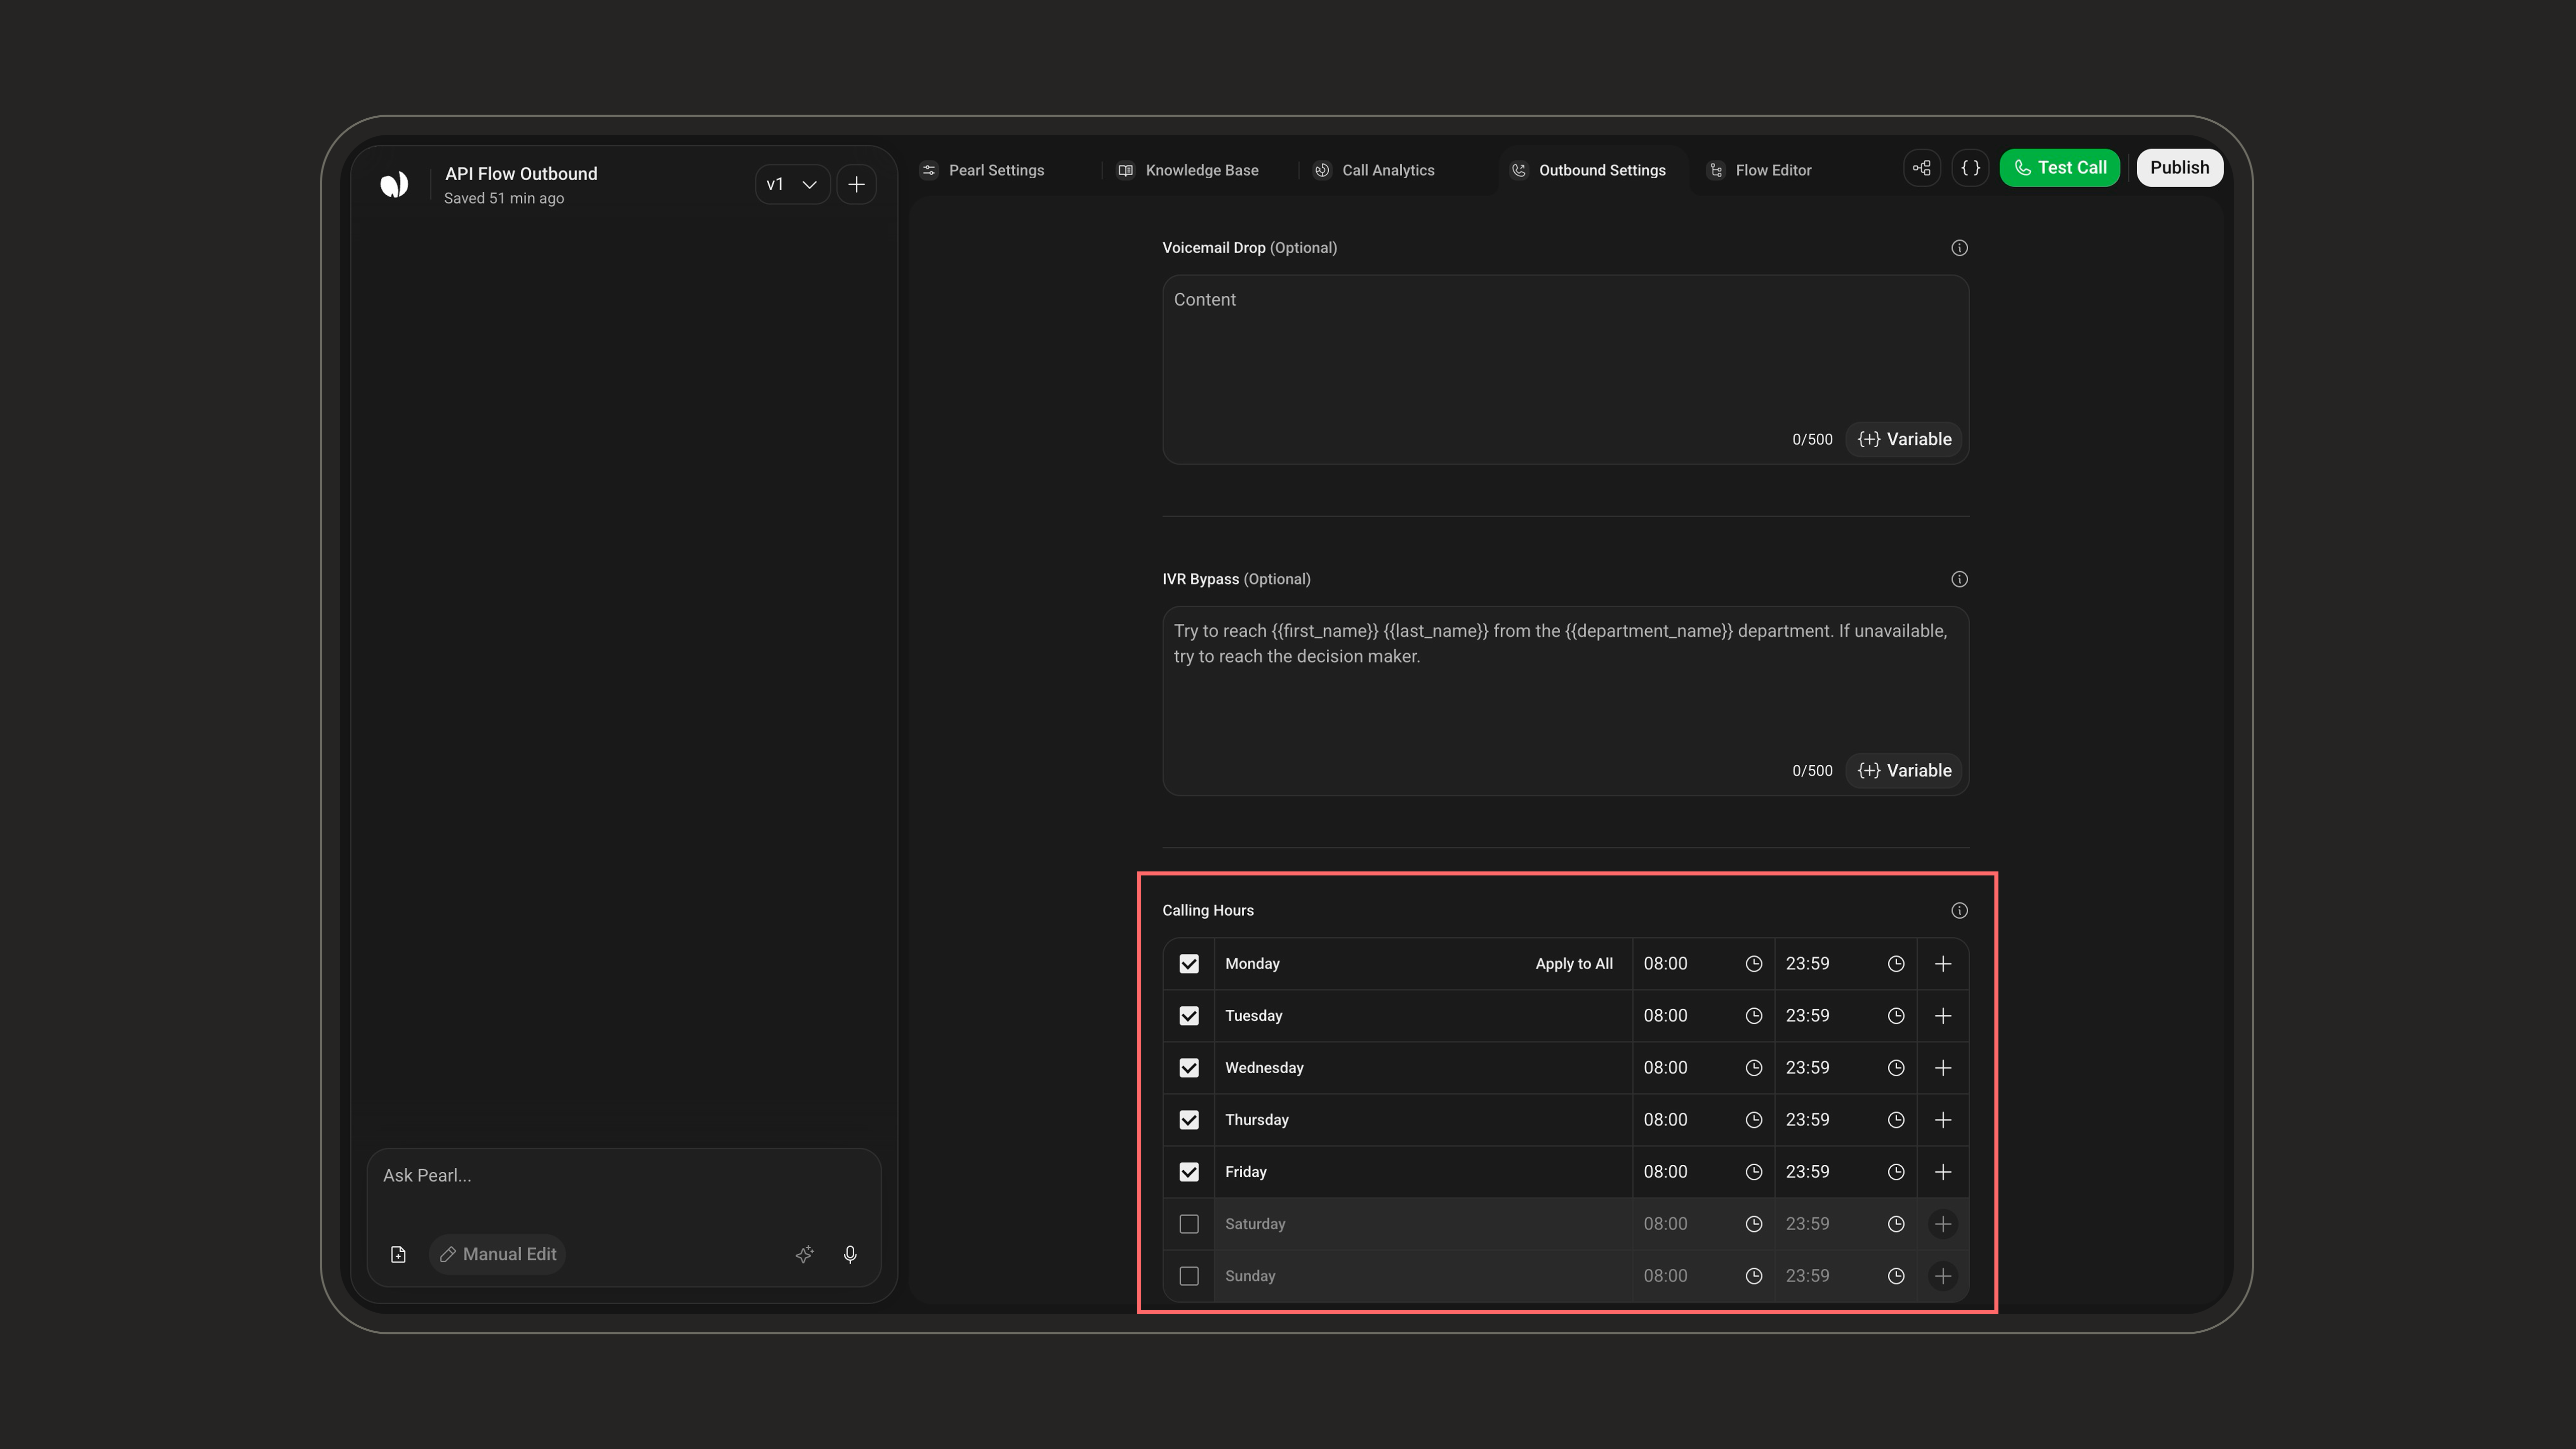
Webhooks
Send call and lead events to an external endpoint, useful for tracking performance and keeping your CRM in sync.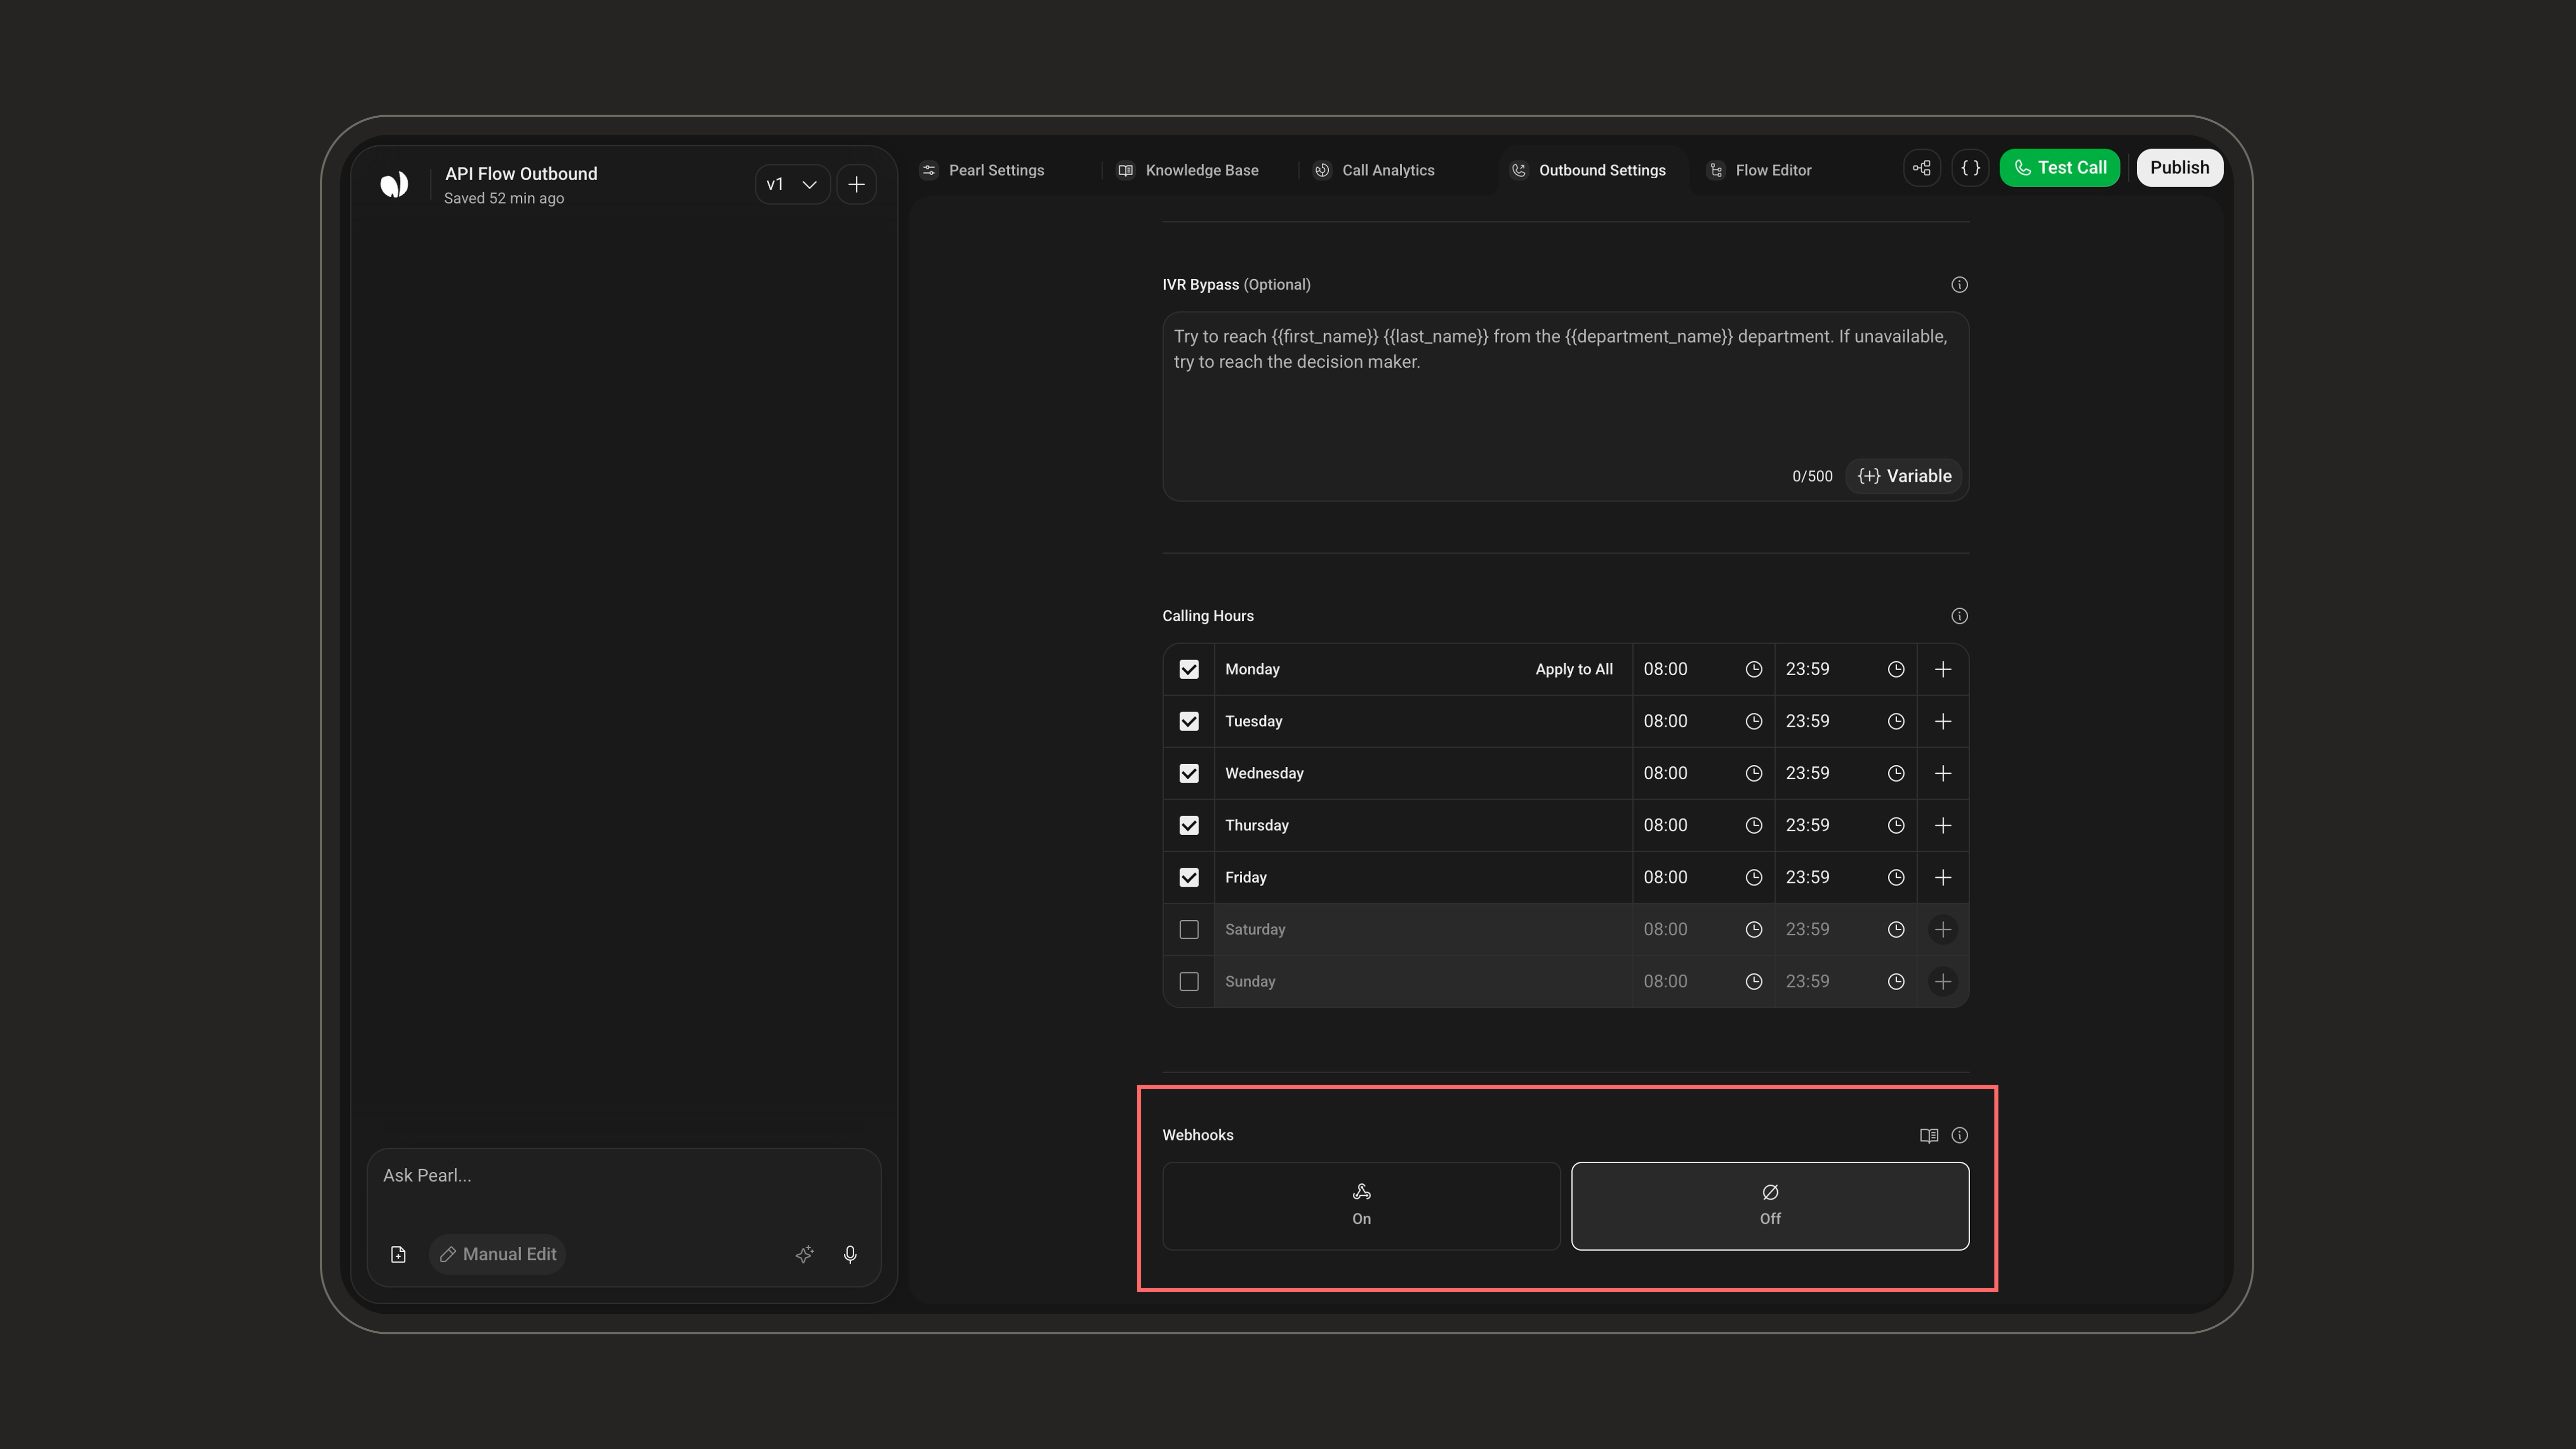
- Call Webhook: fires at key points in the call lifecycle (when the call starts and ends), sending an object similar to the Get Calls endpoint with details like duration, outcome, and any data collected during the call.
- Lead Webhook: fires whenever a lead changes status (at the start and end of the call), sending an object similar to the Get Leads endpoint with the lead’s full information and current status. Use it to update your CRM in real time.
- Version:
V1orV2(default V2). - Credentials: optional authentication token attached to the requests so your endpoint can verify they come from NLPearl.
Webhooks
Learn how to configure webhooks, authenticate requests, and handle the events NLPearl sends.
Project-Level Settings
A few settings live at the Project level rather than in the campaign settings screen. Open them from the settings popover on your Pearl.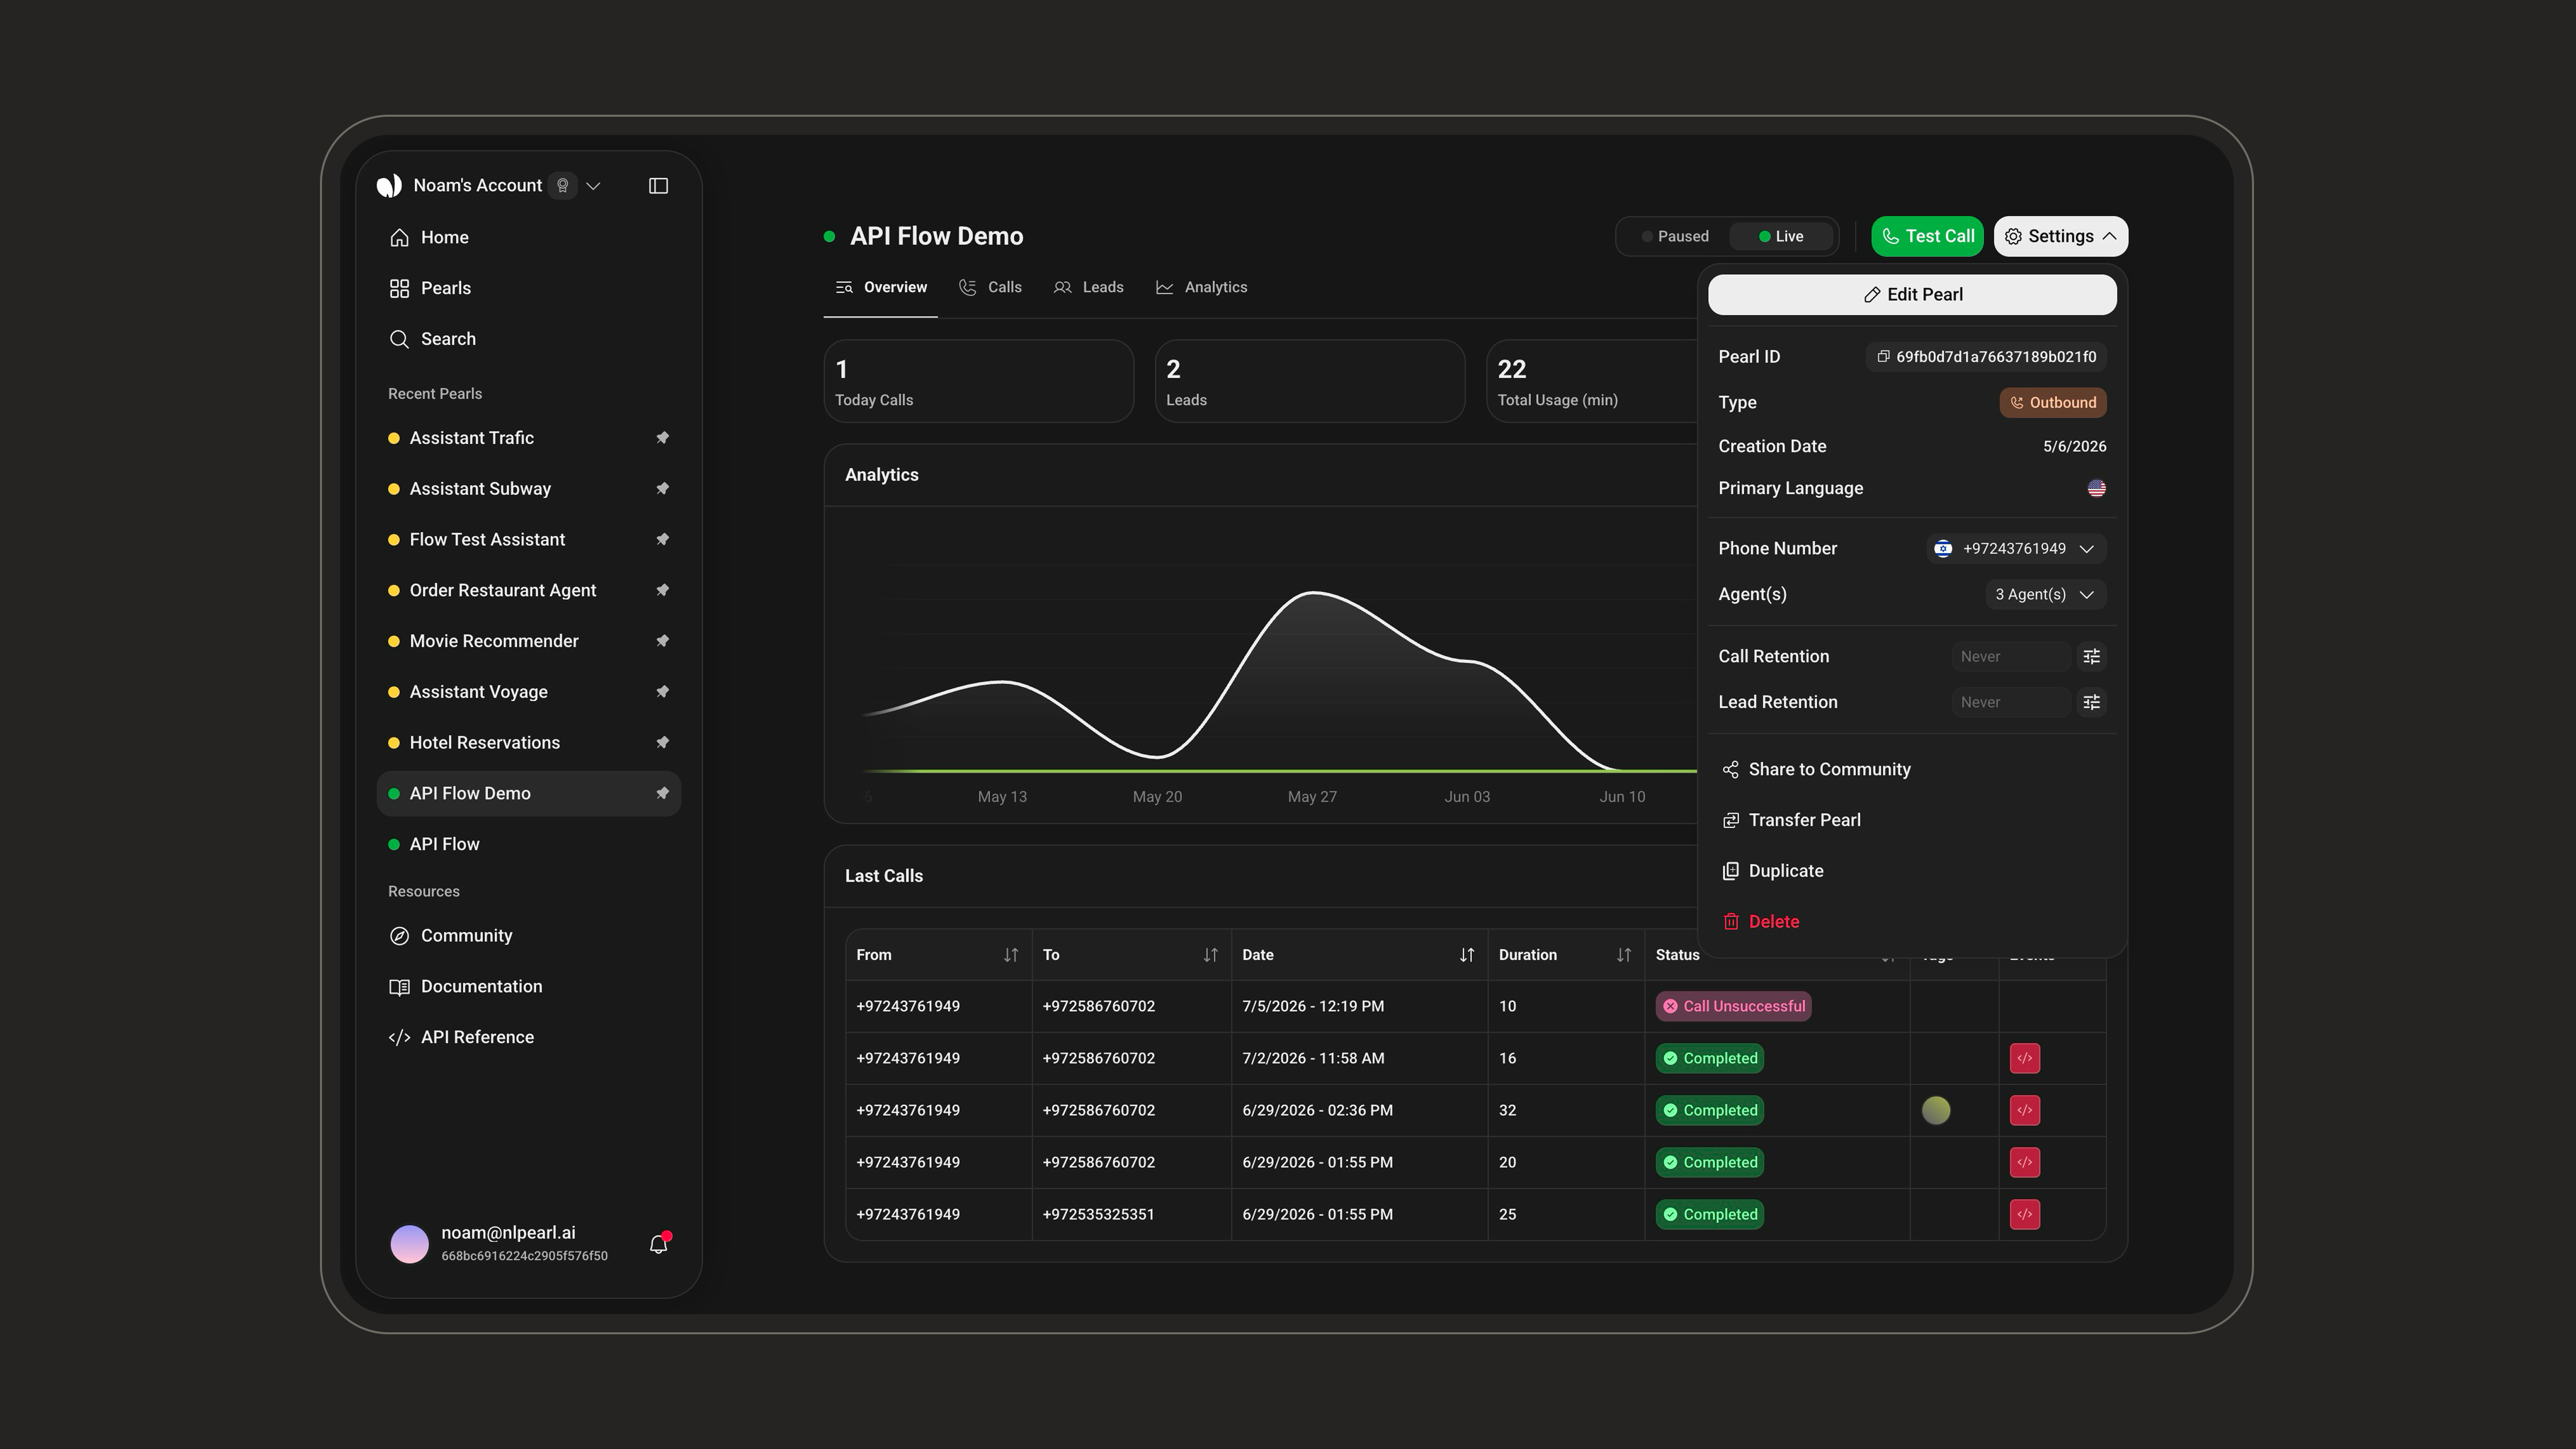
Agents
Sets how many simultaneous agents run this campaign, i.e. how many calls can be placed at the same time, capped by your account’s agent quota. A higher number allows faster outreach.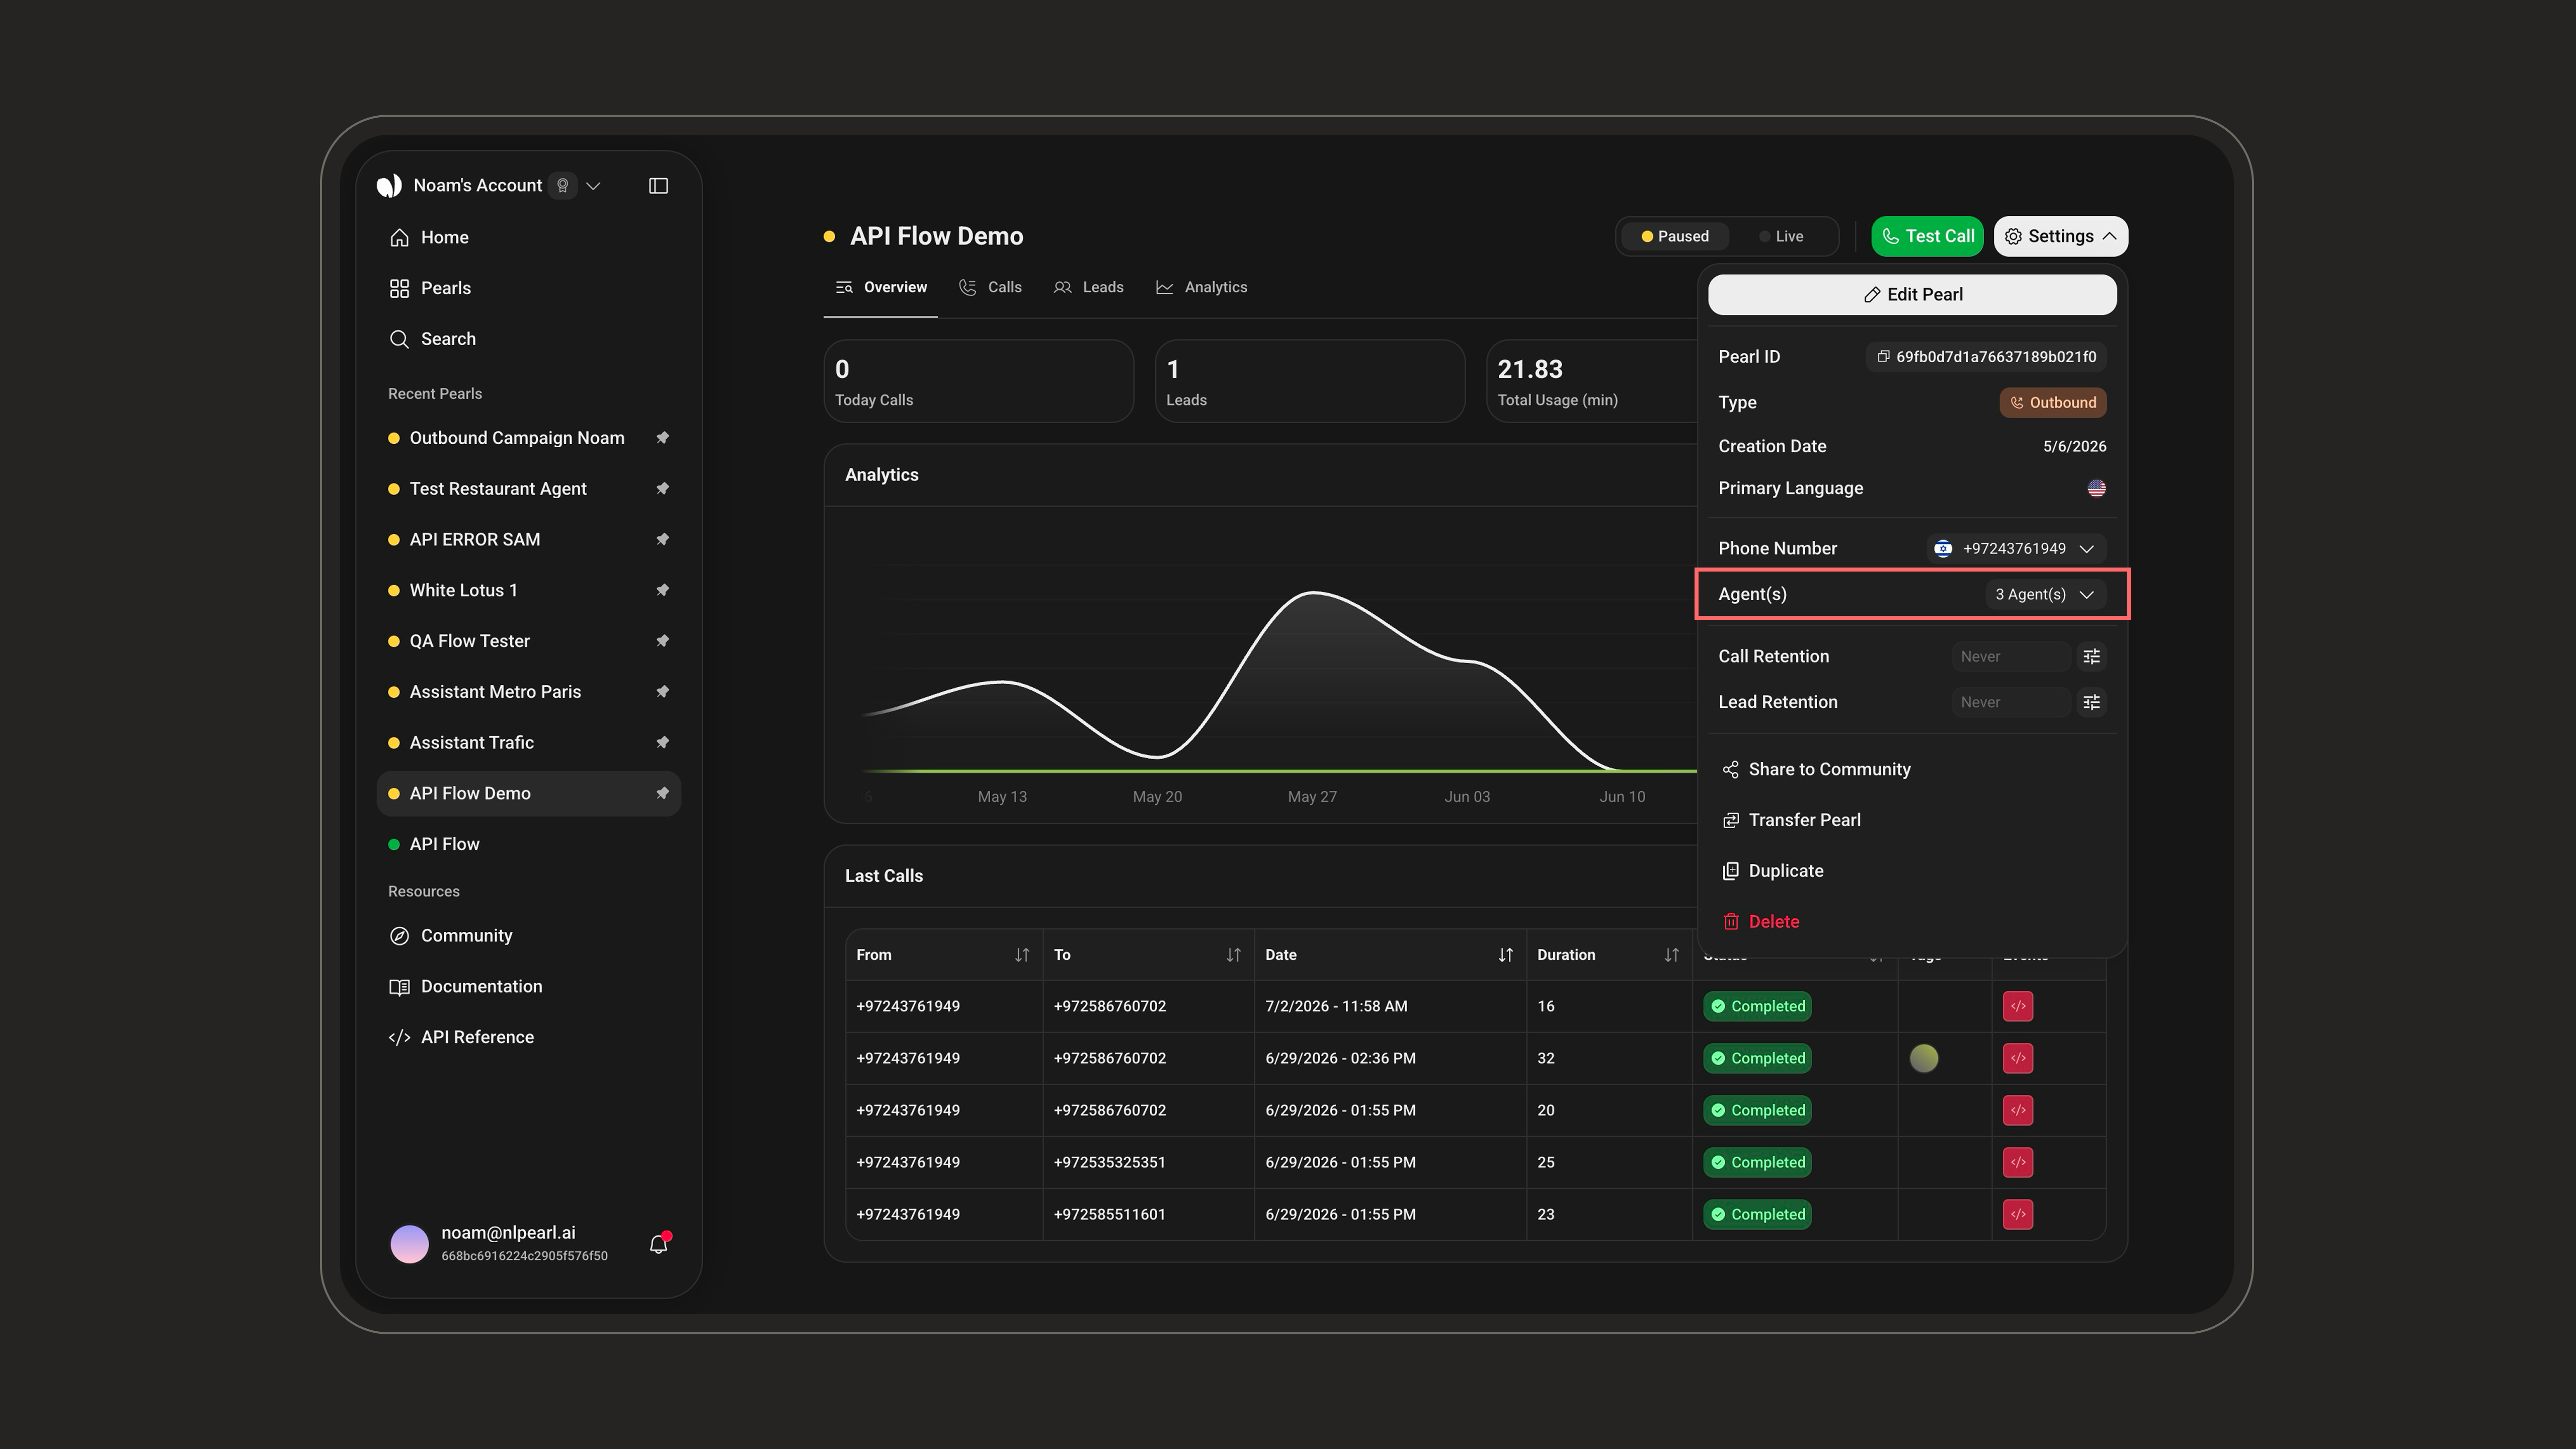
Agents
Learn how to manage the agents assigned to your inbound and outbound activities.
Call Retention
Applies to all calls. Set how long calls are kept (a number of days, or leave empty to keep them indefinitely), then choose what is removed when they expire: delete all call data, or granularly the Recording, Transcript, Summary, or collected Variables.
Lead Retention
Outbound only. Set how long leads are kept before they are automatically deleted (a number of days, or leave empty to keep them indefinitely). This removes the entire lead.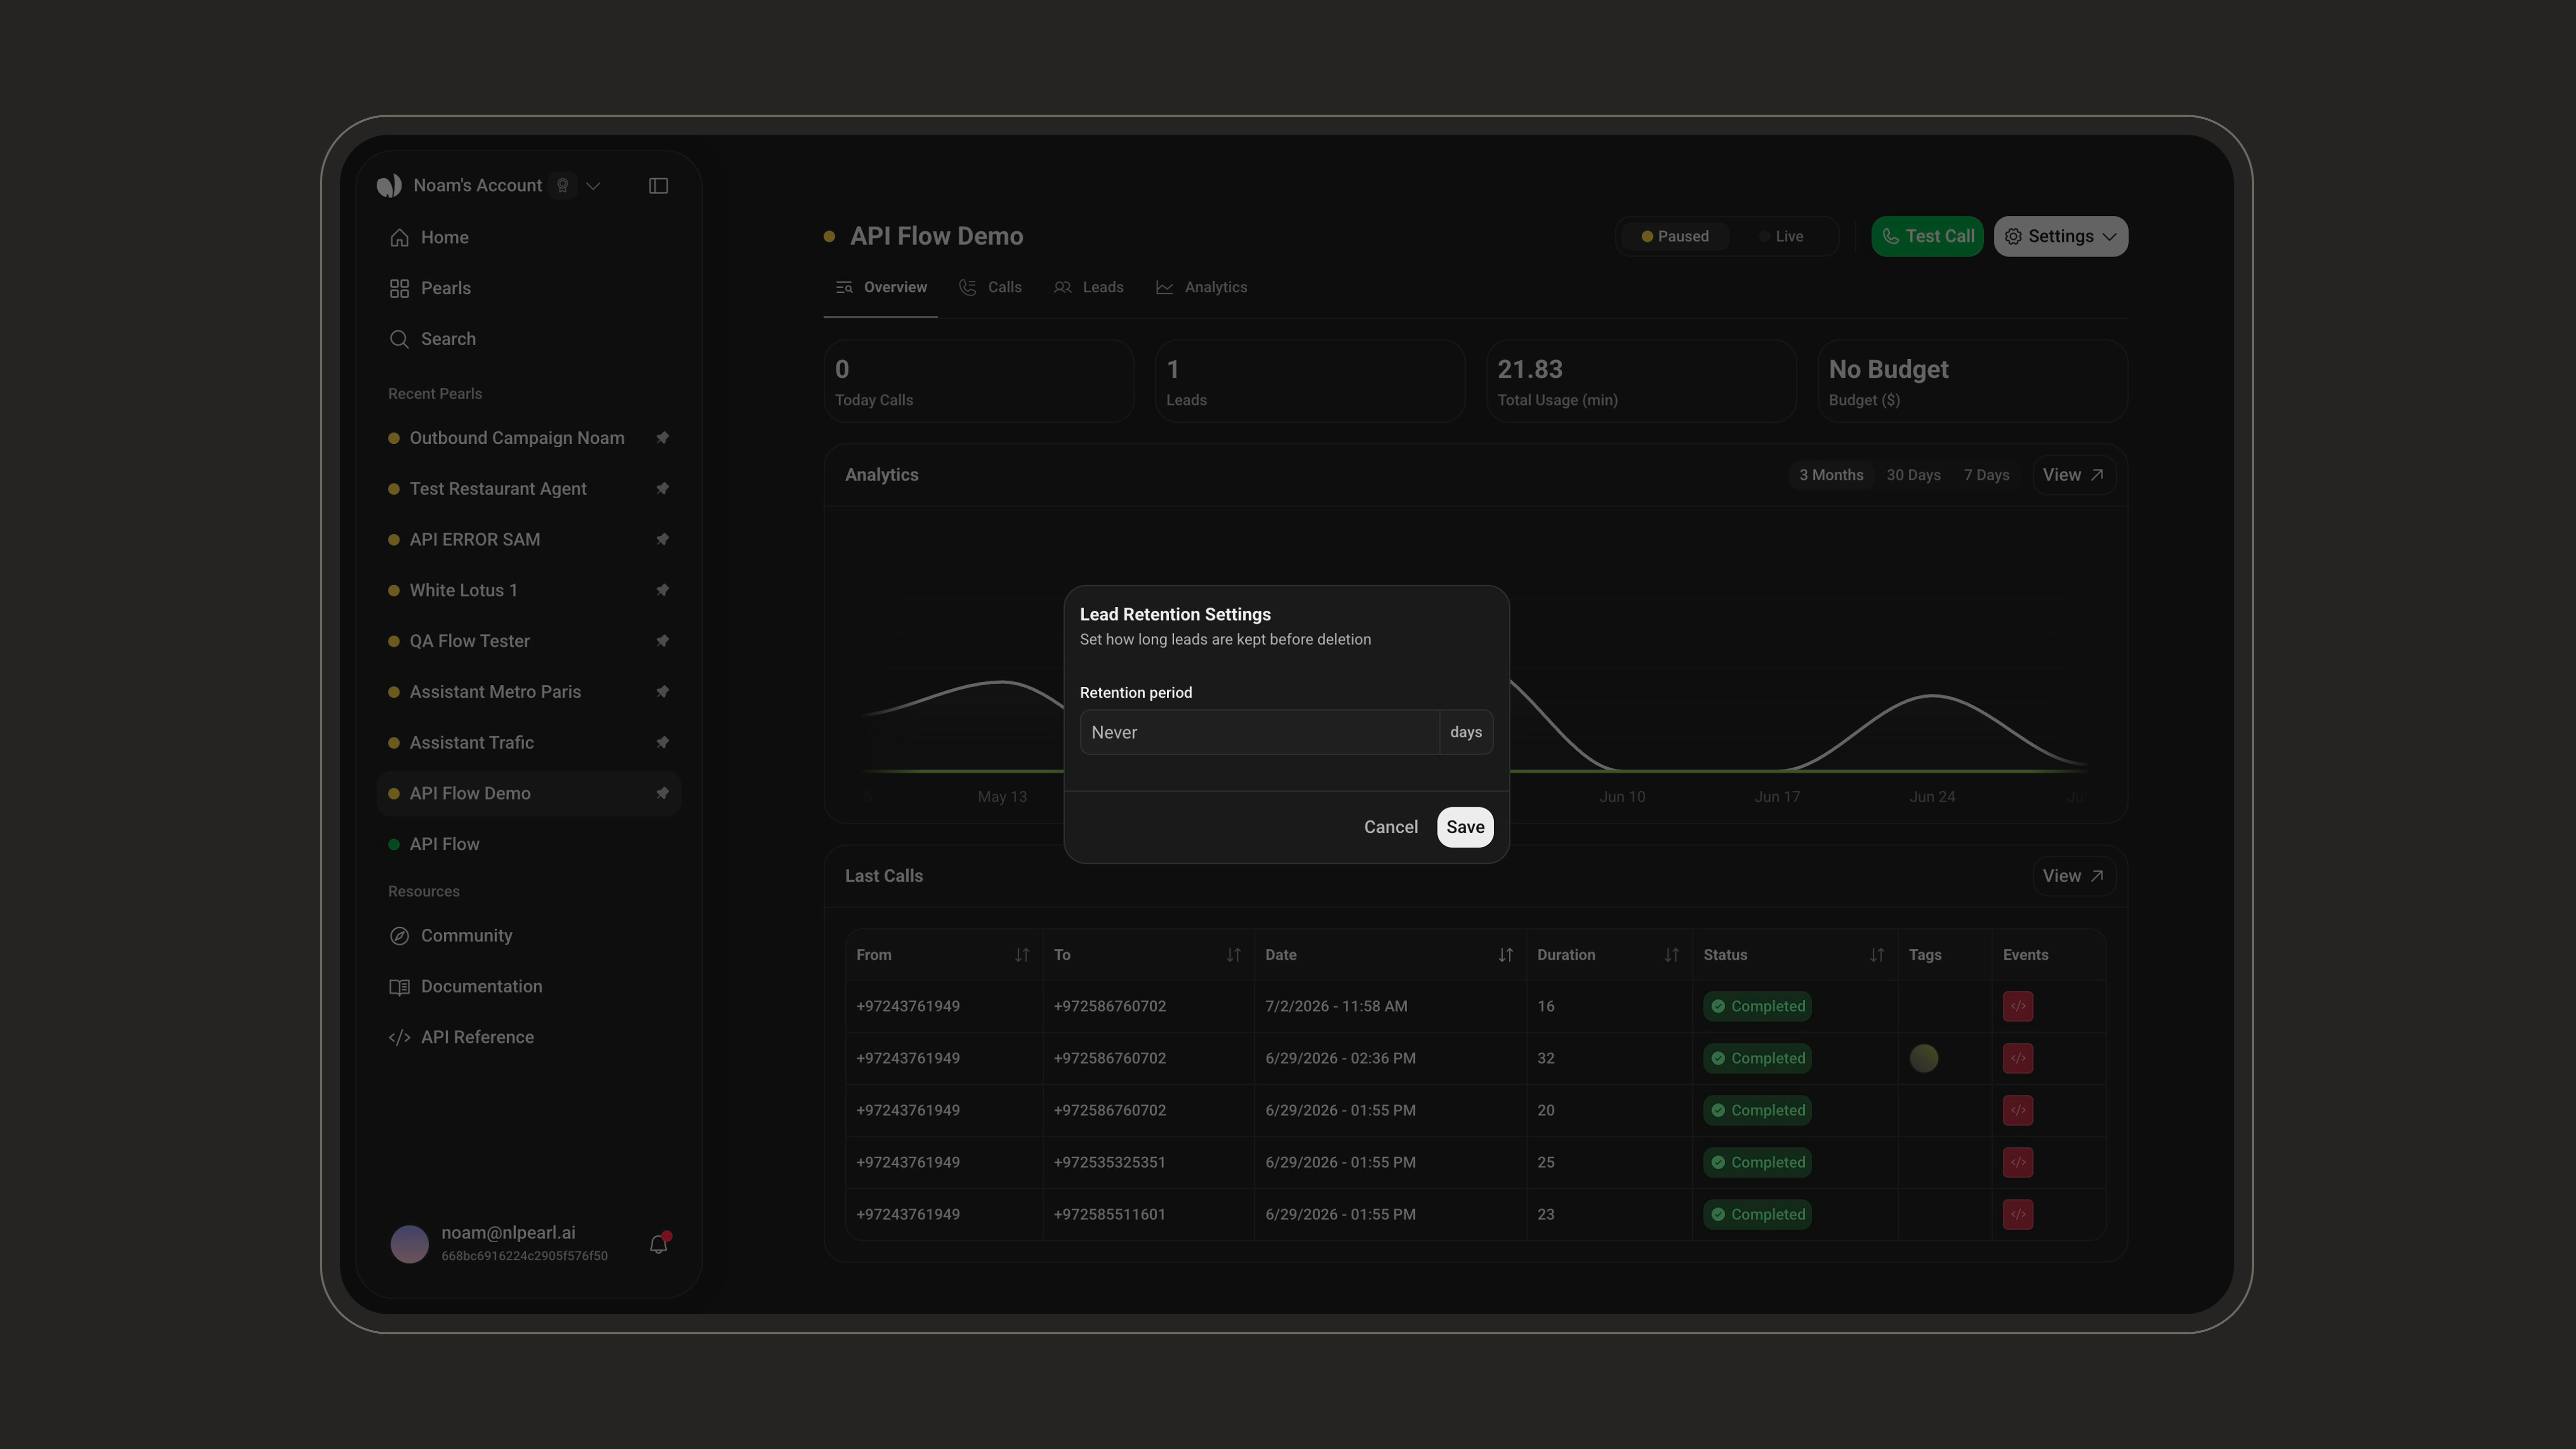
Managing Leads
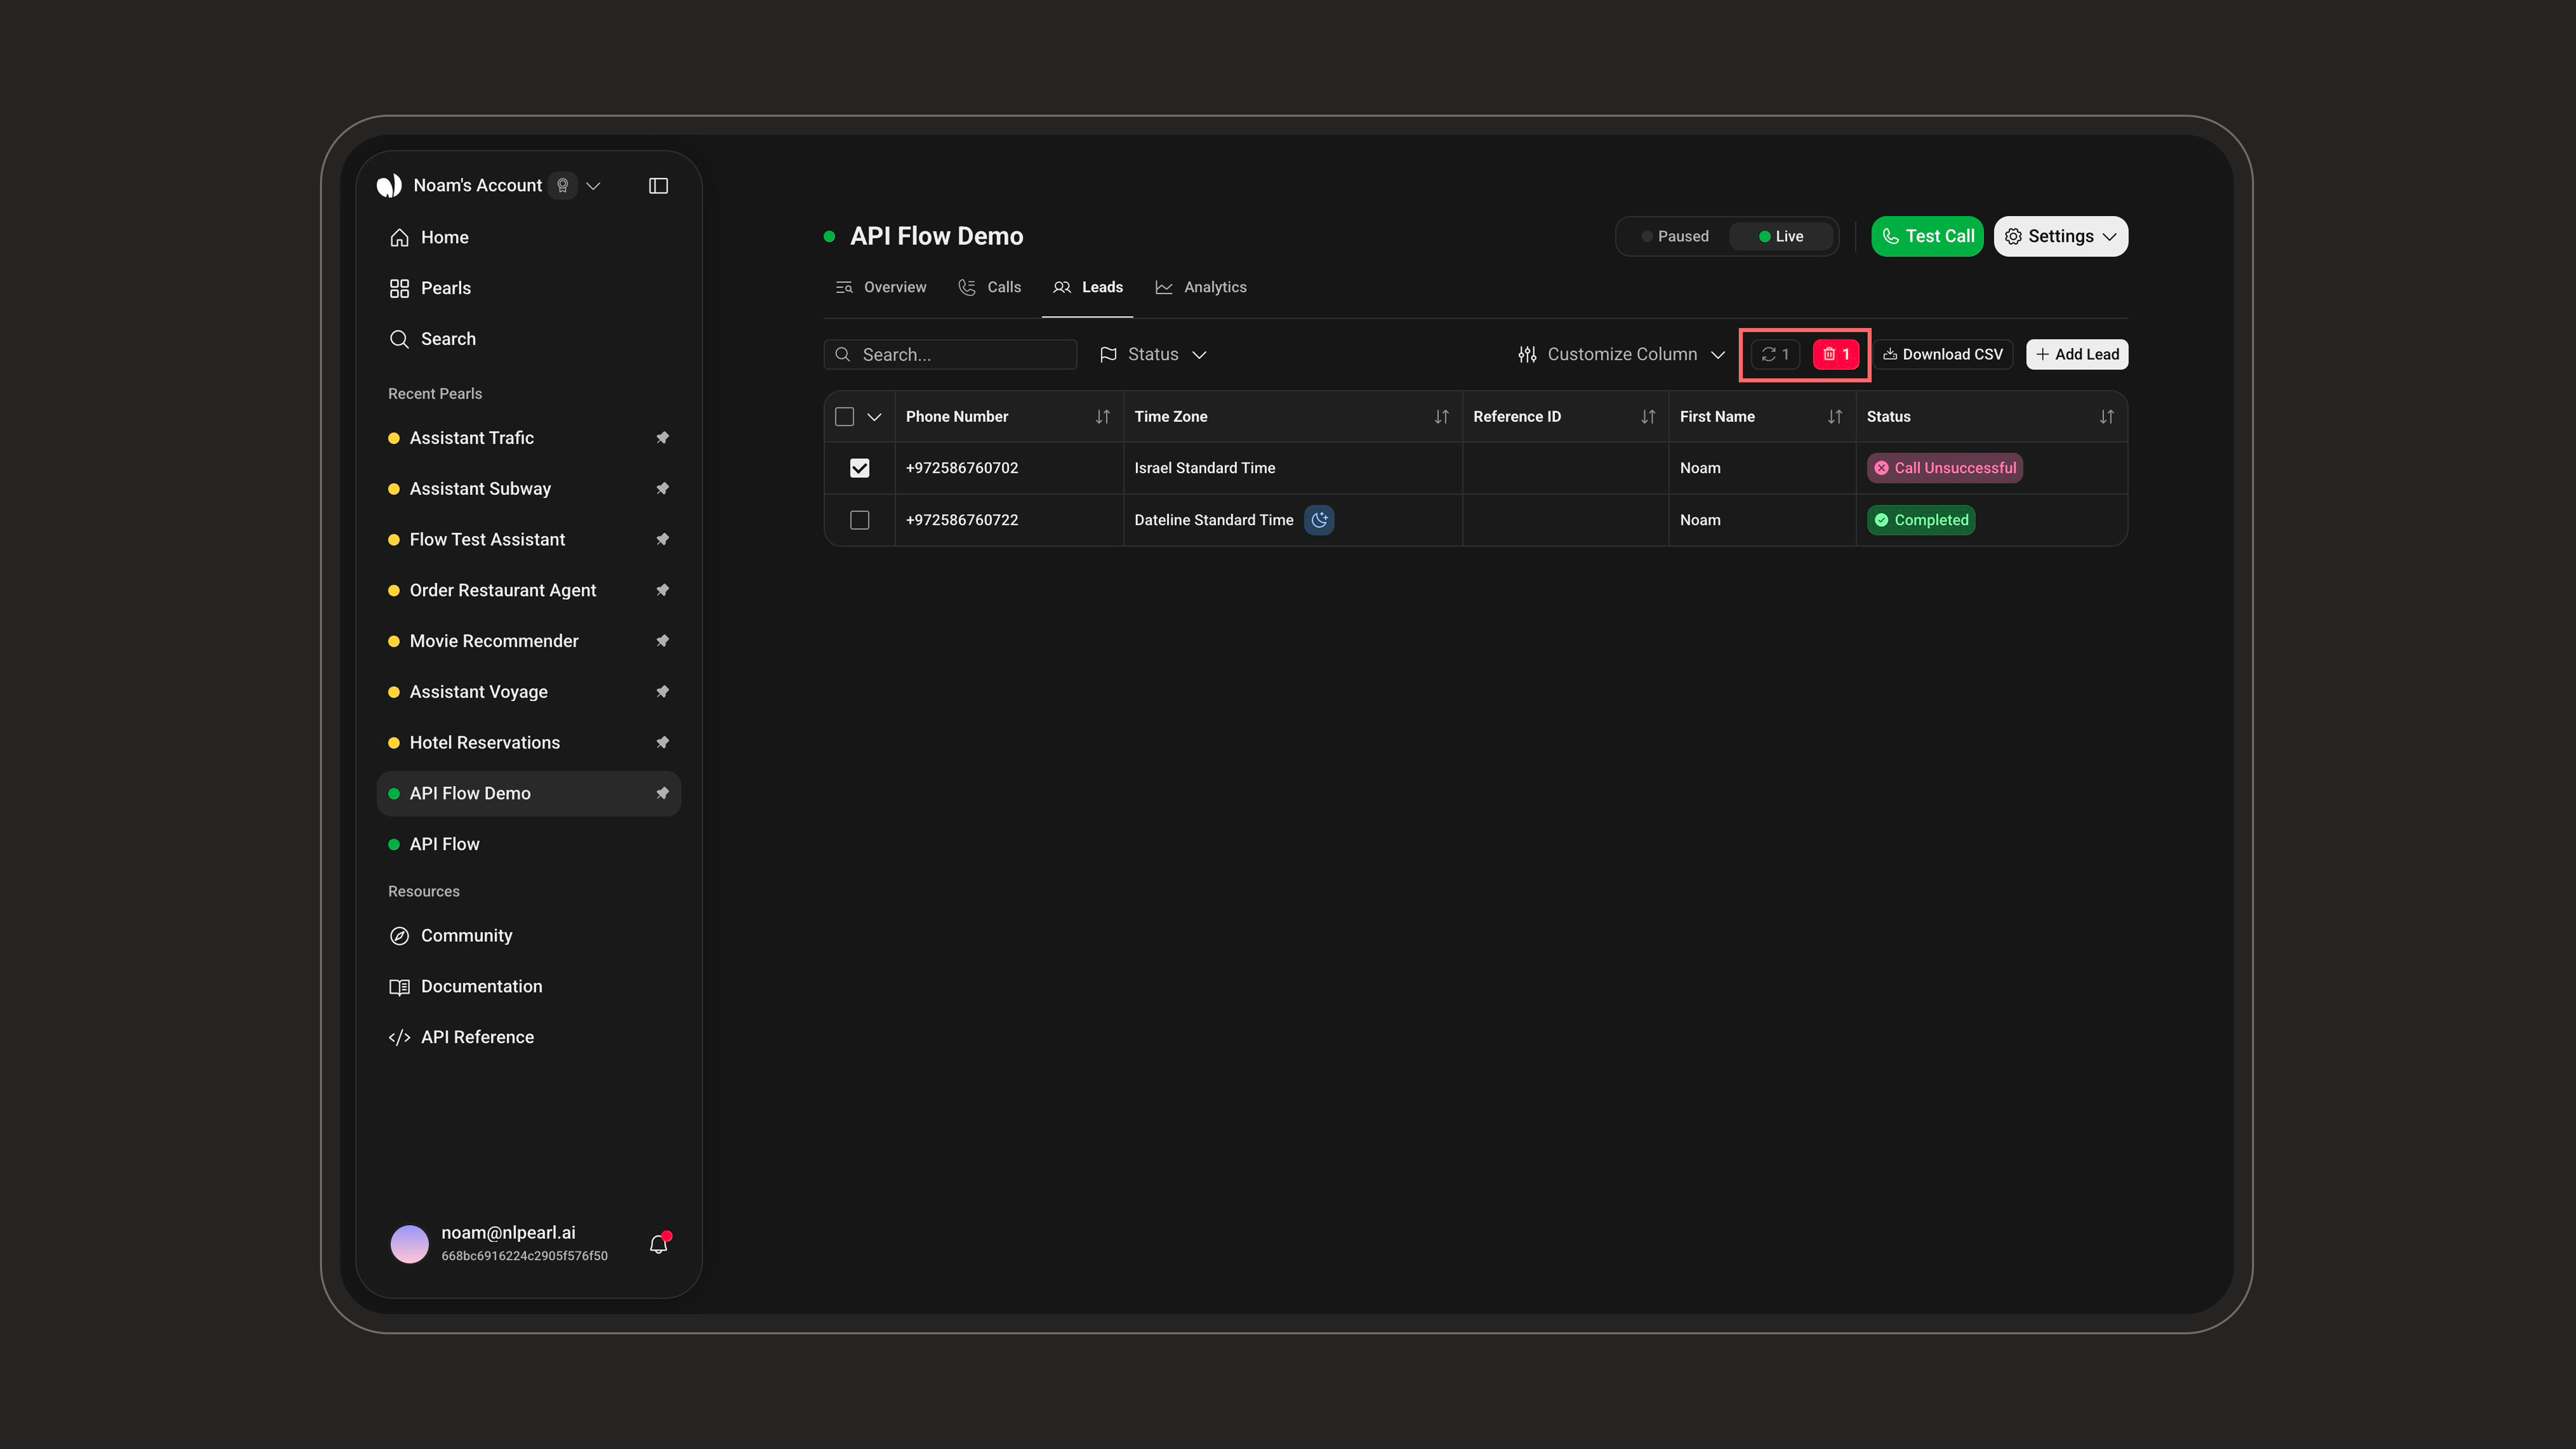
Open the Leads tab in your campaign to add, view, and manage the people Pearl will call. Leads are shown in a searchable, paginated table with default columns Created, Phone Number, Time Zone, Reference ID, and Status, plus one column per variable used in your Pearl.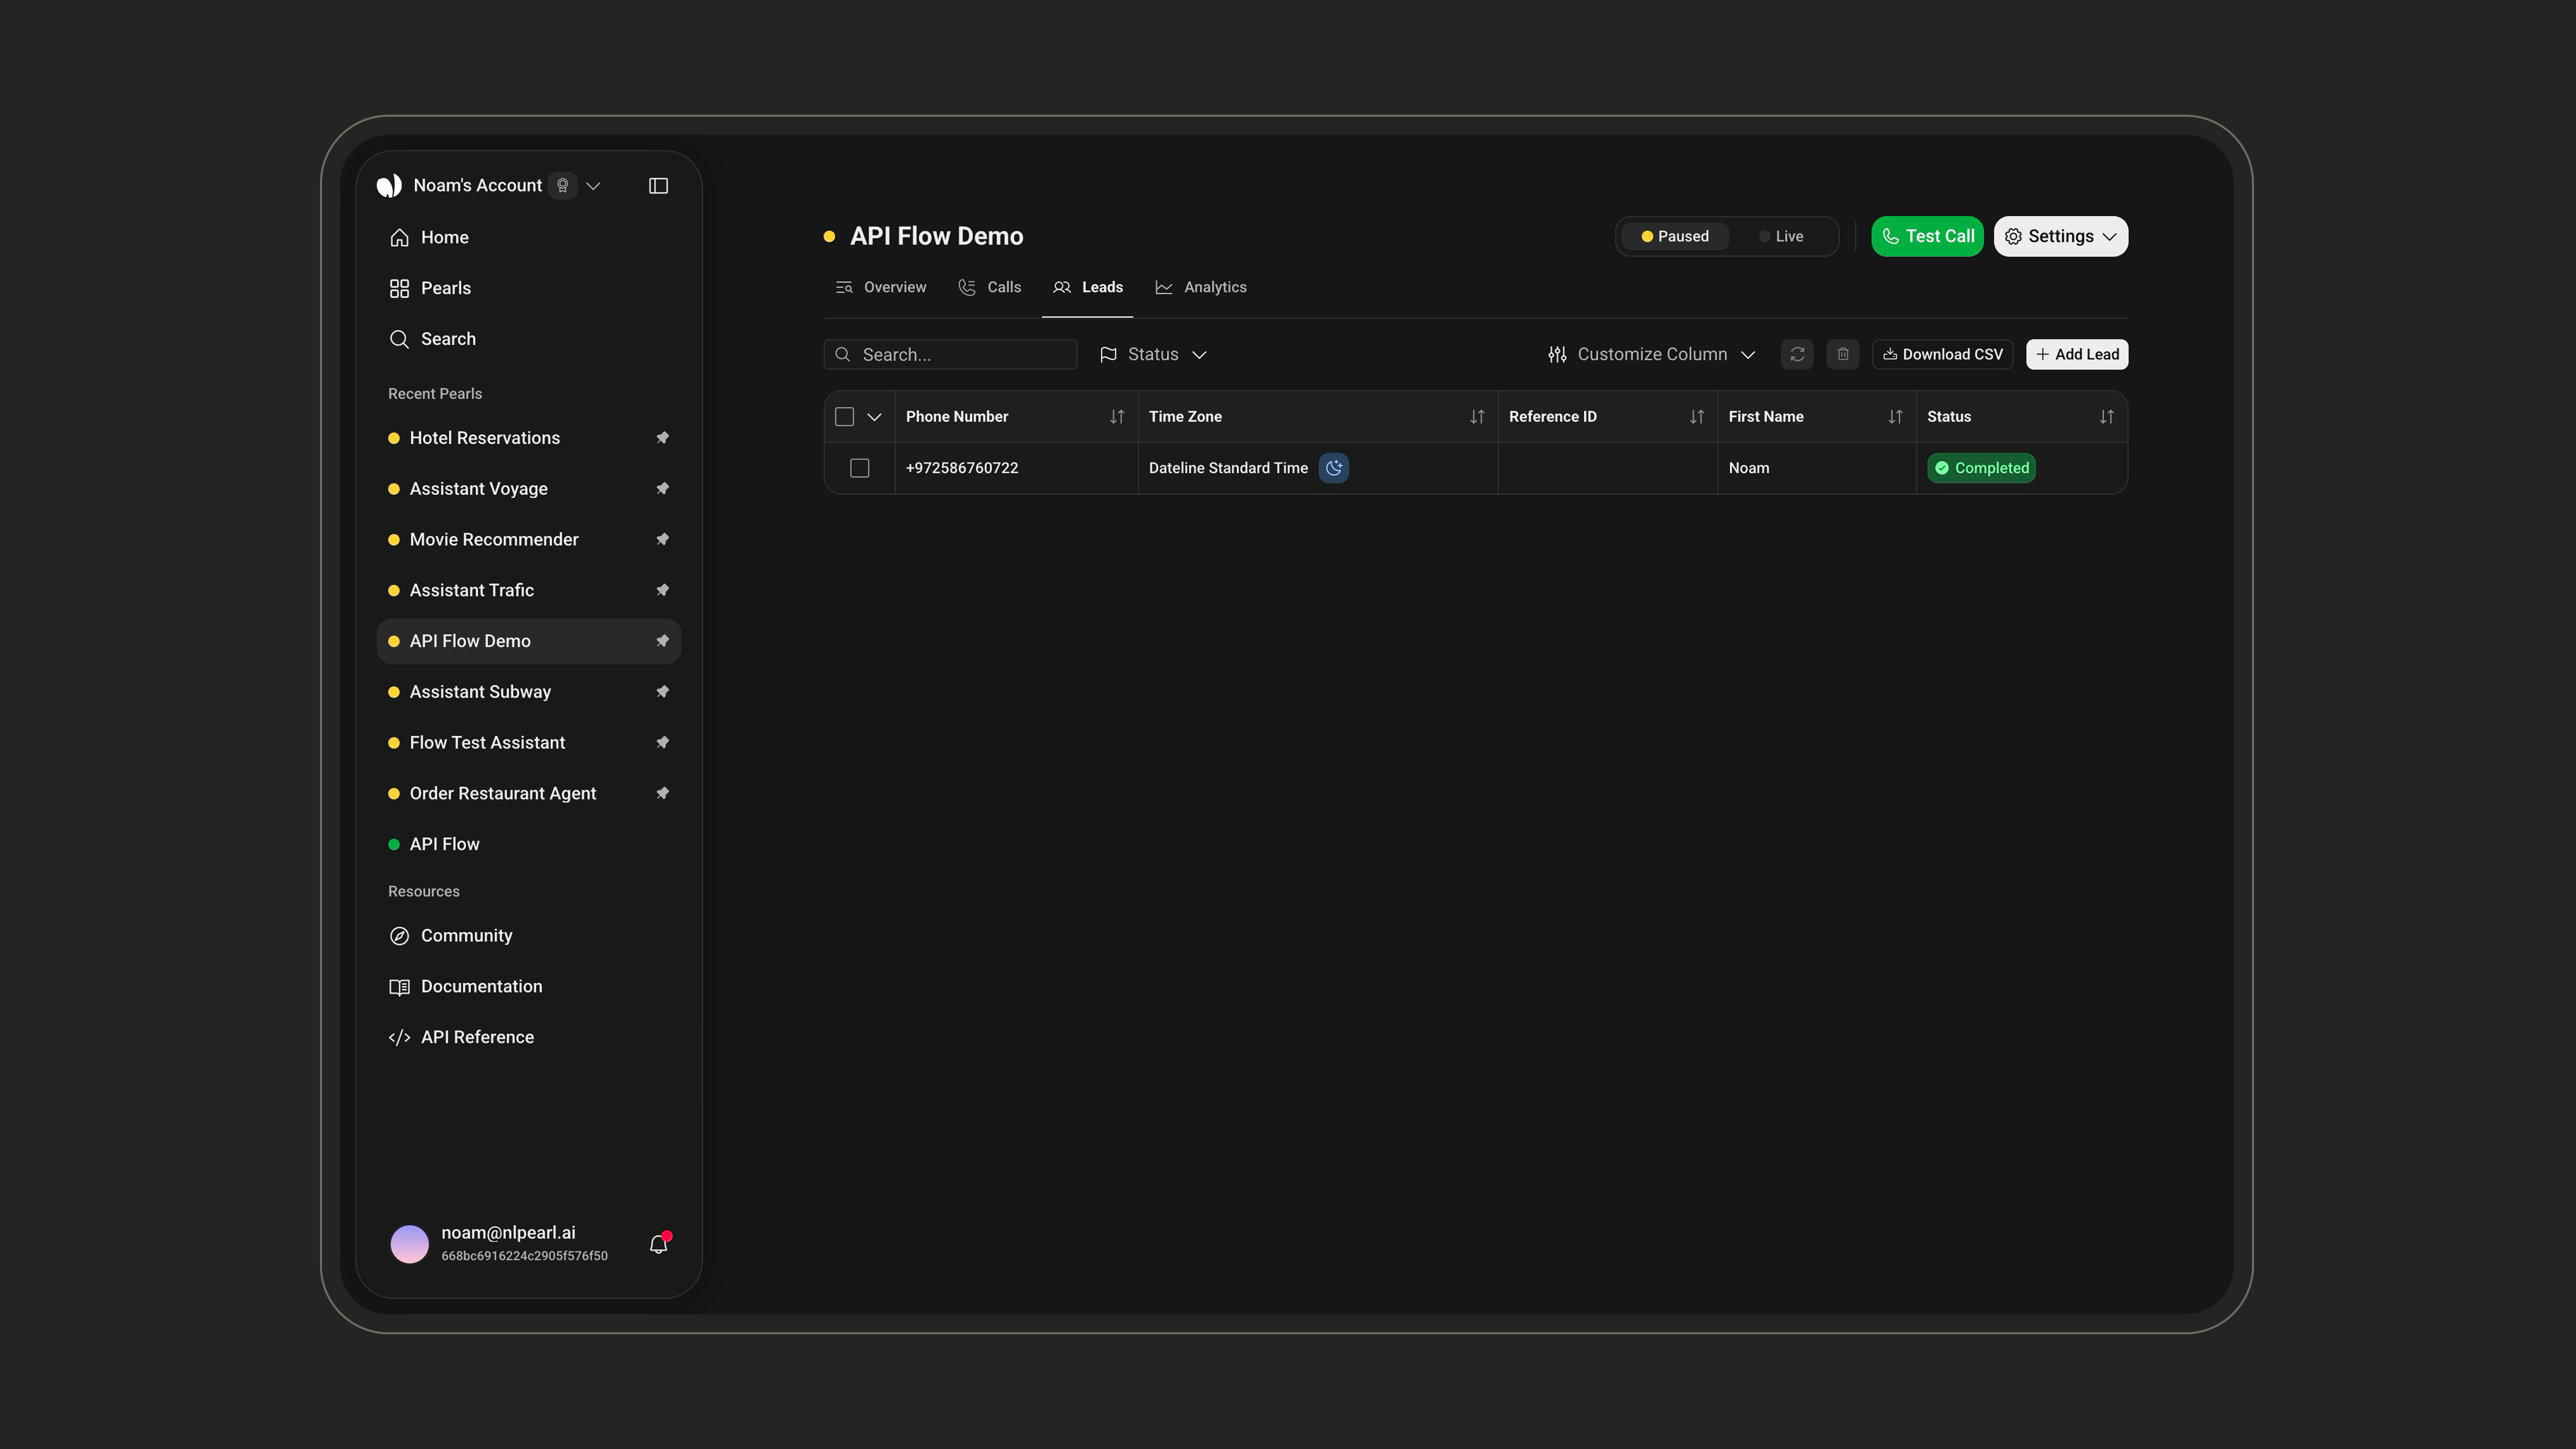
Adding Leads
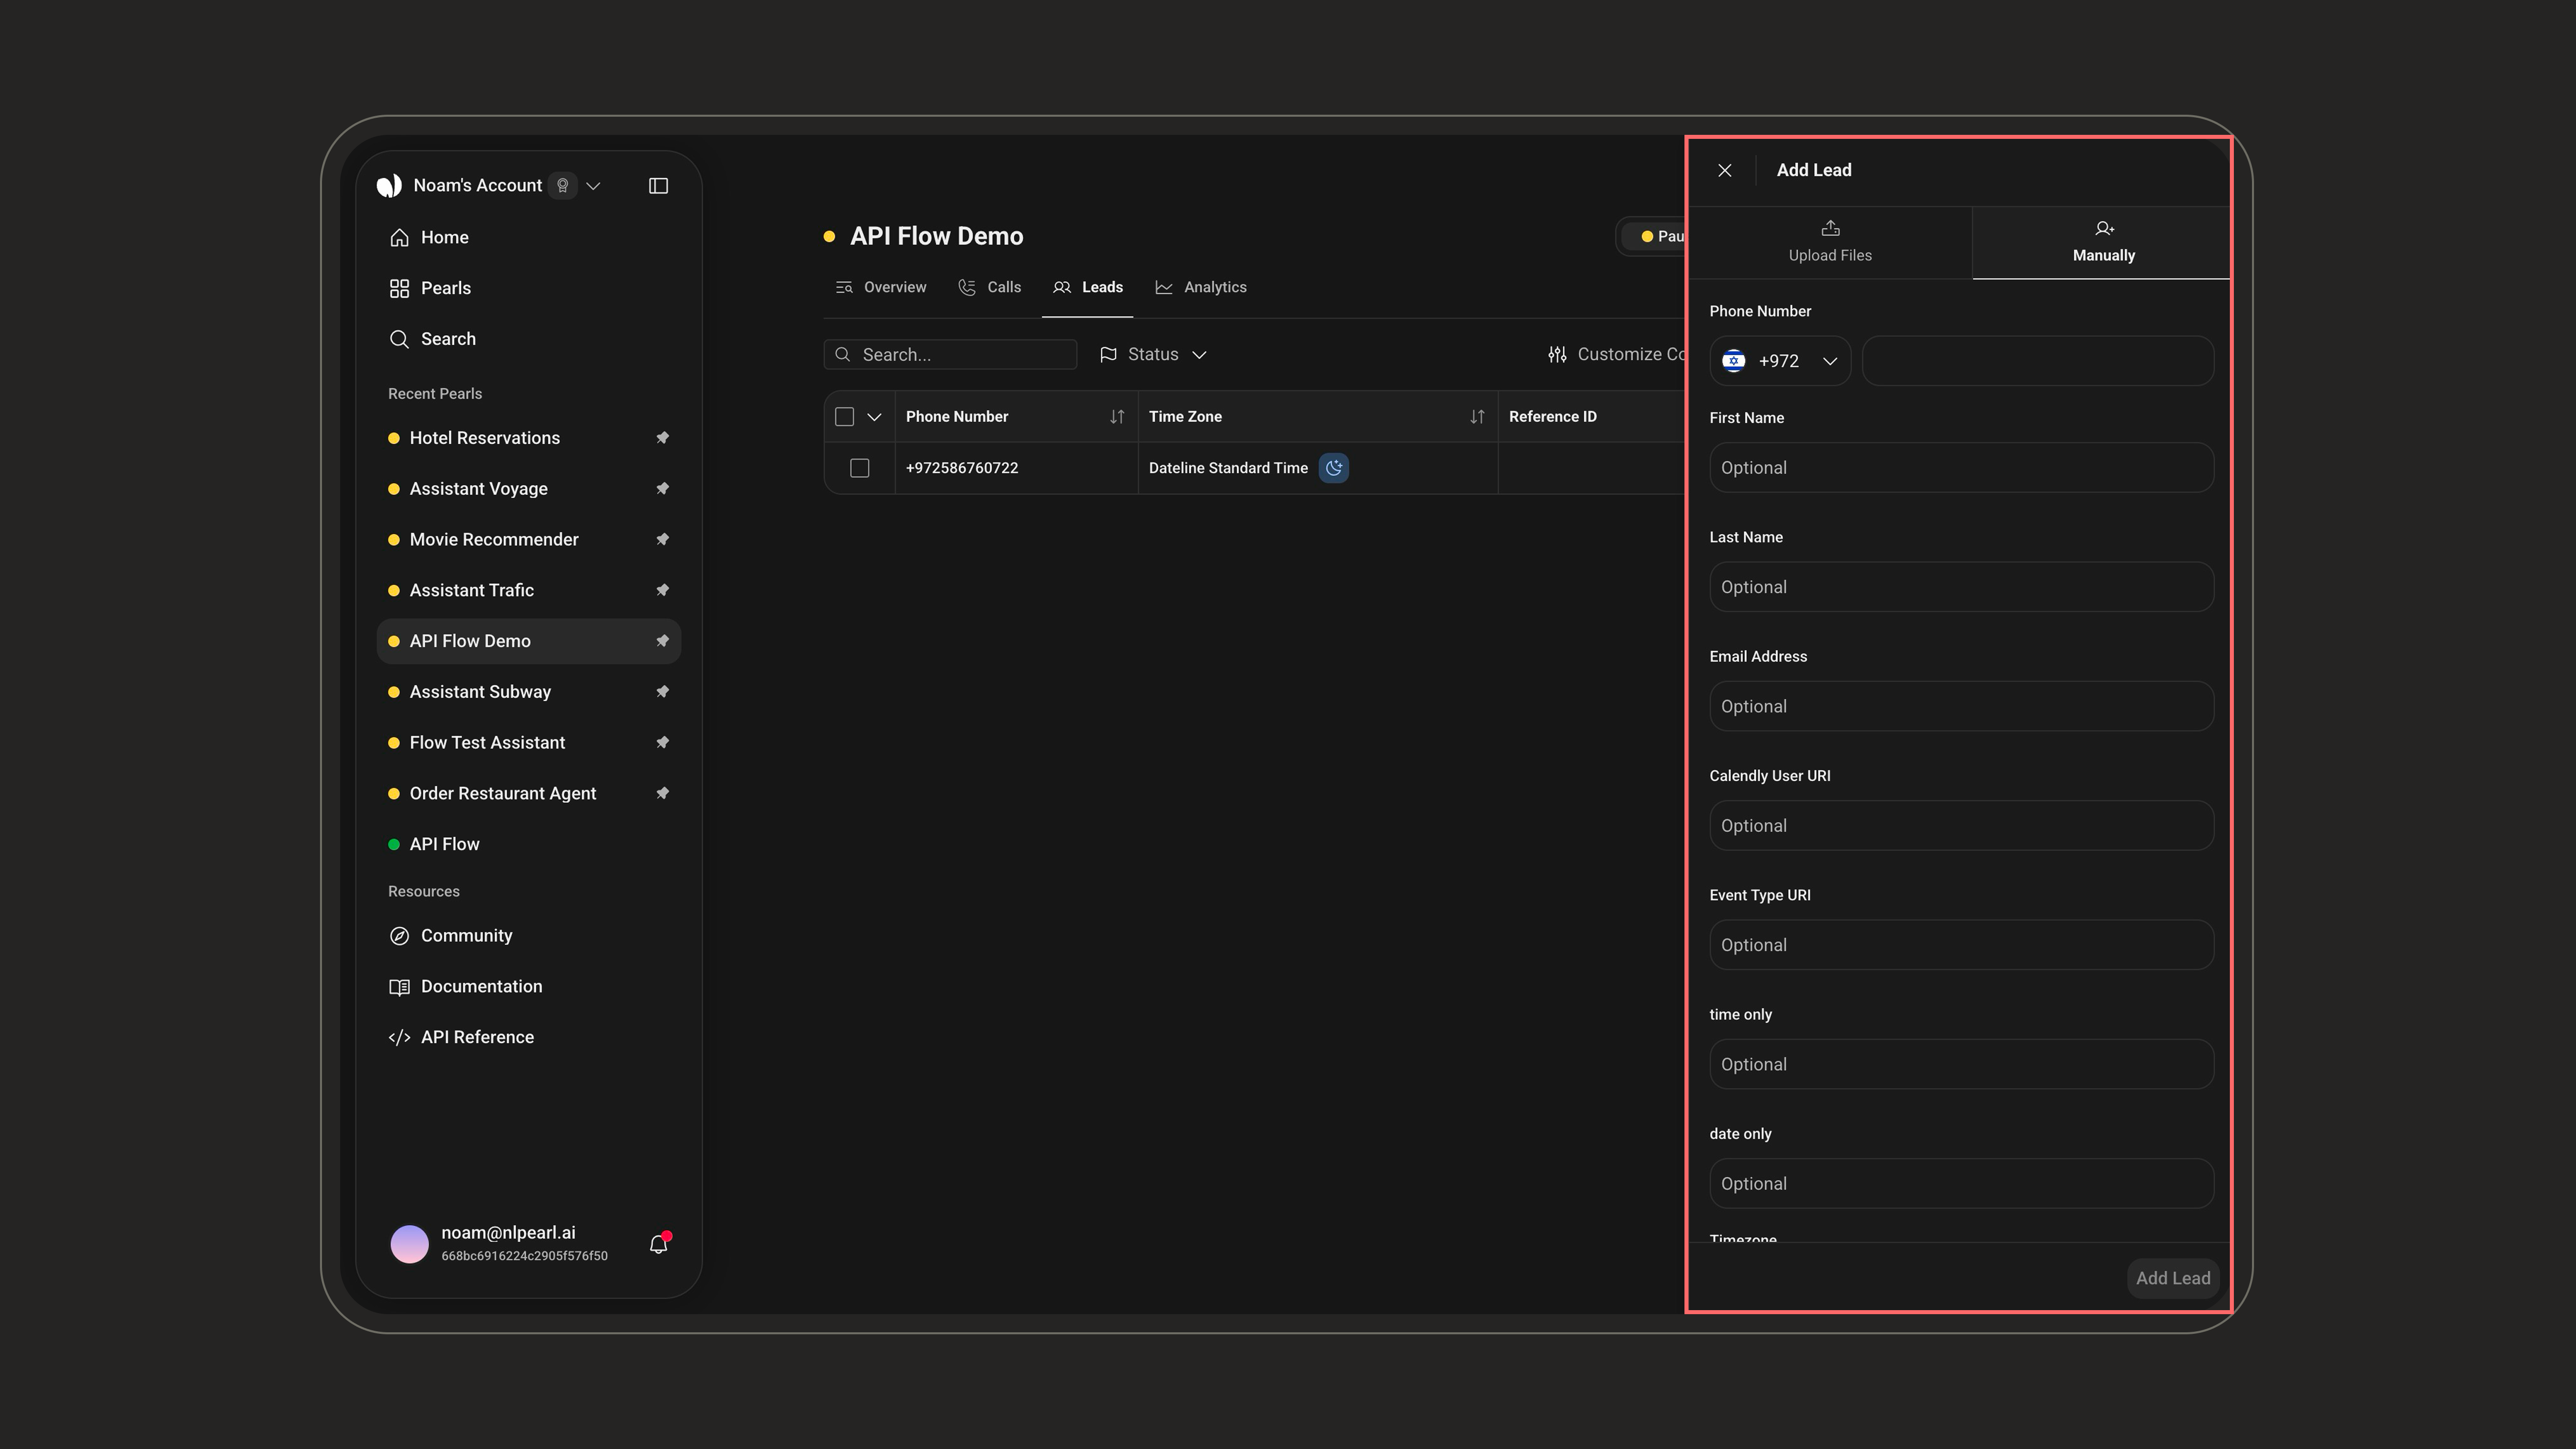
Click Add Lead, then choose how you want to add them.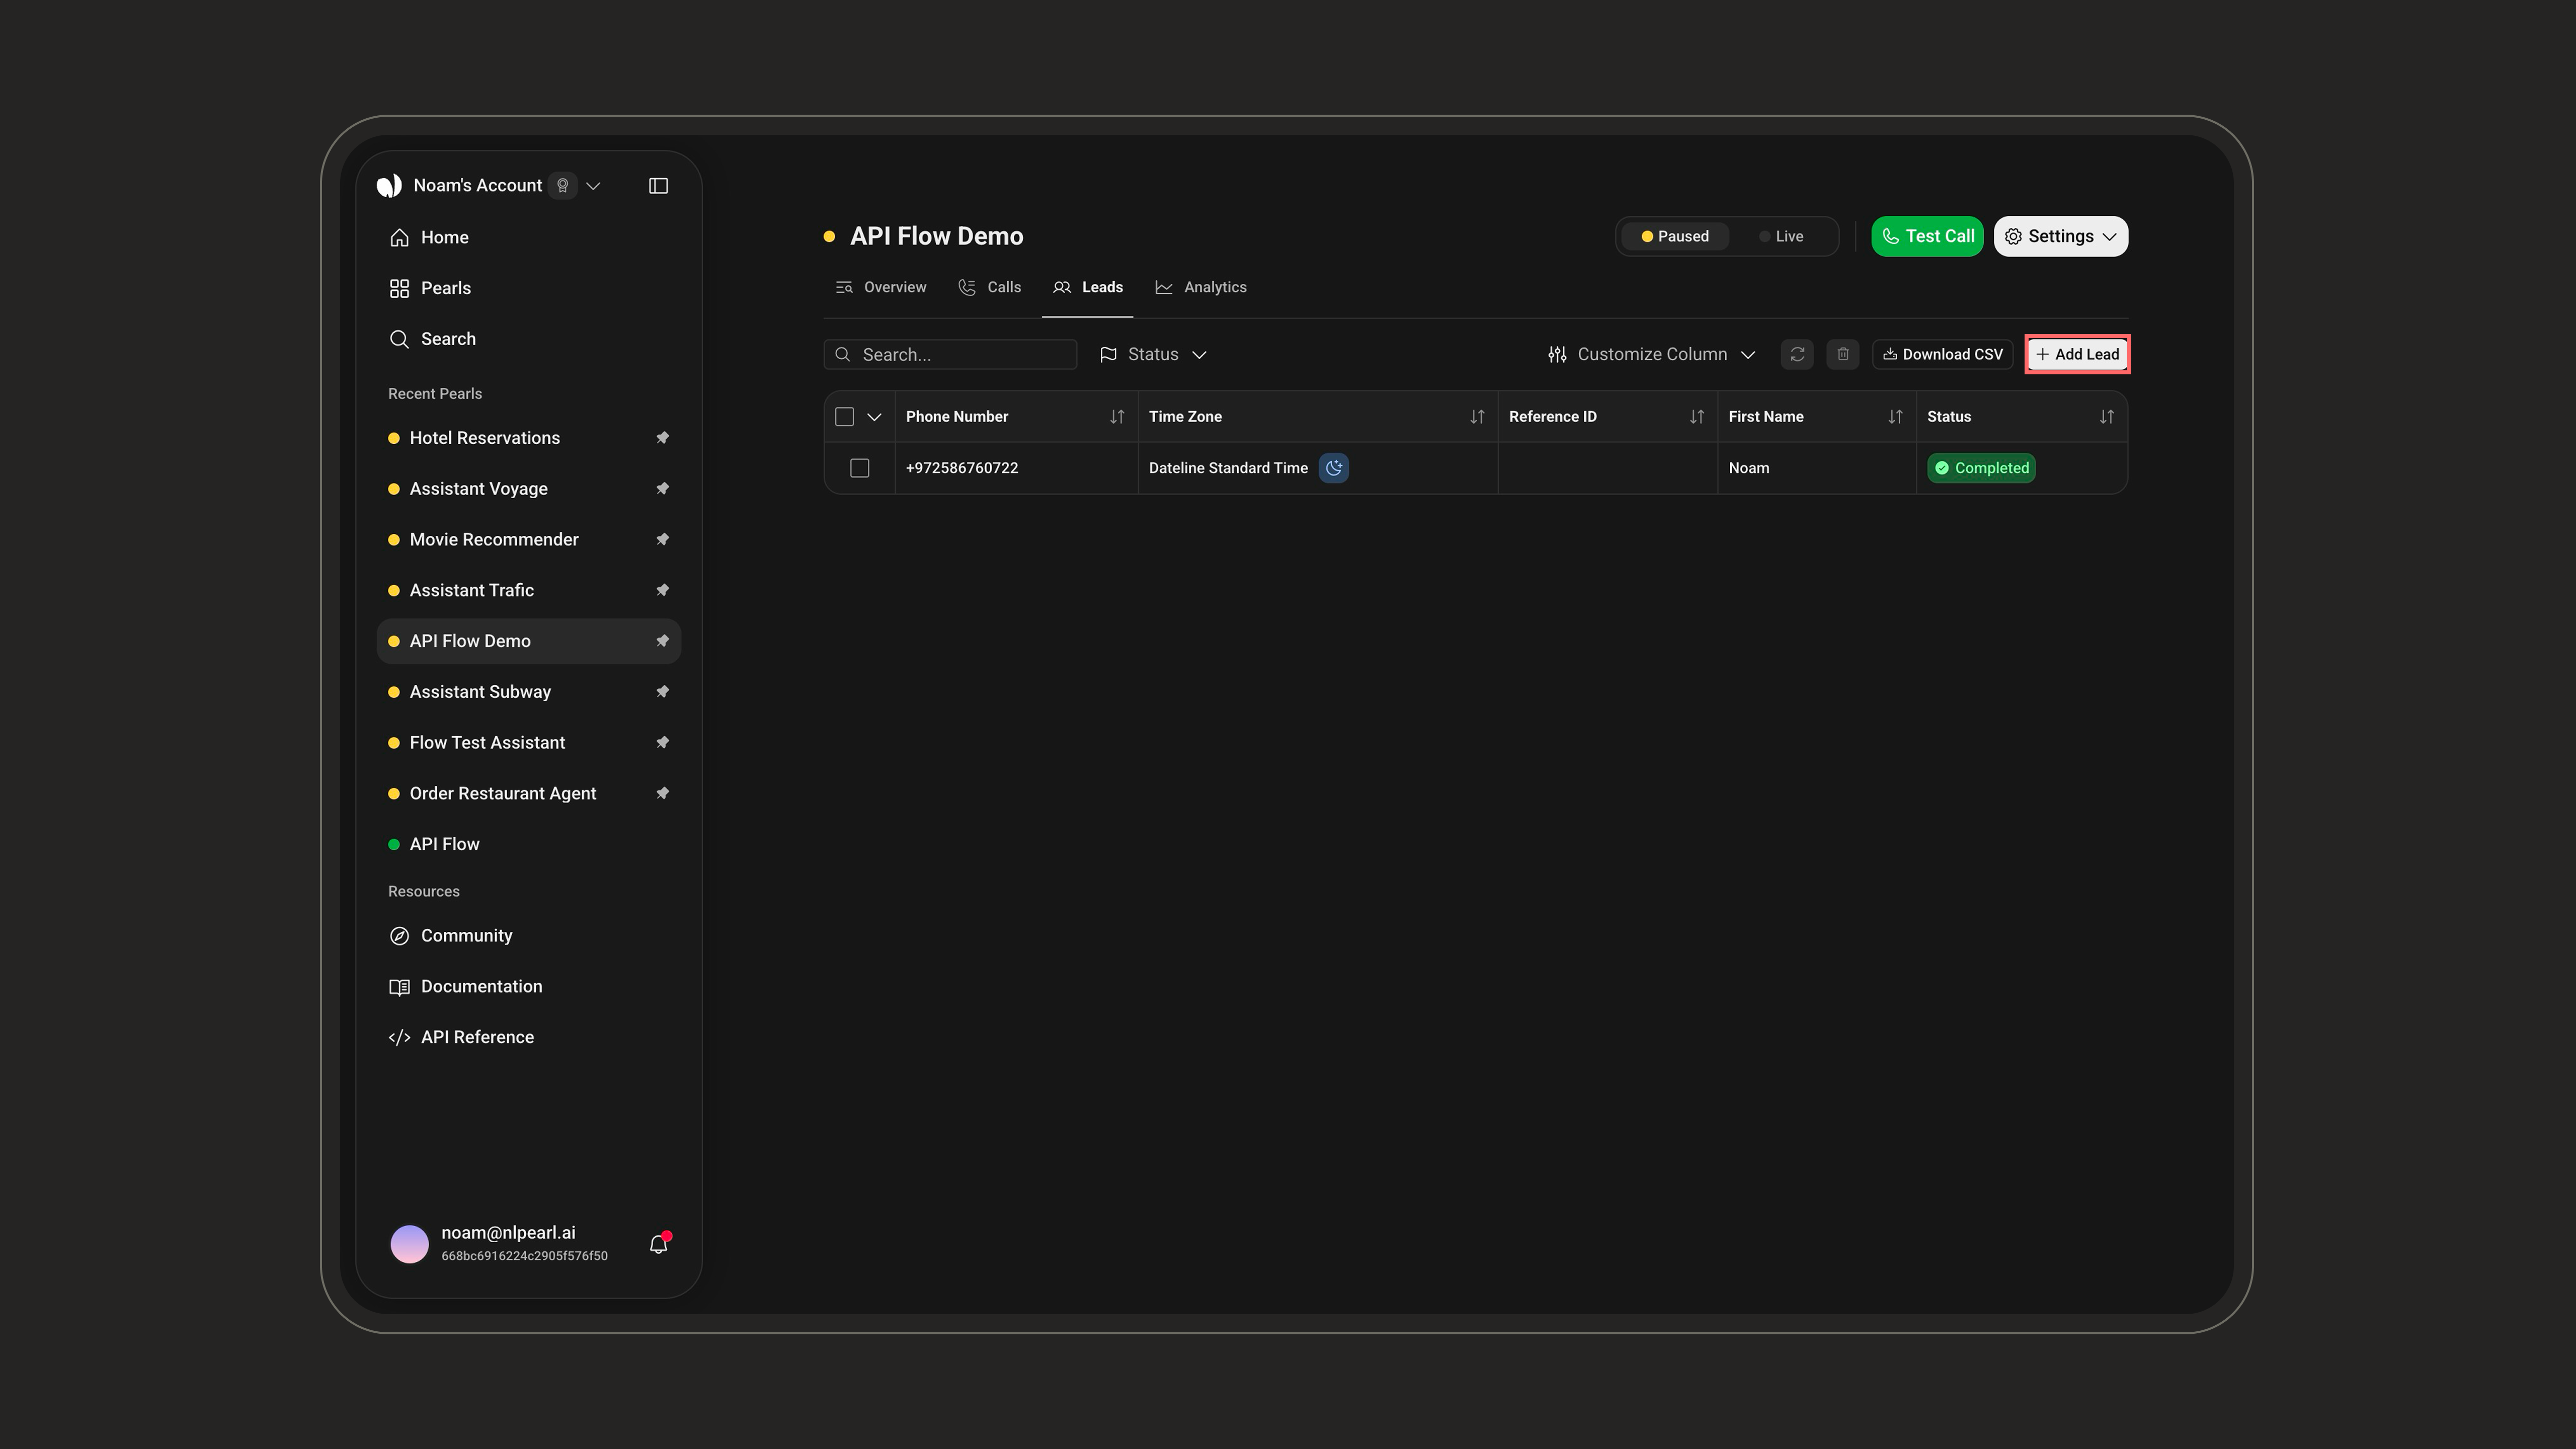
- Upload a File
- Add Manually
Download the CSV or XLSX template, fill it with your lead data, and upload it back. The template only includes the variables actually used in your Pearl (unused ones won’t appear, and extra columns you add won’t be recognized). You can also set a timezone for the file — if left empty, the campaign timezone is used. After the upload, a report shows how many leads were added and lets you download the list of any failed rows.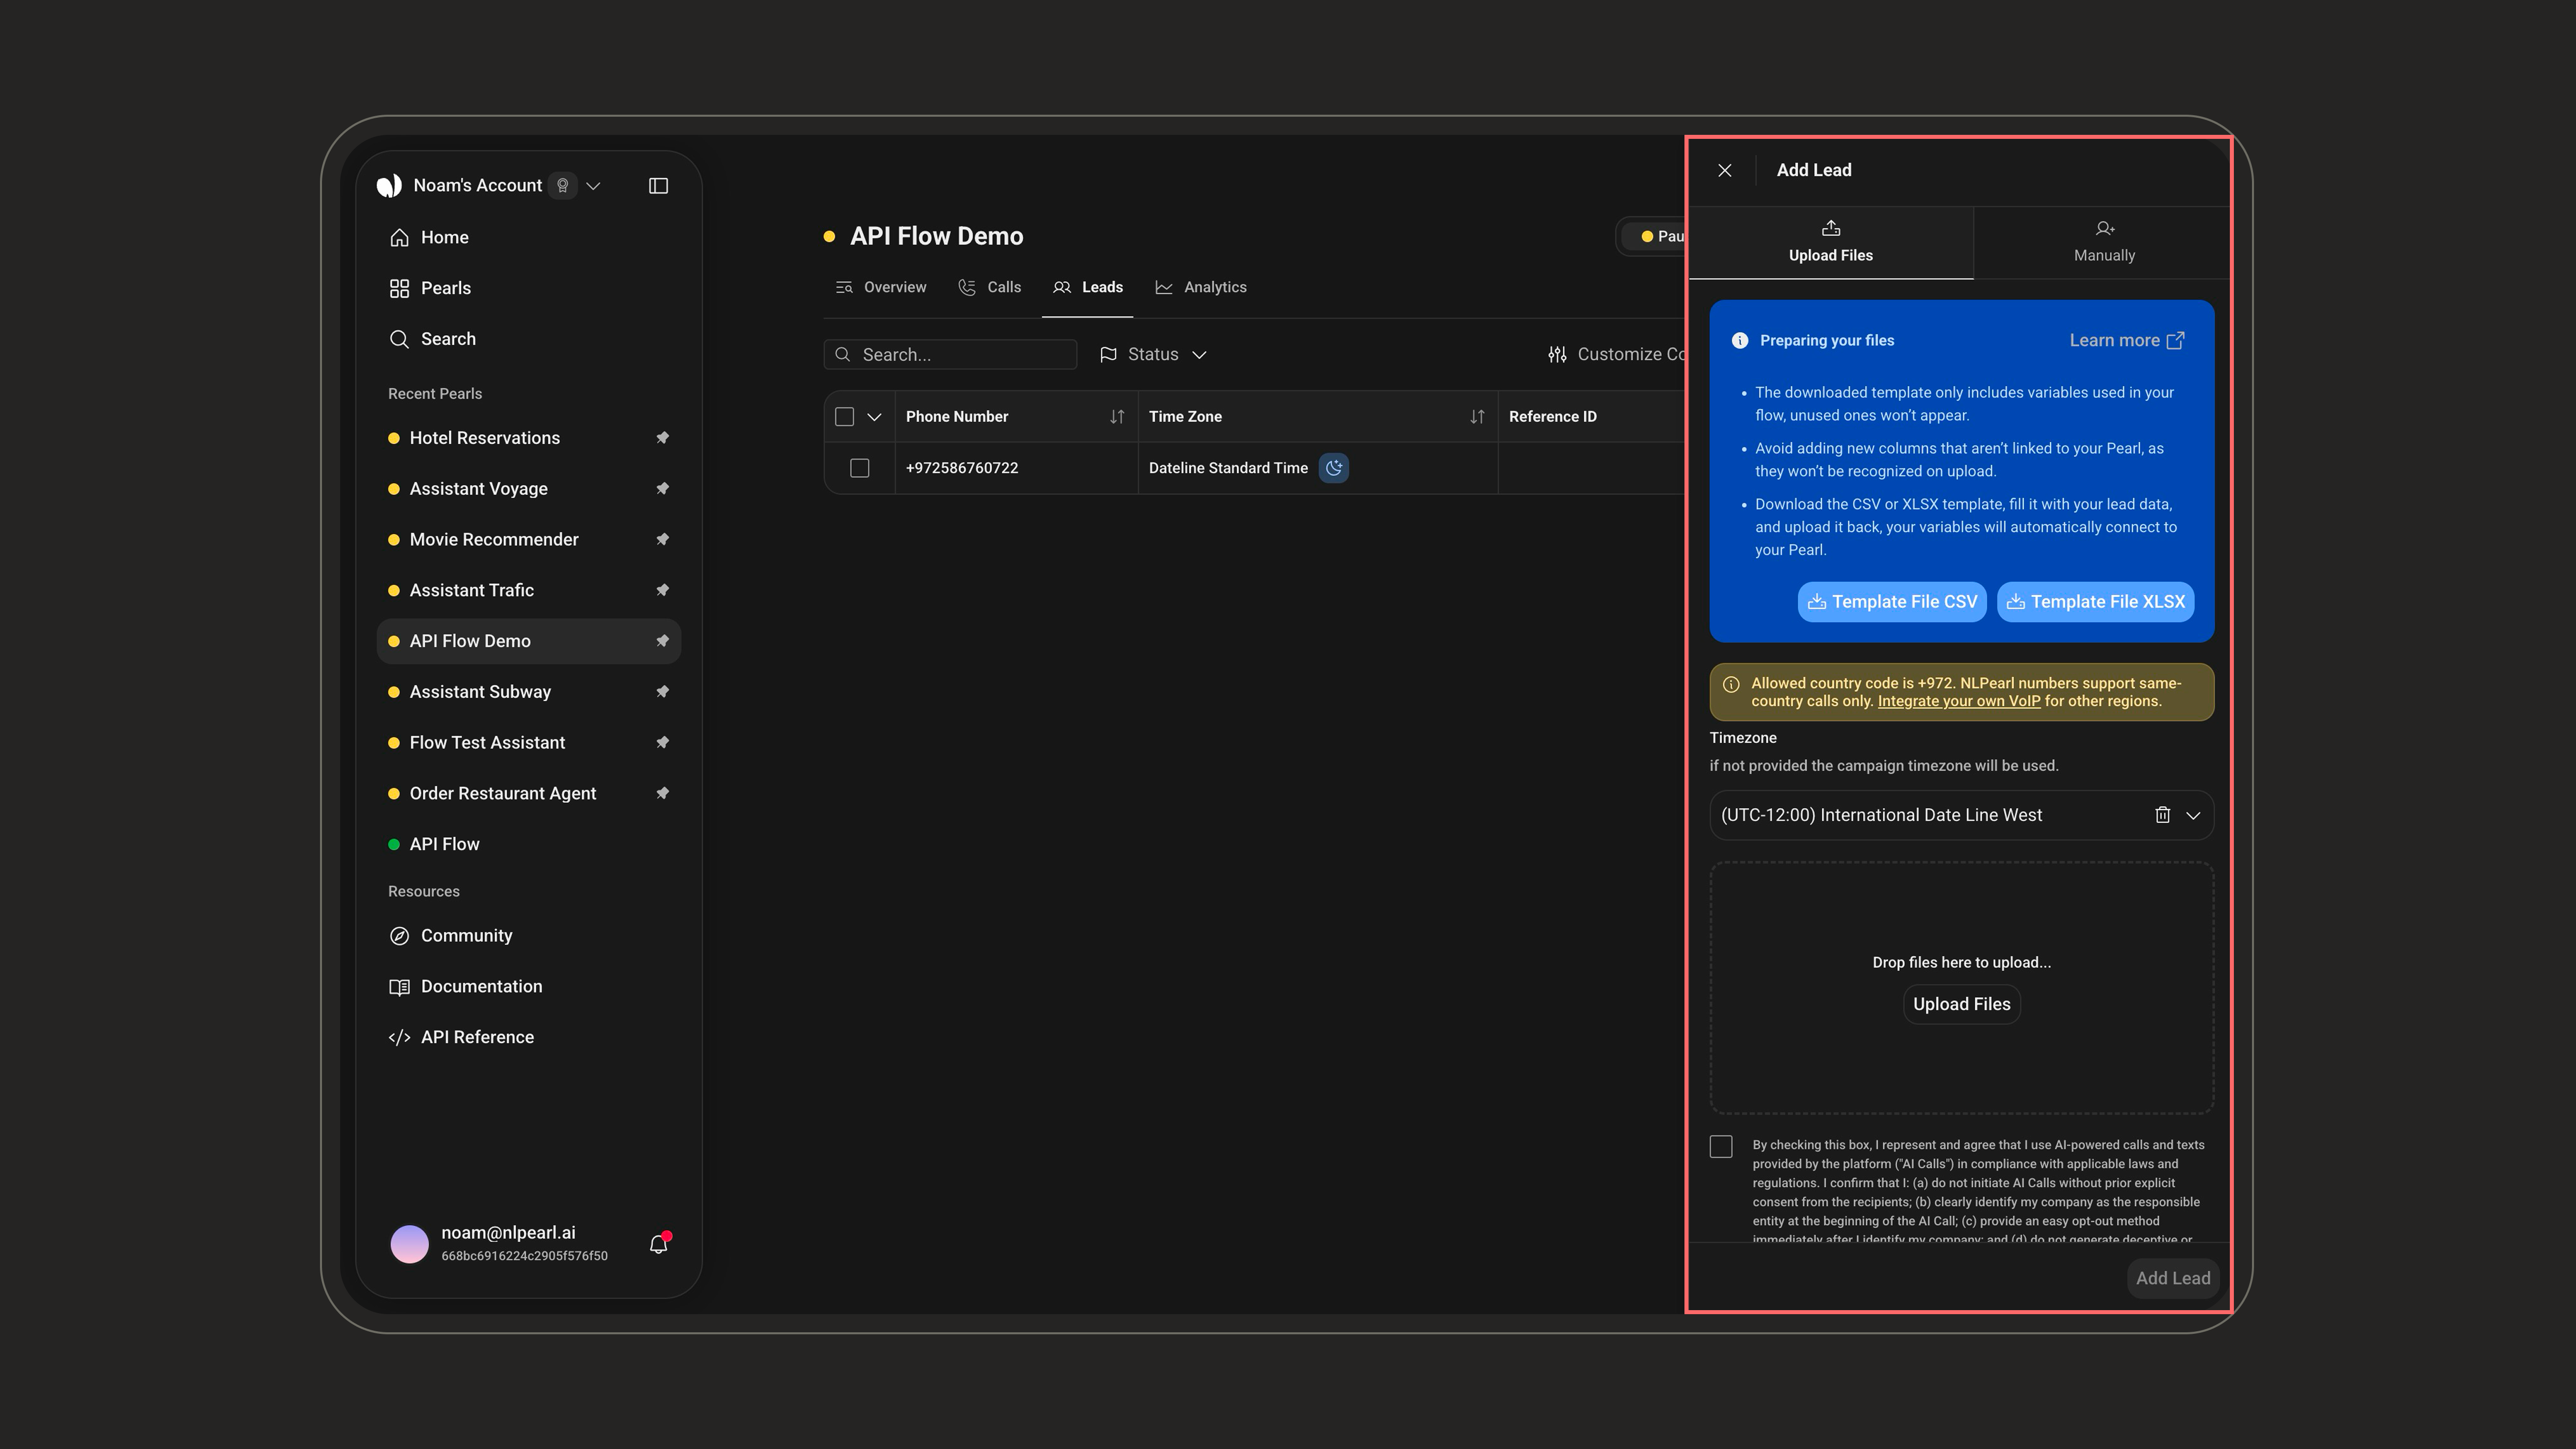
Both methods require accepting the AI-calls compliance checkbox. A notice also warns when a lead’s country code doesn’t match a country-limited NLPearl number — to reach other regions, connect a Twilio or Custom VoIP number.
Customizing the View
Use Customize Column to show or hide any column, including the per-variable columns (by default, only the last 3 variables are shown). Up to 50 columns can be visible at once, and your selection is saved locally in your browser.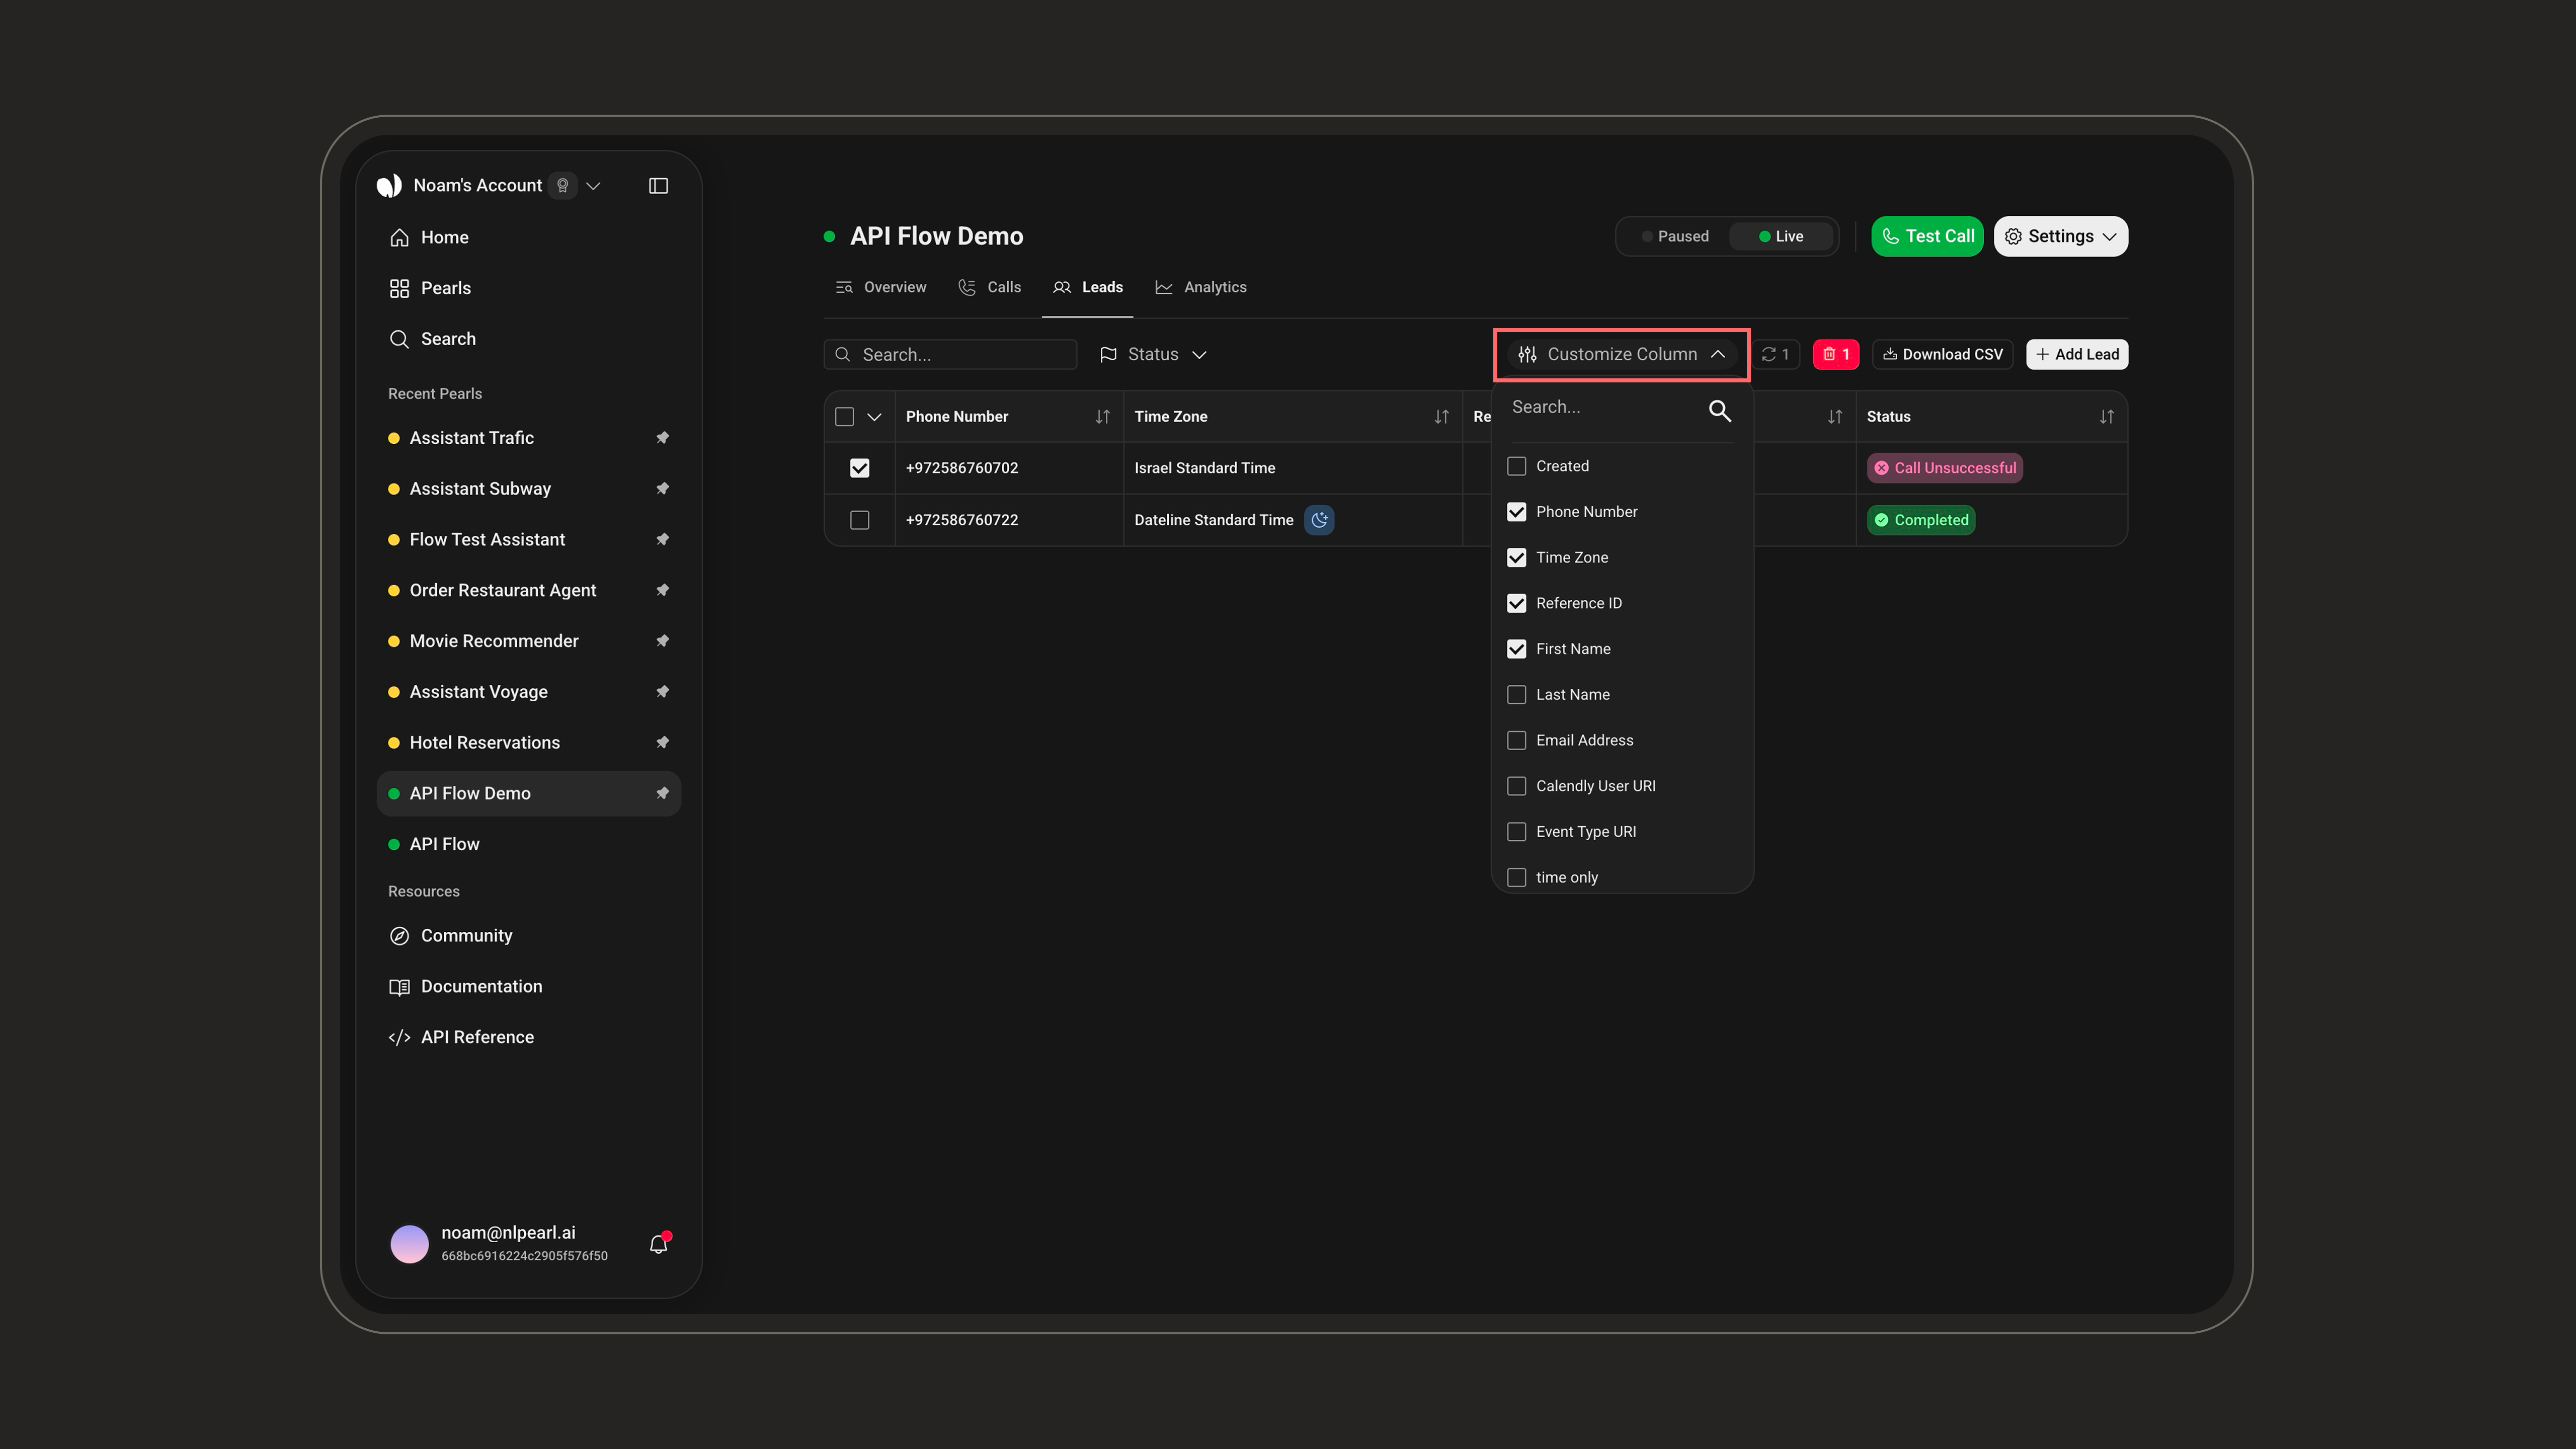
Exporting Leads
Click Download CSV to export your leads together with their current statuses. The export respects the filters currently applied to the table.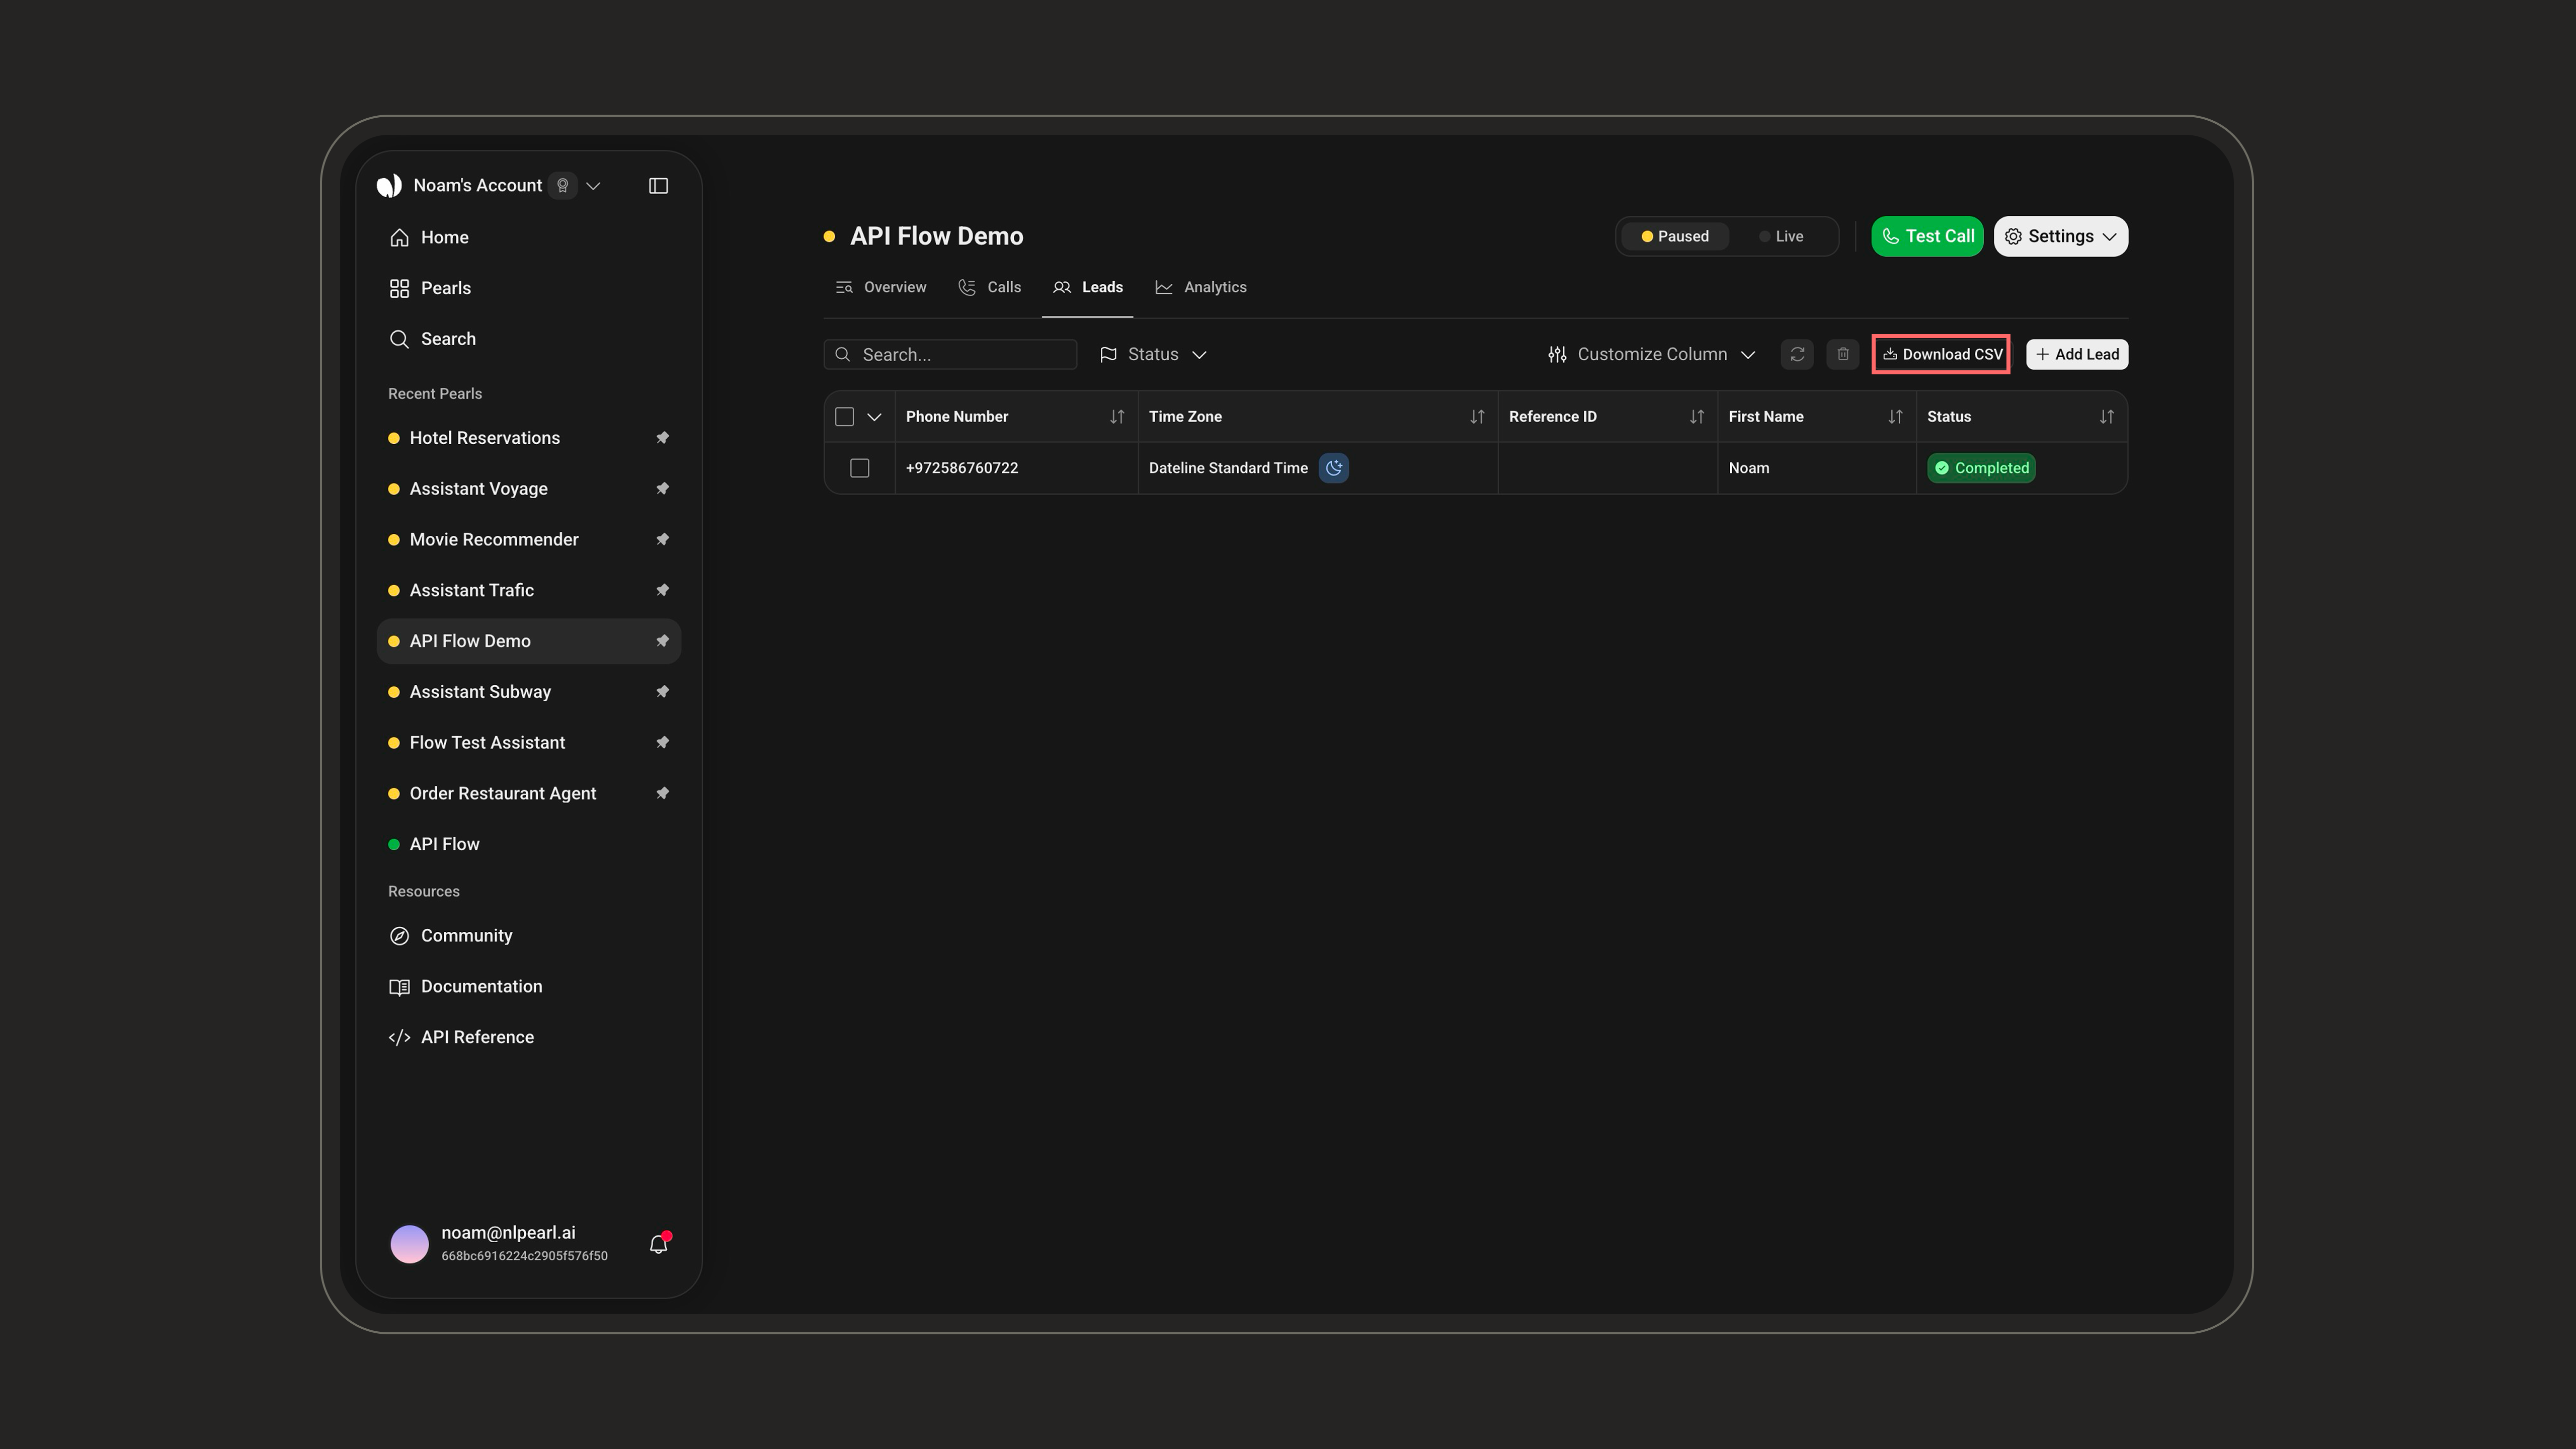
Refreshing and Deleting
Select one or more leads (or select all across the current filter), then:- Refresh: resets the leads to New so they re-enter the calling queue — handy to re-contact already-processed leads (Completed, Unsuccessful, etc.).
- Delete: permanently removes the selected leads, after a confirmation.
Outside Calling Hours
When a lead’s local time falls outside your campaign’s calling hours, a moon icon appears on its Time Zone column — the lead is “sleeping” and won’t be called until its window opens. Hover the icon to see the lead’s local time and UTC offset.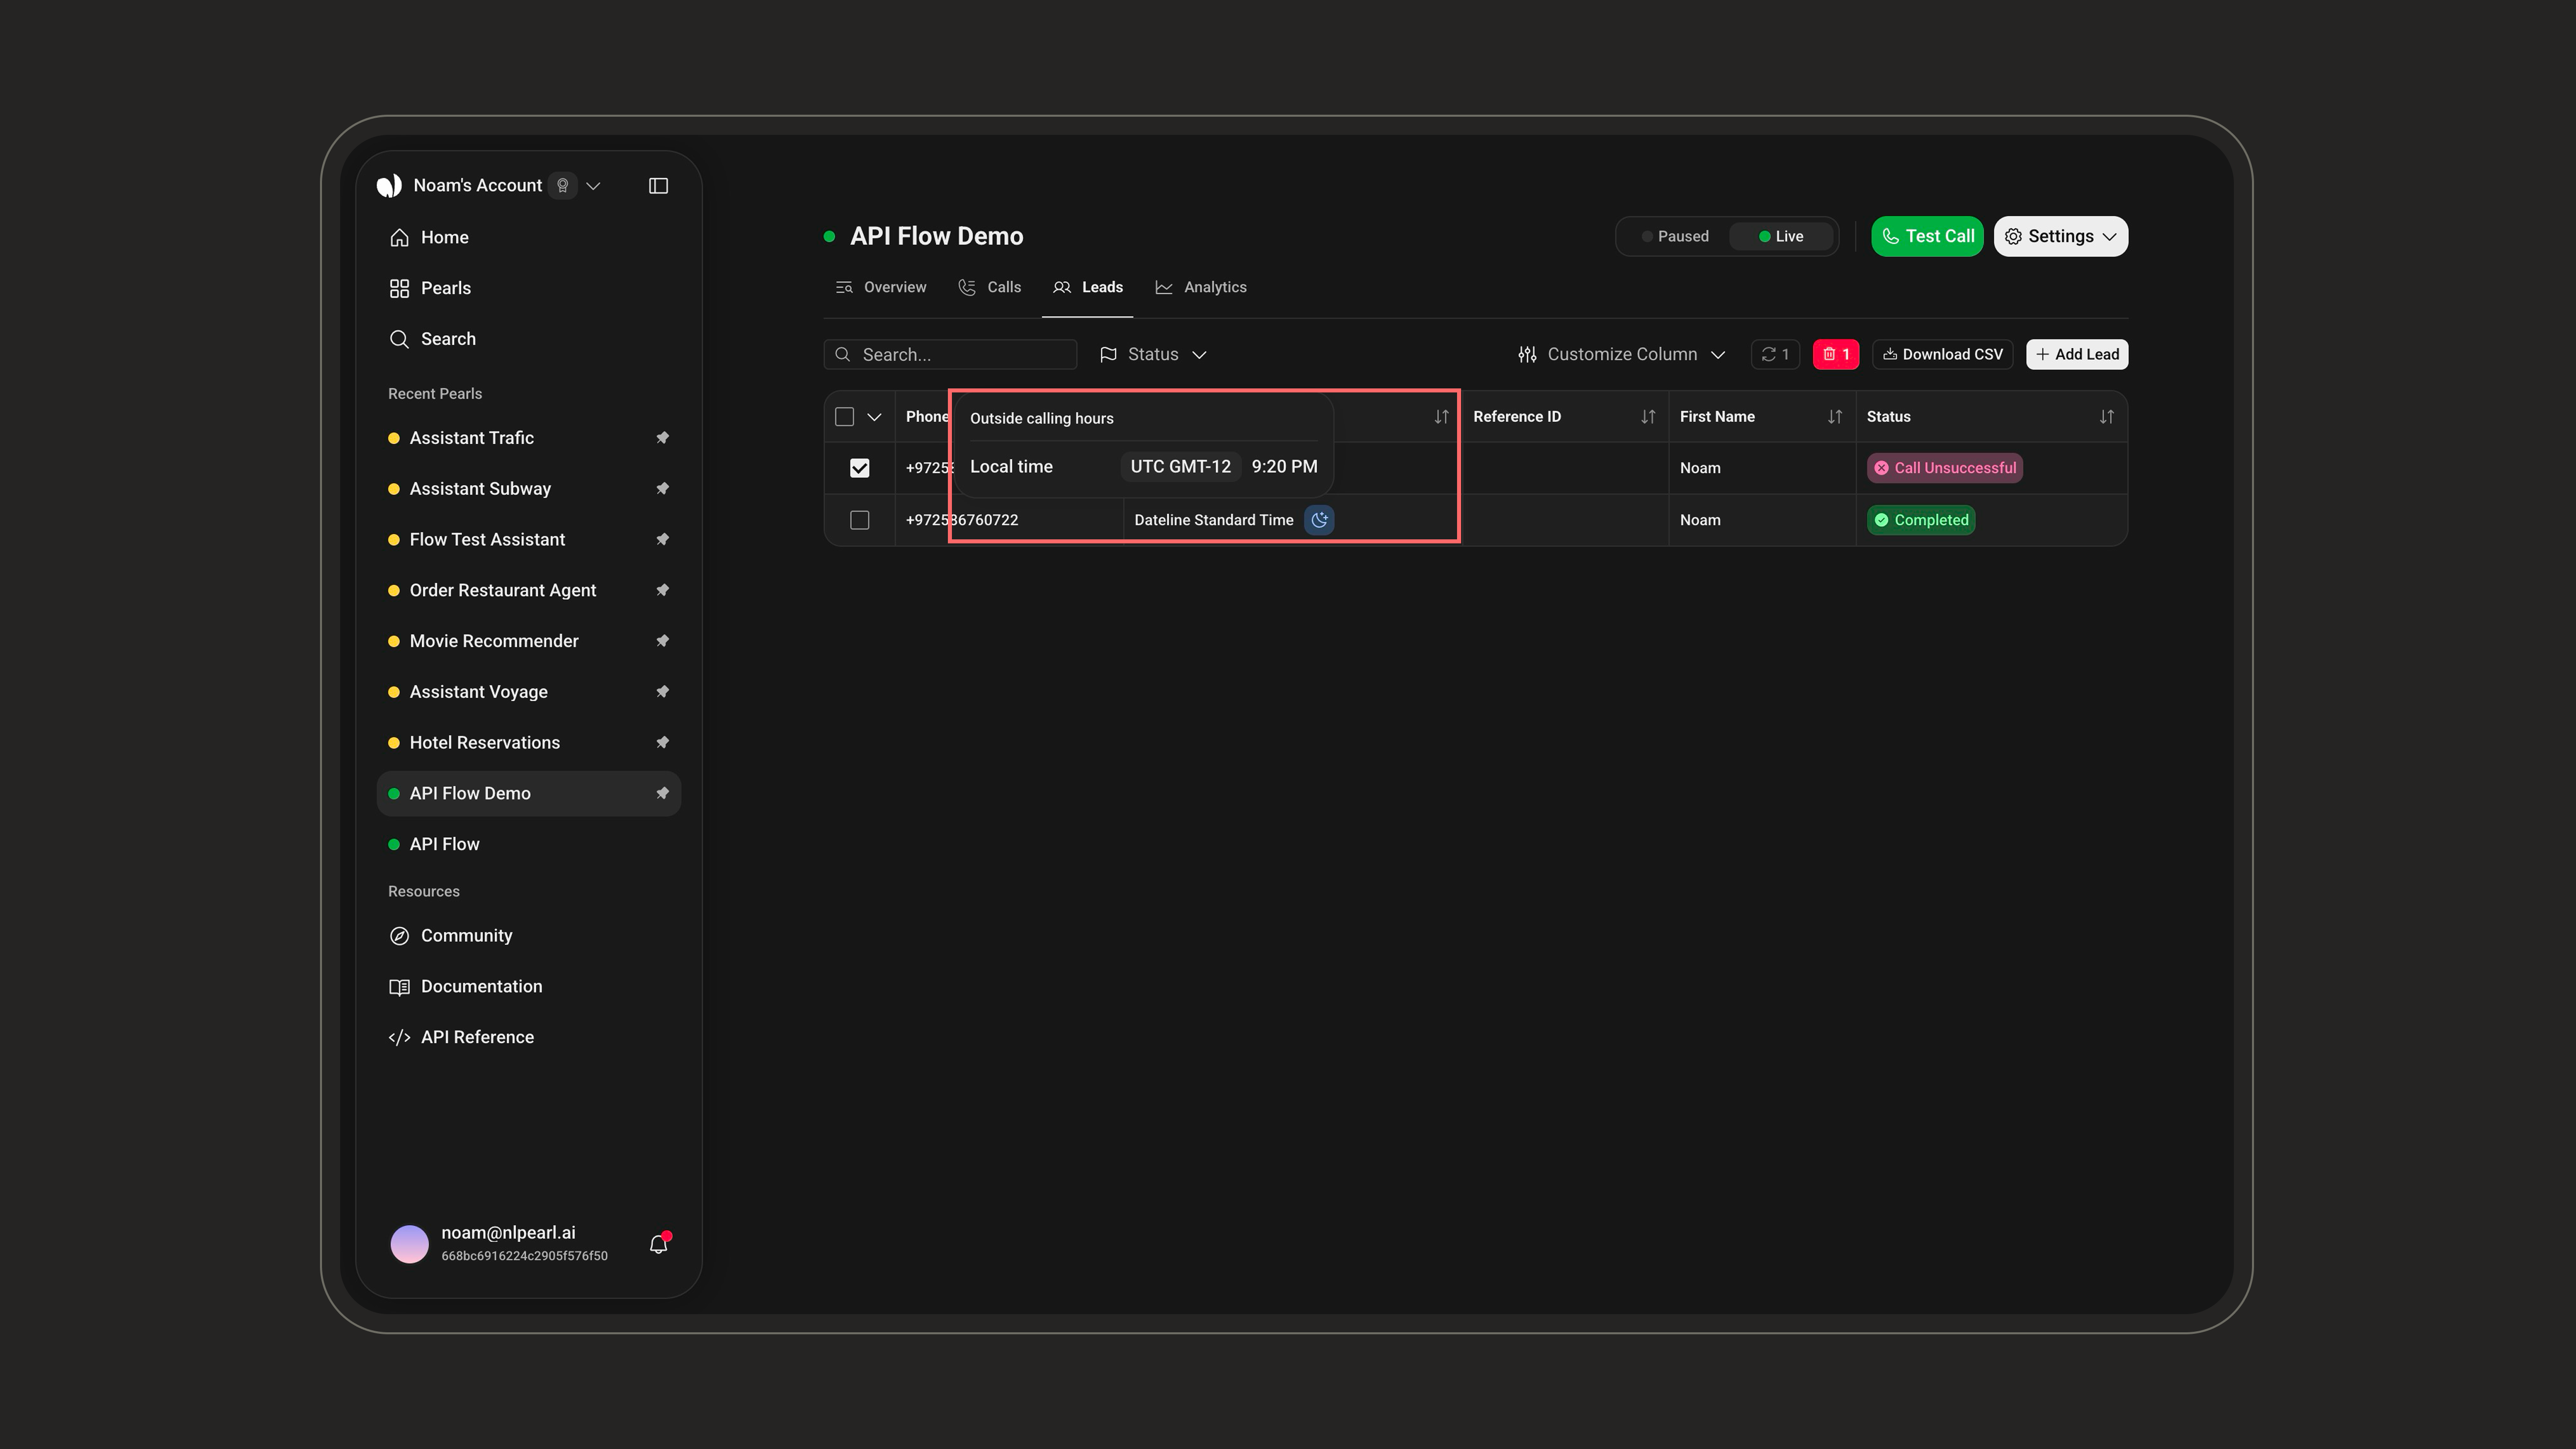
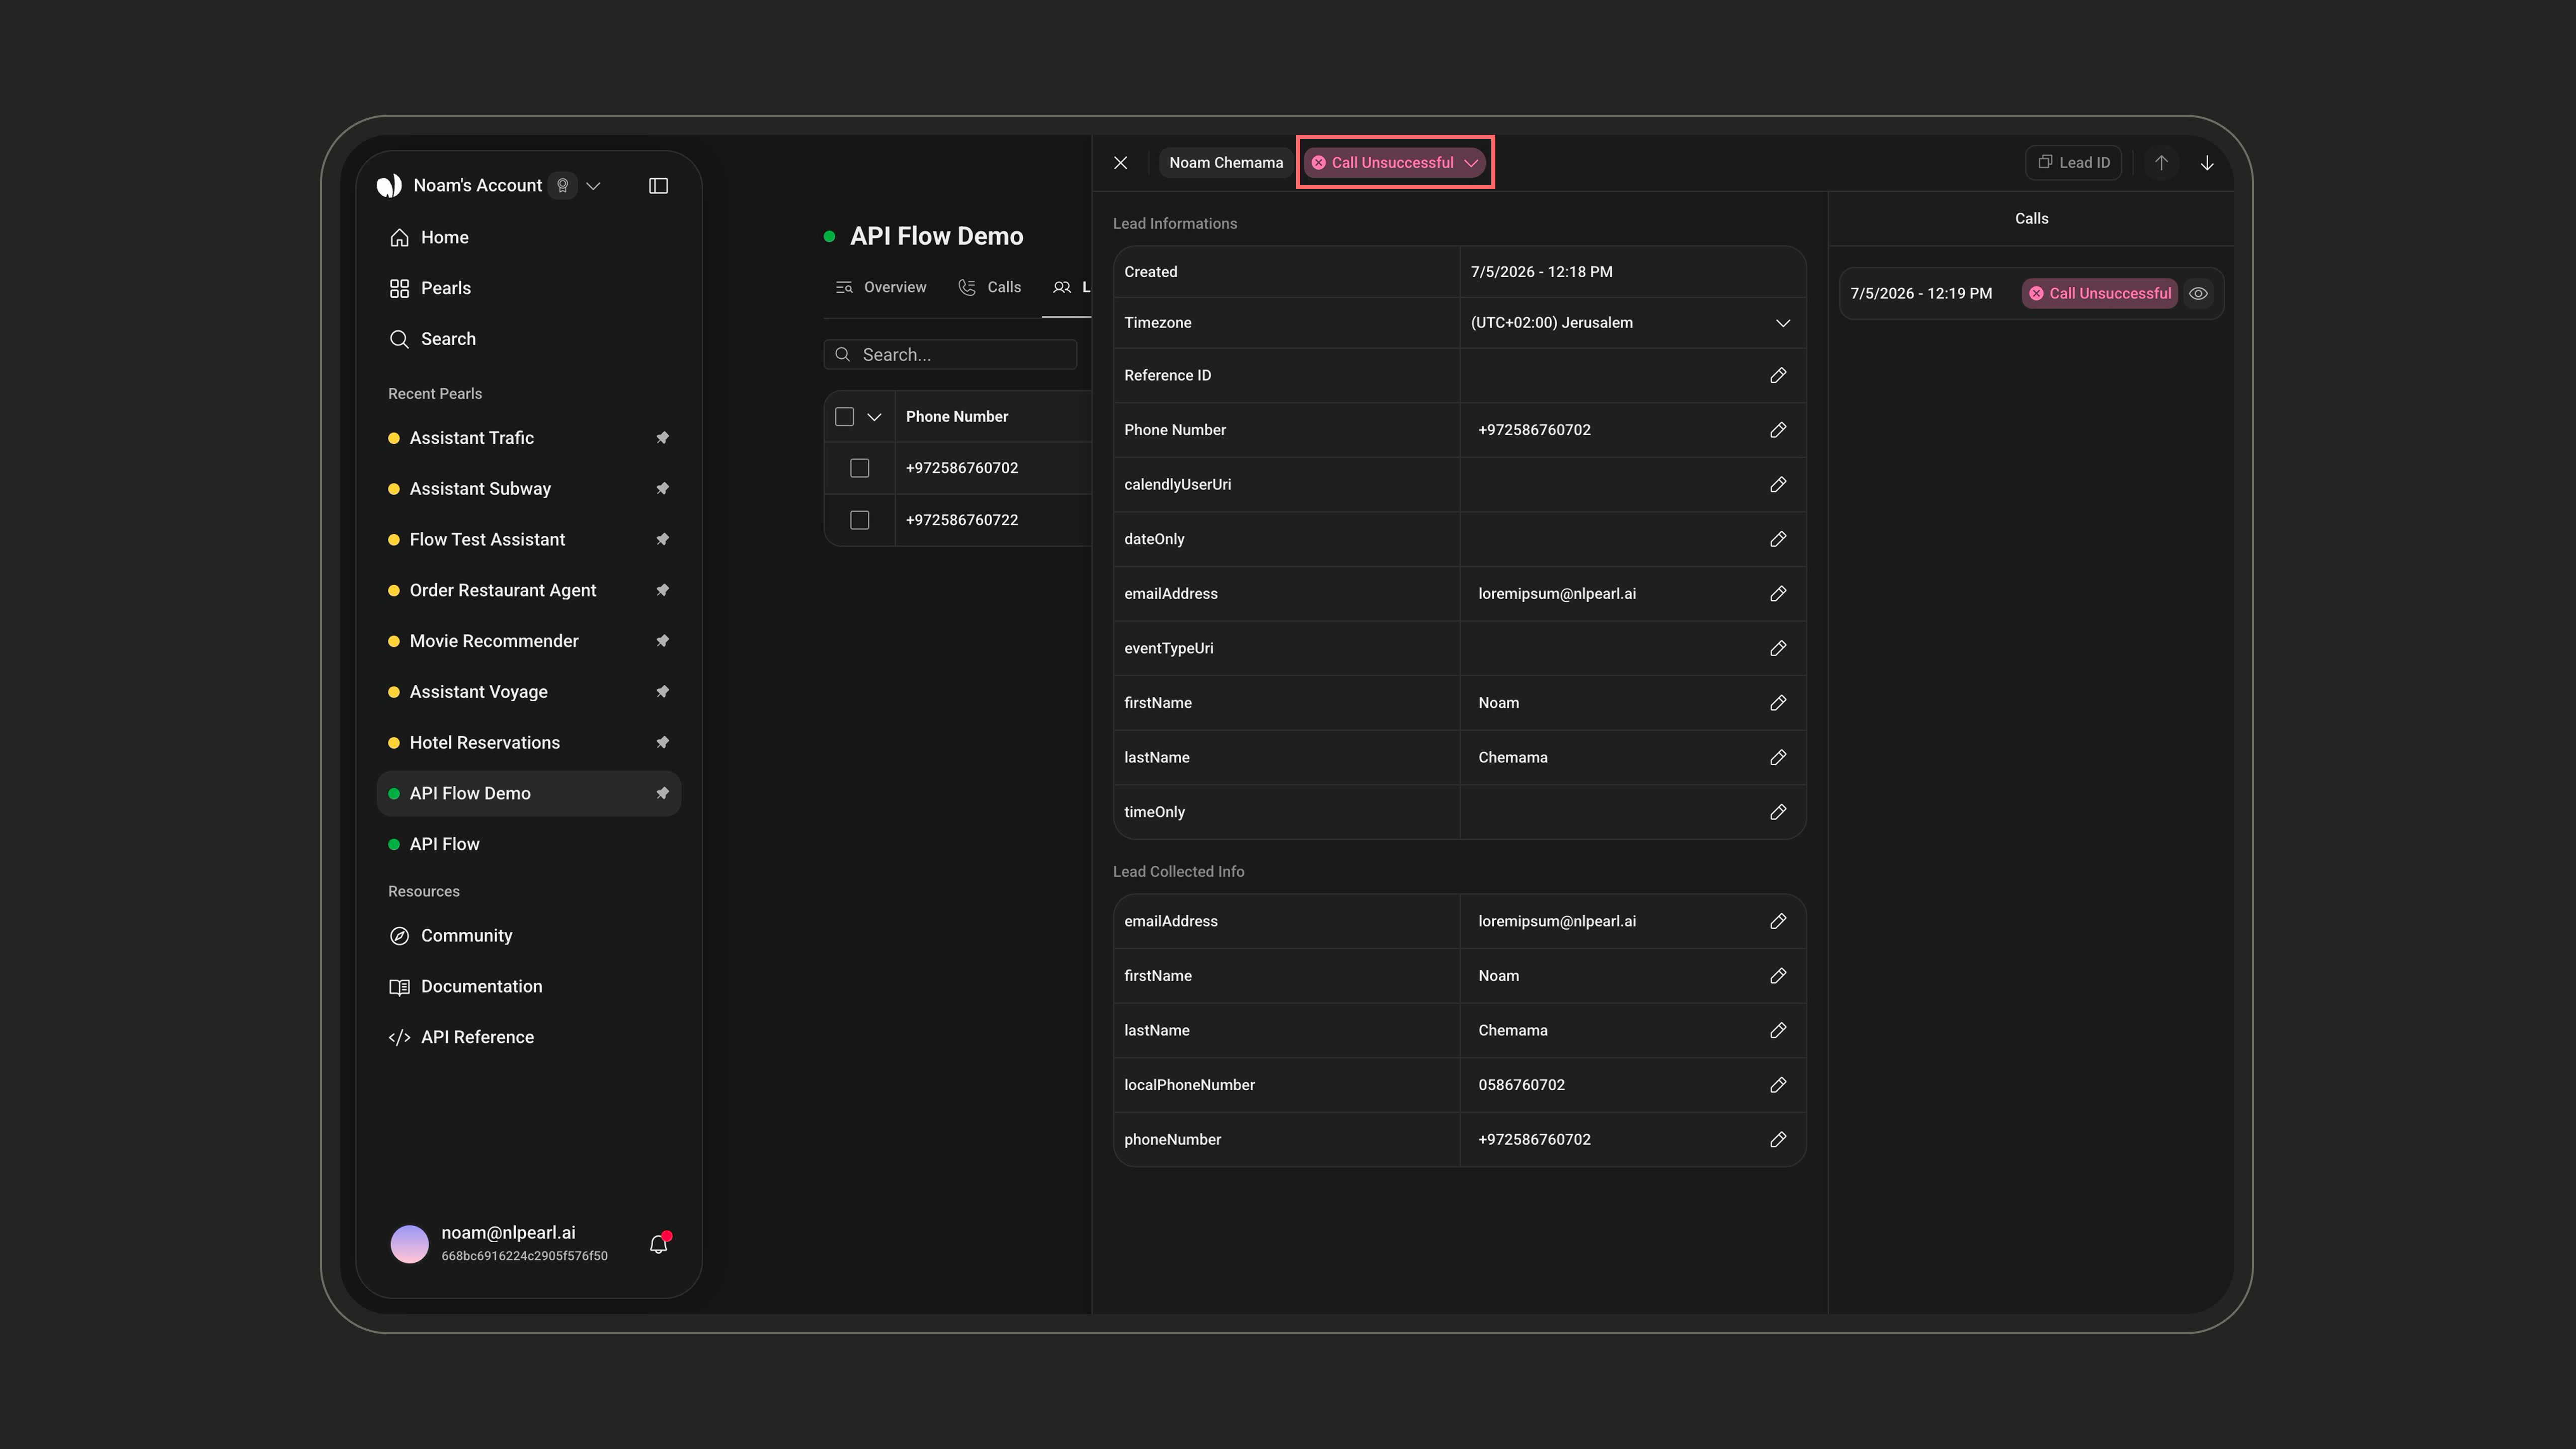
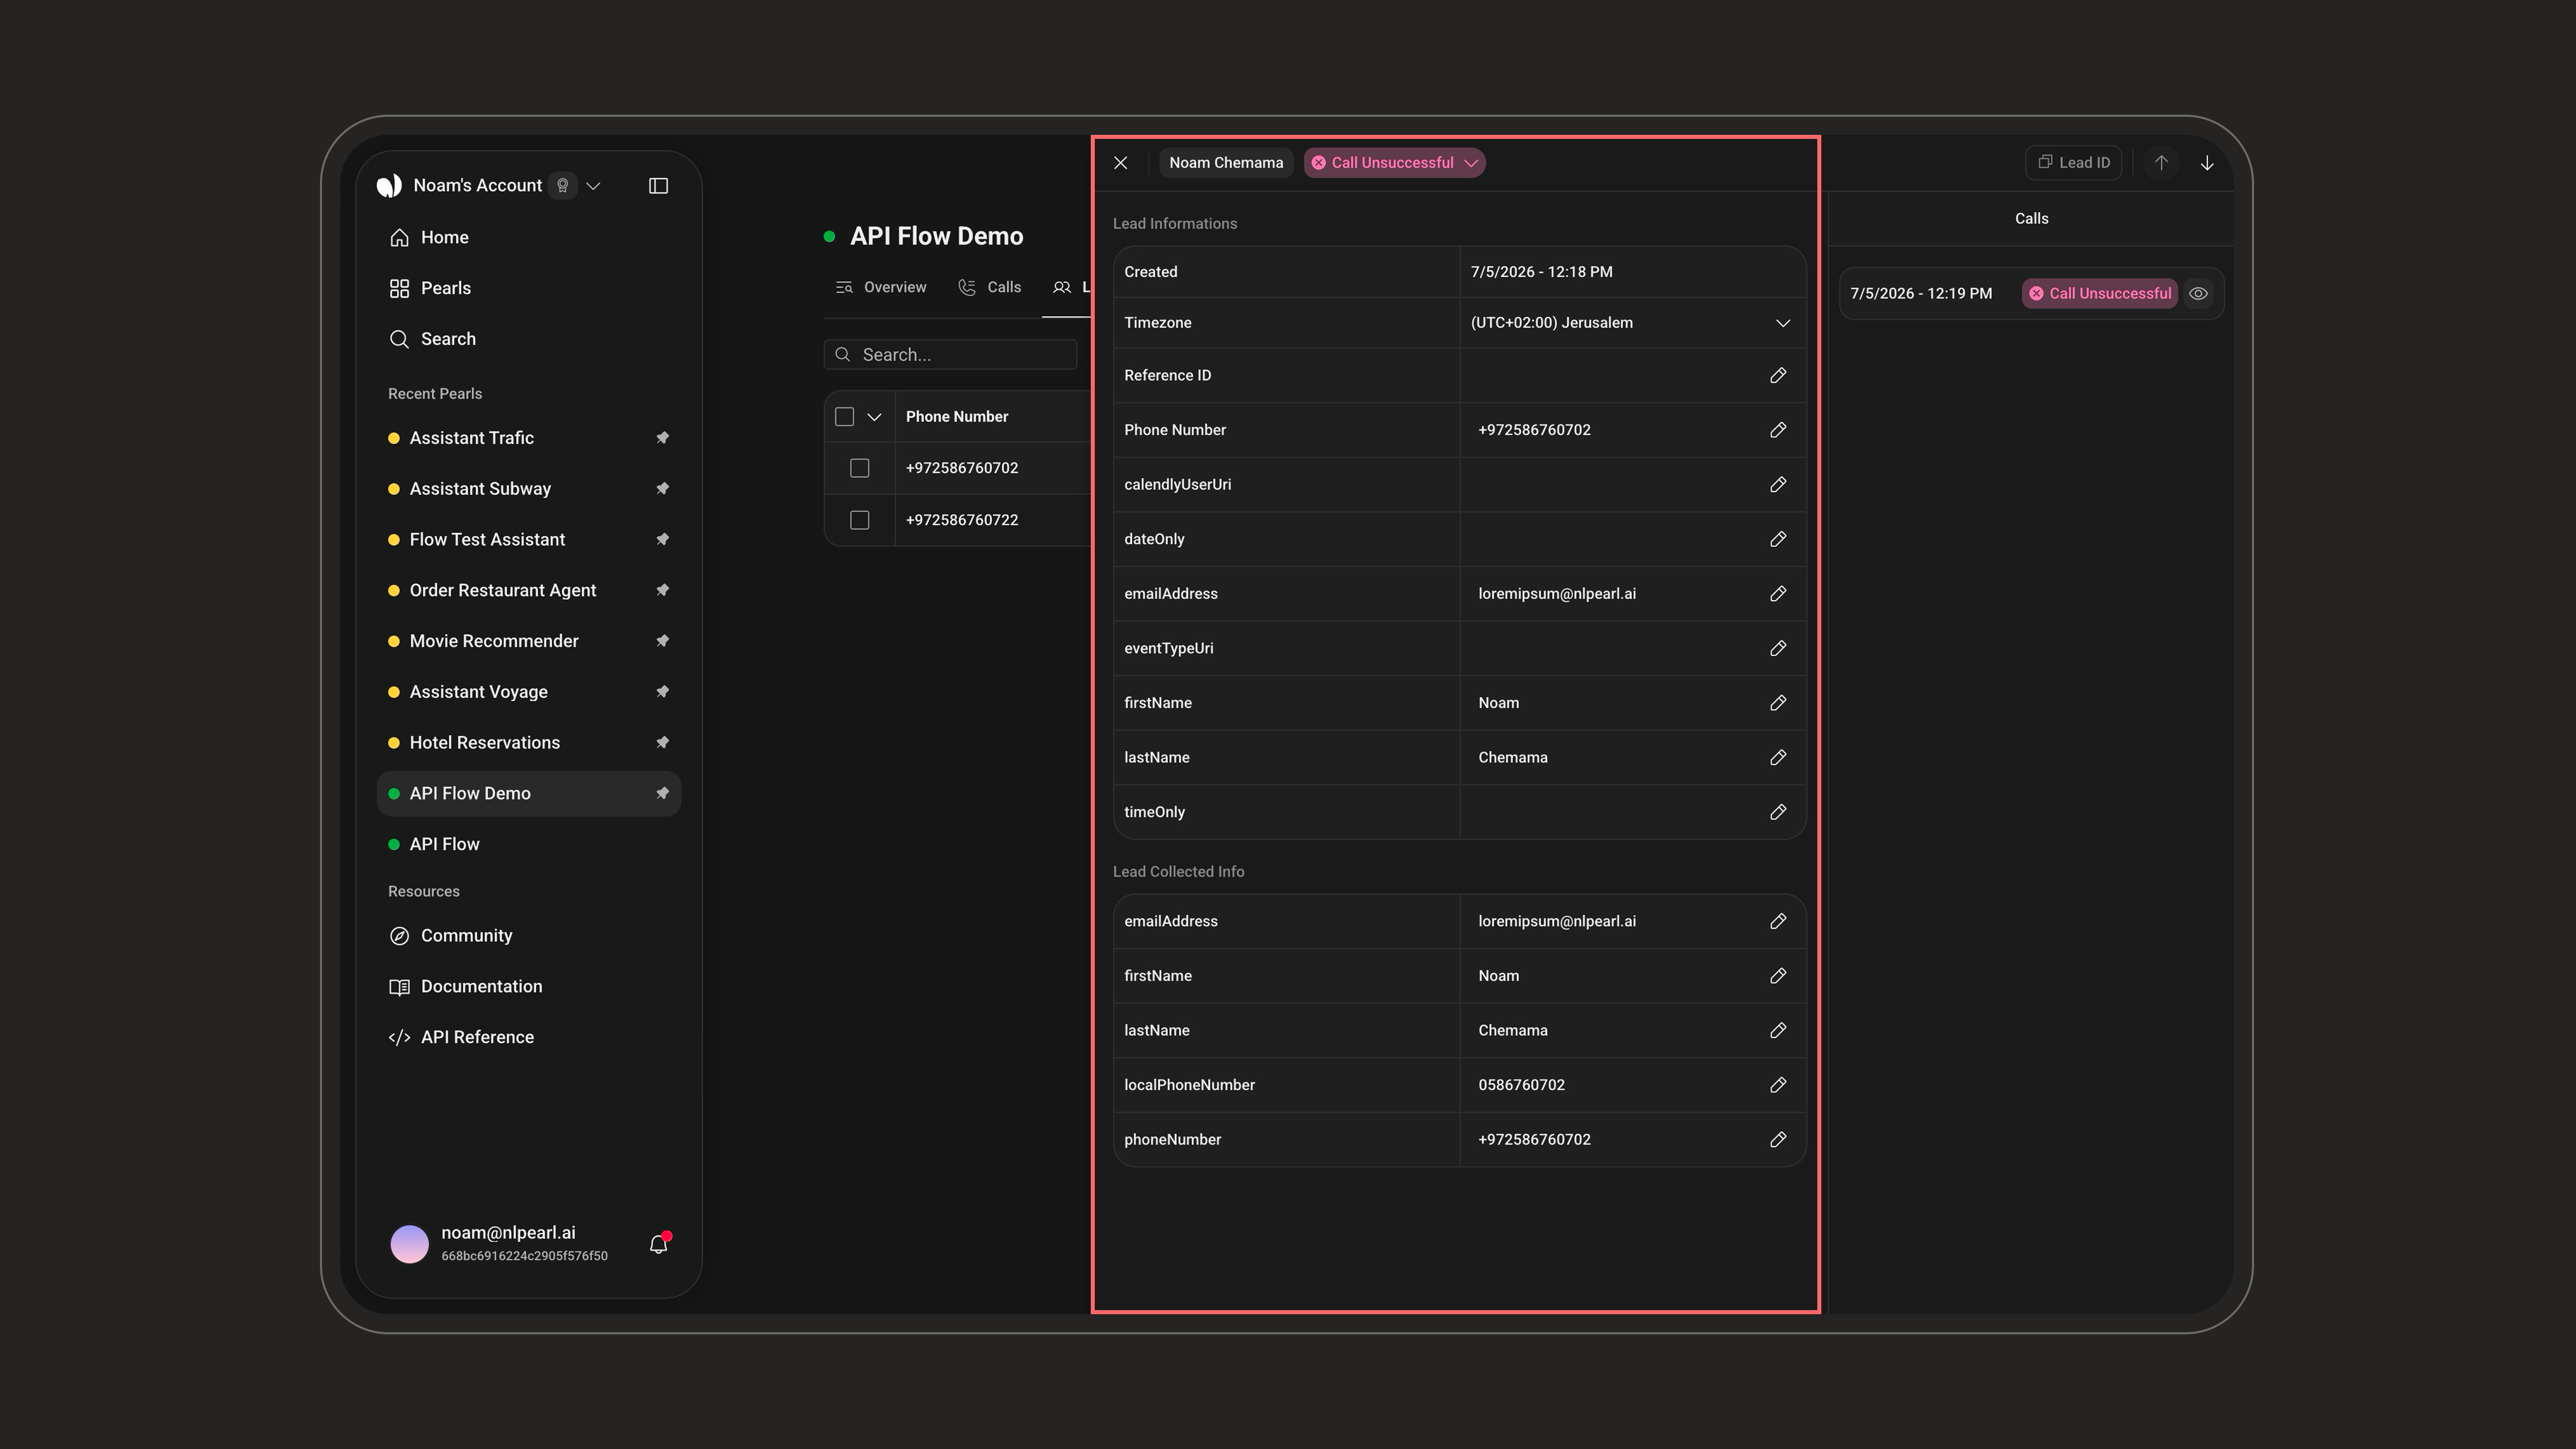
Lead Details
Click a lead to open its details panel. Use the arrows or ↑/↓ keys to move between leads. The header shows the lead’s name (or phone number), its Lead ID (copyable), and its status.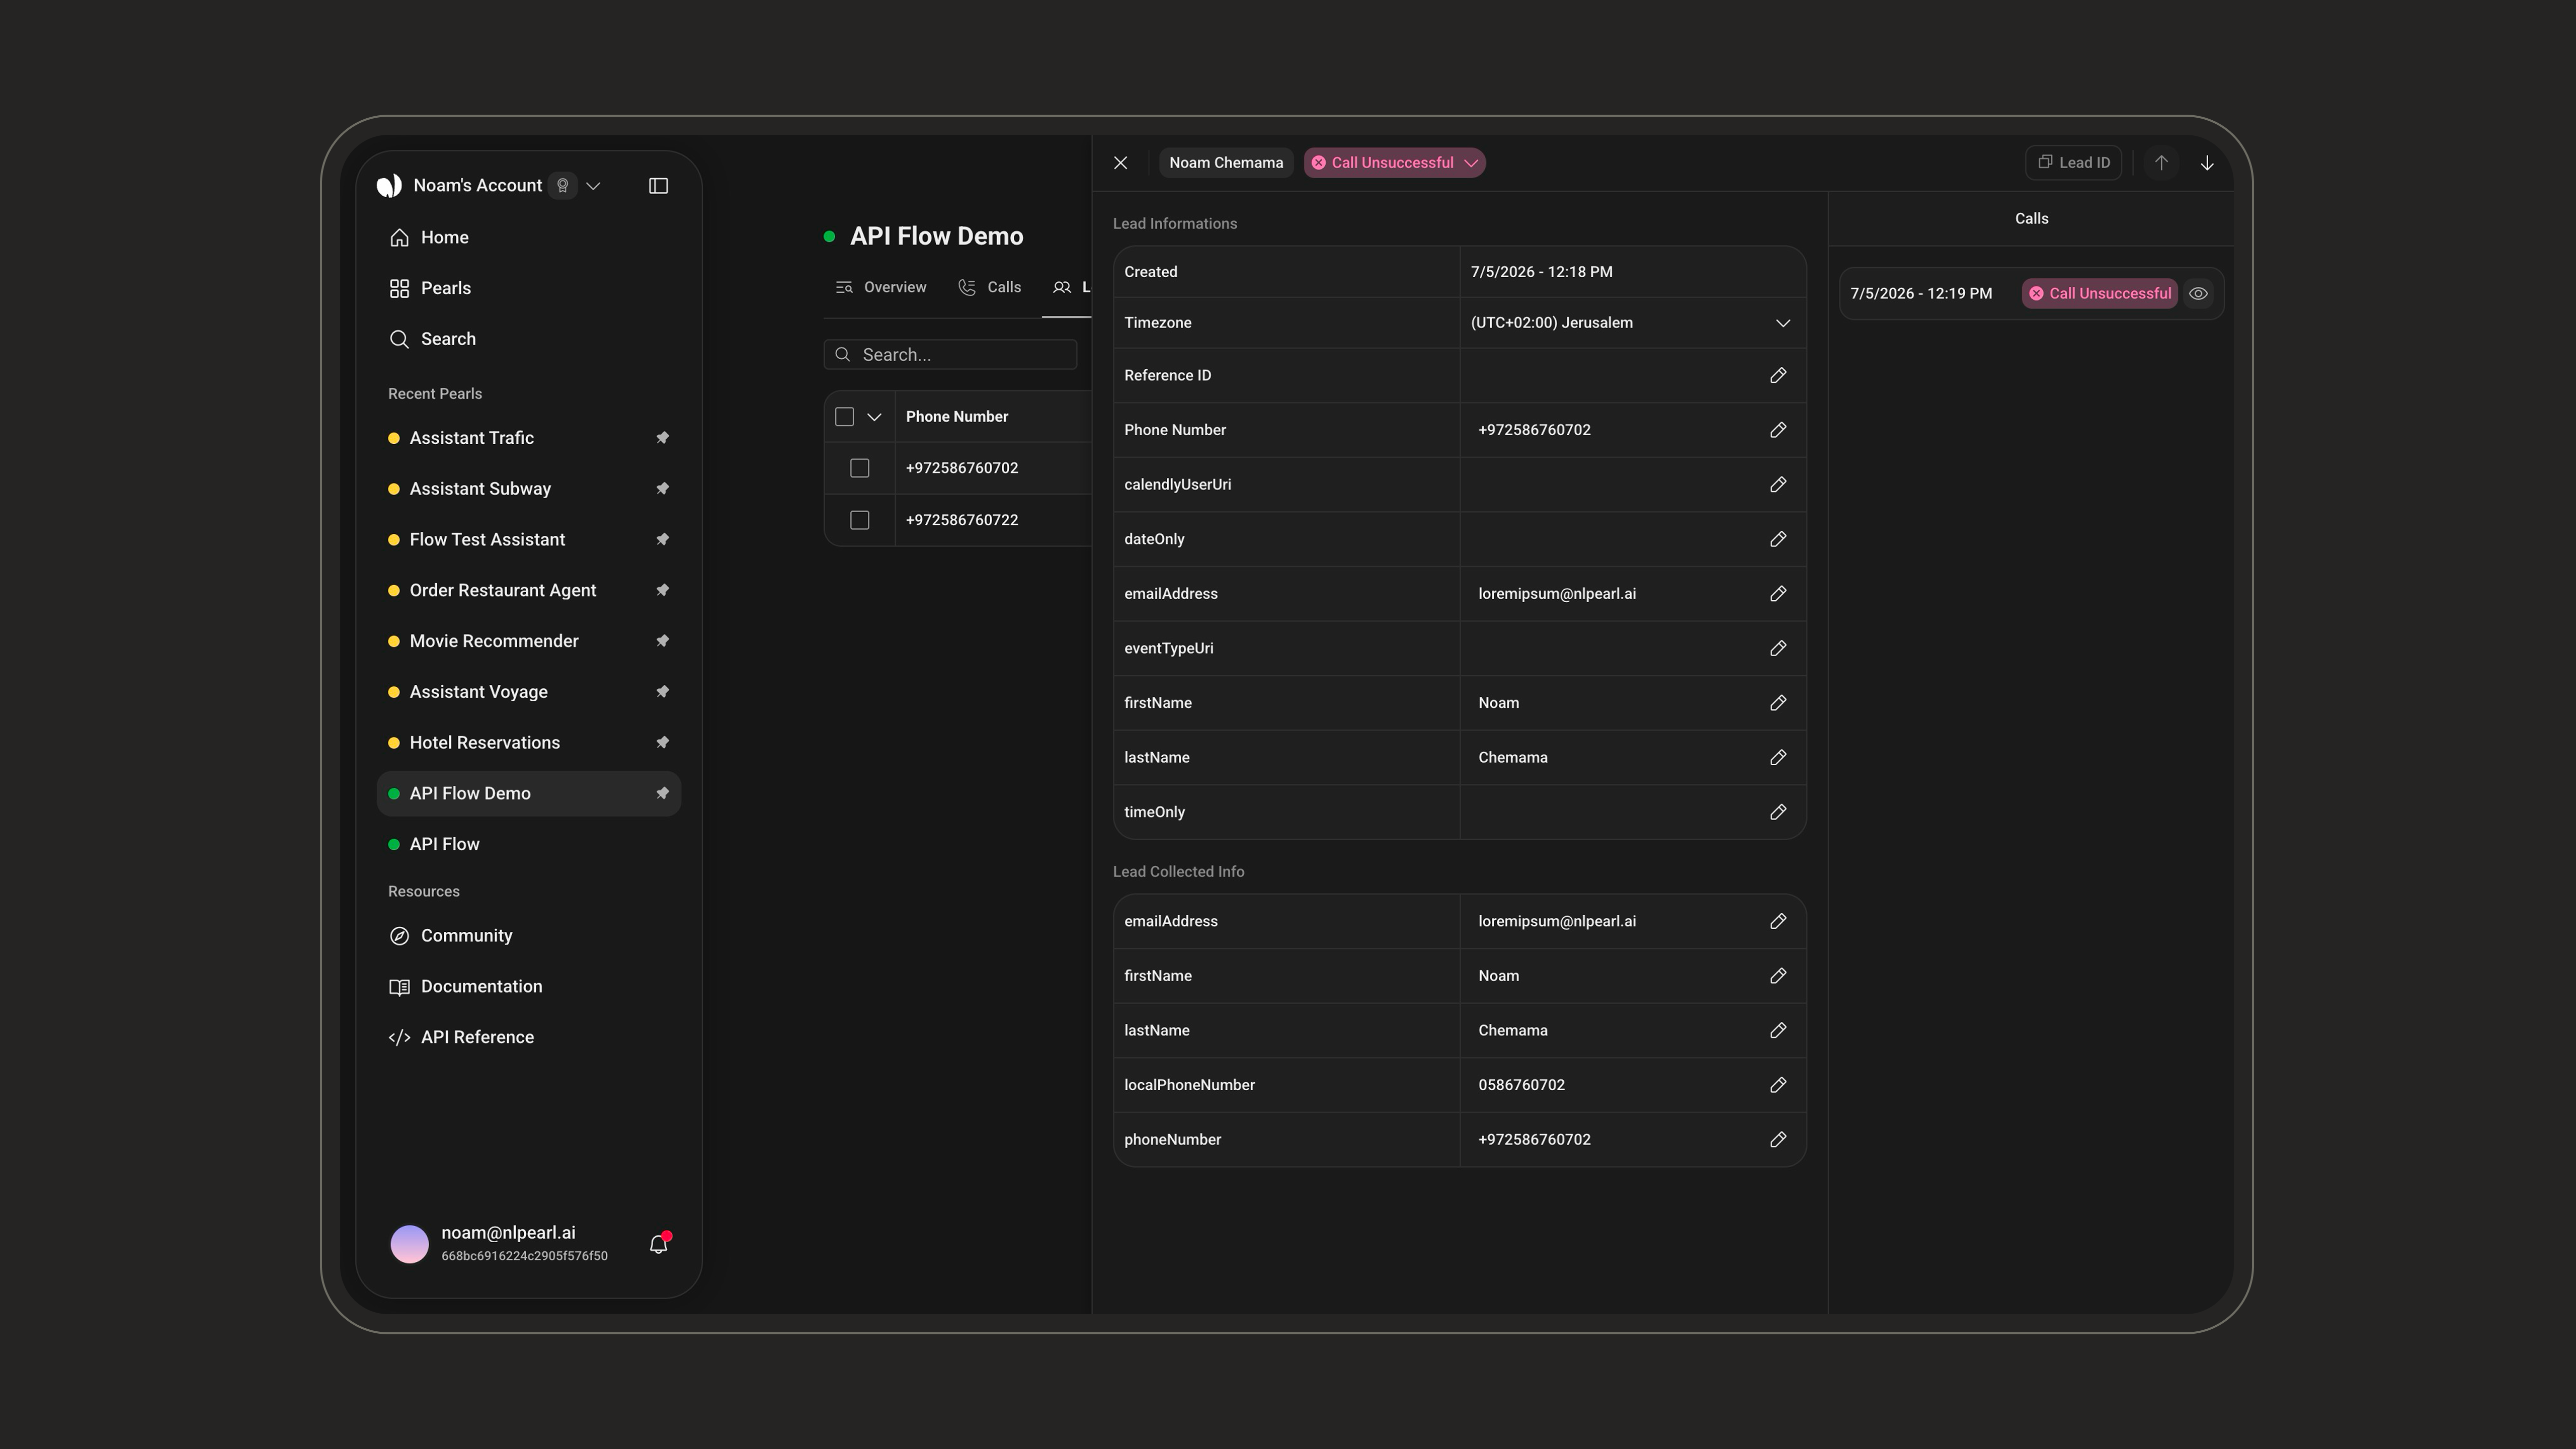
- Lead data: values you provided up front (imported or entered variables).
- Lead Collected Info: values Pearl gathered during the conversation.

Post Call
See everything captured after a call: outcome, transcript, summary, and collected data.