
Overview
What is PearlVibe?
PearlVibe is an AI‑assisted flow editor for building your agents - both voice (phone) and text agents. You build your Pearl as a decision tree made of nodes (dialogue, actions, integrations…) and transitions (what happens next depending on user intent, answers, or conversation outcome).You can work in two complementary ways:
What can you build with PearlVibe?
With PearlVibe, you can design both voice (phone) and text (chat) flows:Each of these works the same way whether your Pearl is voice or text — you build the flow once, and the editor adapts labels and available nodes to your Pearl’s channel.
Key benefits
- Build in minutes instead of days – Use the chat to describe what you want, then refine visually.
- Safe versioning – Work in a separate version with autosave while your Published version keeps running in production.
- Visual understanding of calls – Use test calls and live node highlighting to see exactly how calls traverse your flow.
- Structured but flexible – Combine high‑level “vibes” (global instructions, personality) with precise node and transition logic.
Header
The header is always visible at the top of the editor. From left to right, it holds the Pearl icon (menu) and the editable Pearl title with its autosave indicator, the version selector, the top navigation tabs, and — on the right — the credentials & variables ({ }) button, Test Call, and Publish. Each of these is detailed below.
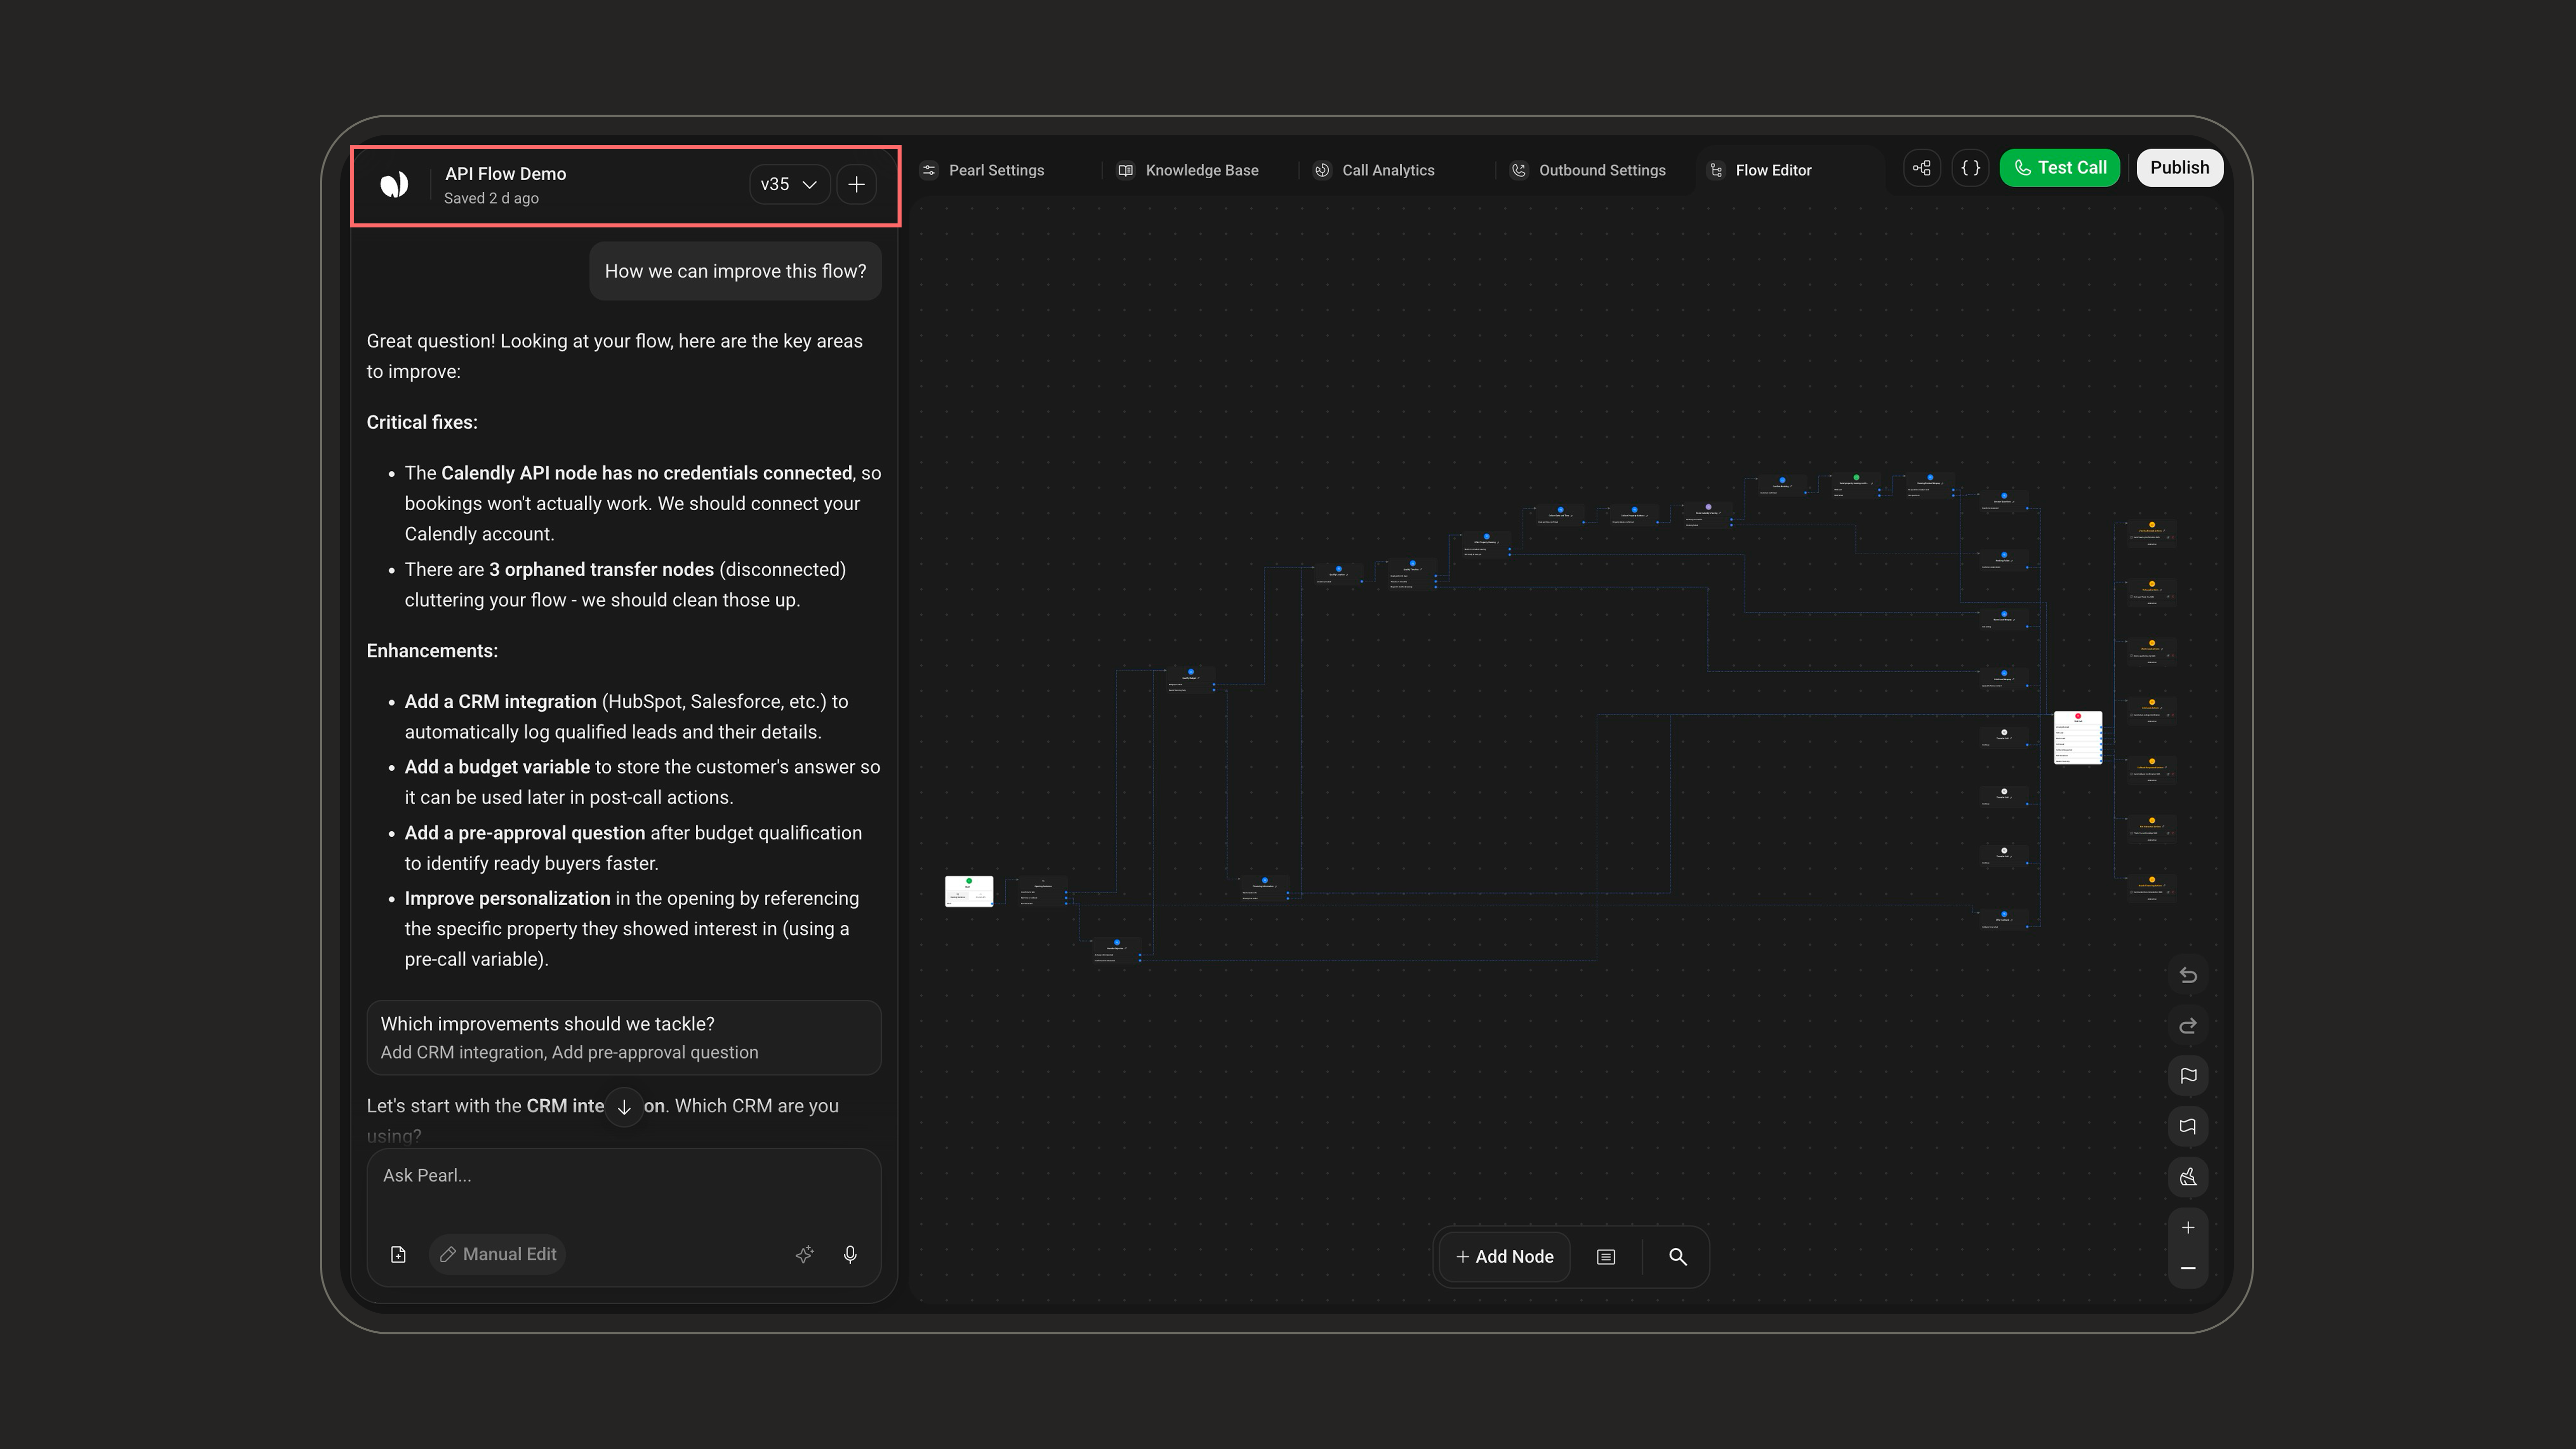
The top-left corner shows the Pearl’s title as an inline, editable field (it reads Untitled Pearl by default). Click it to rename your Pearl — this is the label you’ll reuse across the platform and in your workspace. Just below, an autosave indicator shows the save status (for example Saved 2 min ago).
Versioning & Publishing
Versioning & Publishing
Pearl Vibe is built for safe iteration: you can experiment freely without breaking your live calls. Your work is organized into versions (v1, v2, v3…), and the one currently handling calls carries a Published badge.AutosaveEvery change you make is saved automatically. The header shows an Auto Save indicator that turns into Saved N min ago once your edits are stored, so you never lose work and can come back later.
Versions & historyThe version selector next to the title shows the version you’re editing (for example v35).
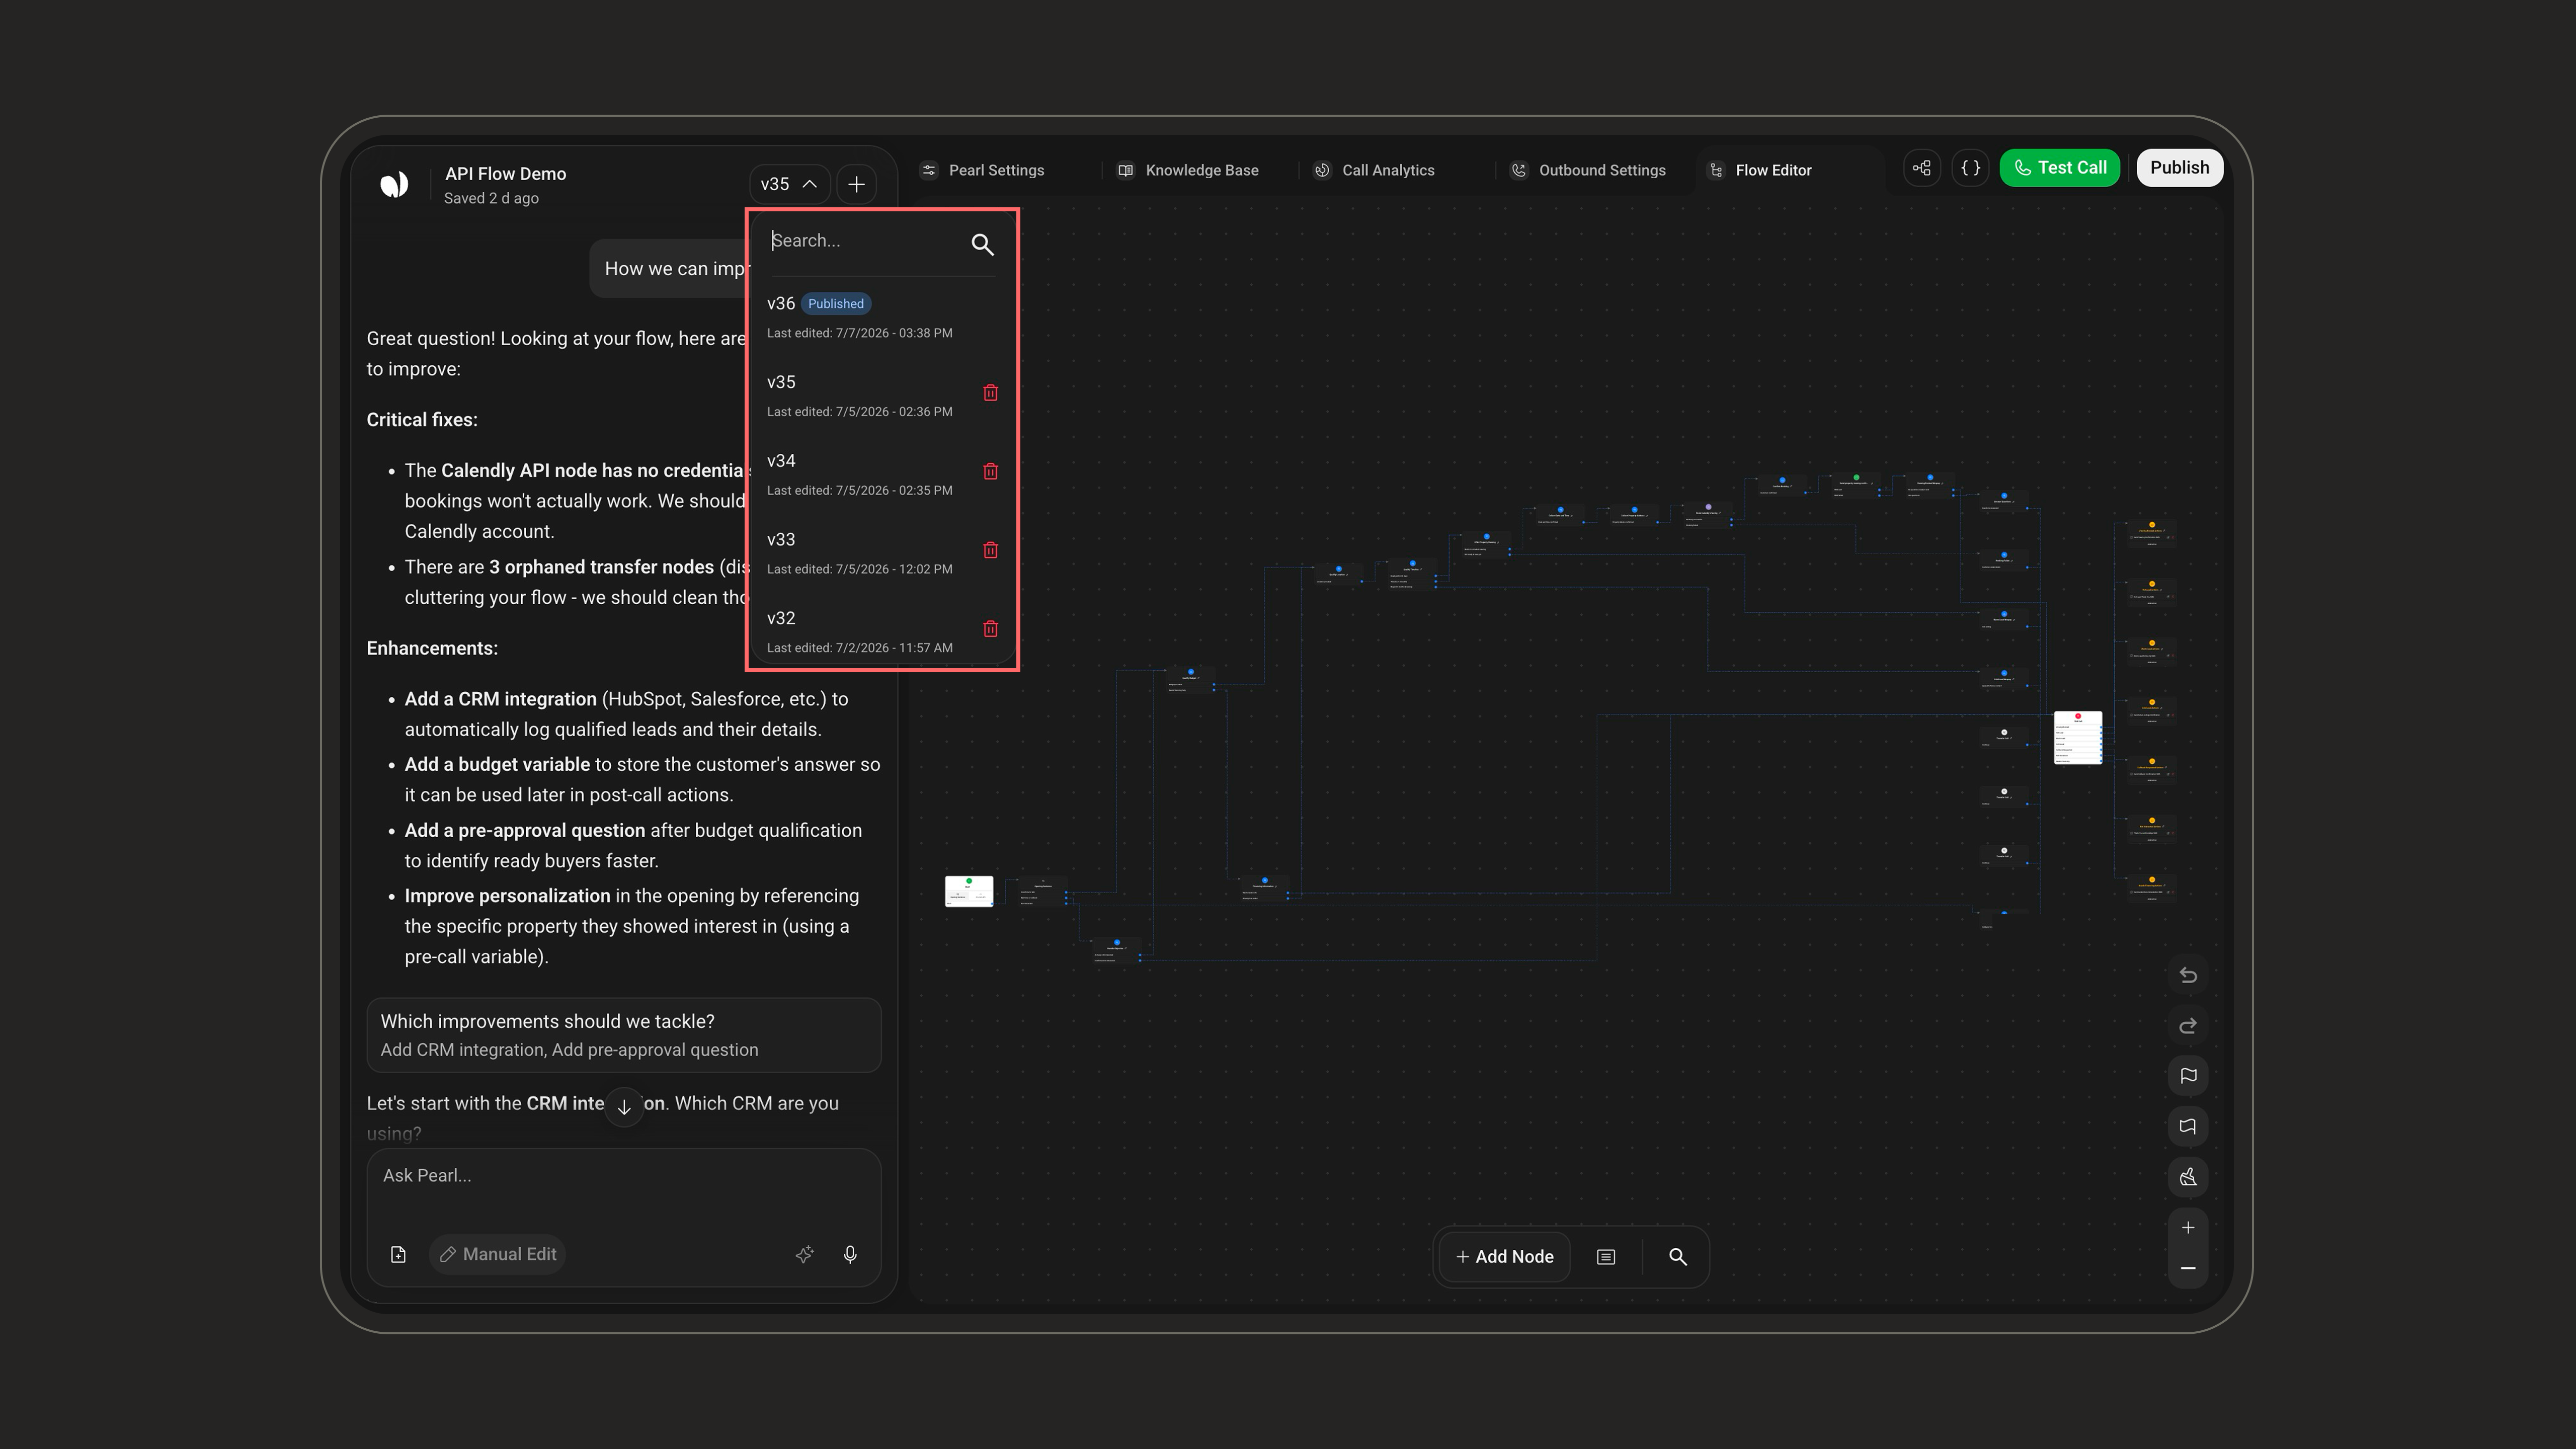
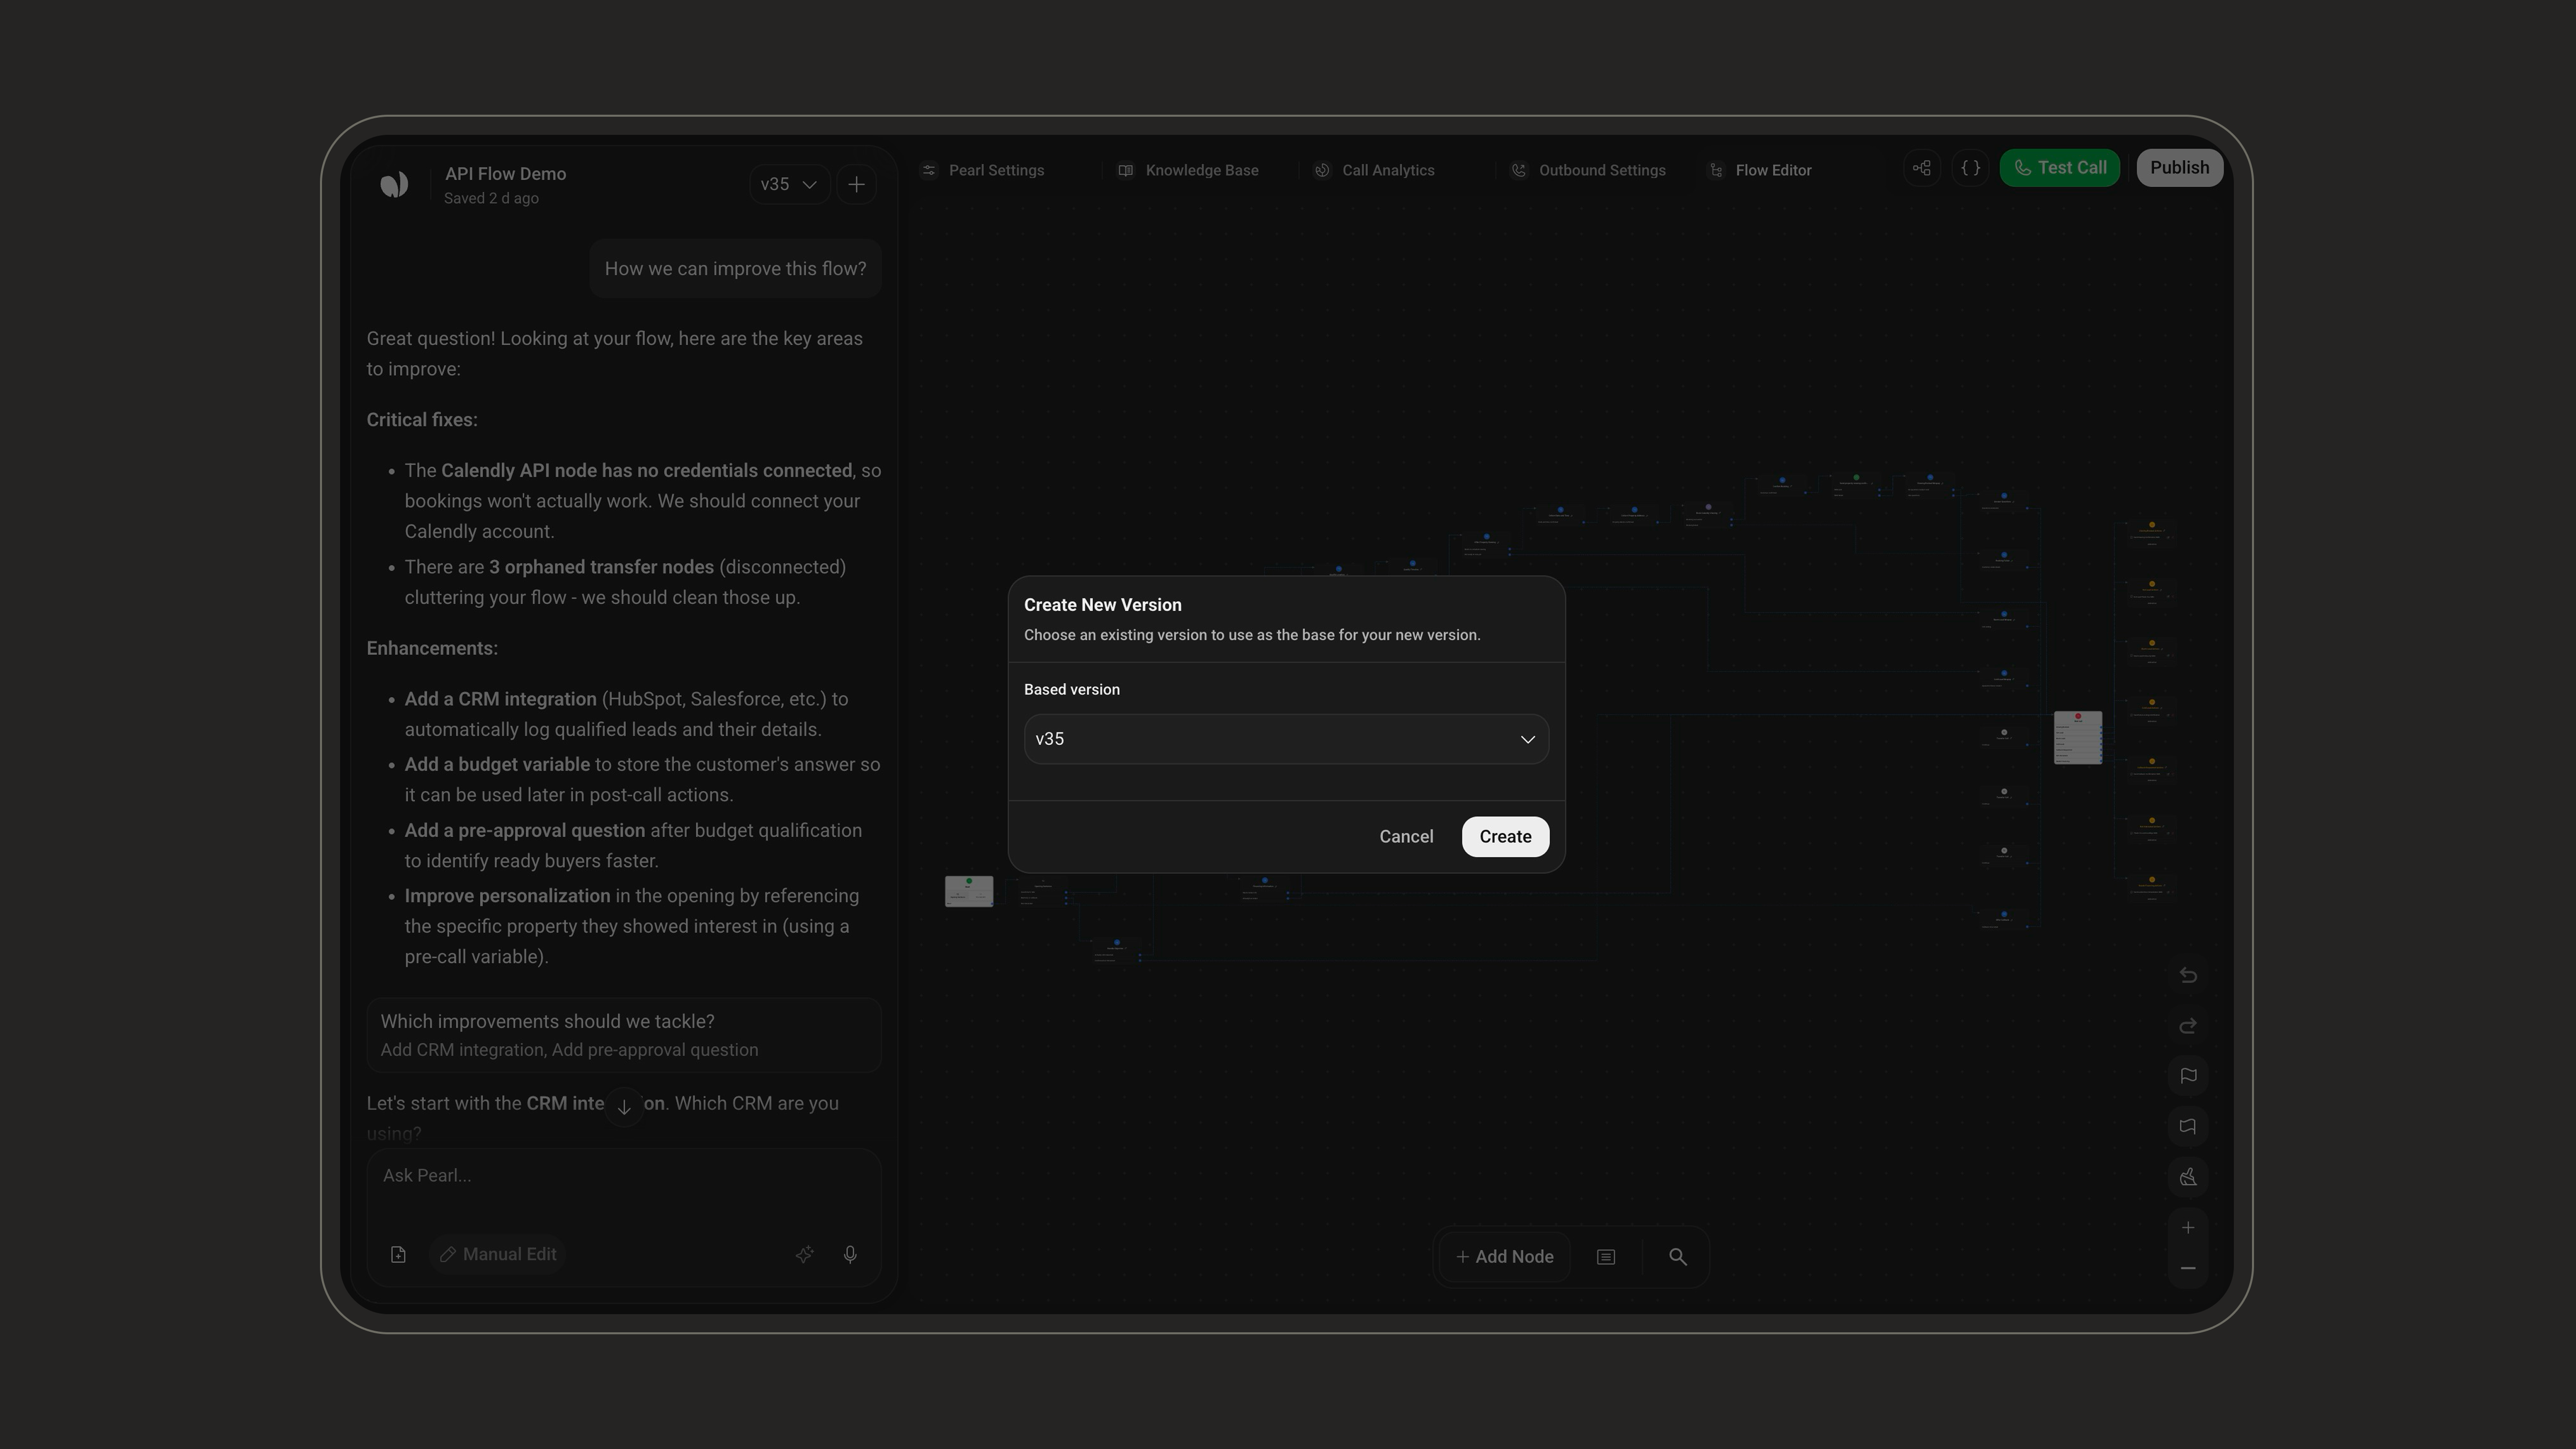
Creating a new versionUse the + button next to the version selector to create a new version.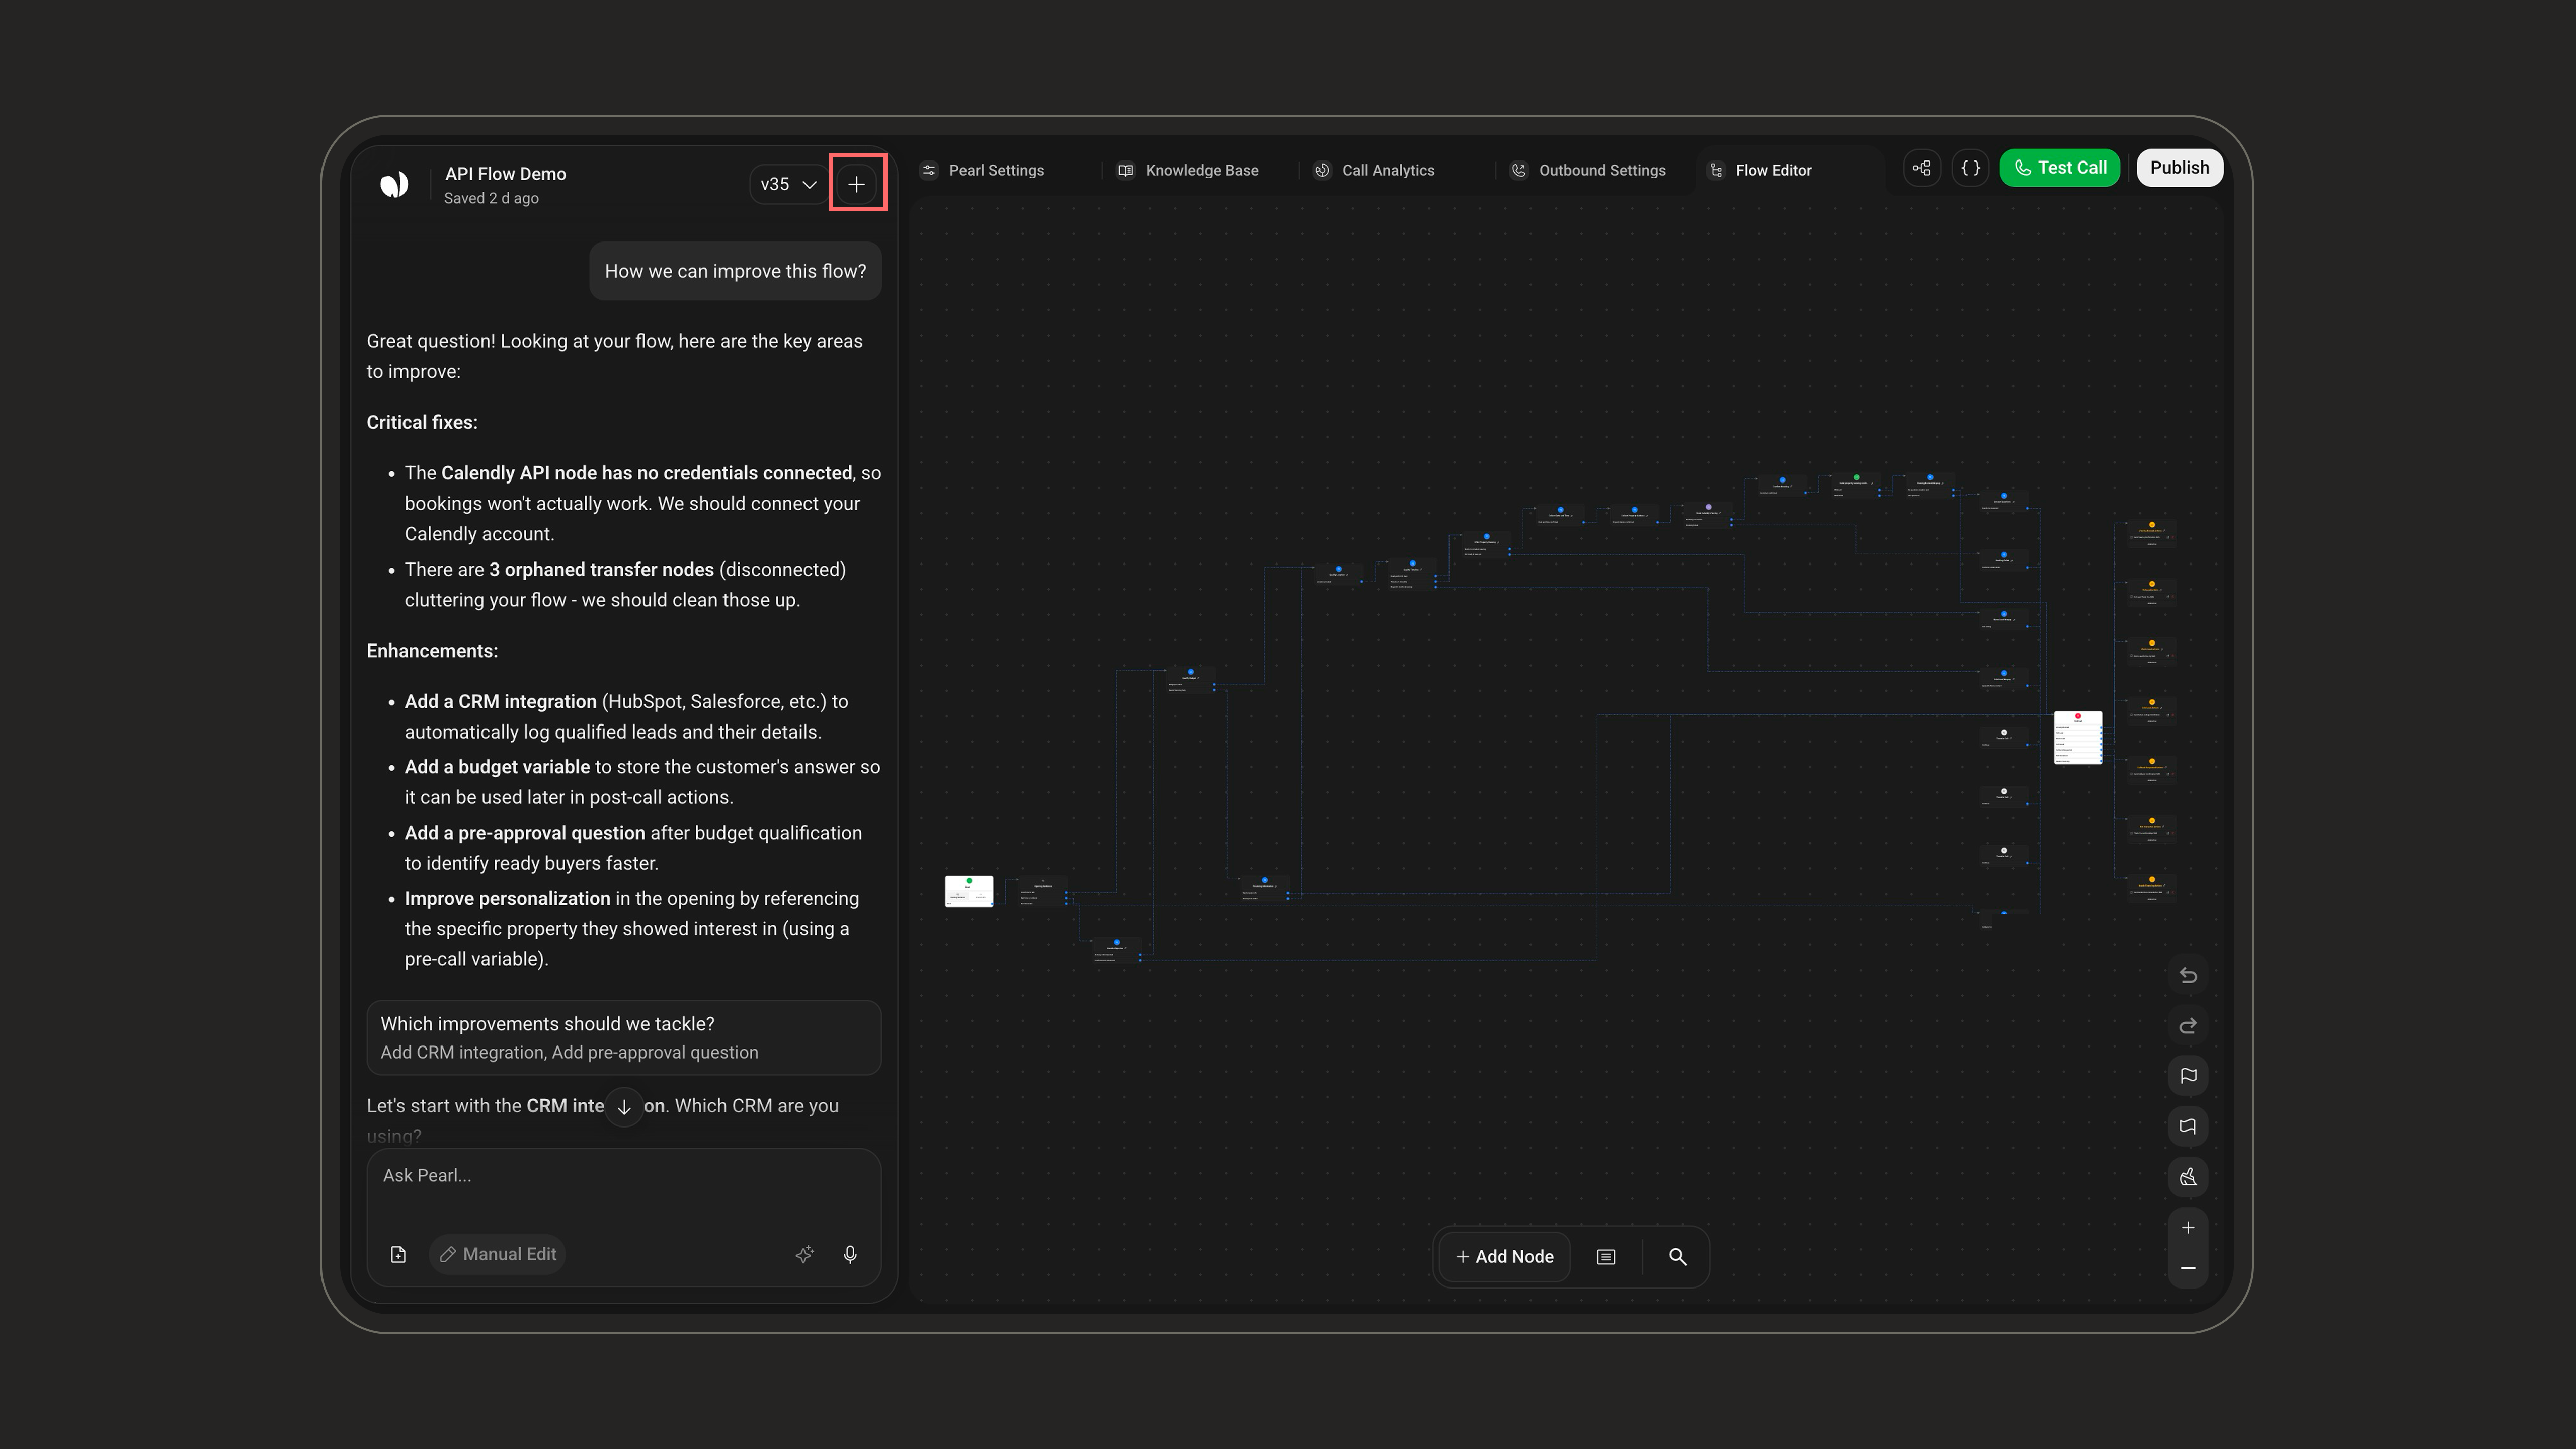
PublishingWhen you’re satisfied with your changes and tests, click Publish (top-right of the header). The current version becomes the new Published version and starts handling calls.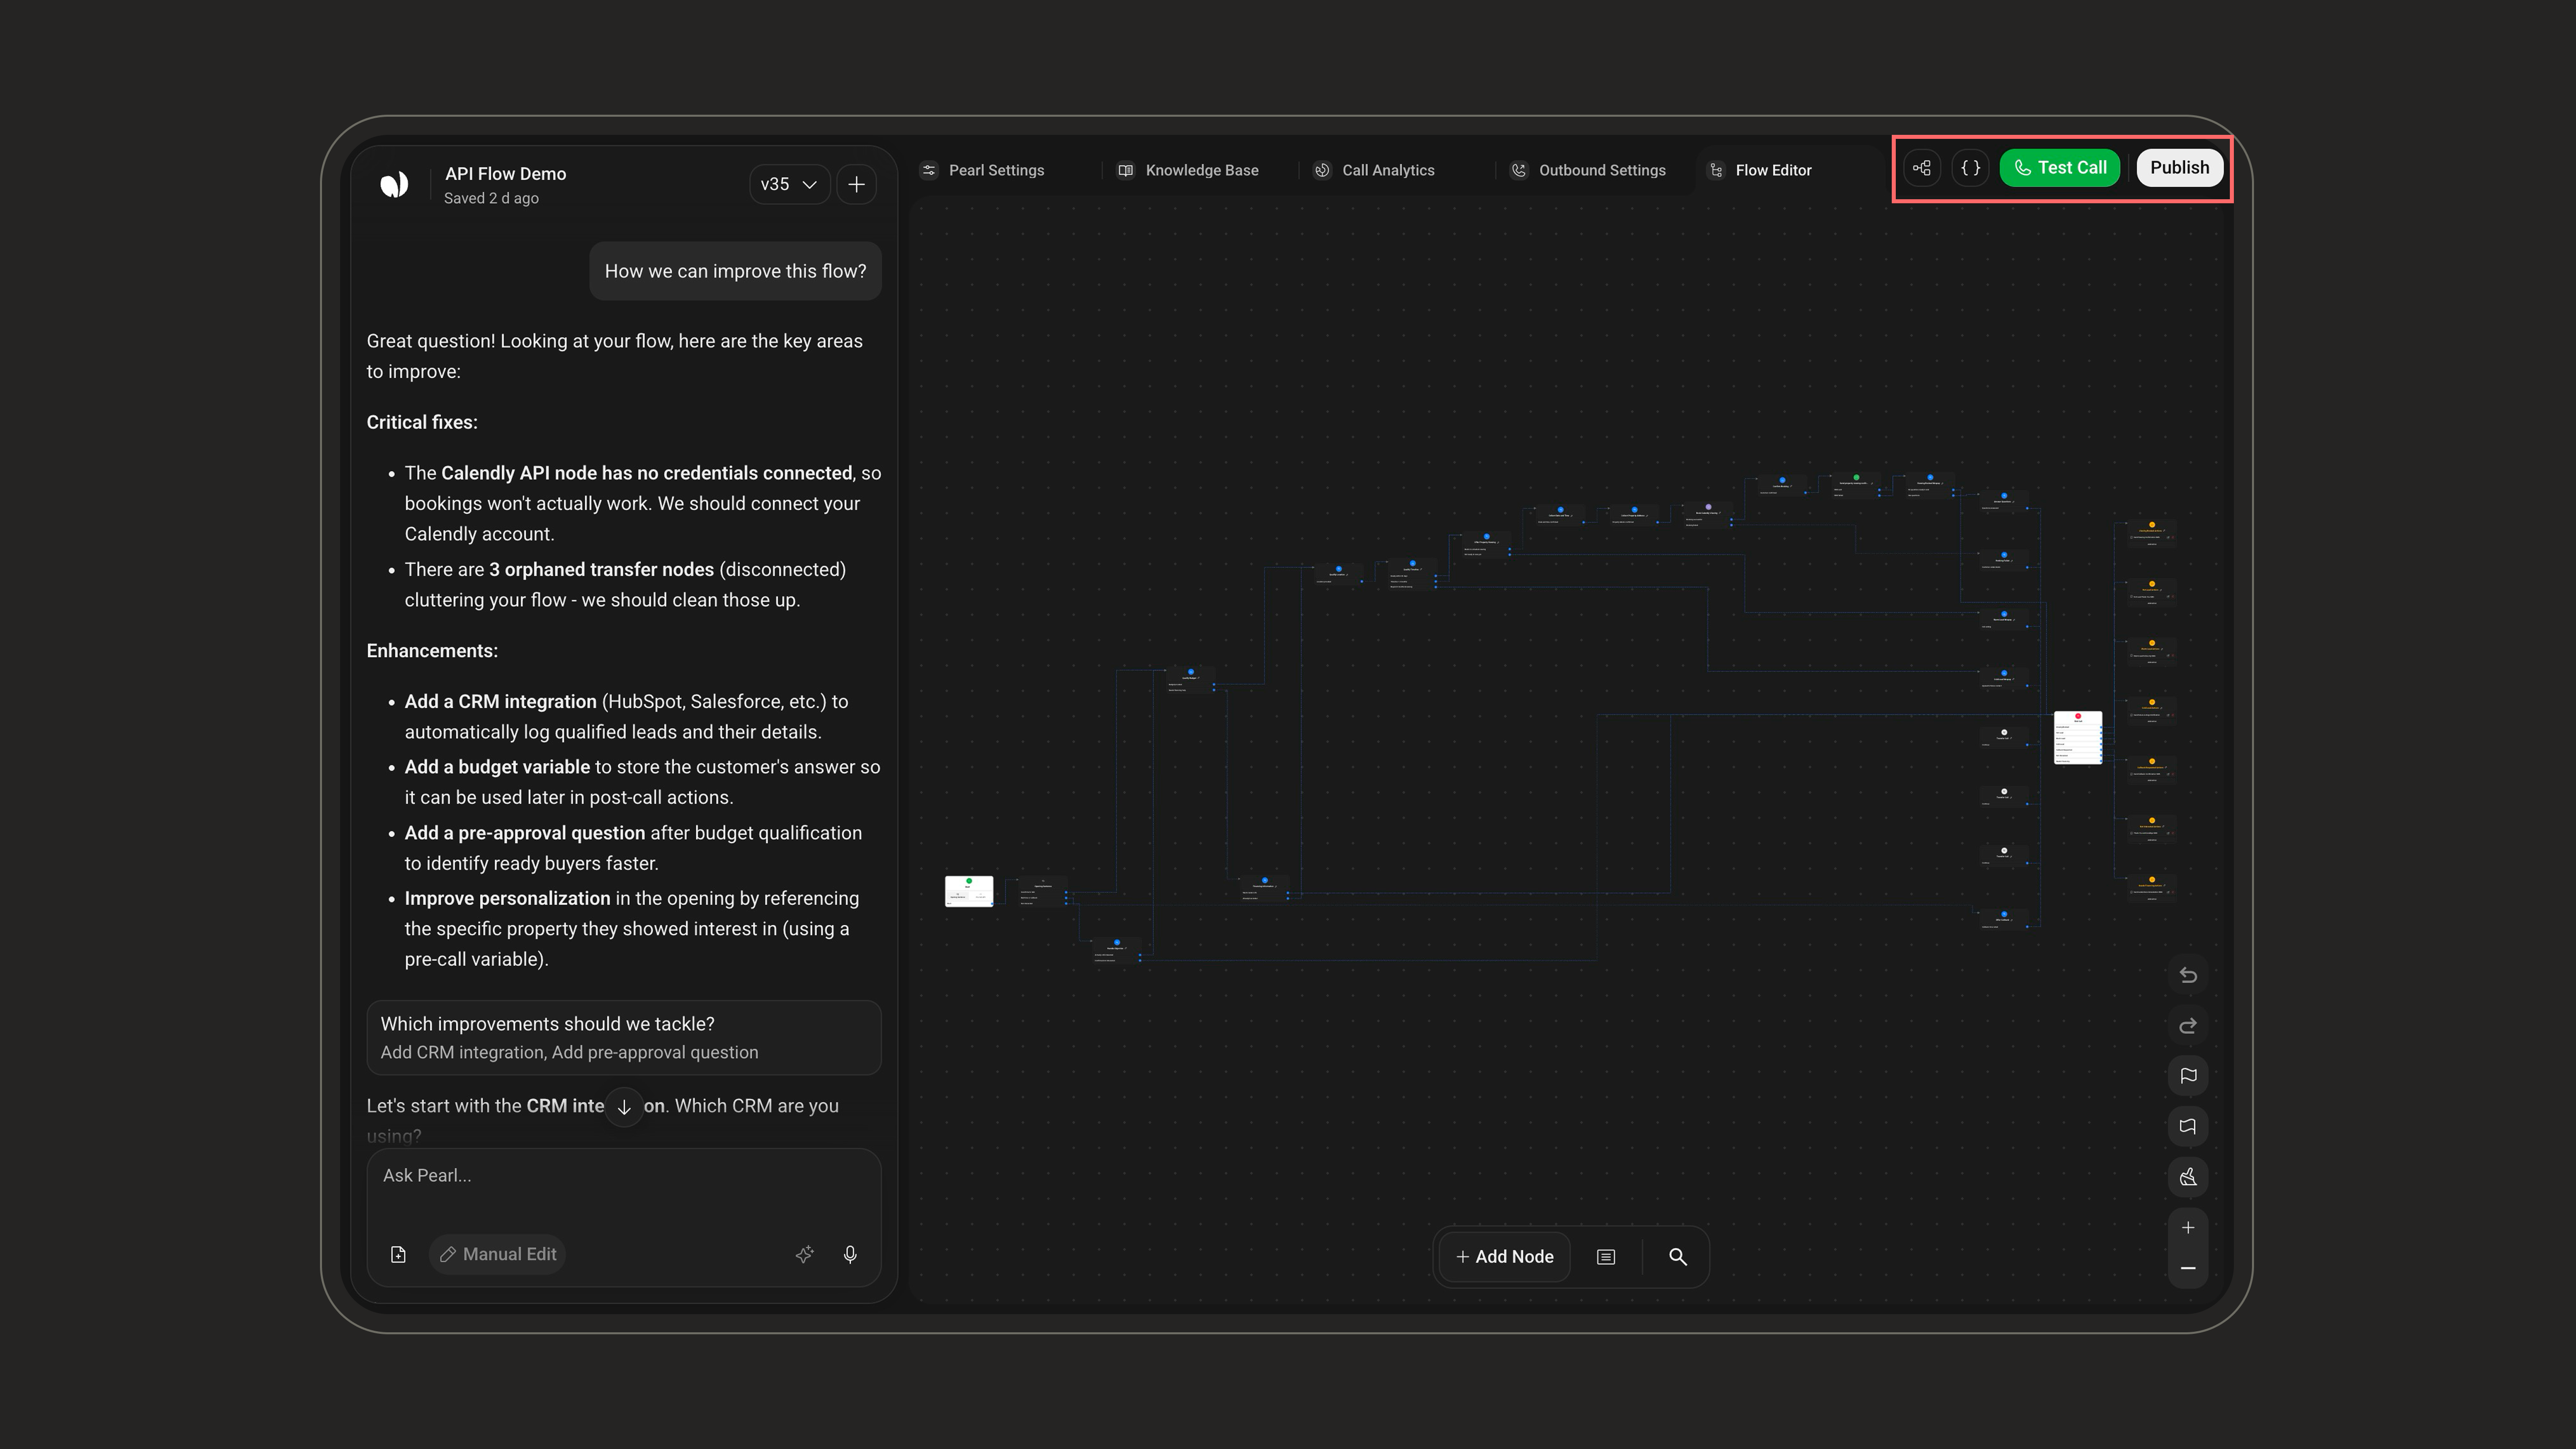
Versions & historyThe version selector next to the title shows the version you’re editing (for example v35).
Creating a new versionUse the + button next to the version selector to create a new version.
PublishingWhen you’re satisfied with your changes and tests, click Publish (top-right of the header). The current version becomes the new Published version and starts handling calls.
If your flow still has unresolved issues, the Publish button is replaced by an Errors & Tasks (N) button until you fix or dismiss them (see the Tasks & Errors section below).
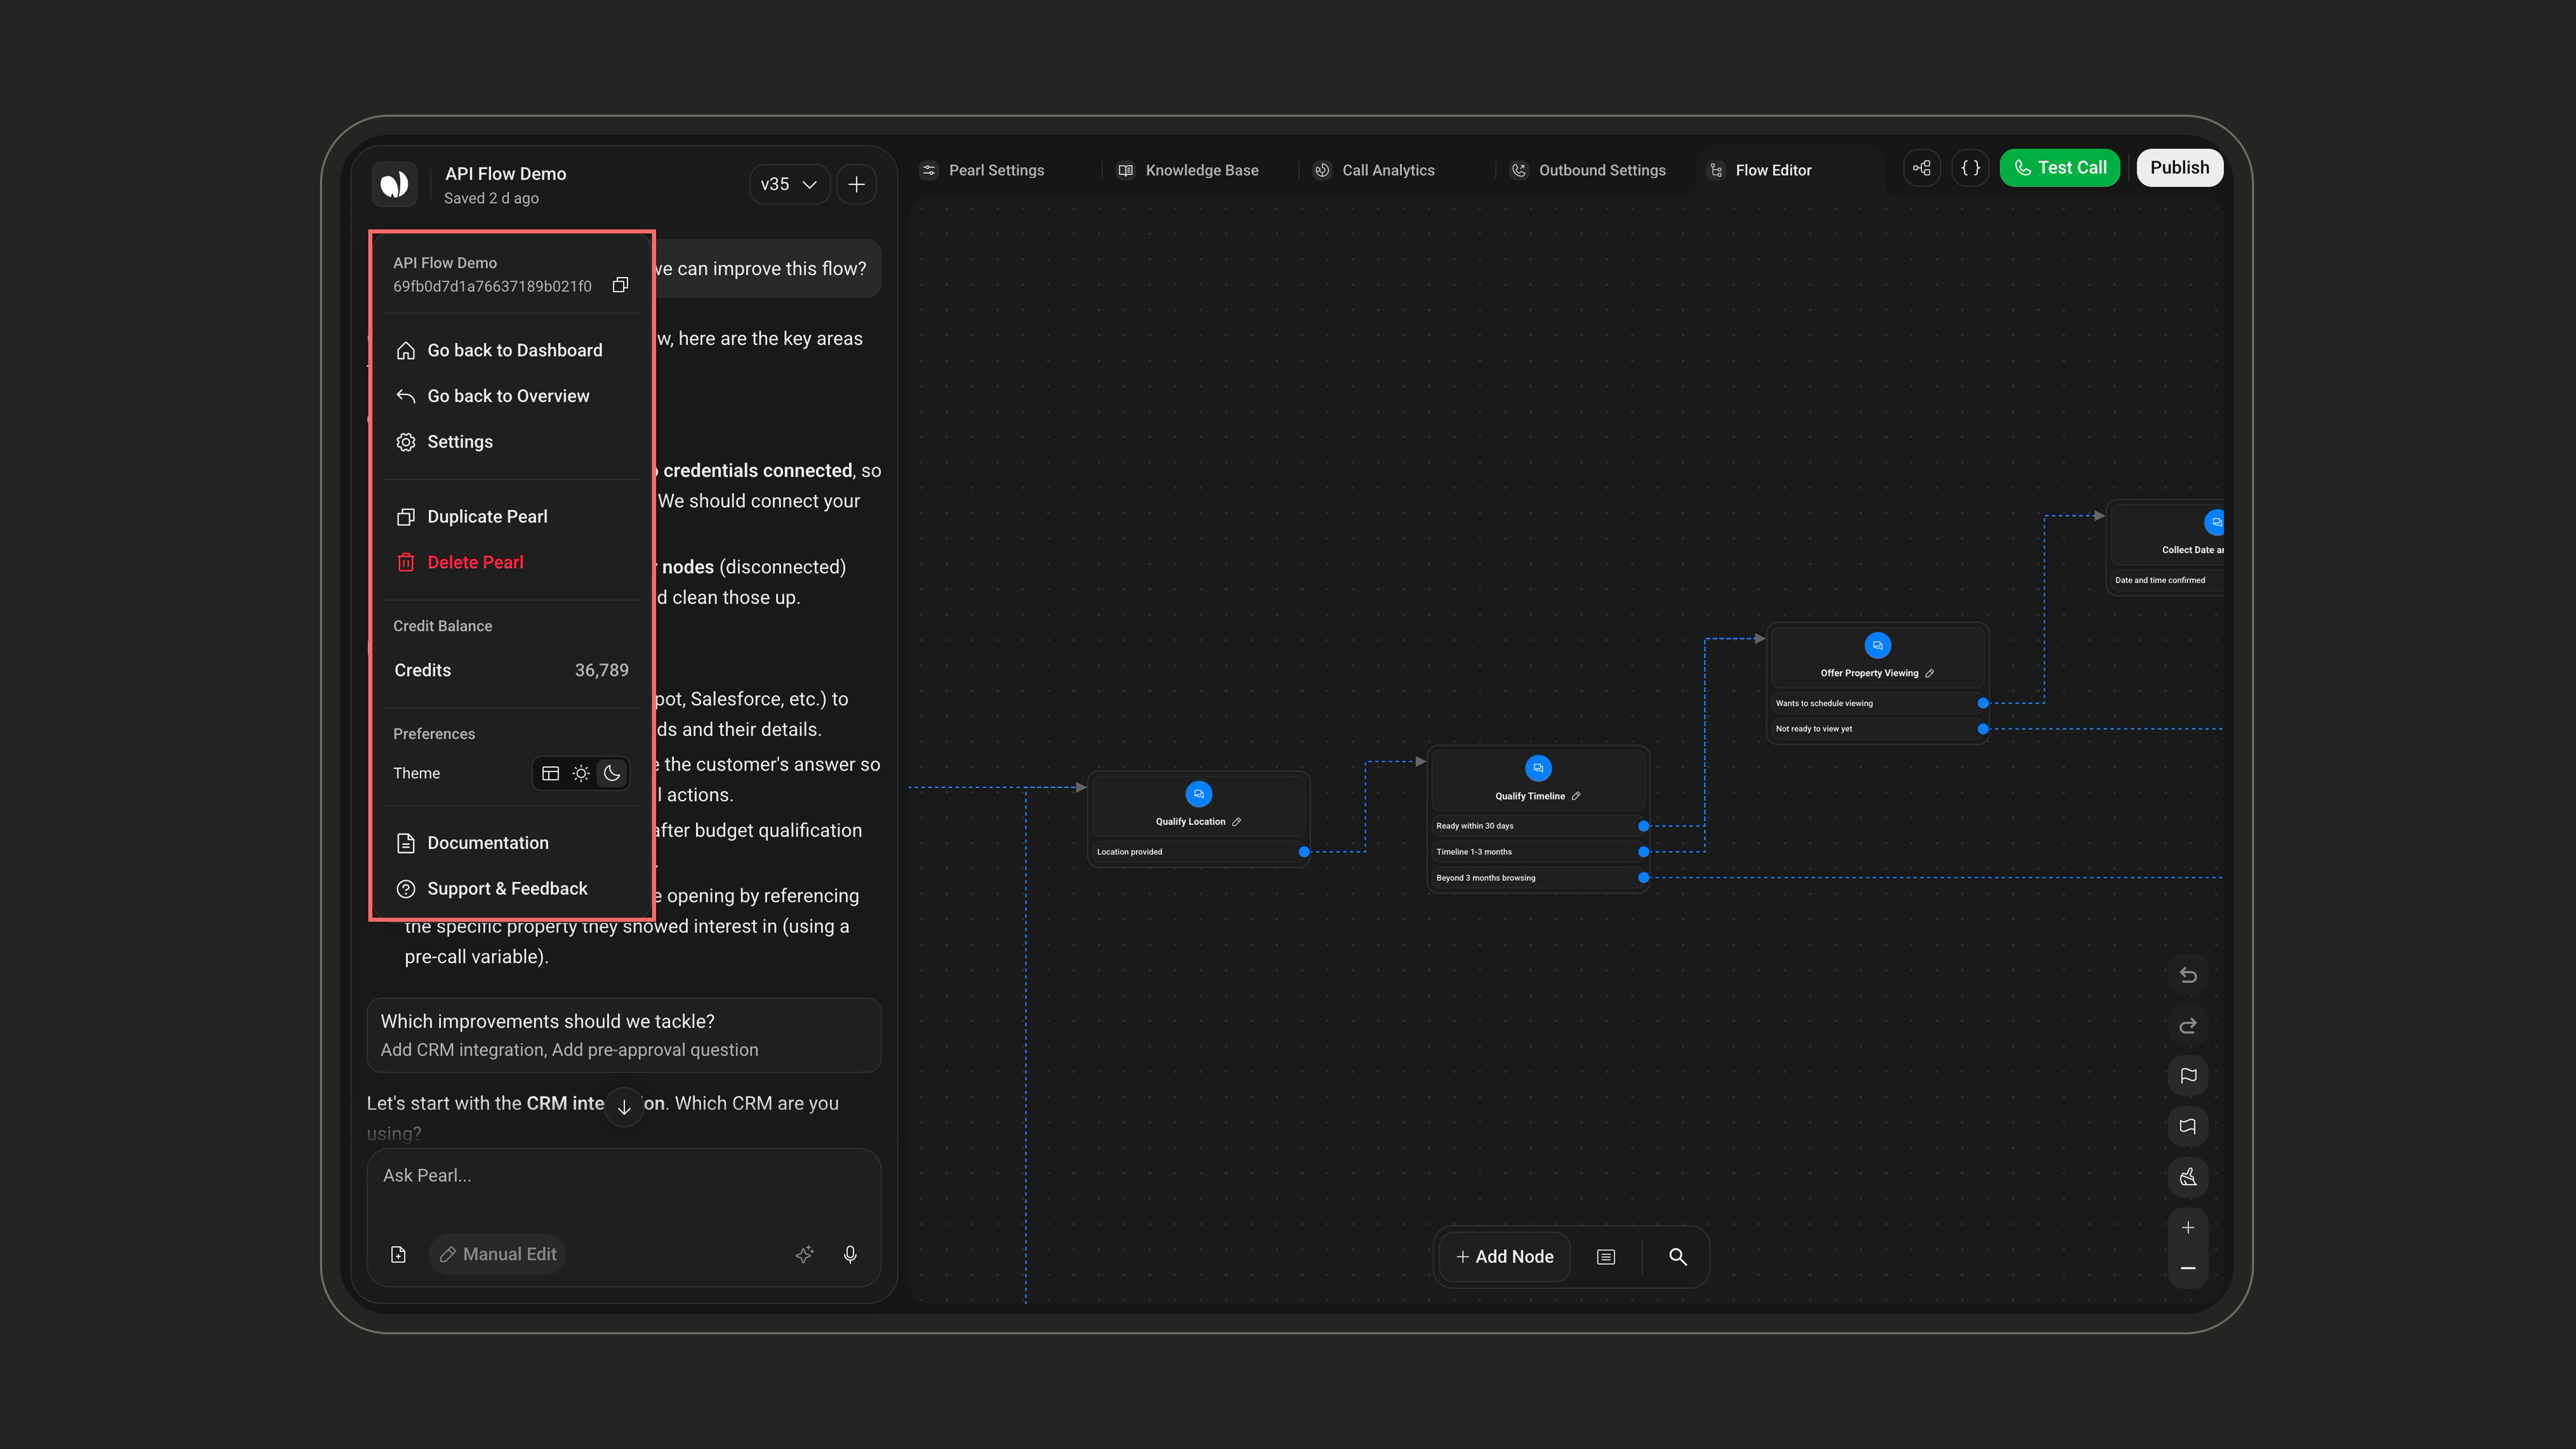
Credentials & Variables Managers
Credentials & Variables Managers
Credentials and variables are what connect your Pearl to the rest of your stack. Both are opened from the 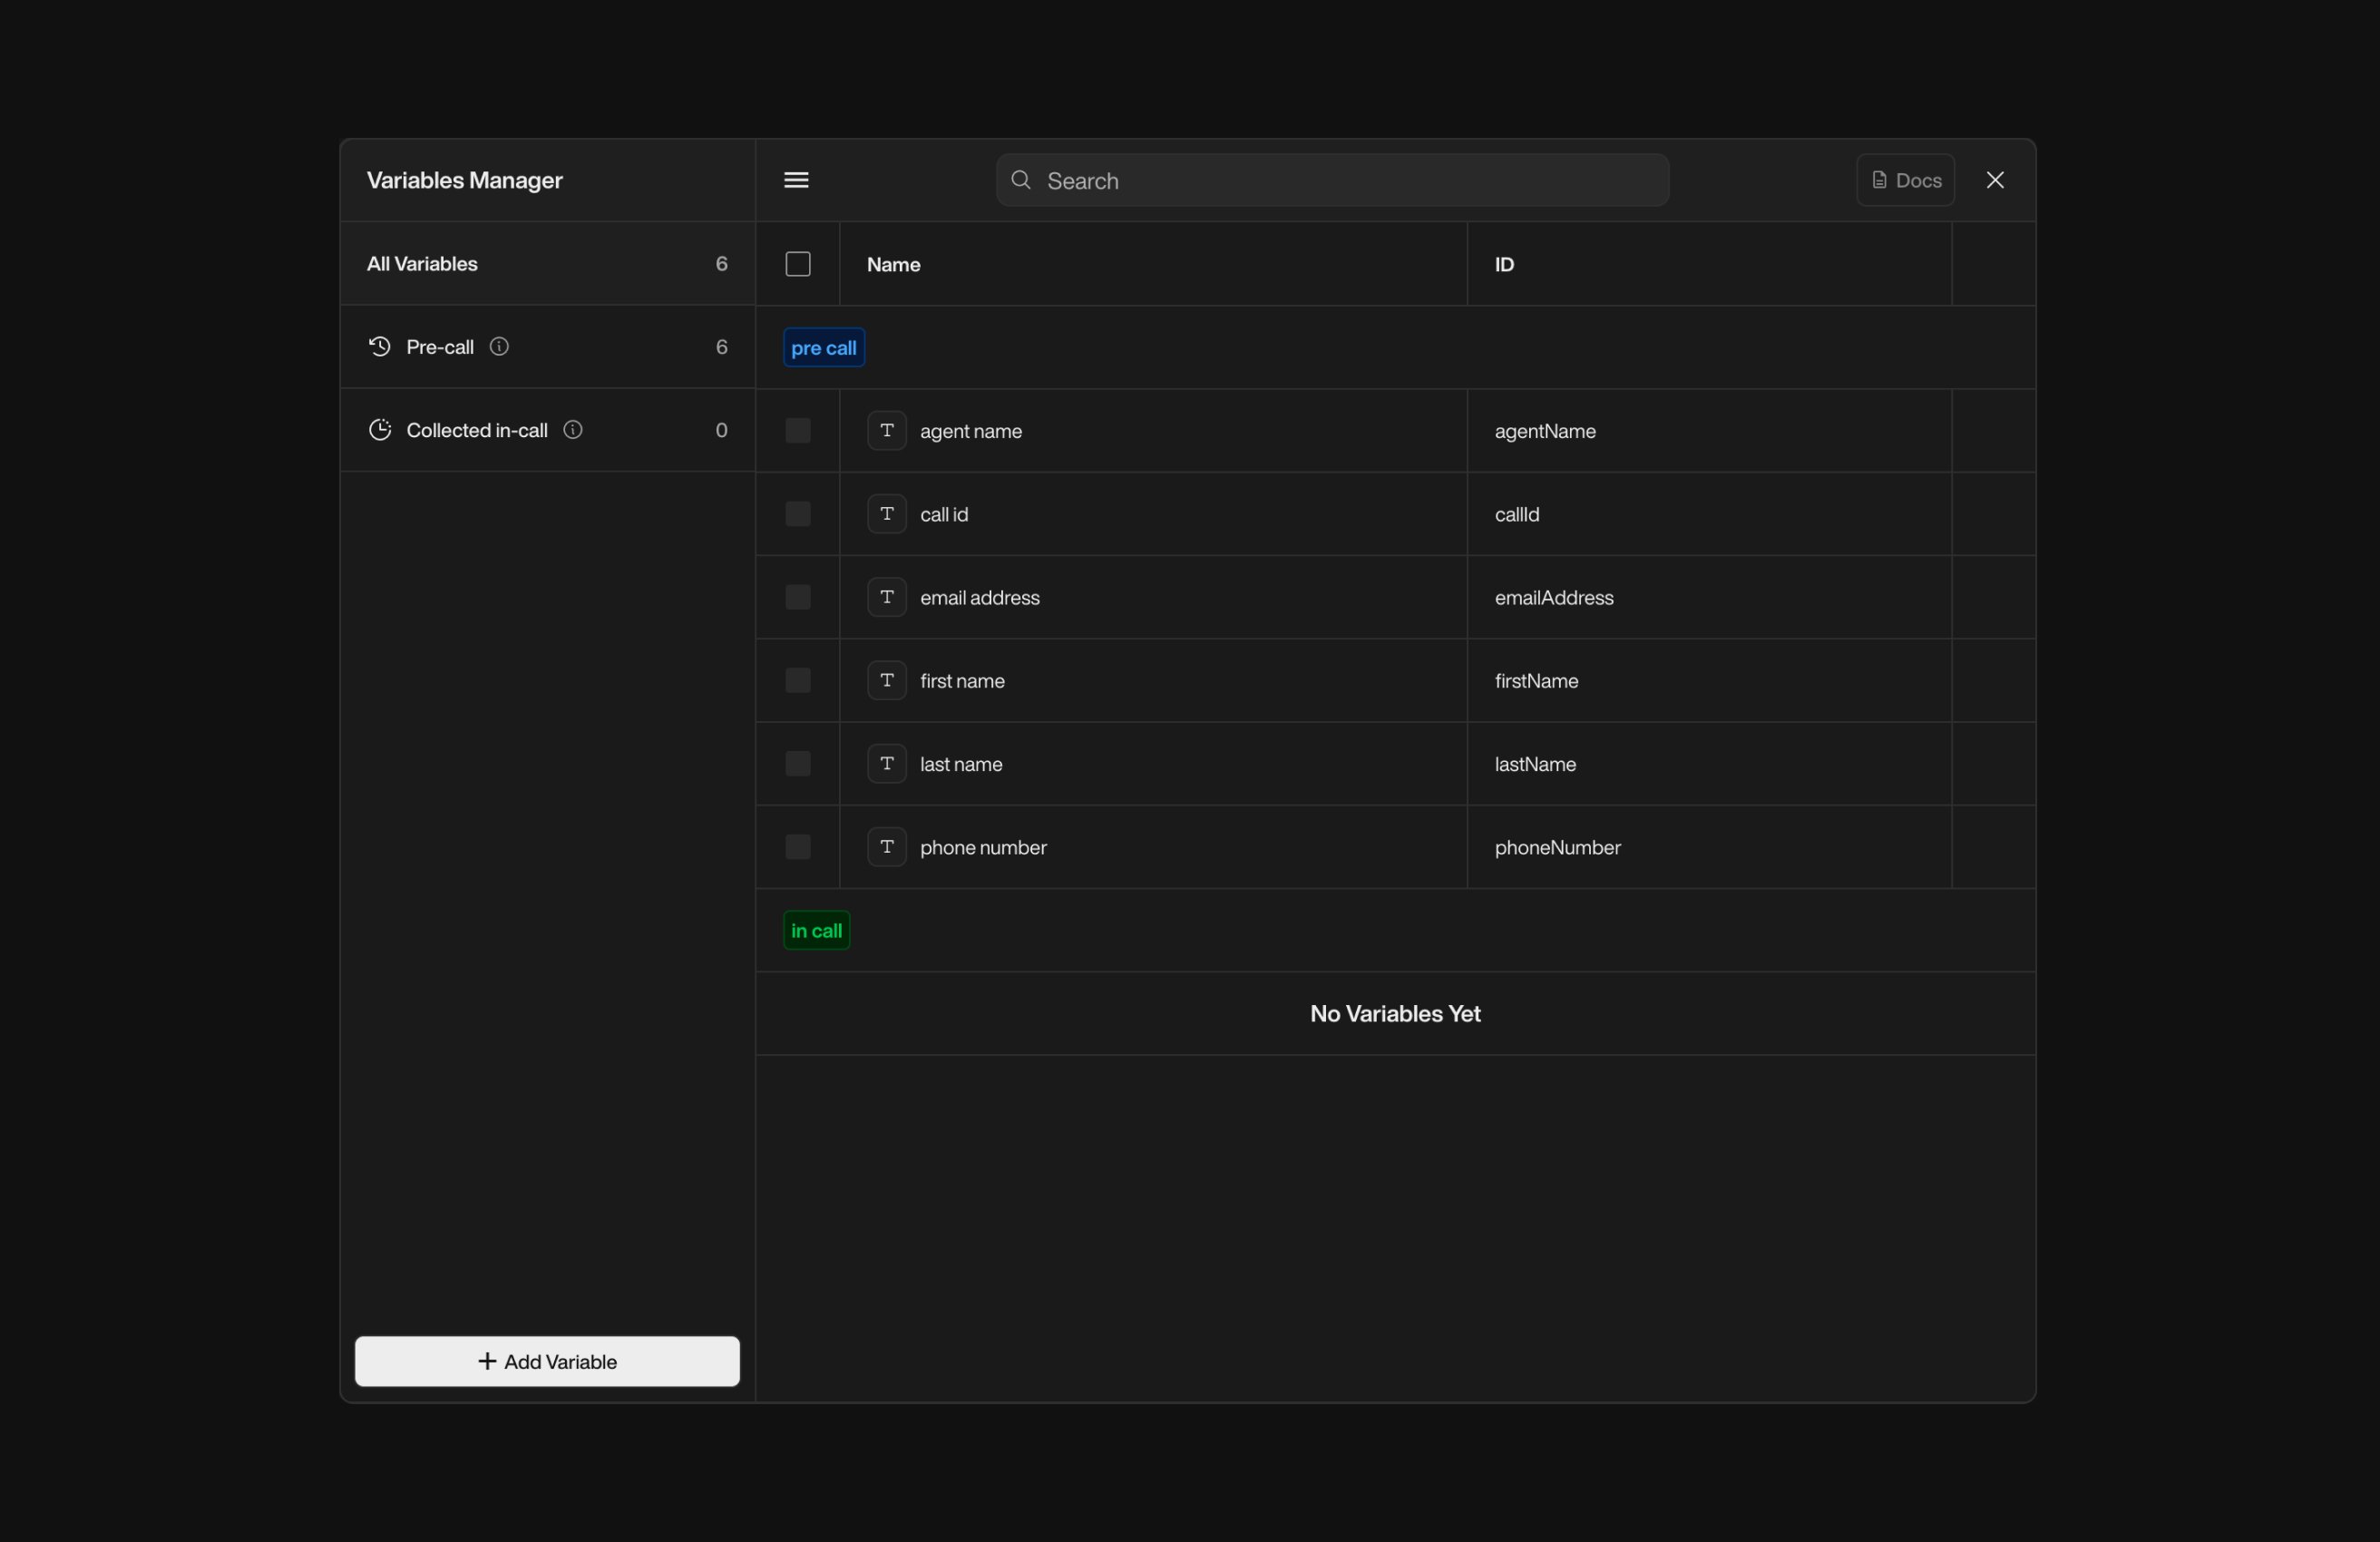
Credentials ManagerThe Credentials Manager is where your integrations live: you connect external systems by adding credentials and configuration for each one. Once a credential is added, the matching integration becomes available as a node in your flow.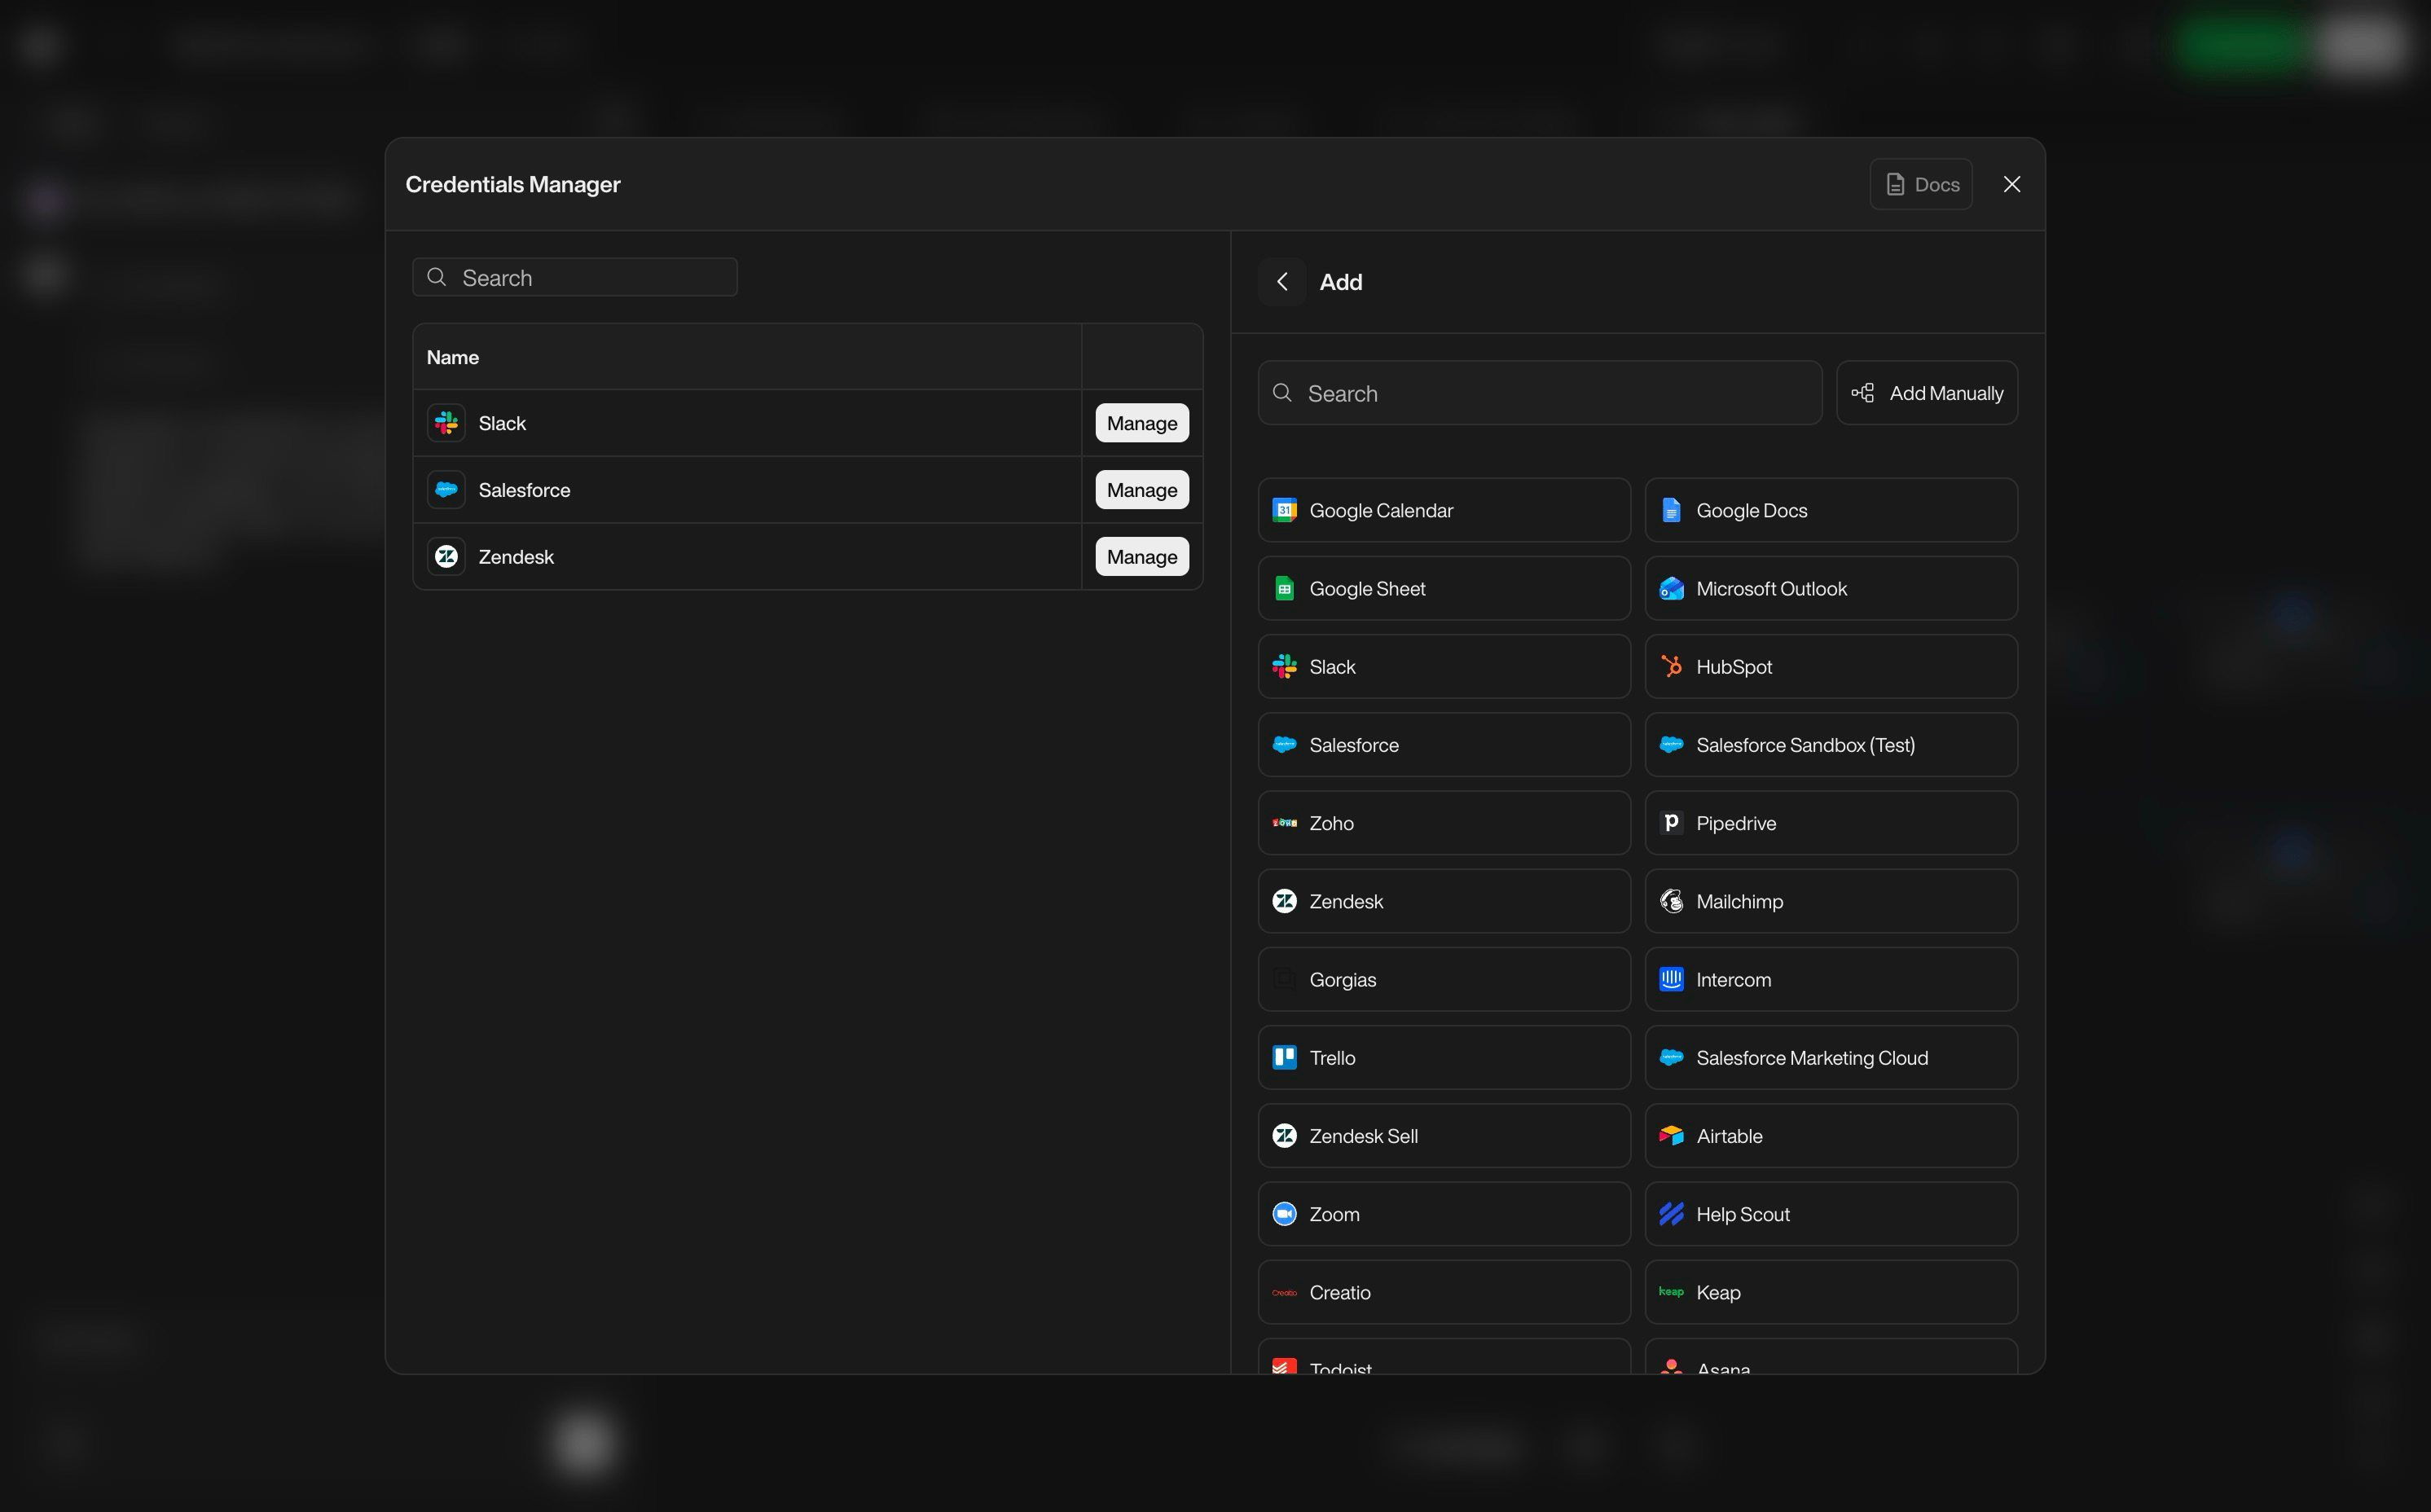
{ } button in the top-right of the header.Variables ManagerThe Variables Manager lets you create, edit, and organize the variables used in your conversation flows.See the Variables documentation for more details.
Credentials ManagerThe Credentials Manager is where your integrations live: you connect external systems by adding credentials and configuration for each one. Once a credential is added, the matching integration becomes available as a node in your flow.
- Add new integrations (e.g. Salesforce, HubSpot, ticketing tools, booking engines).
- Configure authentication.
Tasks & Errors
Tasks & Errors
As your flows grow, PearlVibe helps you keep them valid, connected, and fully configured.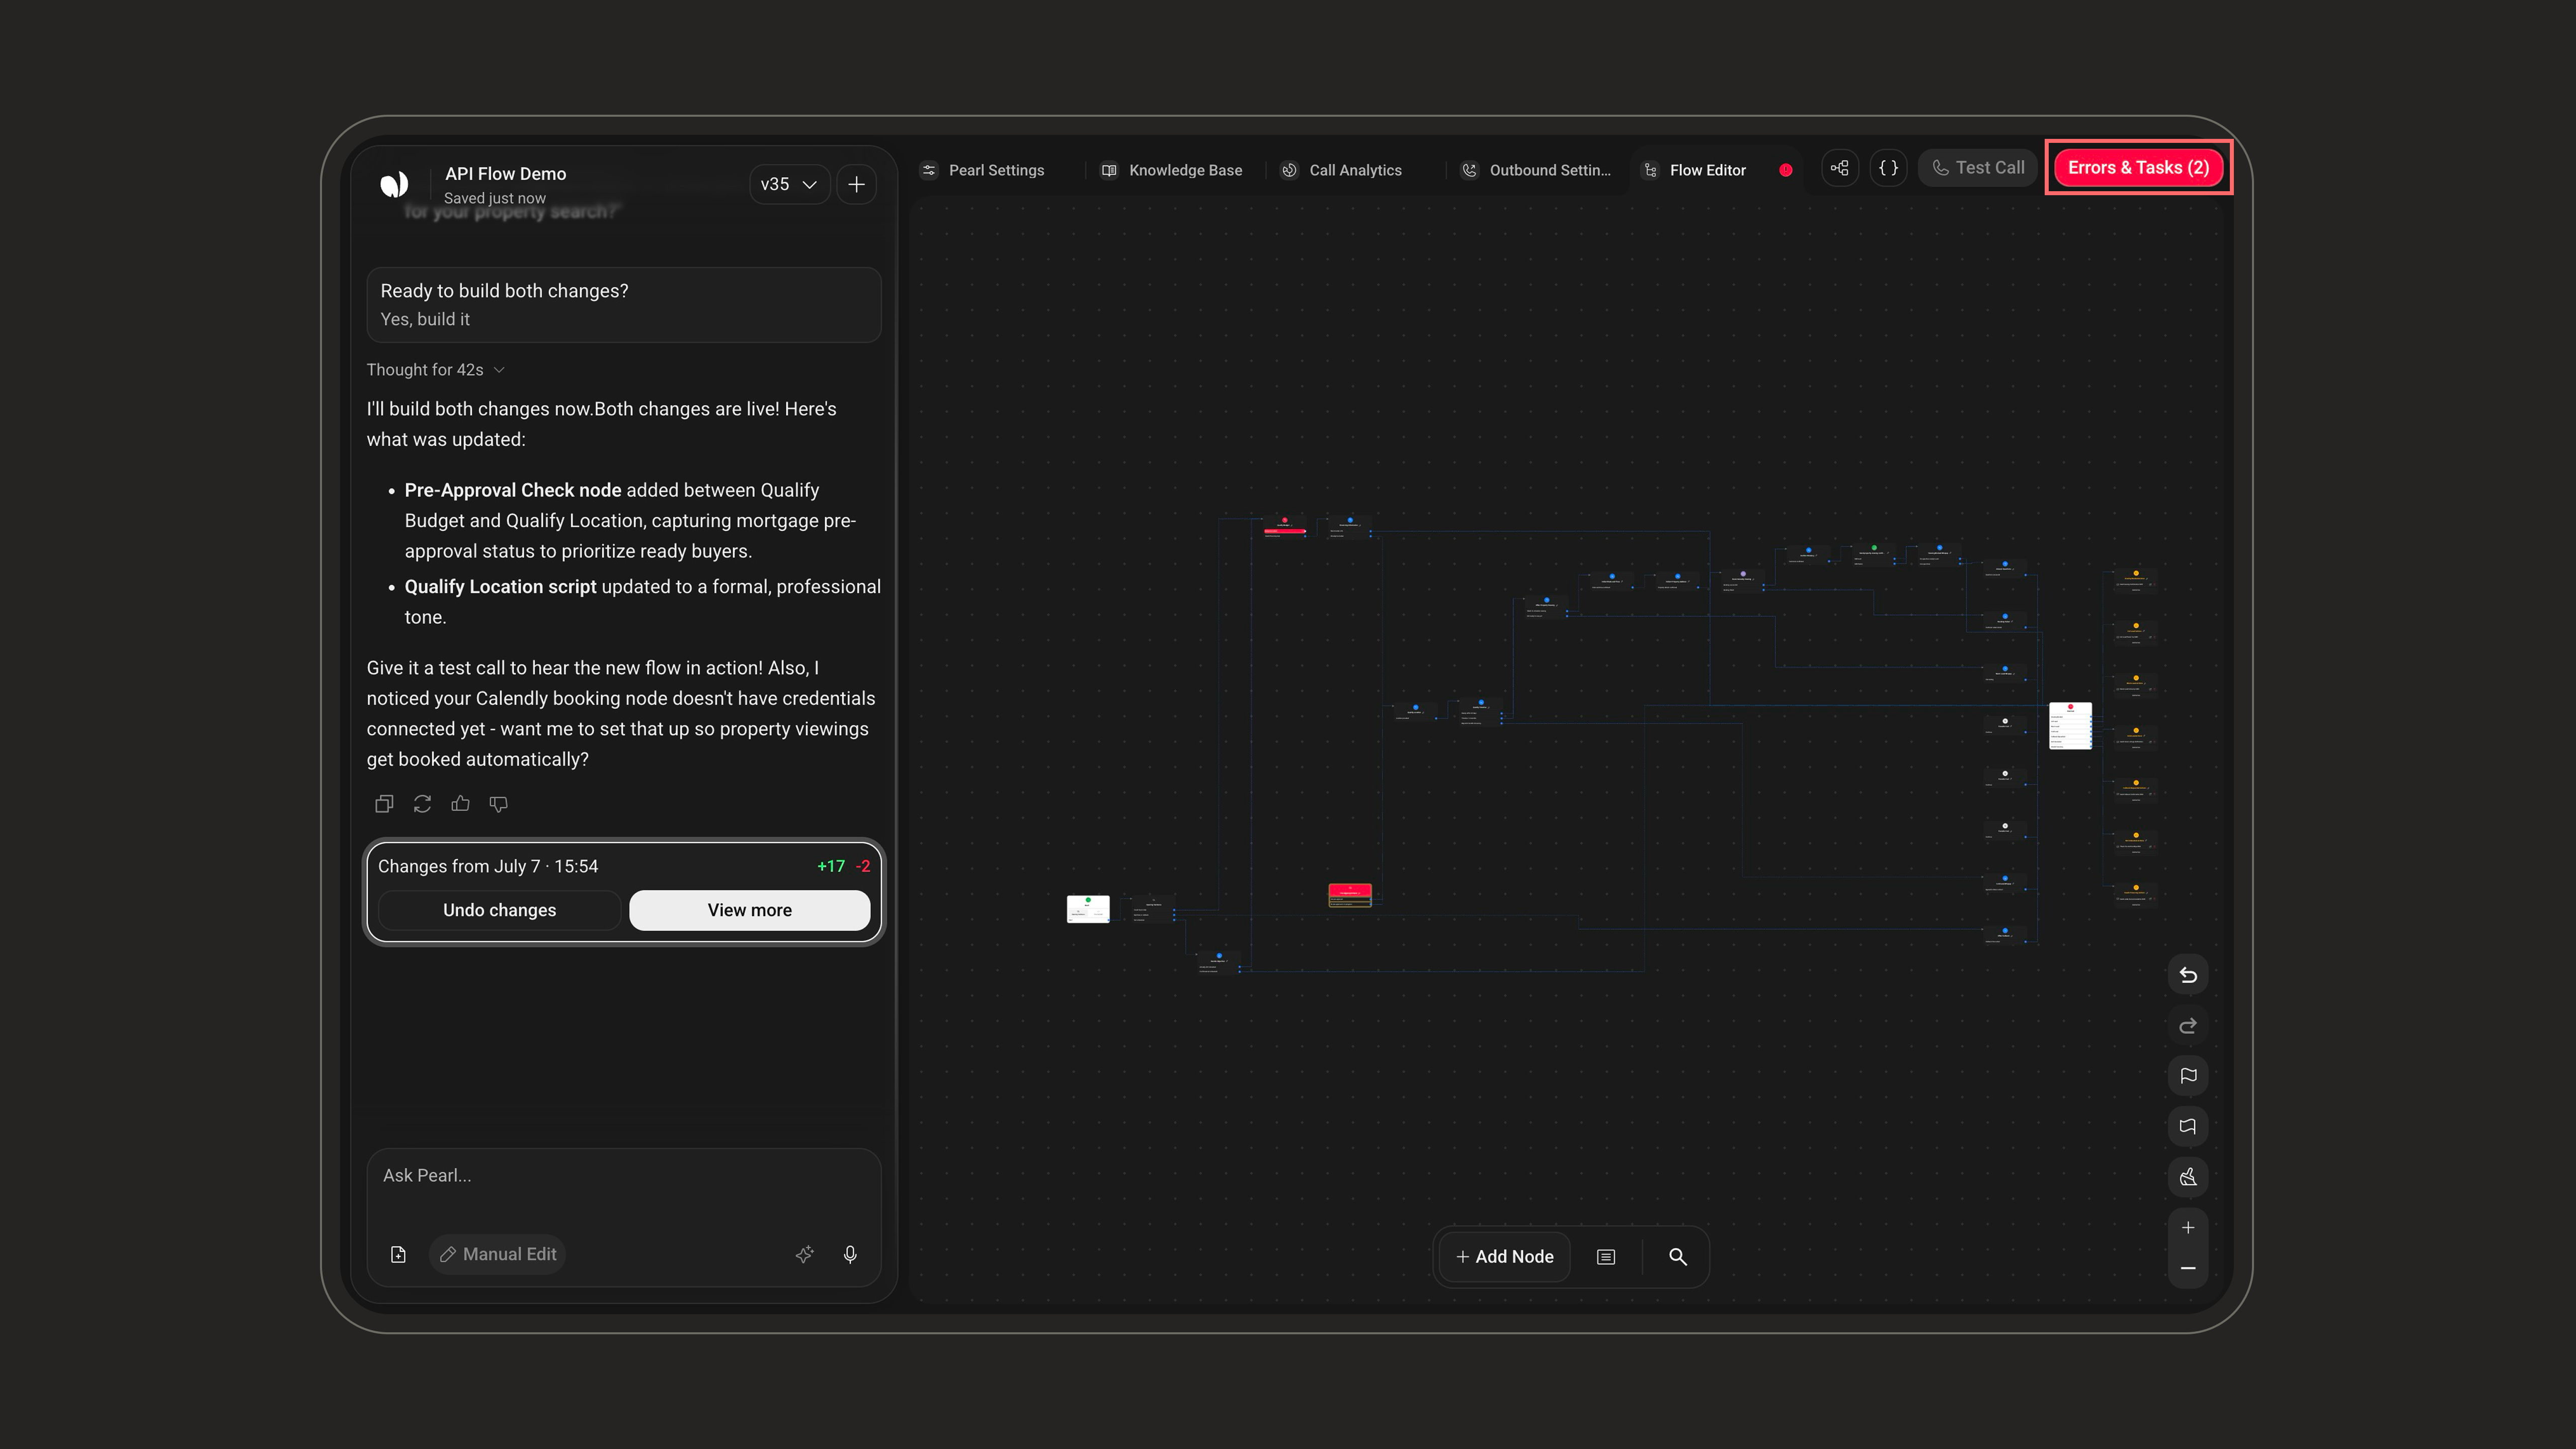
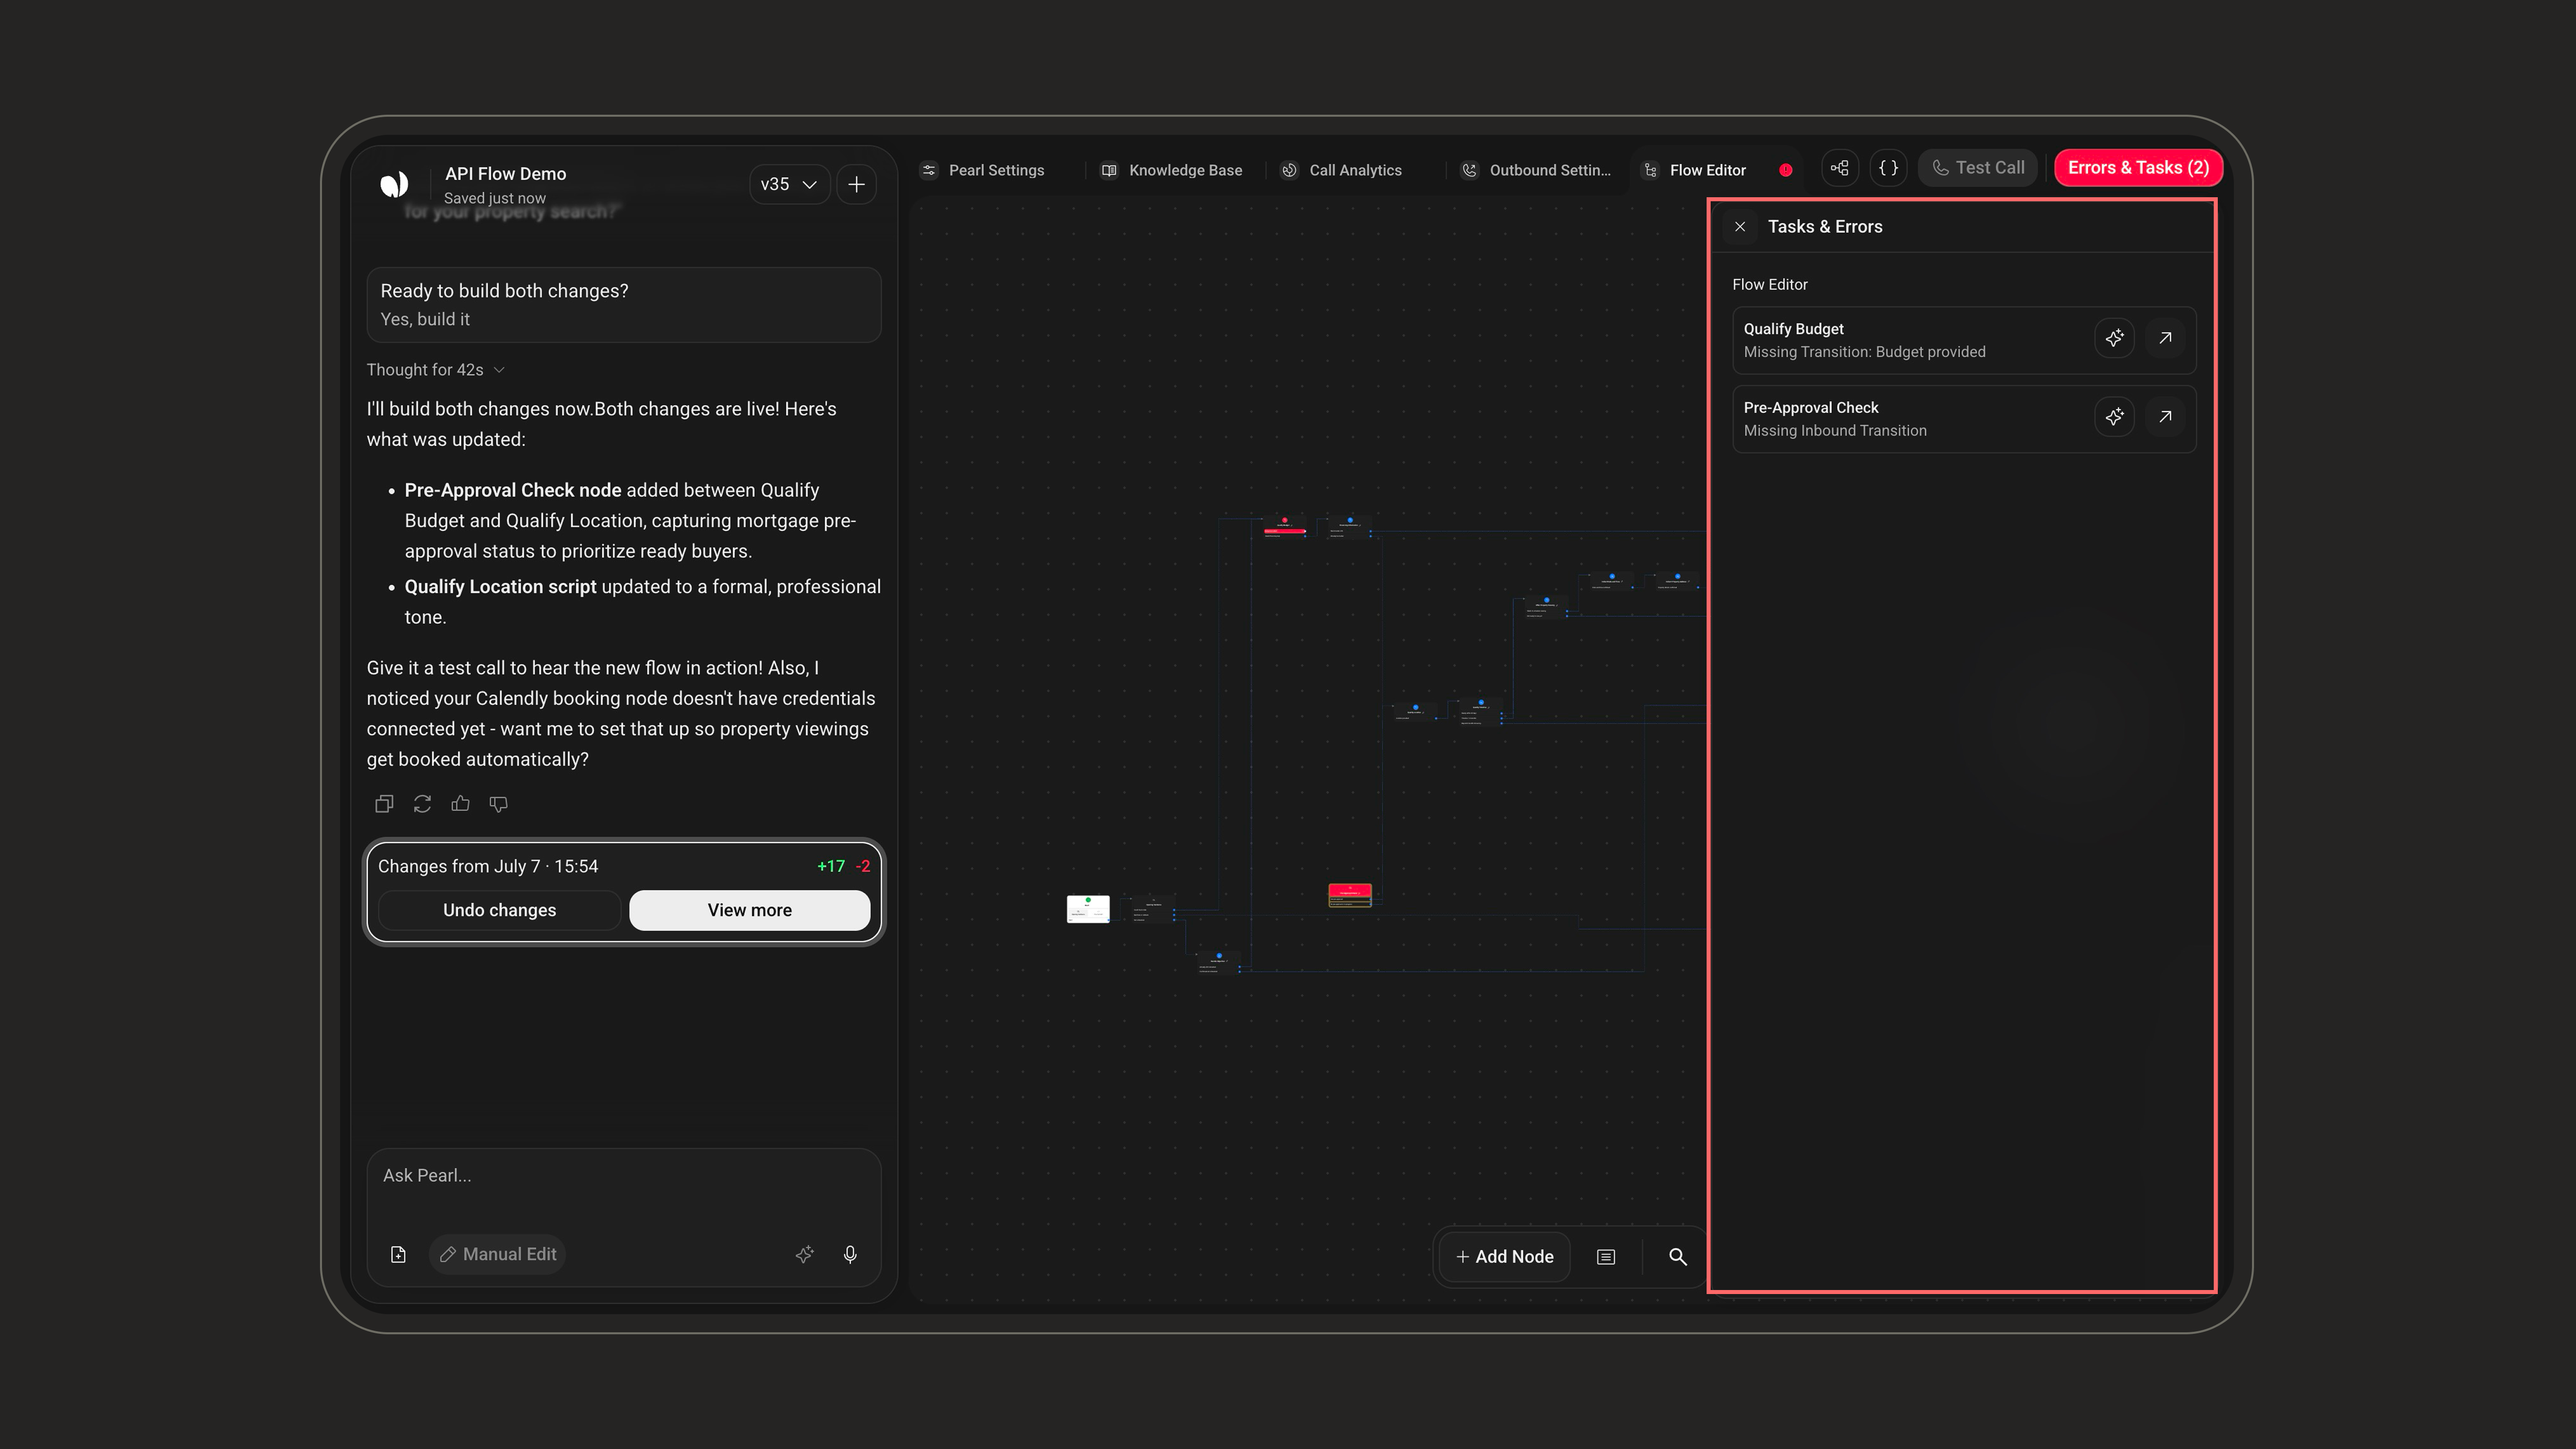
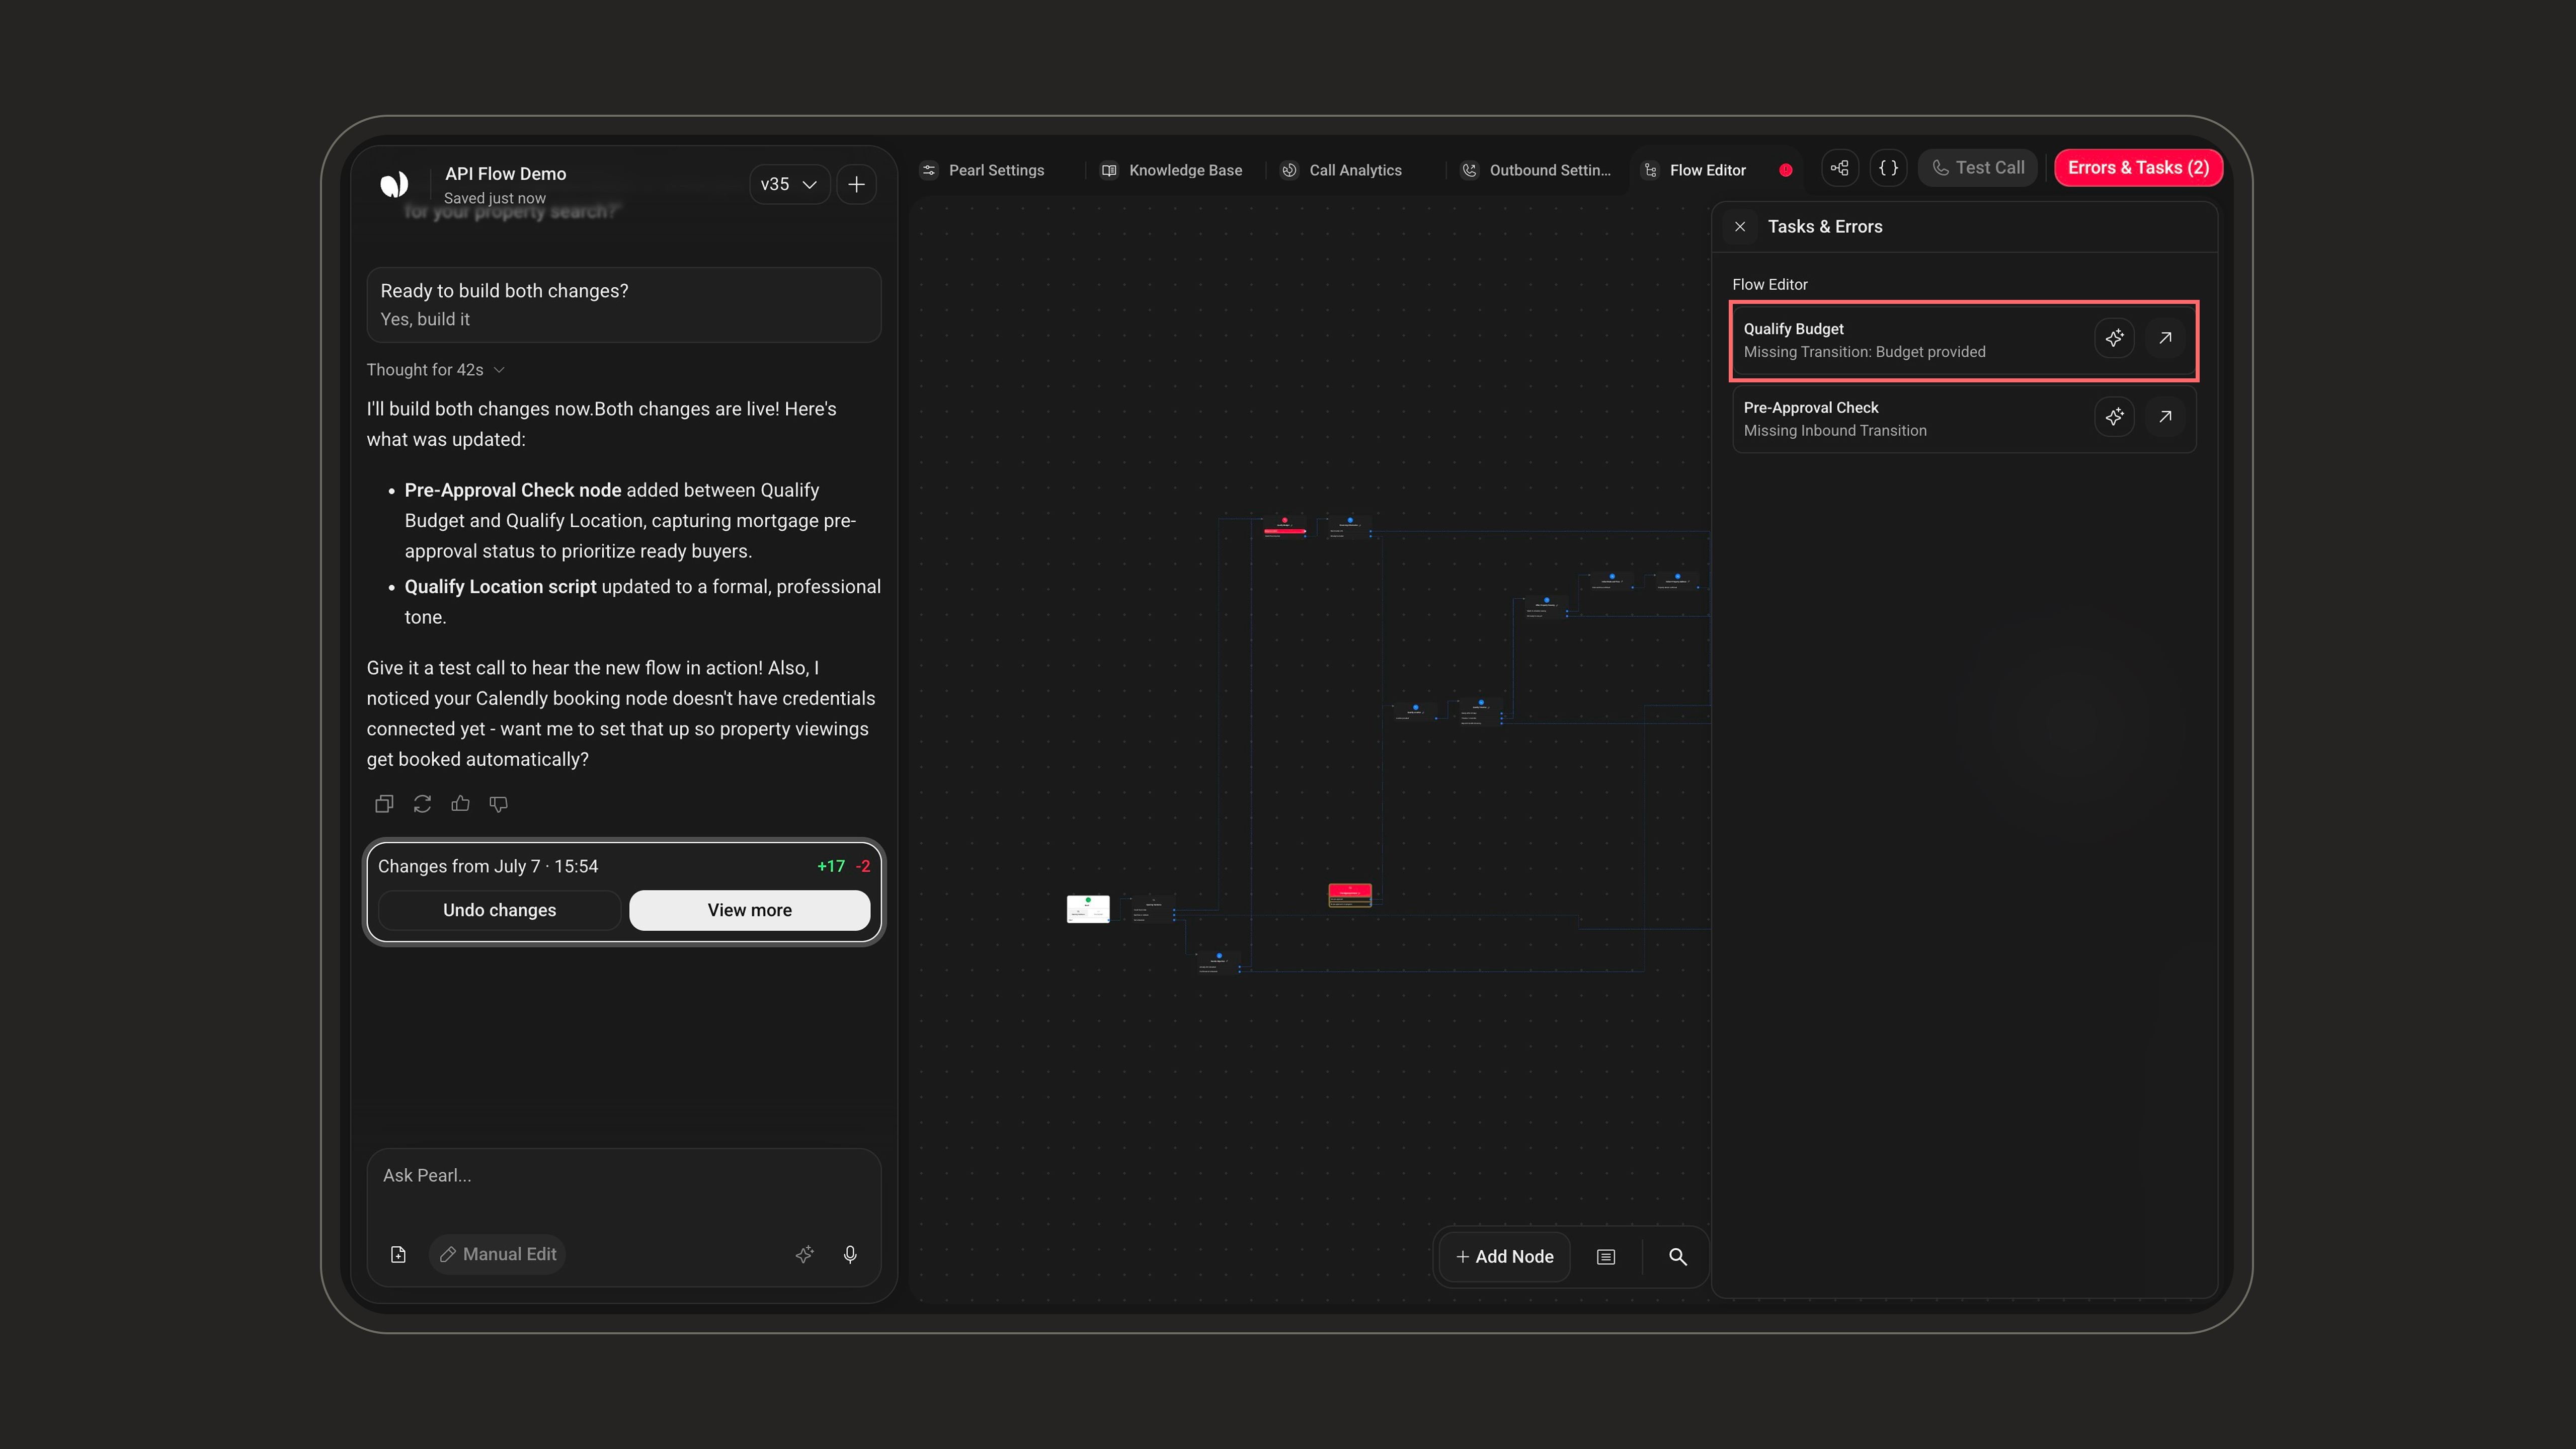
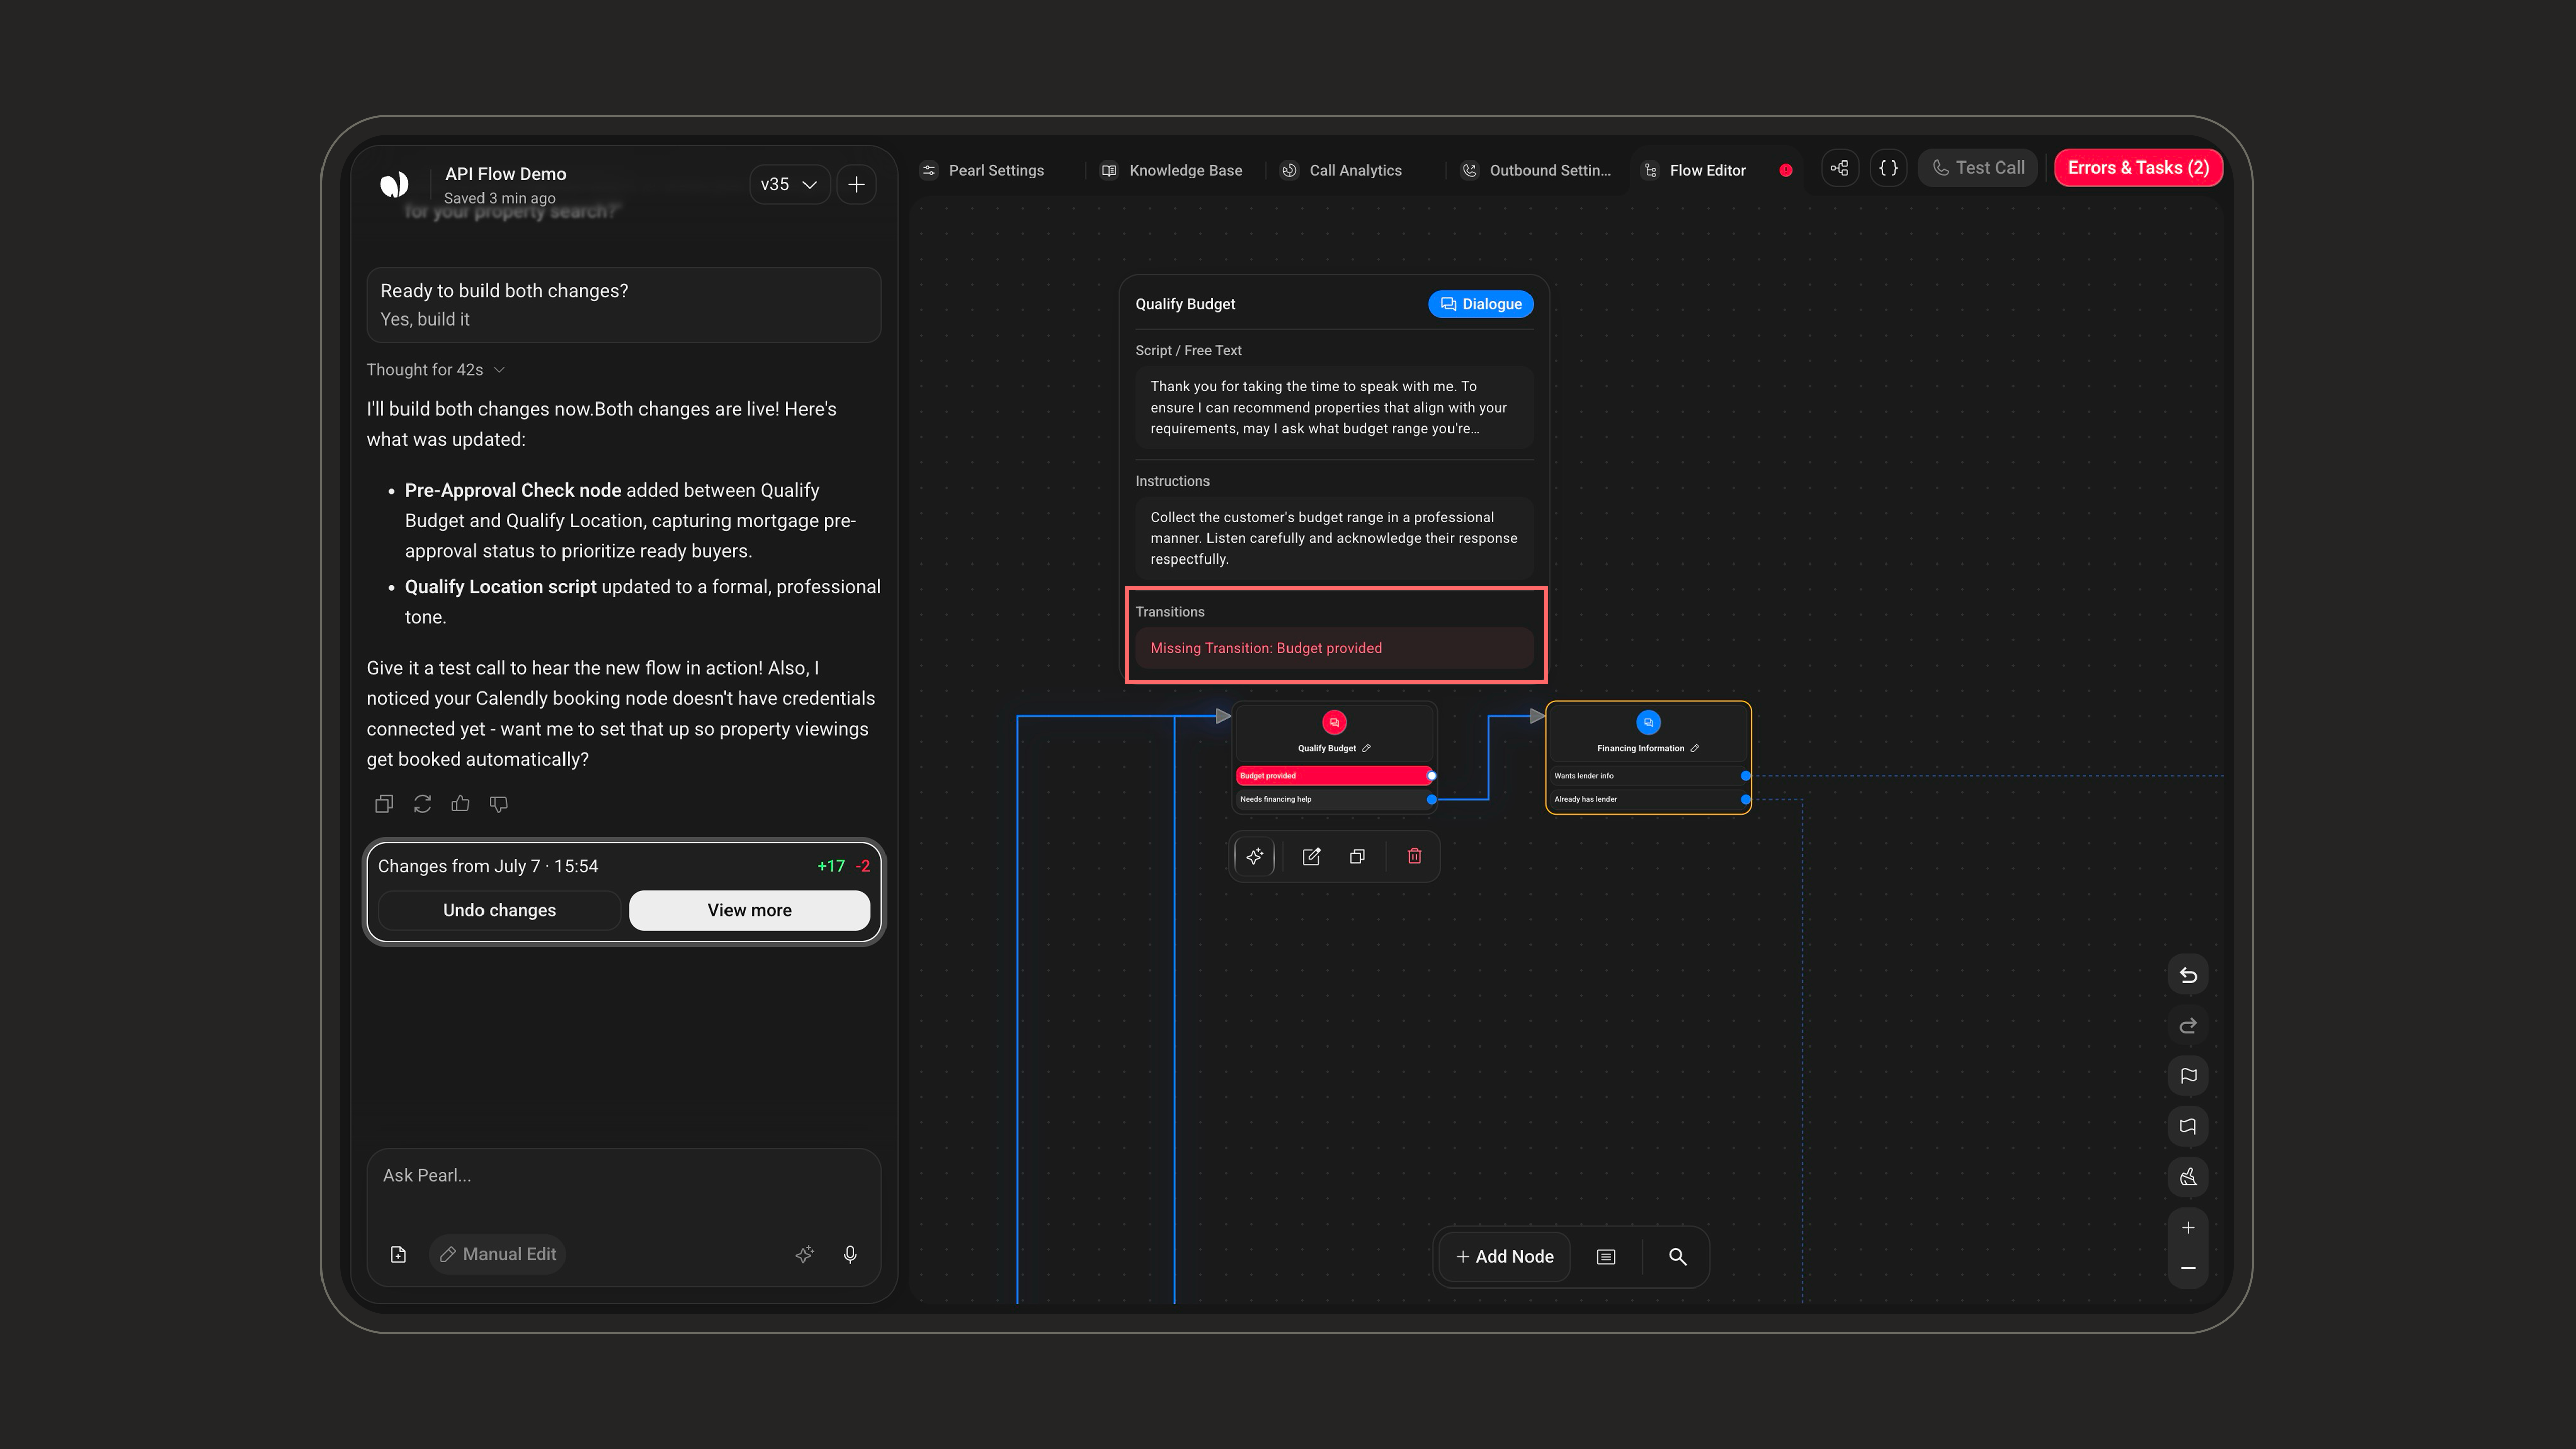
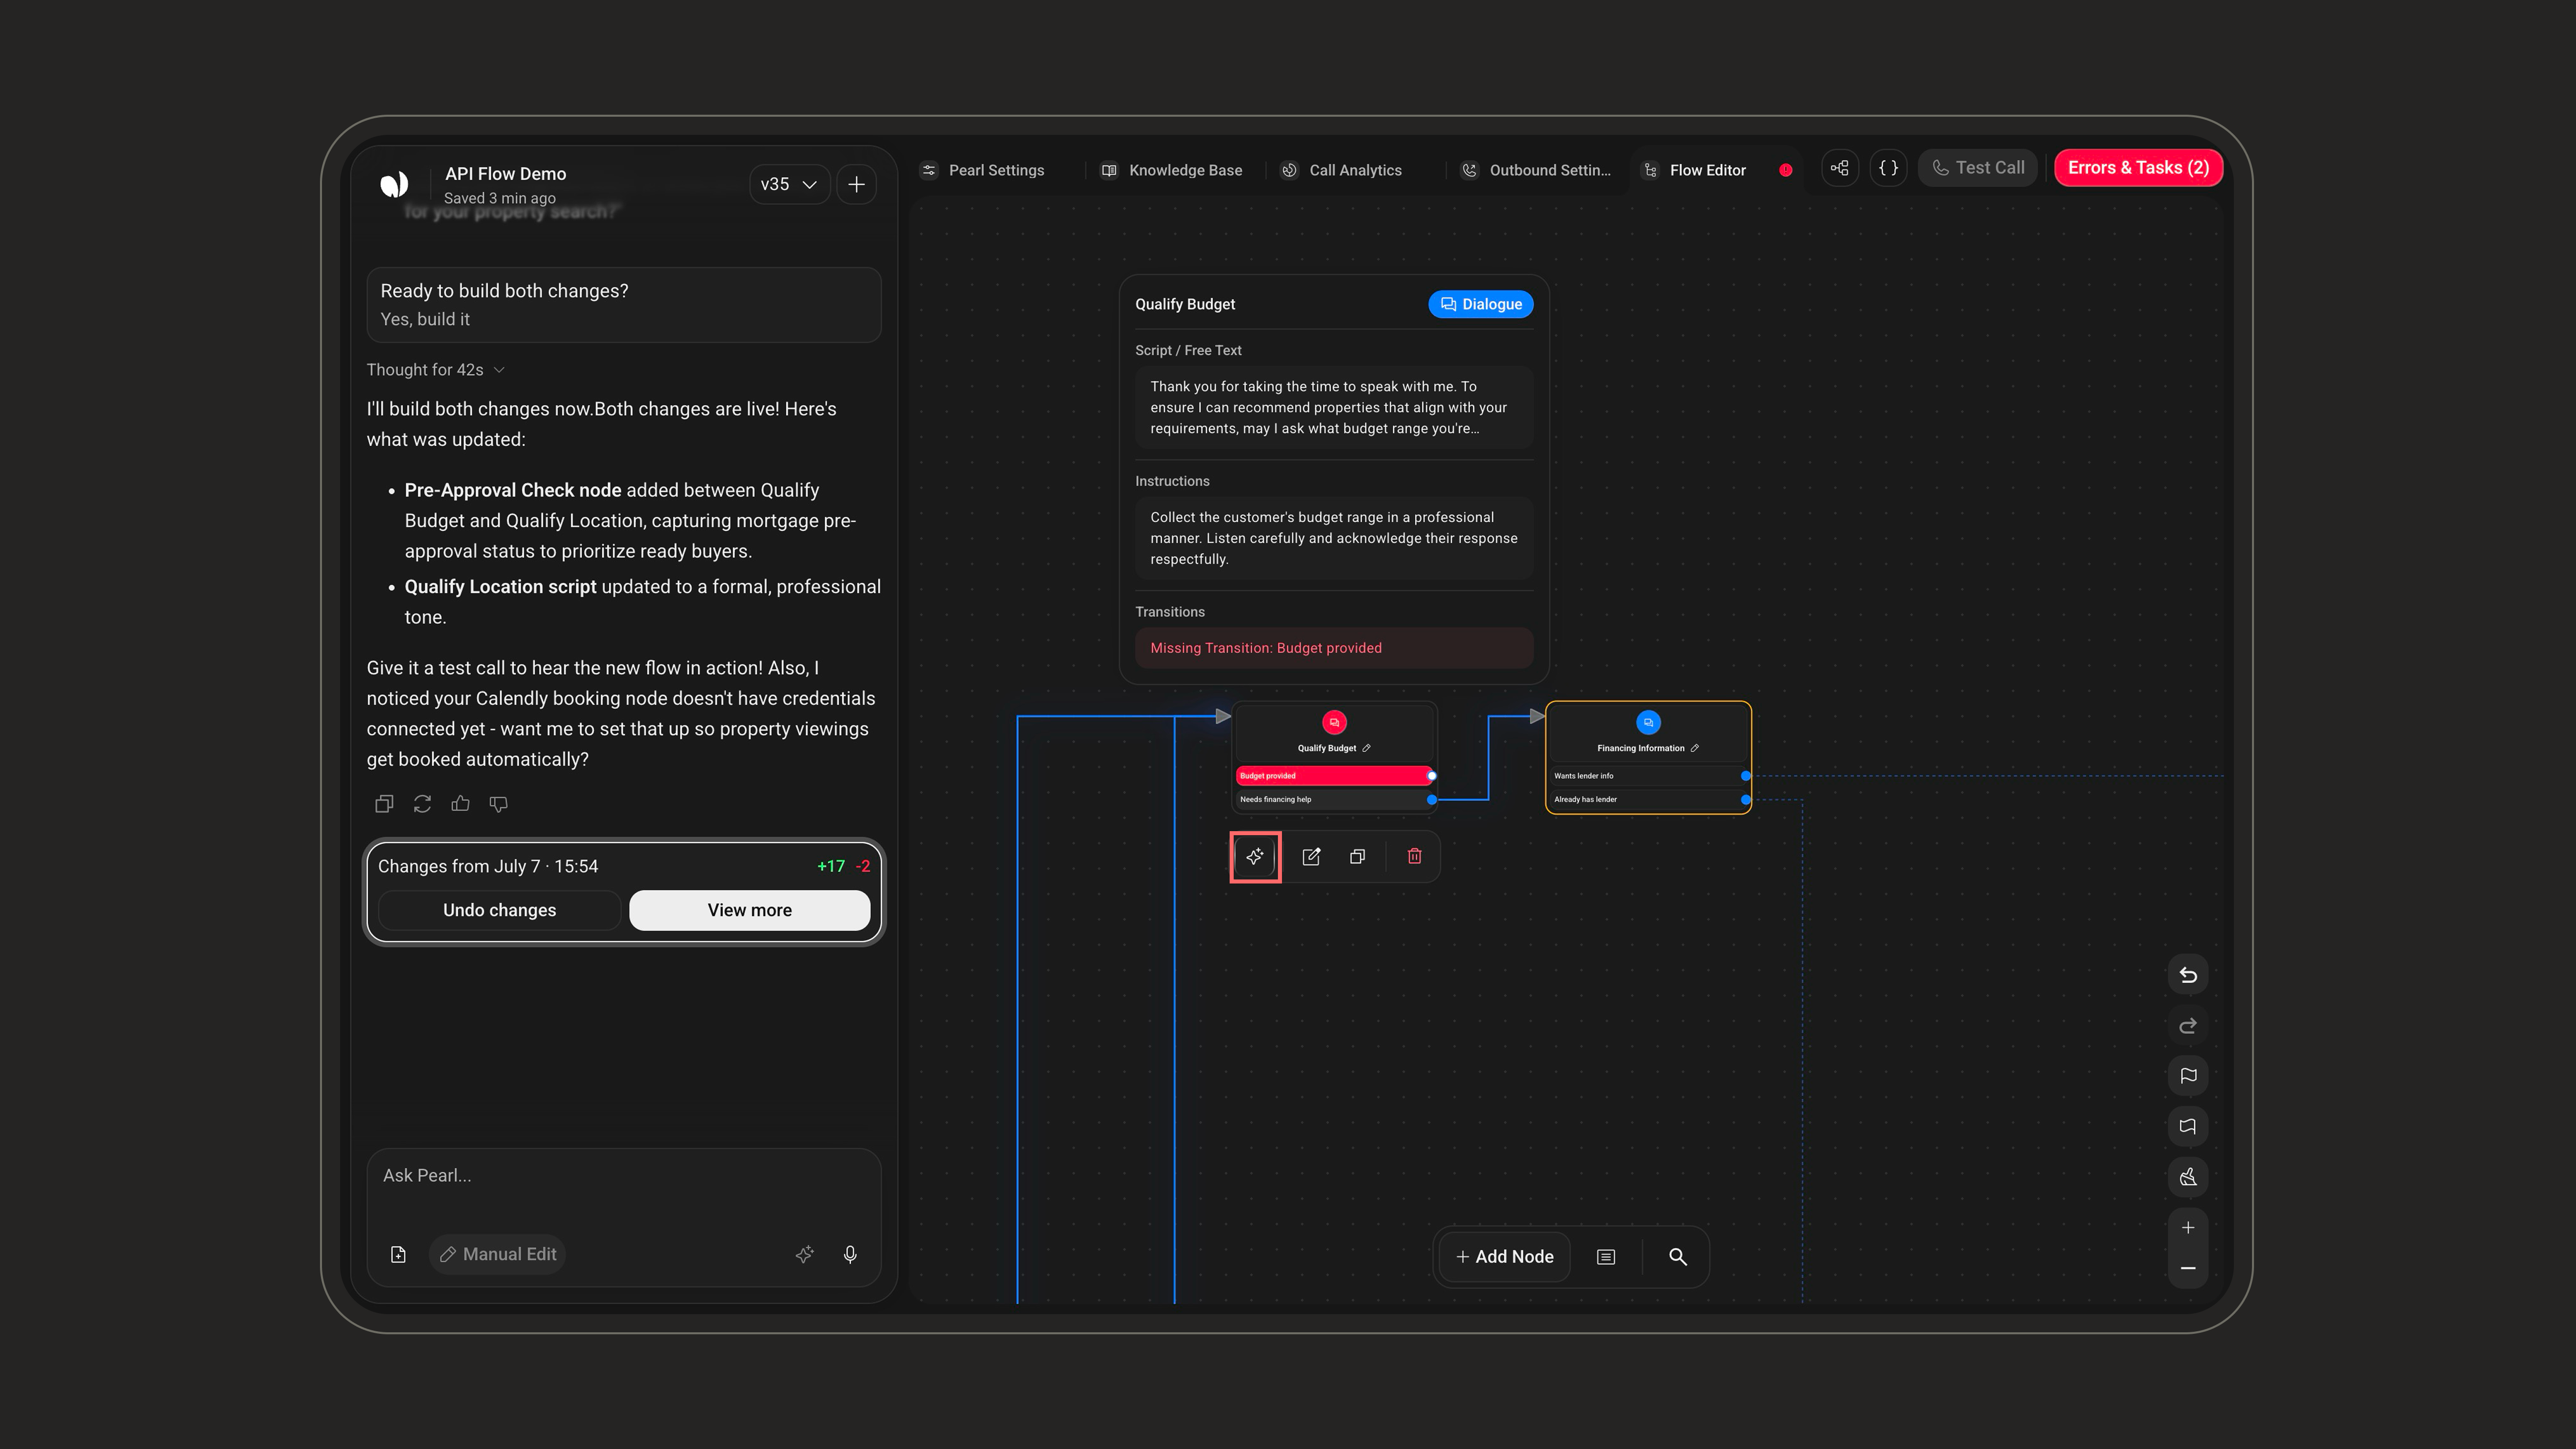
- Fix With Pearl — let the agent propose and apply the corrected configuration for you.
- Open in editor — jump directly to the affected node in the Flow Editor.
Test Calls & Debugging
Test Calls & Debugging
Test calls are the safest way to validate your Pearl before and after publishing.Launching a Test CallOpen the Test Call menu in the header. From here you switch between the two views: Test Call (test your agent by phone) and Past Calls (view your call history and details).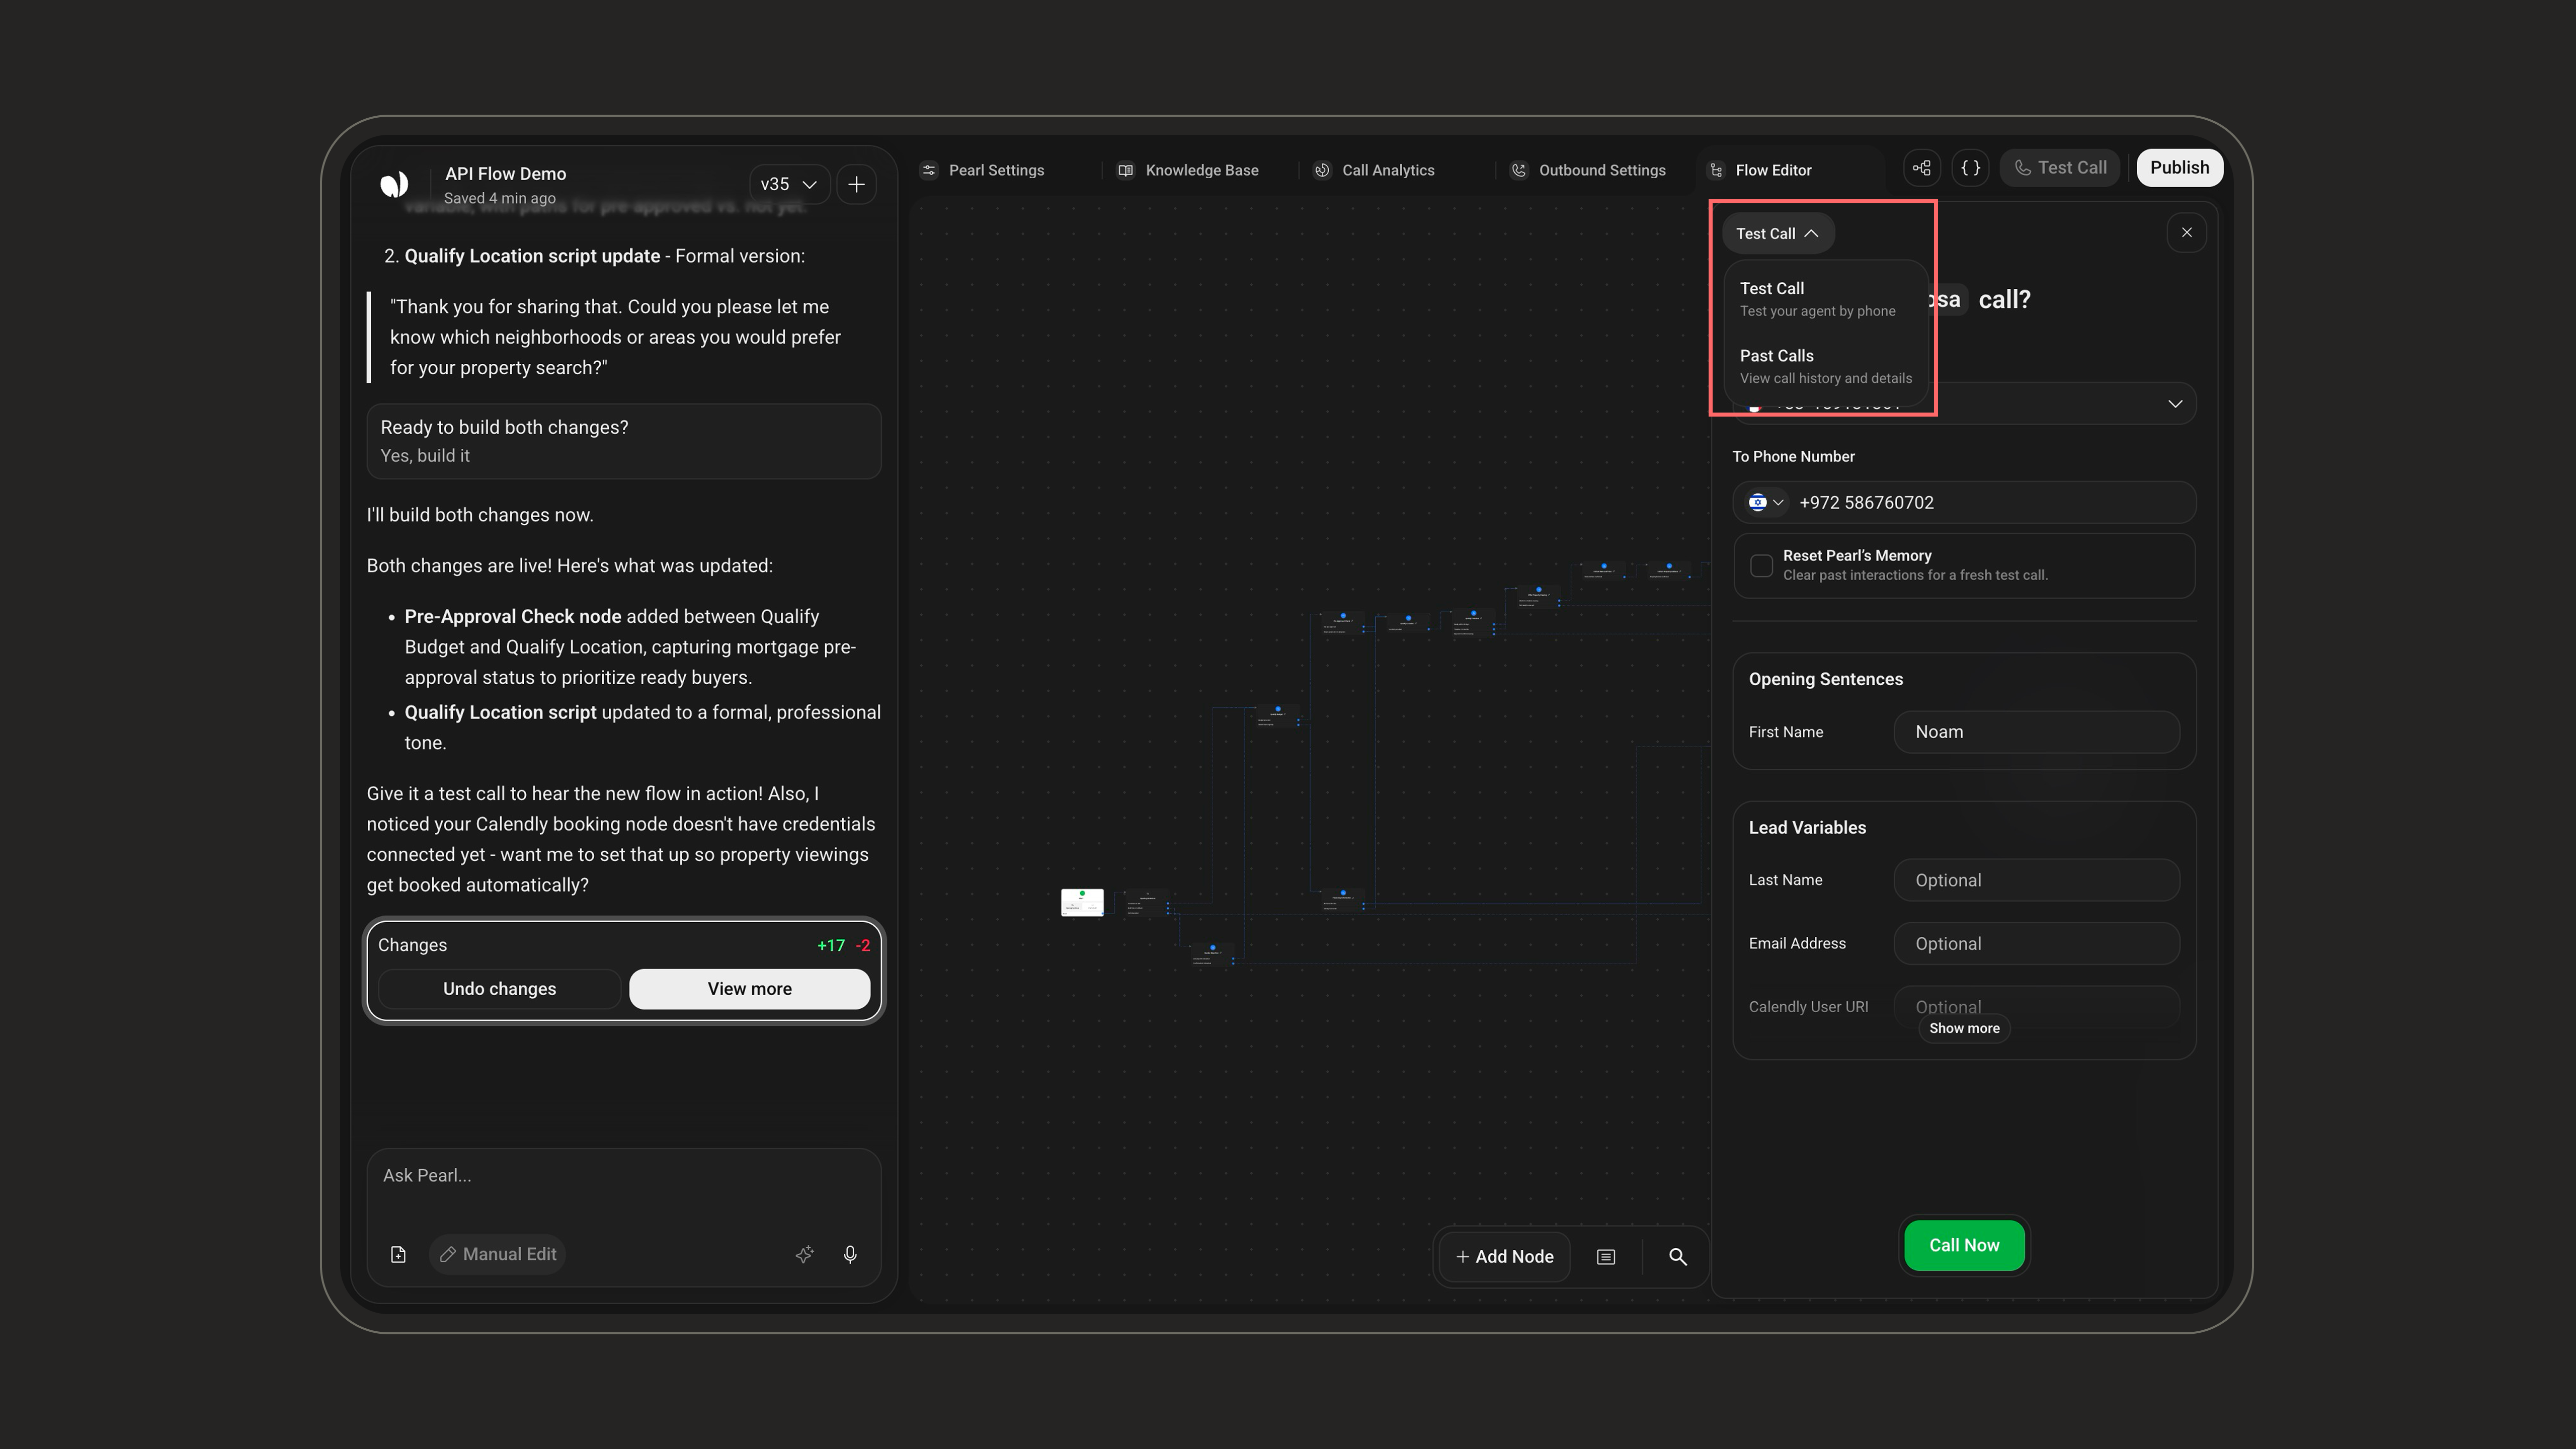
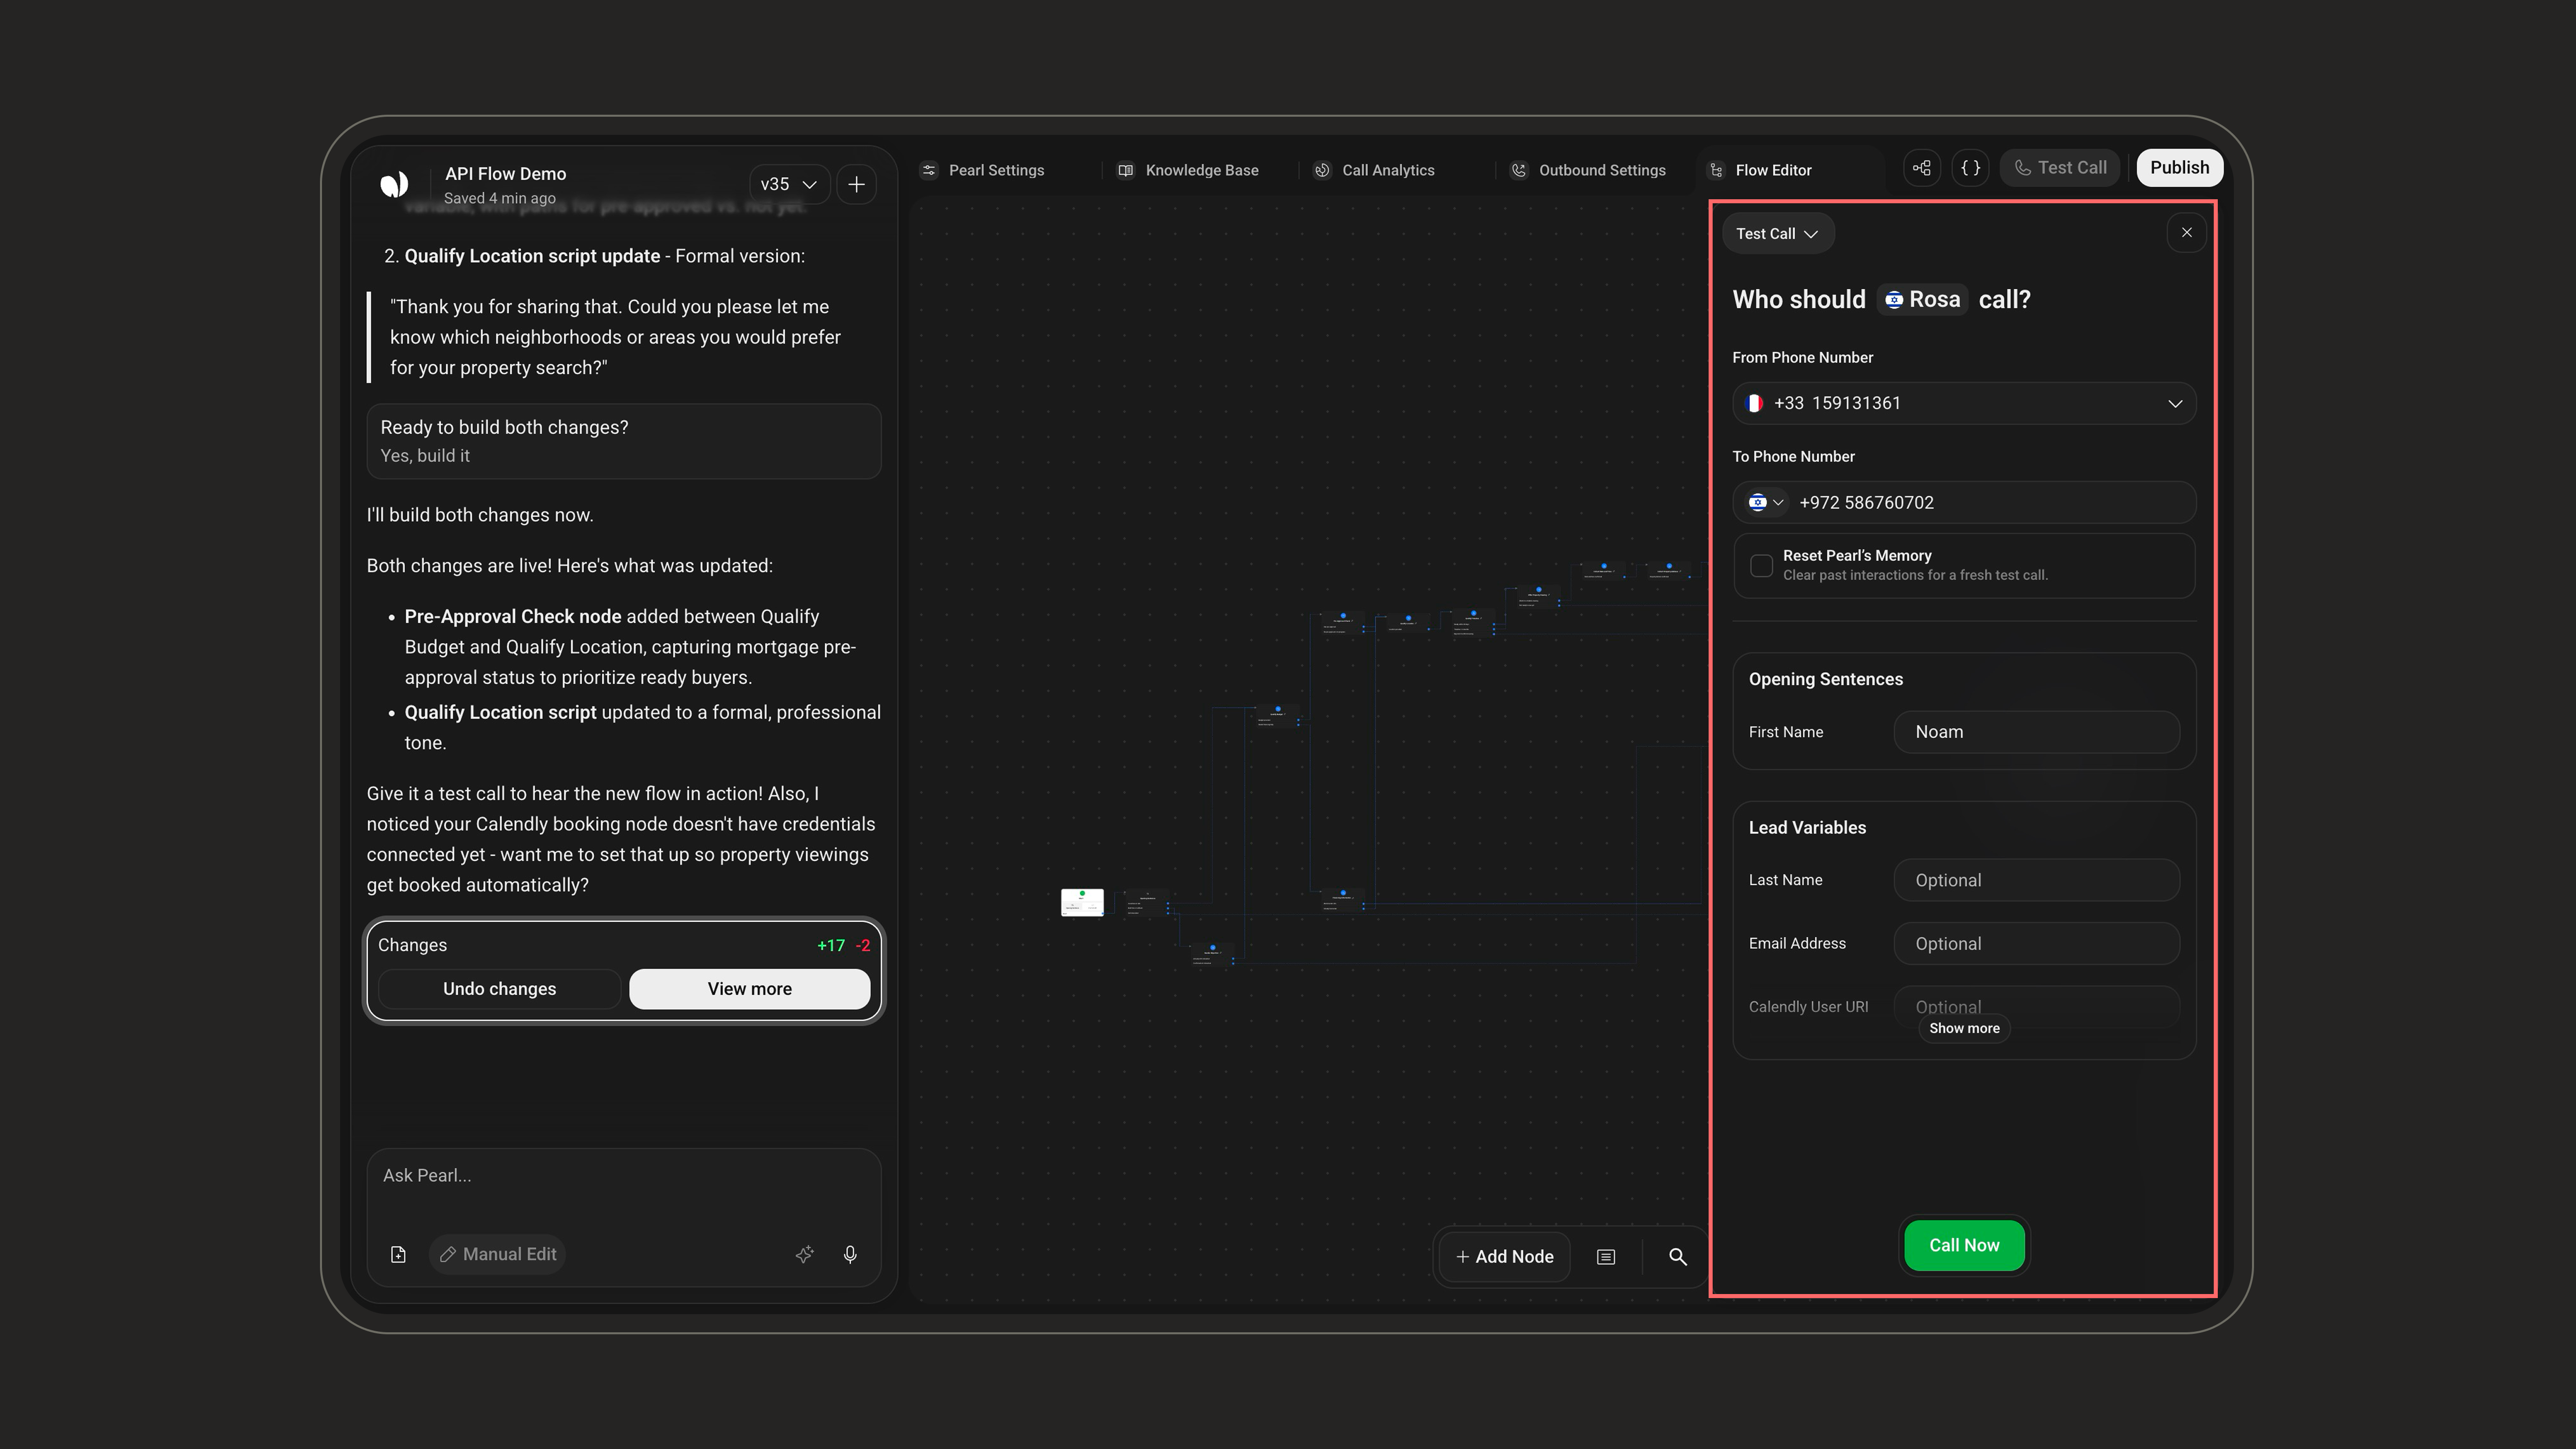
Live Node TracingDuring the test call, a Ringing… / Stop Following pill appears and the nodes in the canvas light up one after another as the conversation progresses, so you can visually follow the path the call is taking through your flow.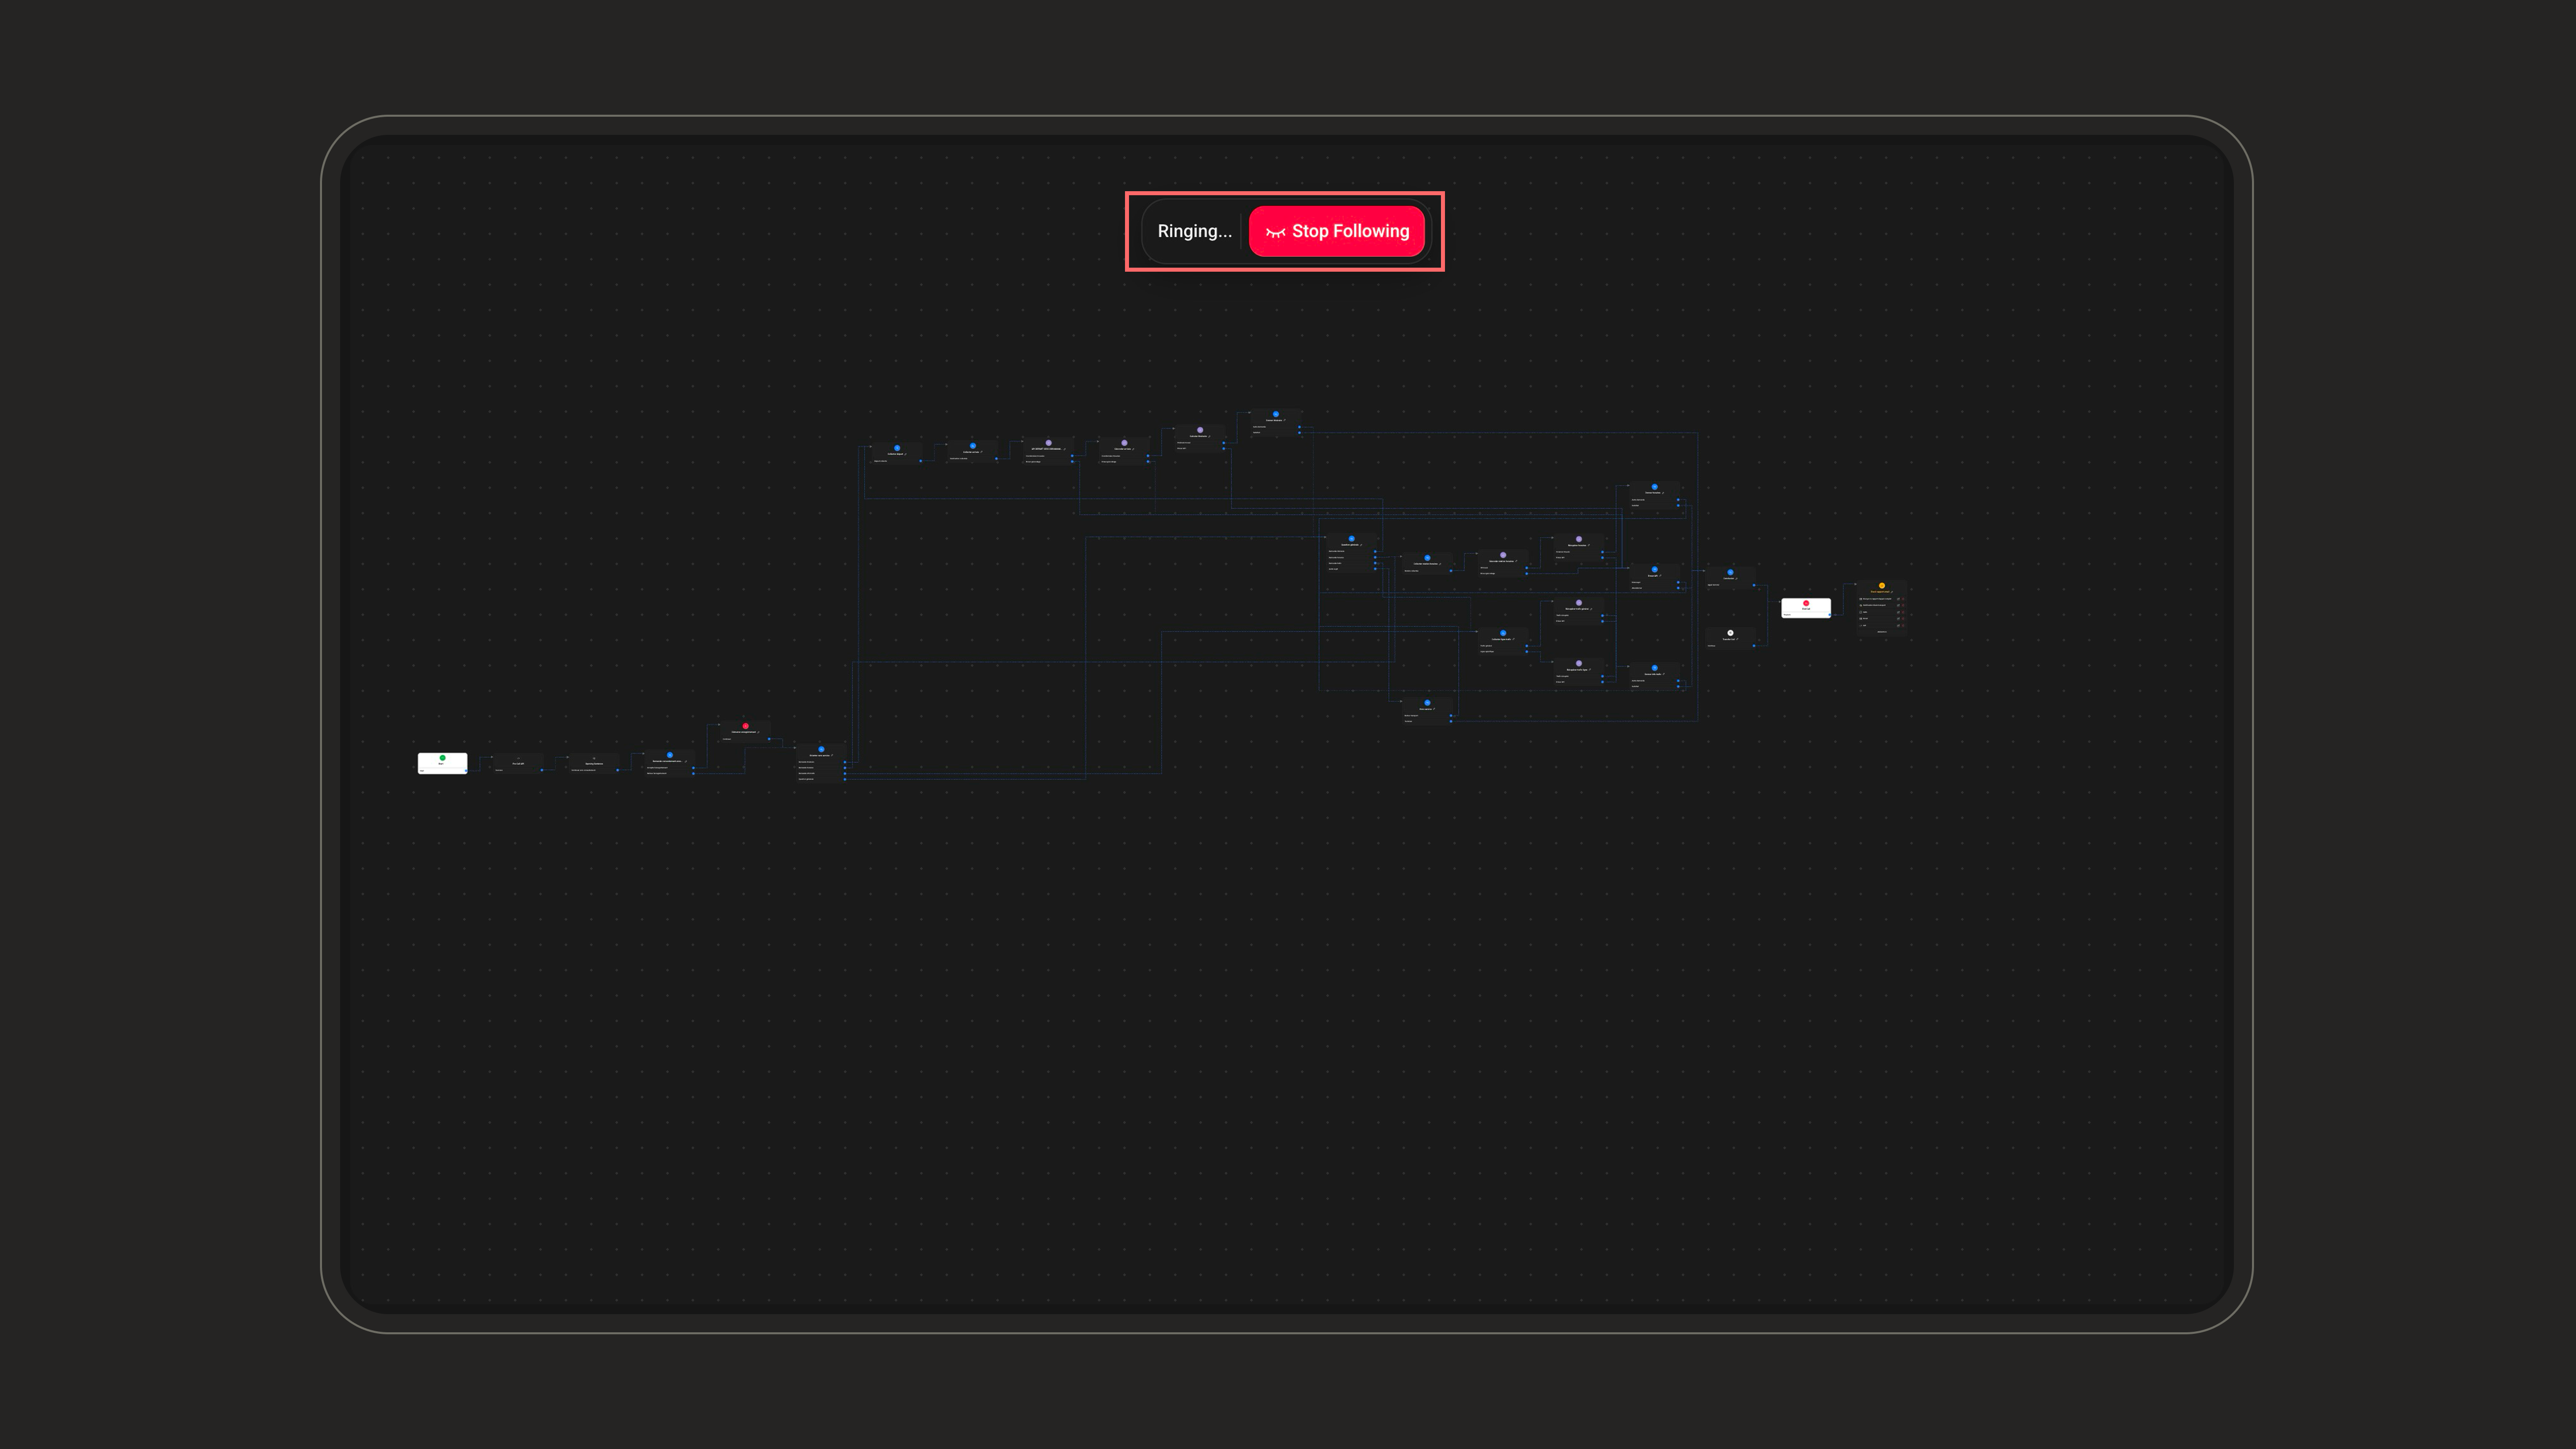
Past CallsThe Past Calls view lists your previous test calls grouped by date. Open any entry to inspect its details and verify that your flow — including post-call automation — behaved as expected.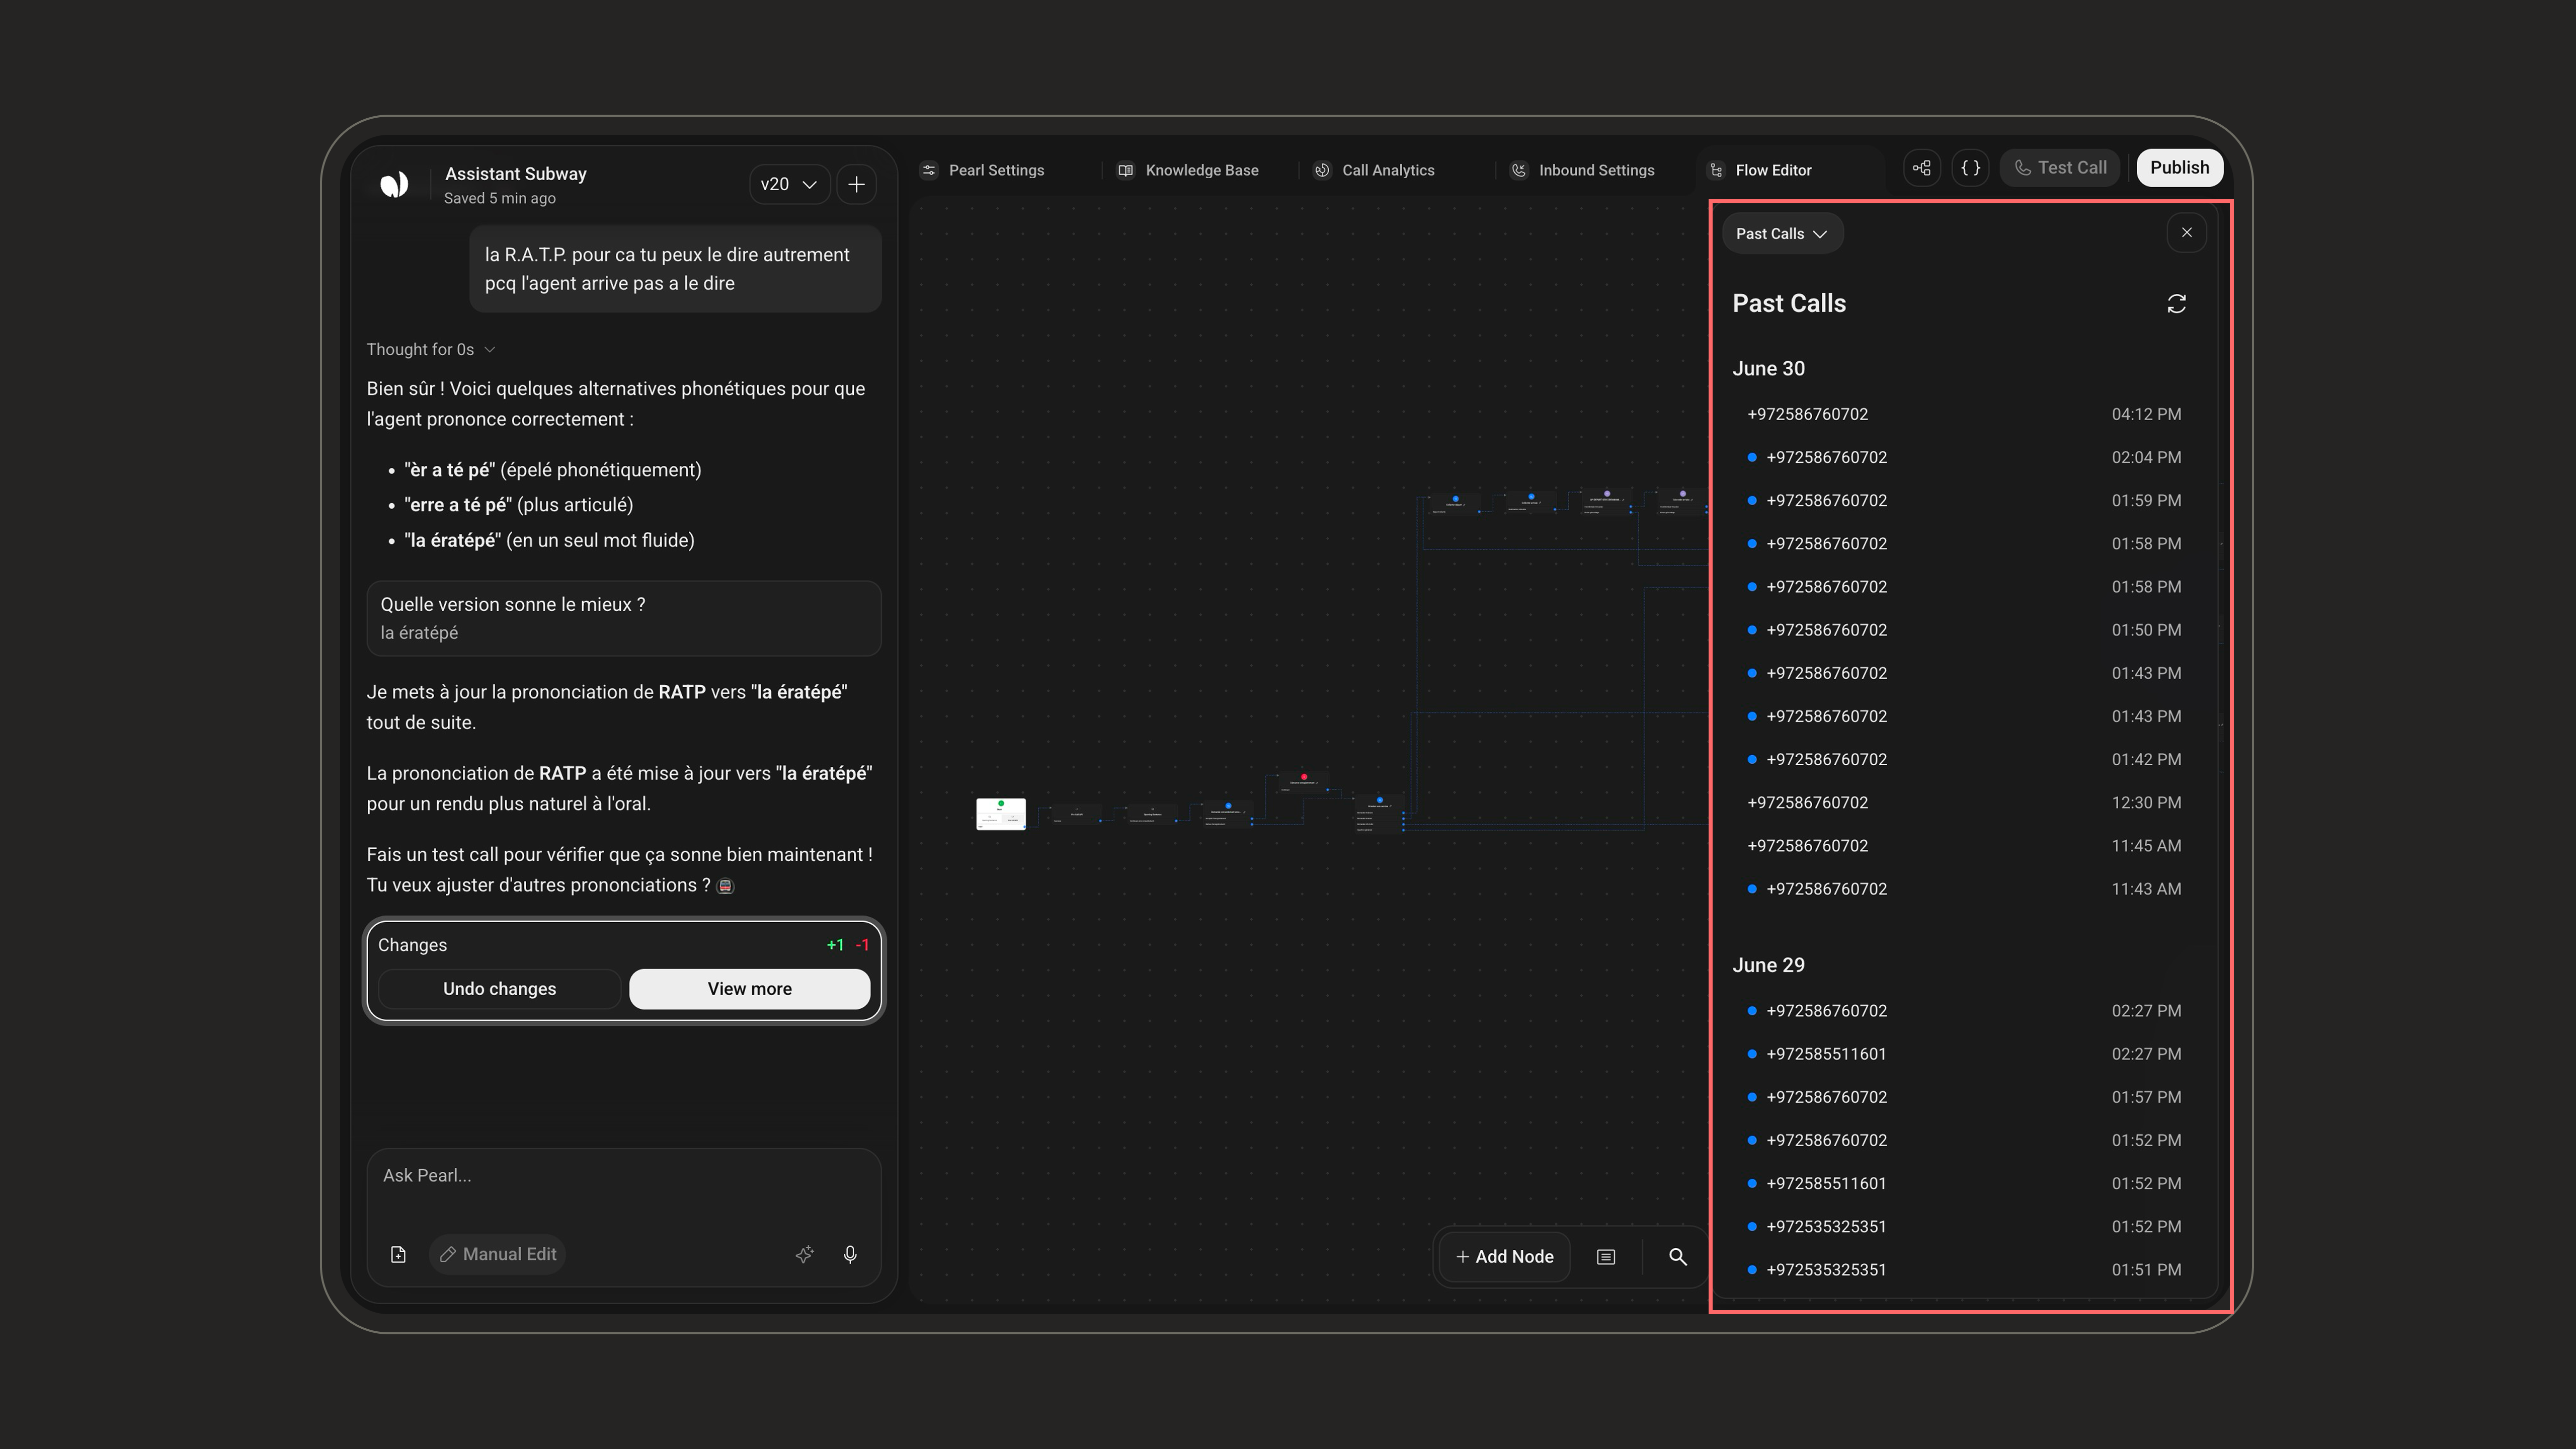
On text Pearls, these controls read Test Chat and Past Chats instead of Test Call and Past Calls.
Live Node TracingDuring the test call, a Ringing… / Stop Following pill appears and the nodes in the canvas light up one after another as the conversation progresses, so you can visually follow the path the call is taking through your flow.
Past CallsThe Past Calls view lists your previous test calls grouped by date. Open any entry to inspect its details and verify that your flow — including post-call automation — behaved as expected.
To learn more about post-call actions, see the Post-Call documentation — or, for text Pearls, the Post-Chat documentation.
Chat Sidebar
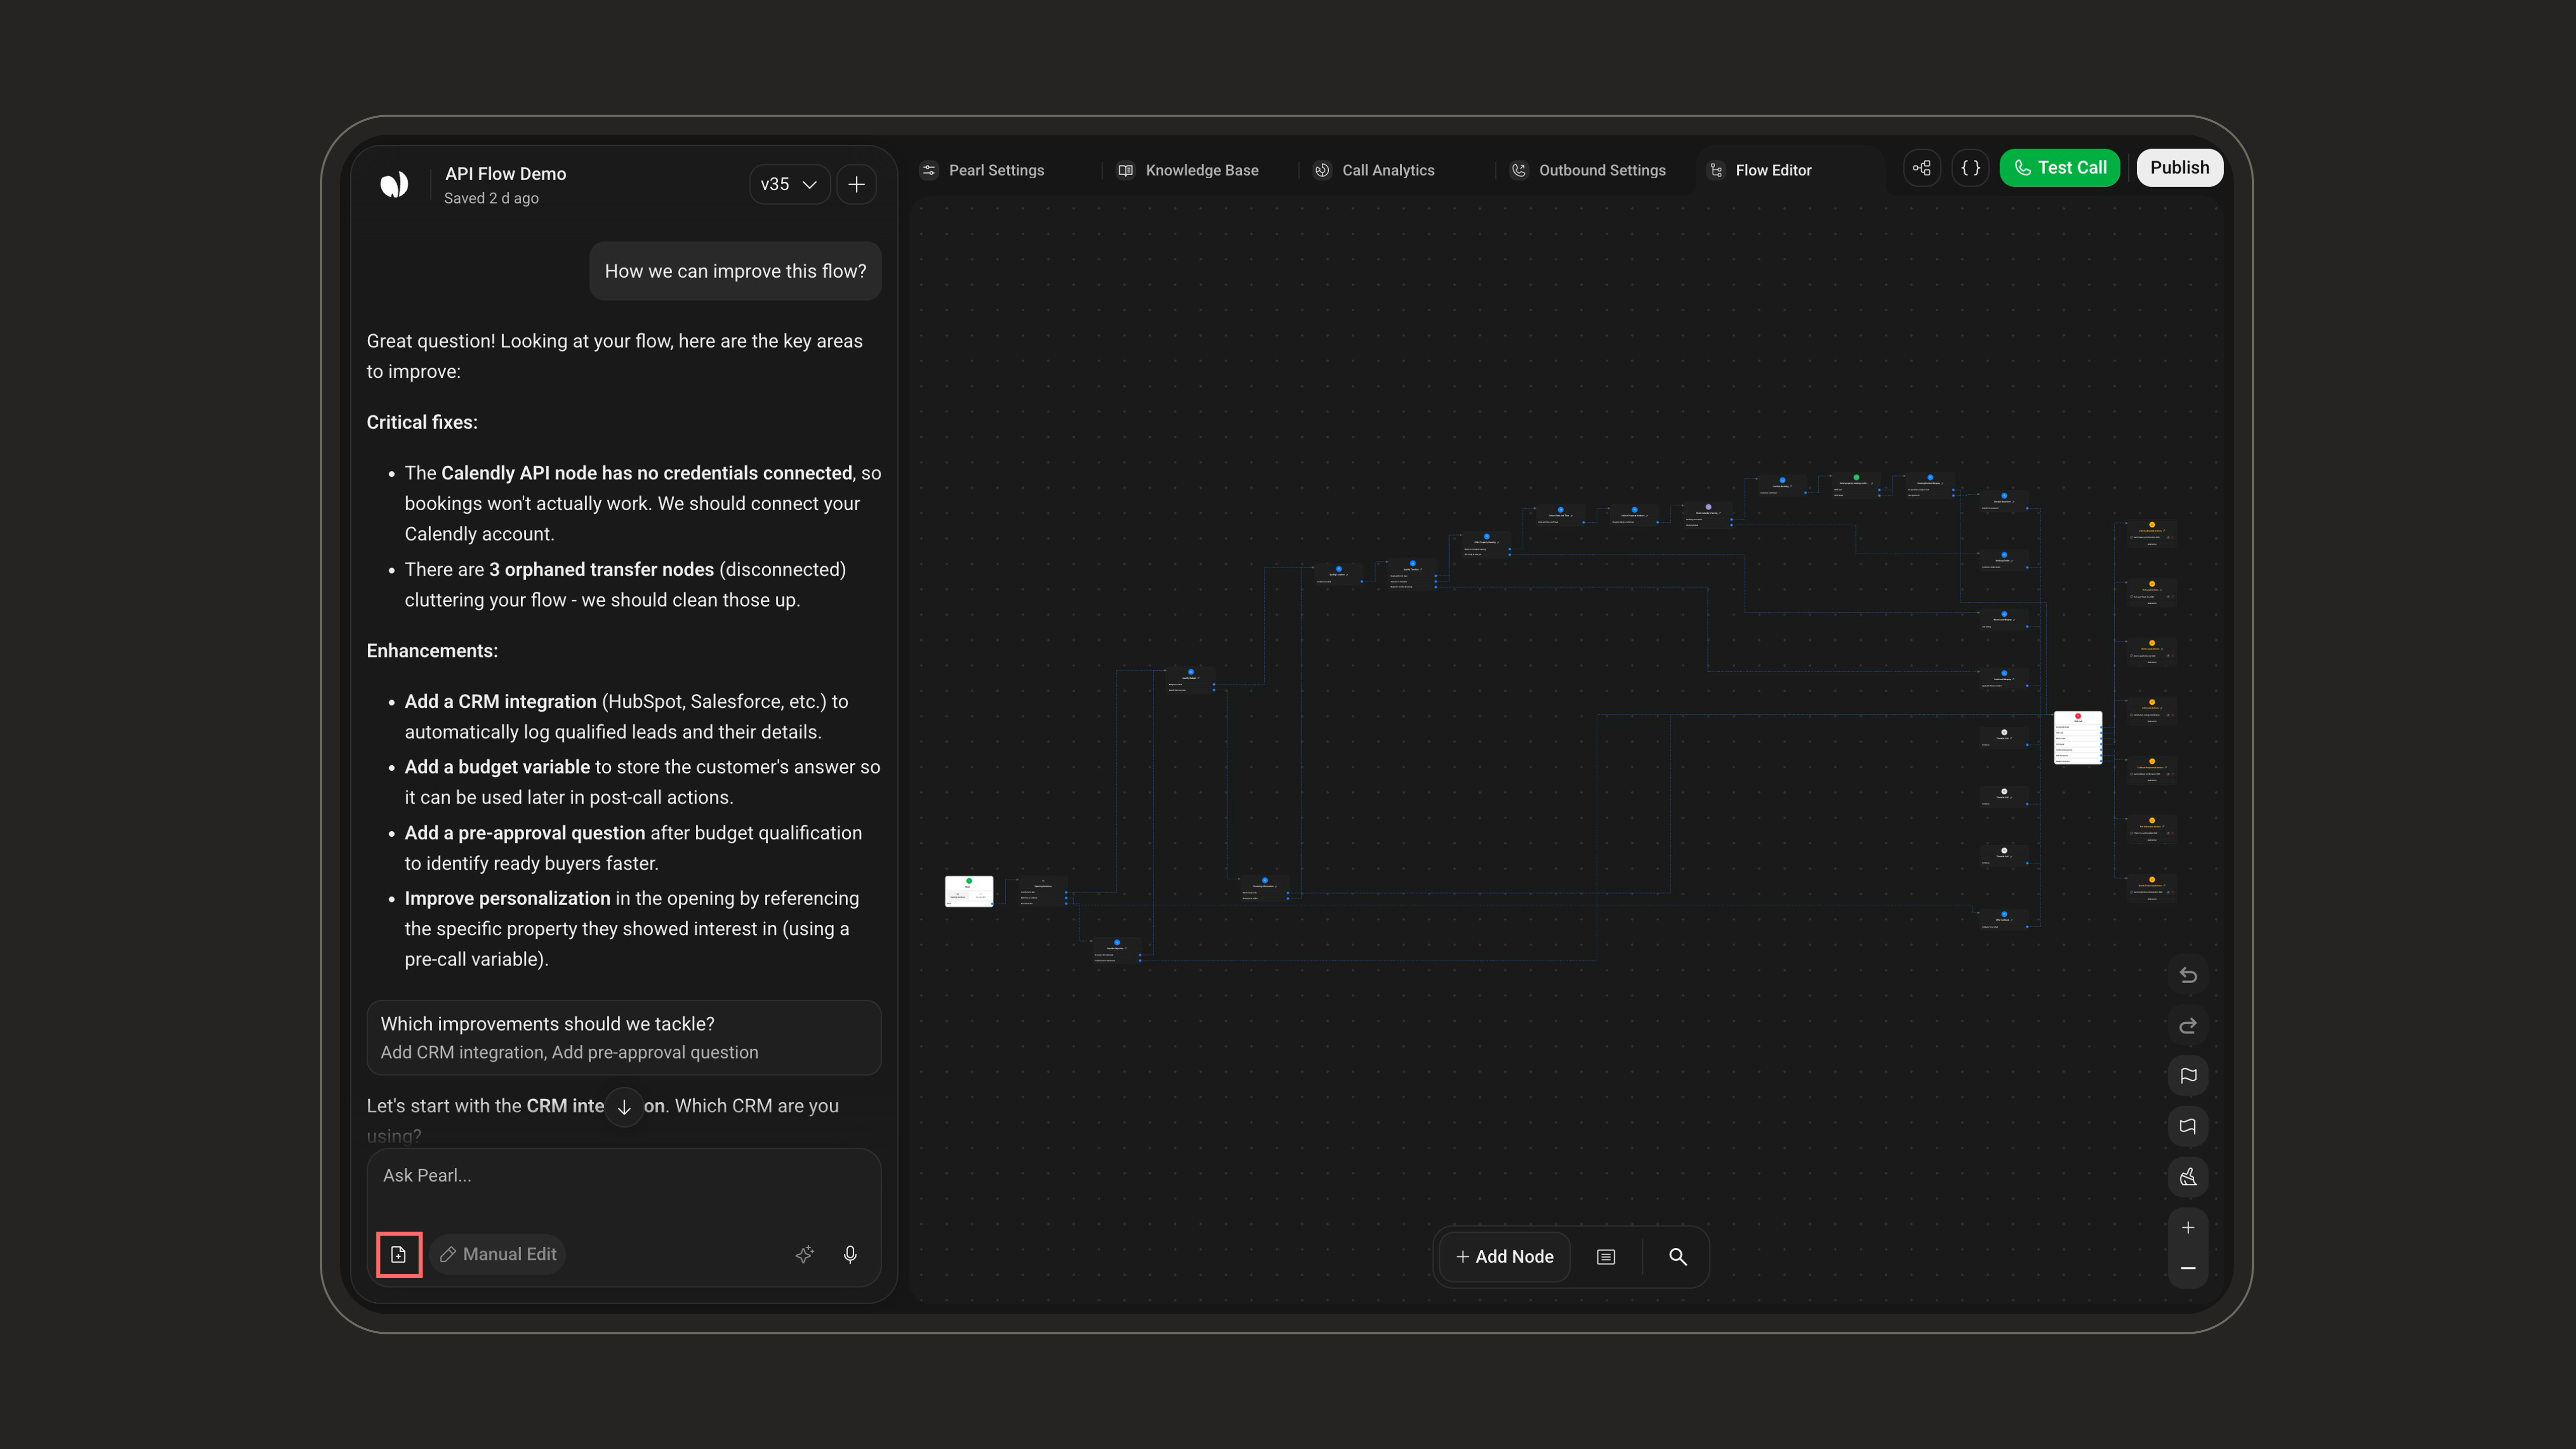
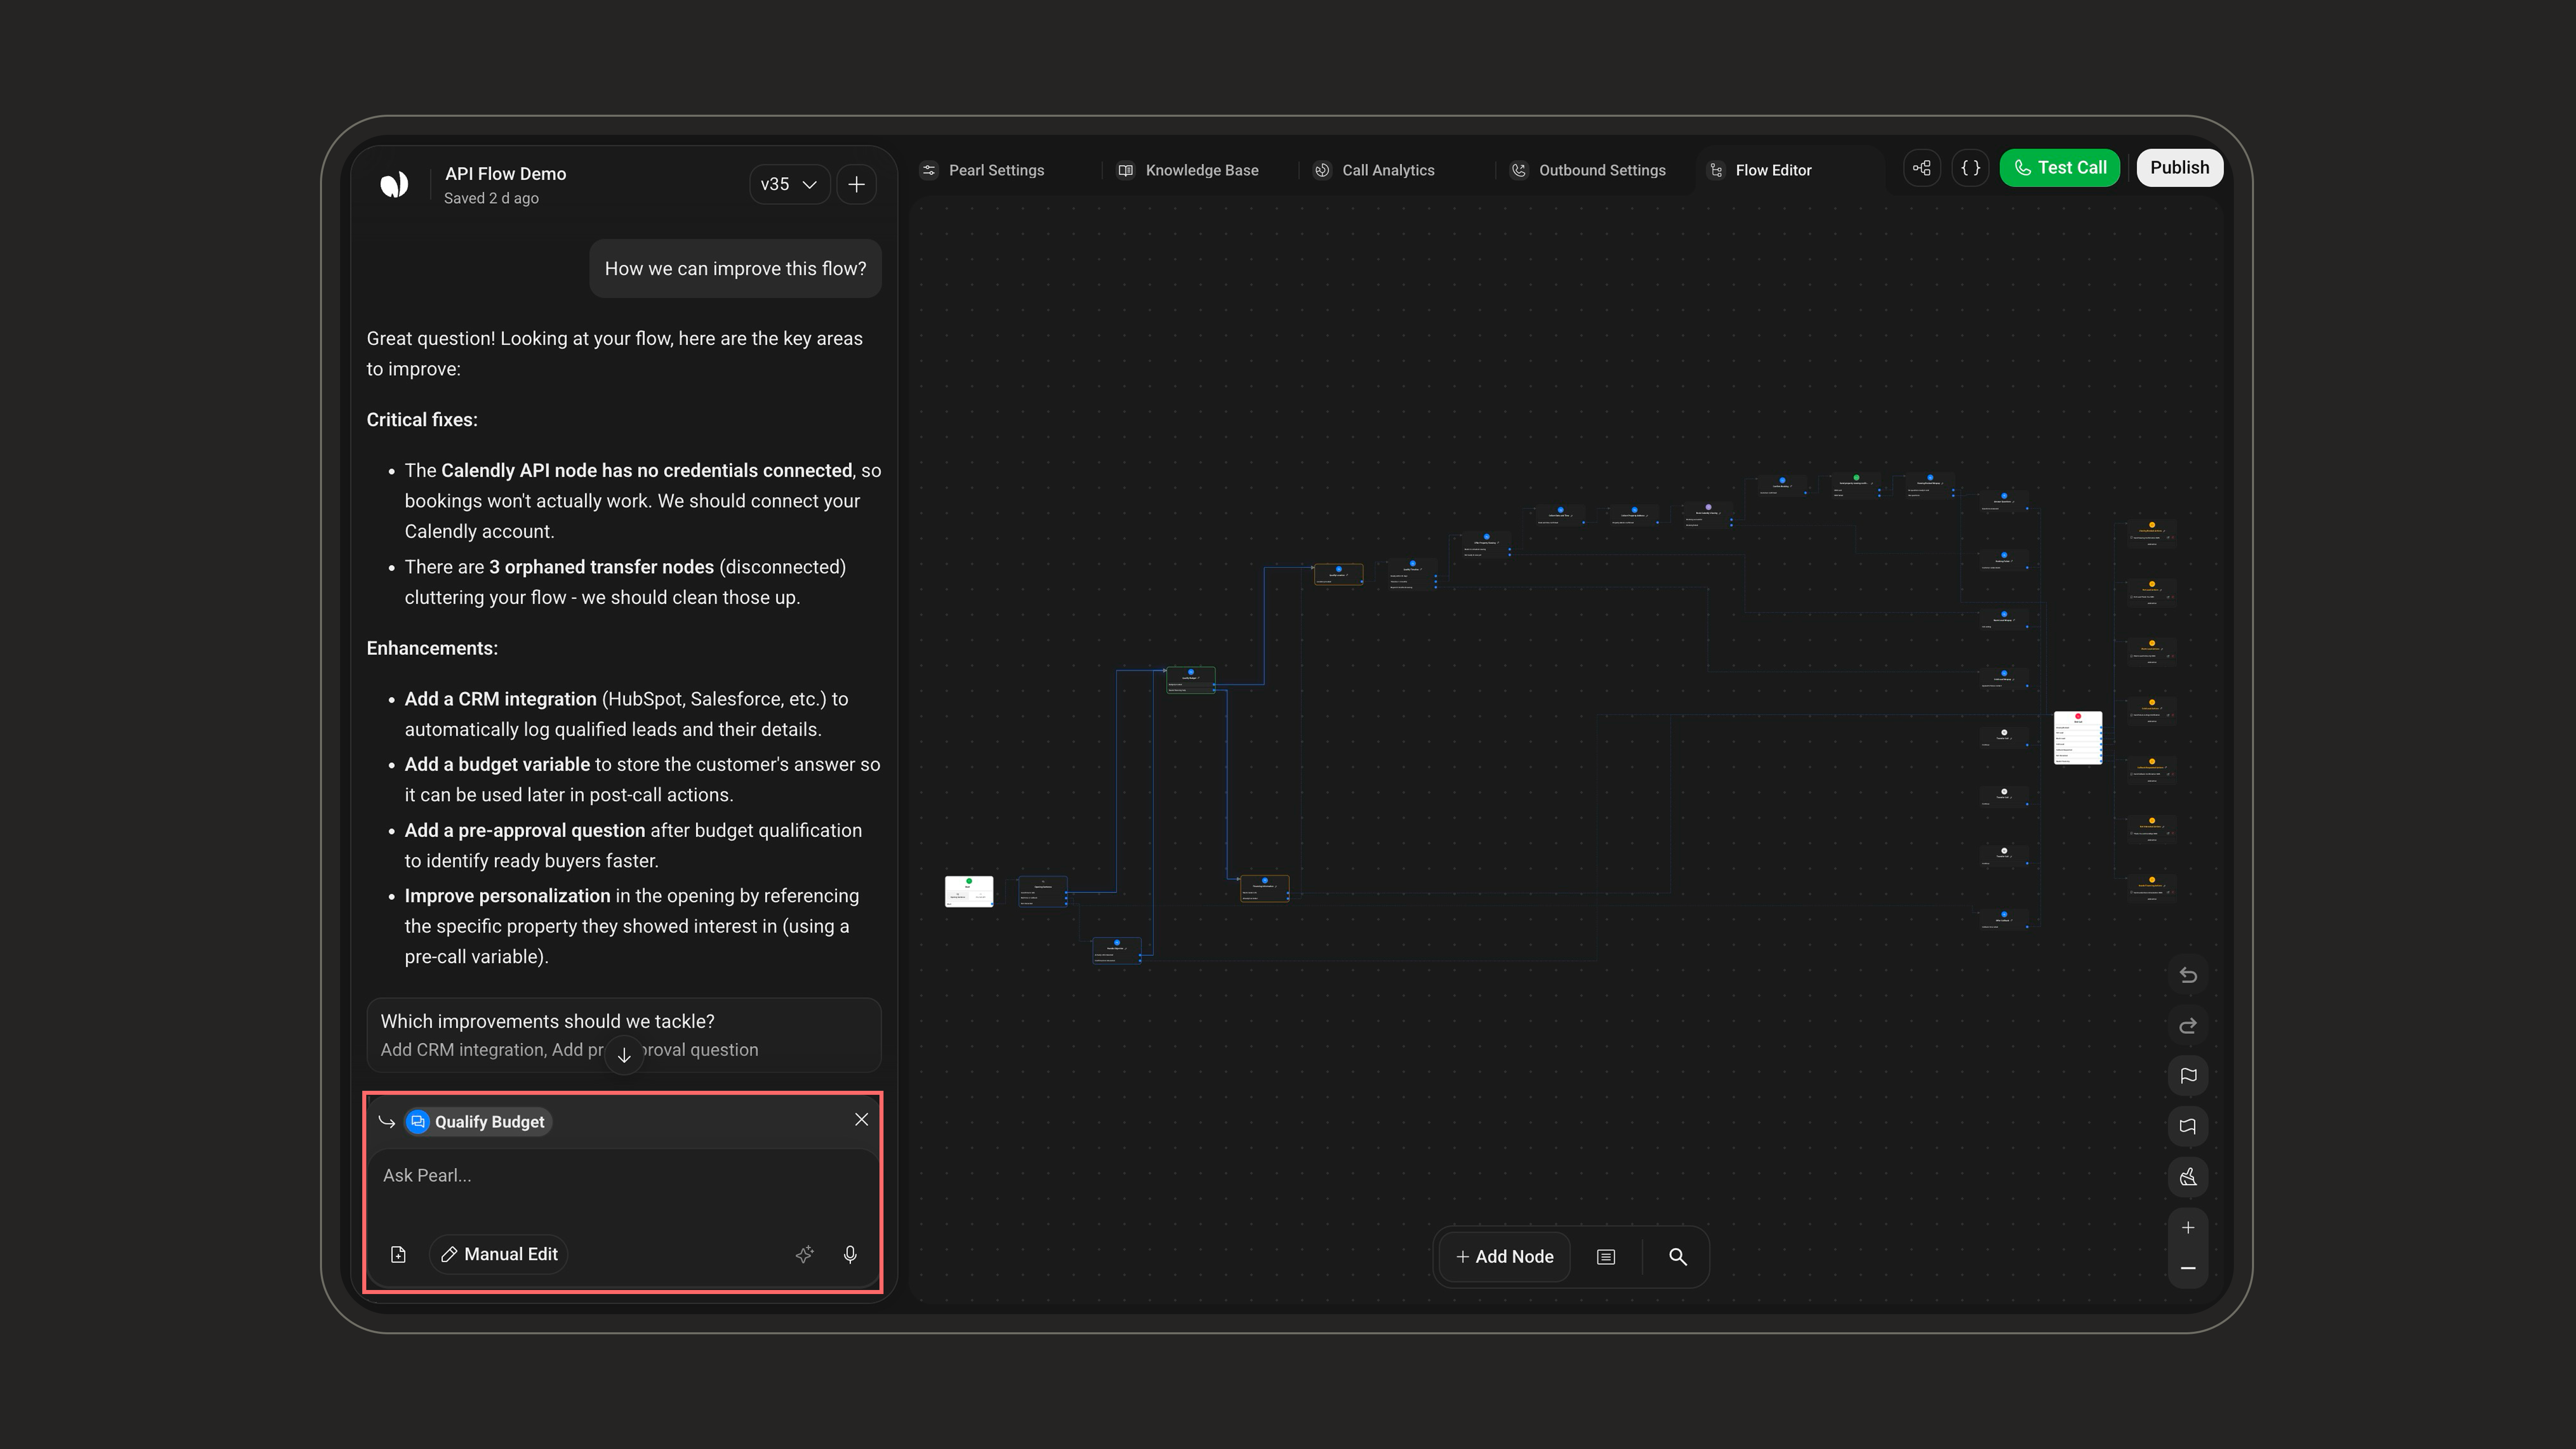
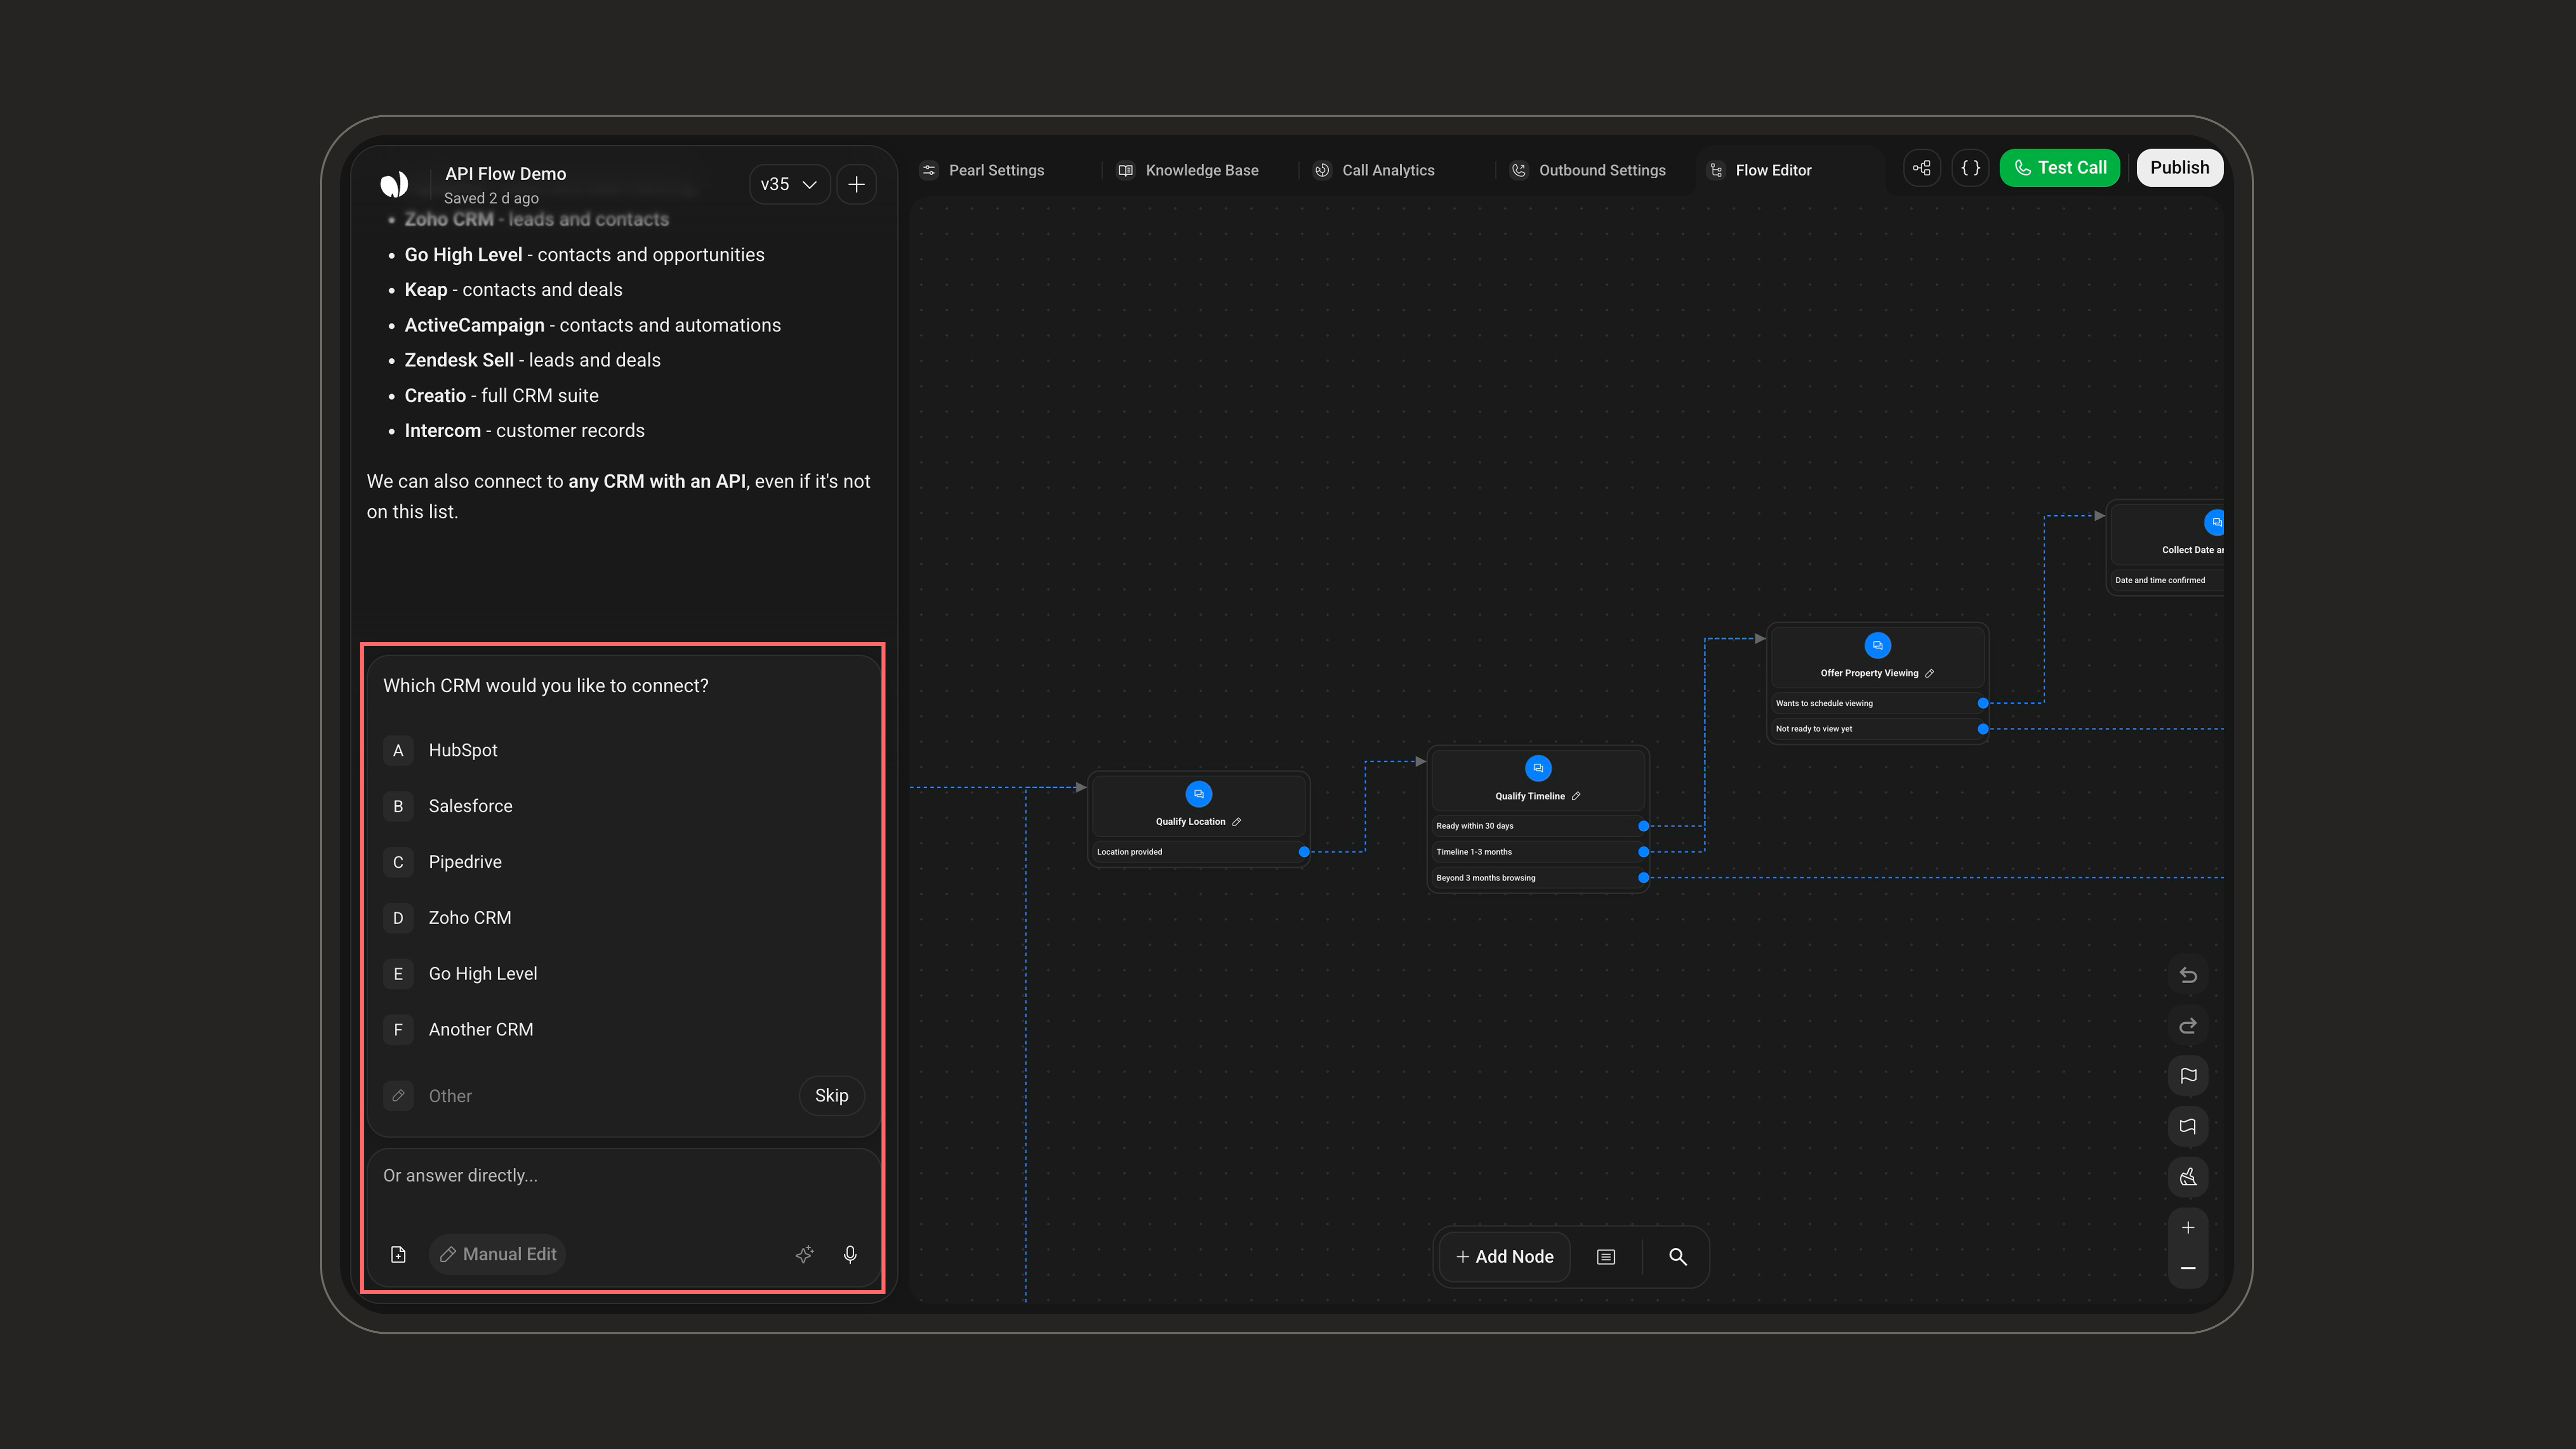
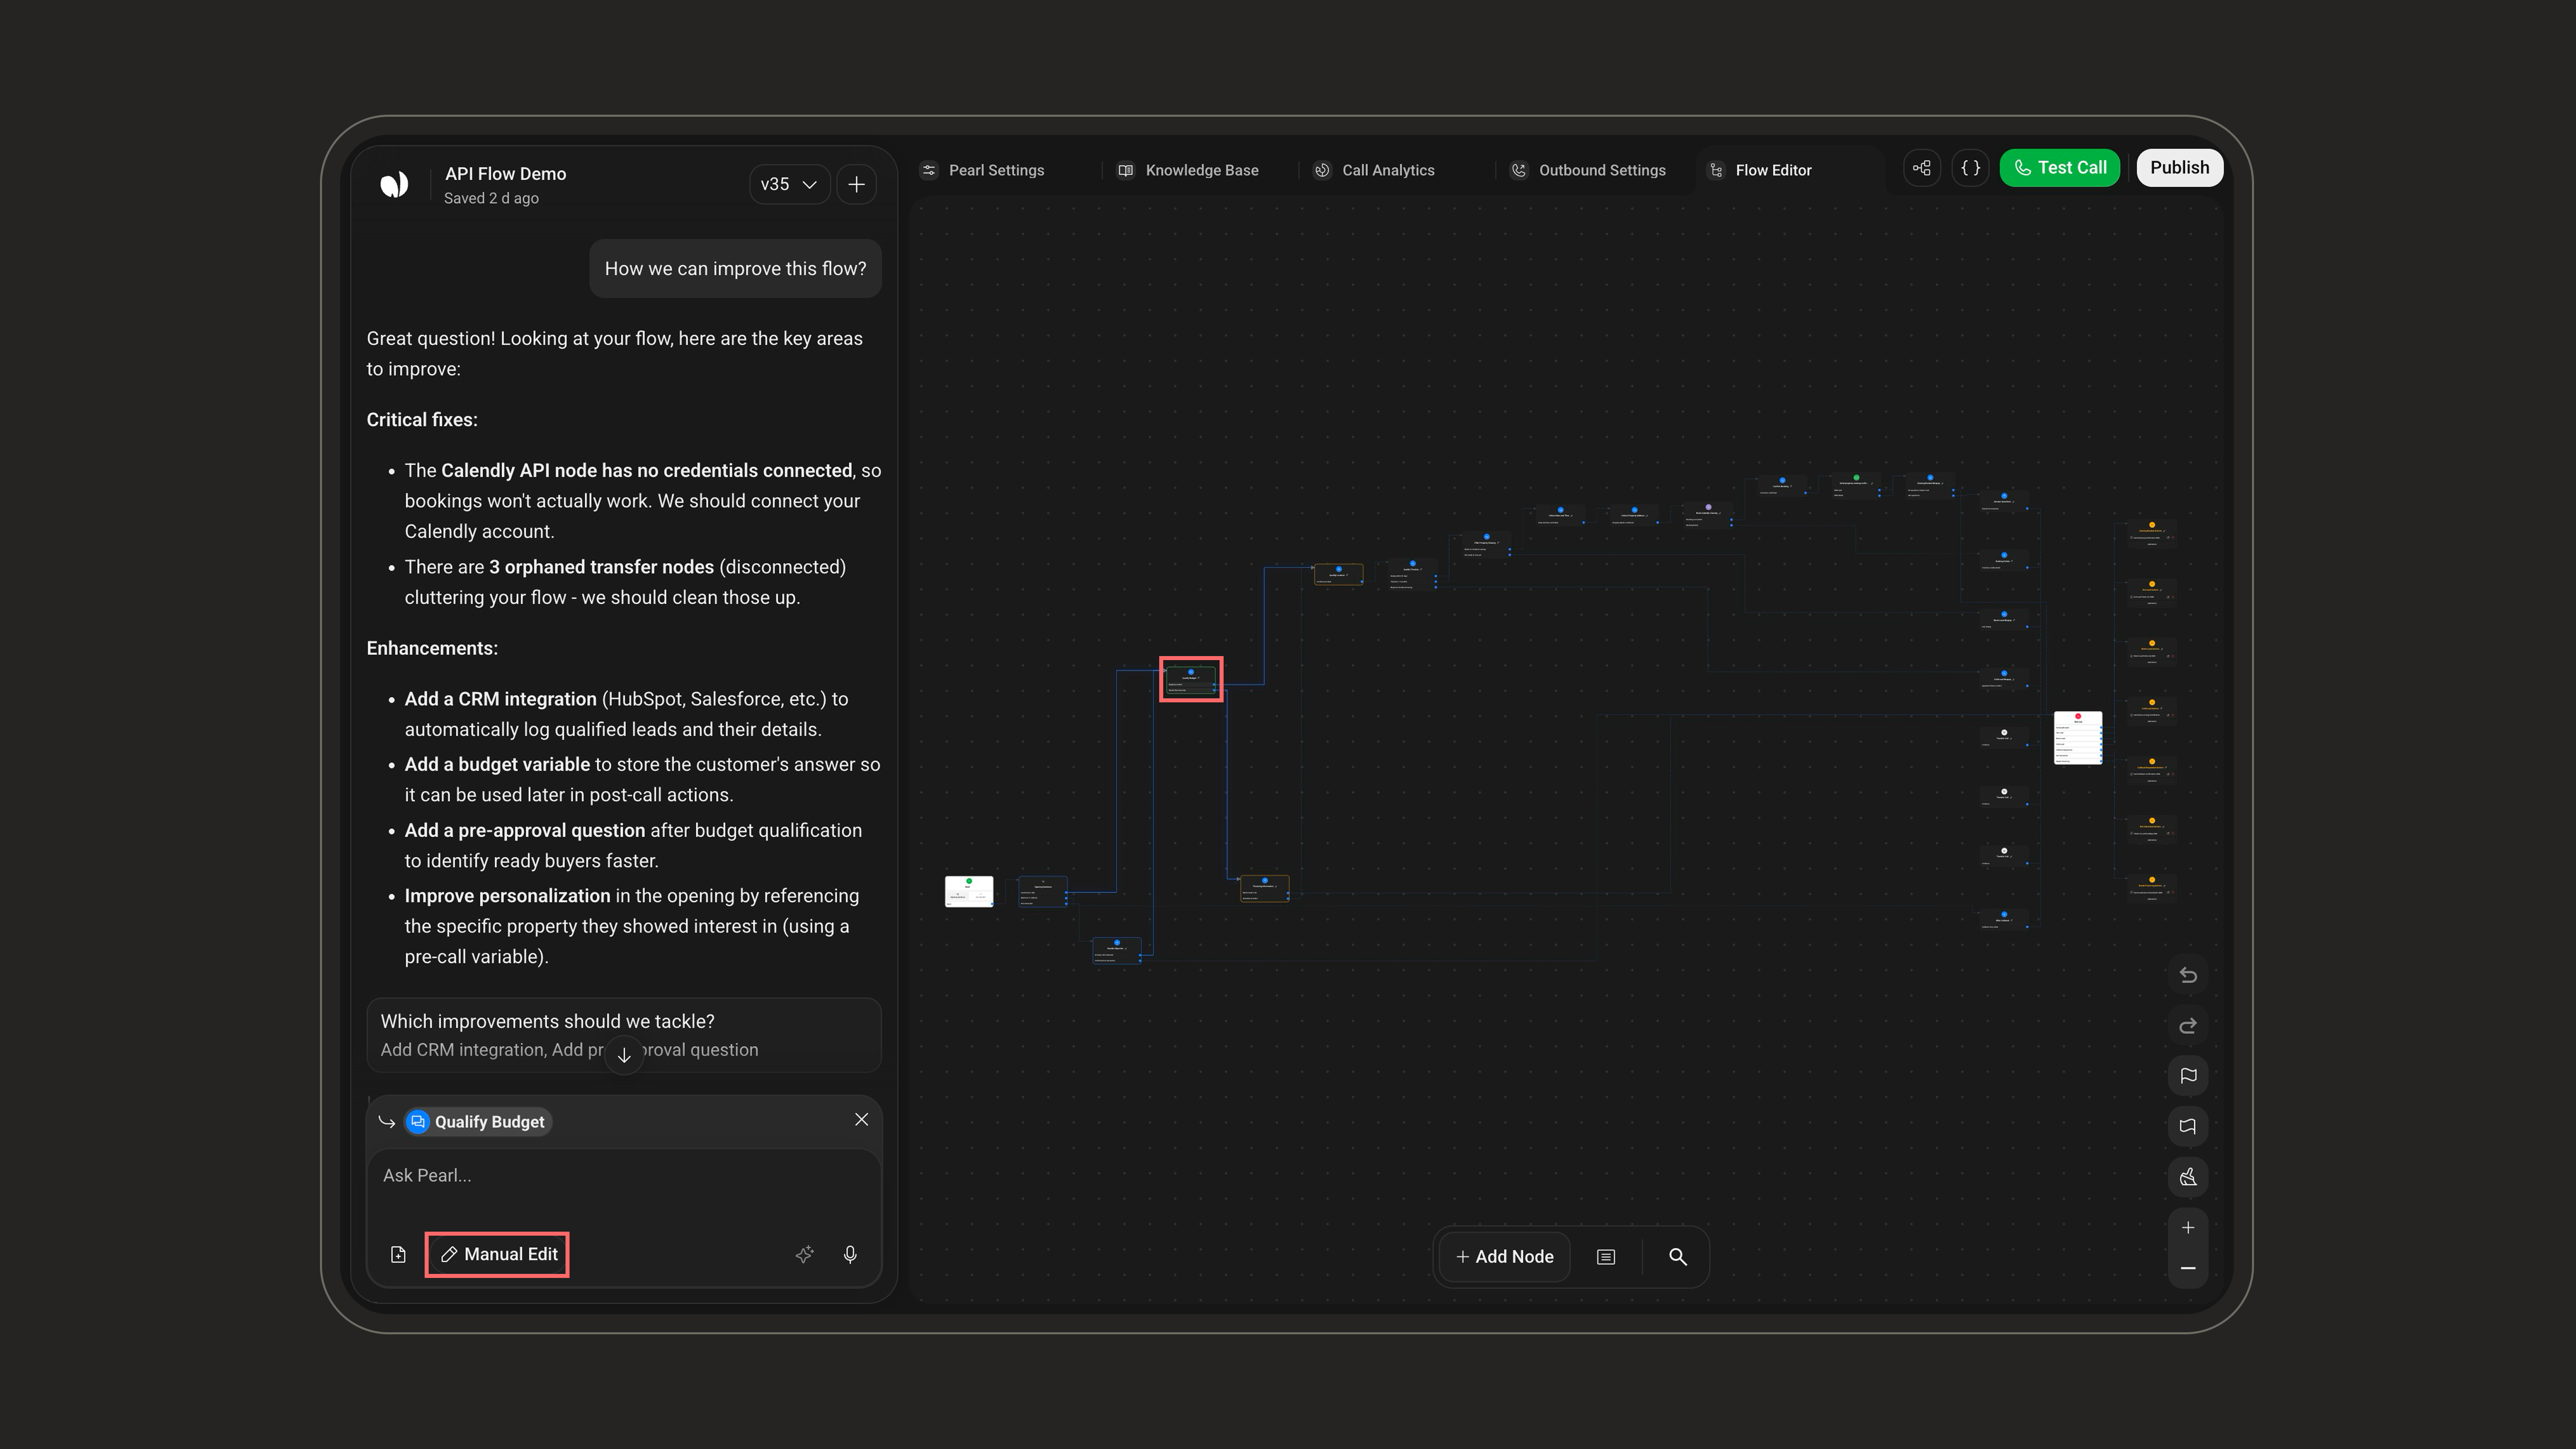
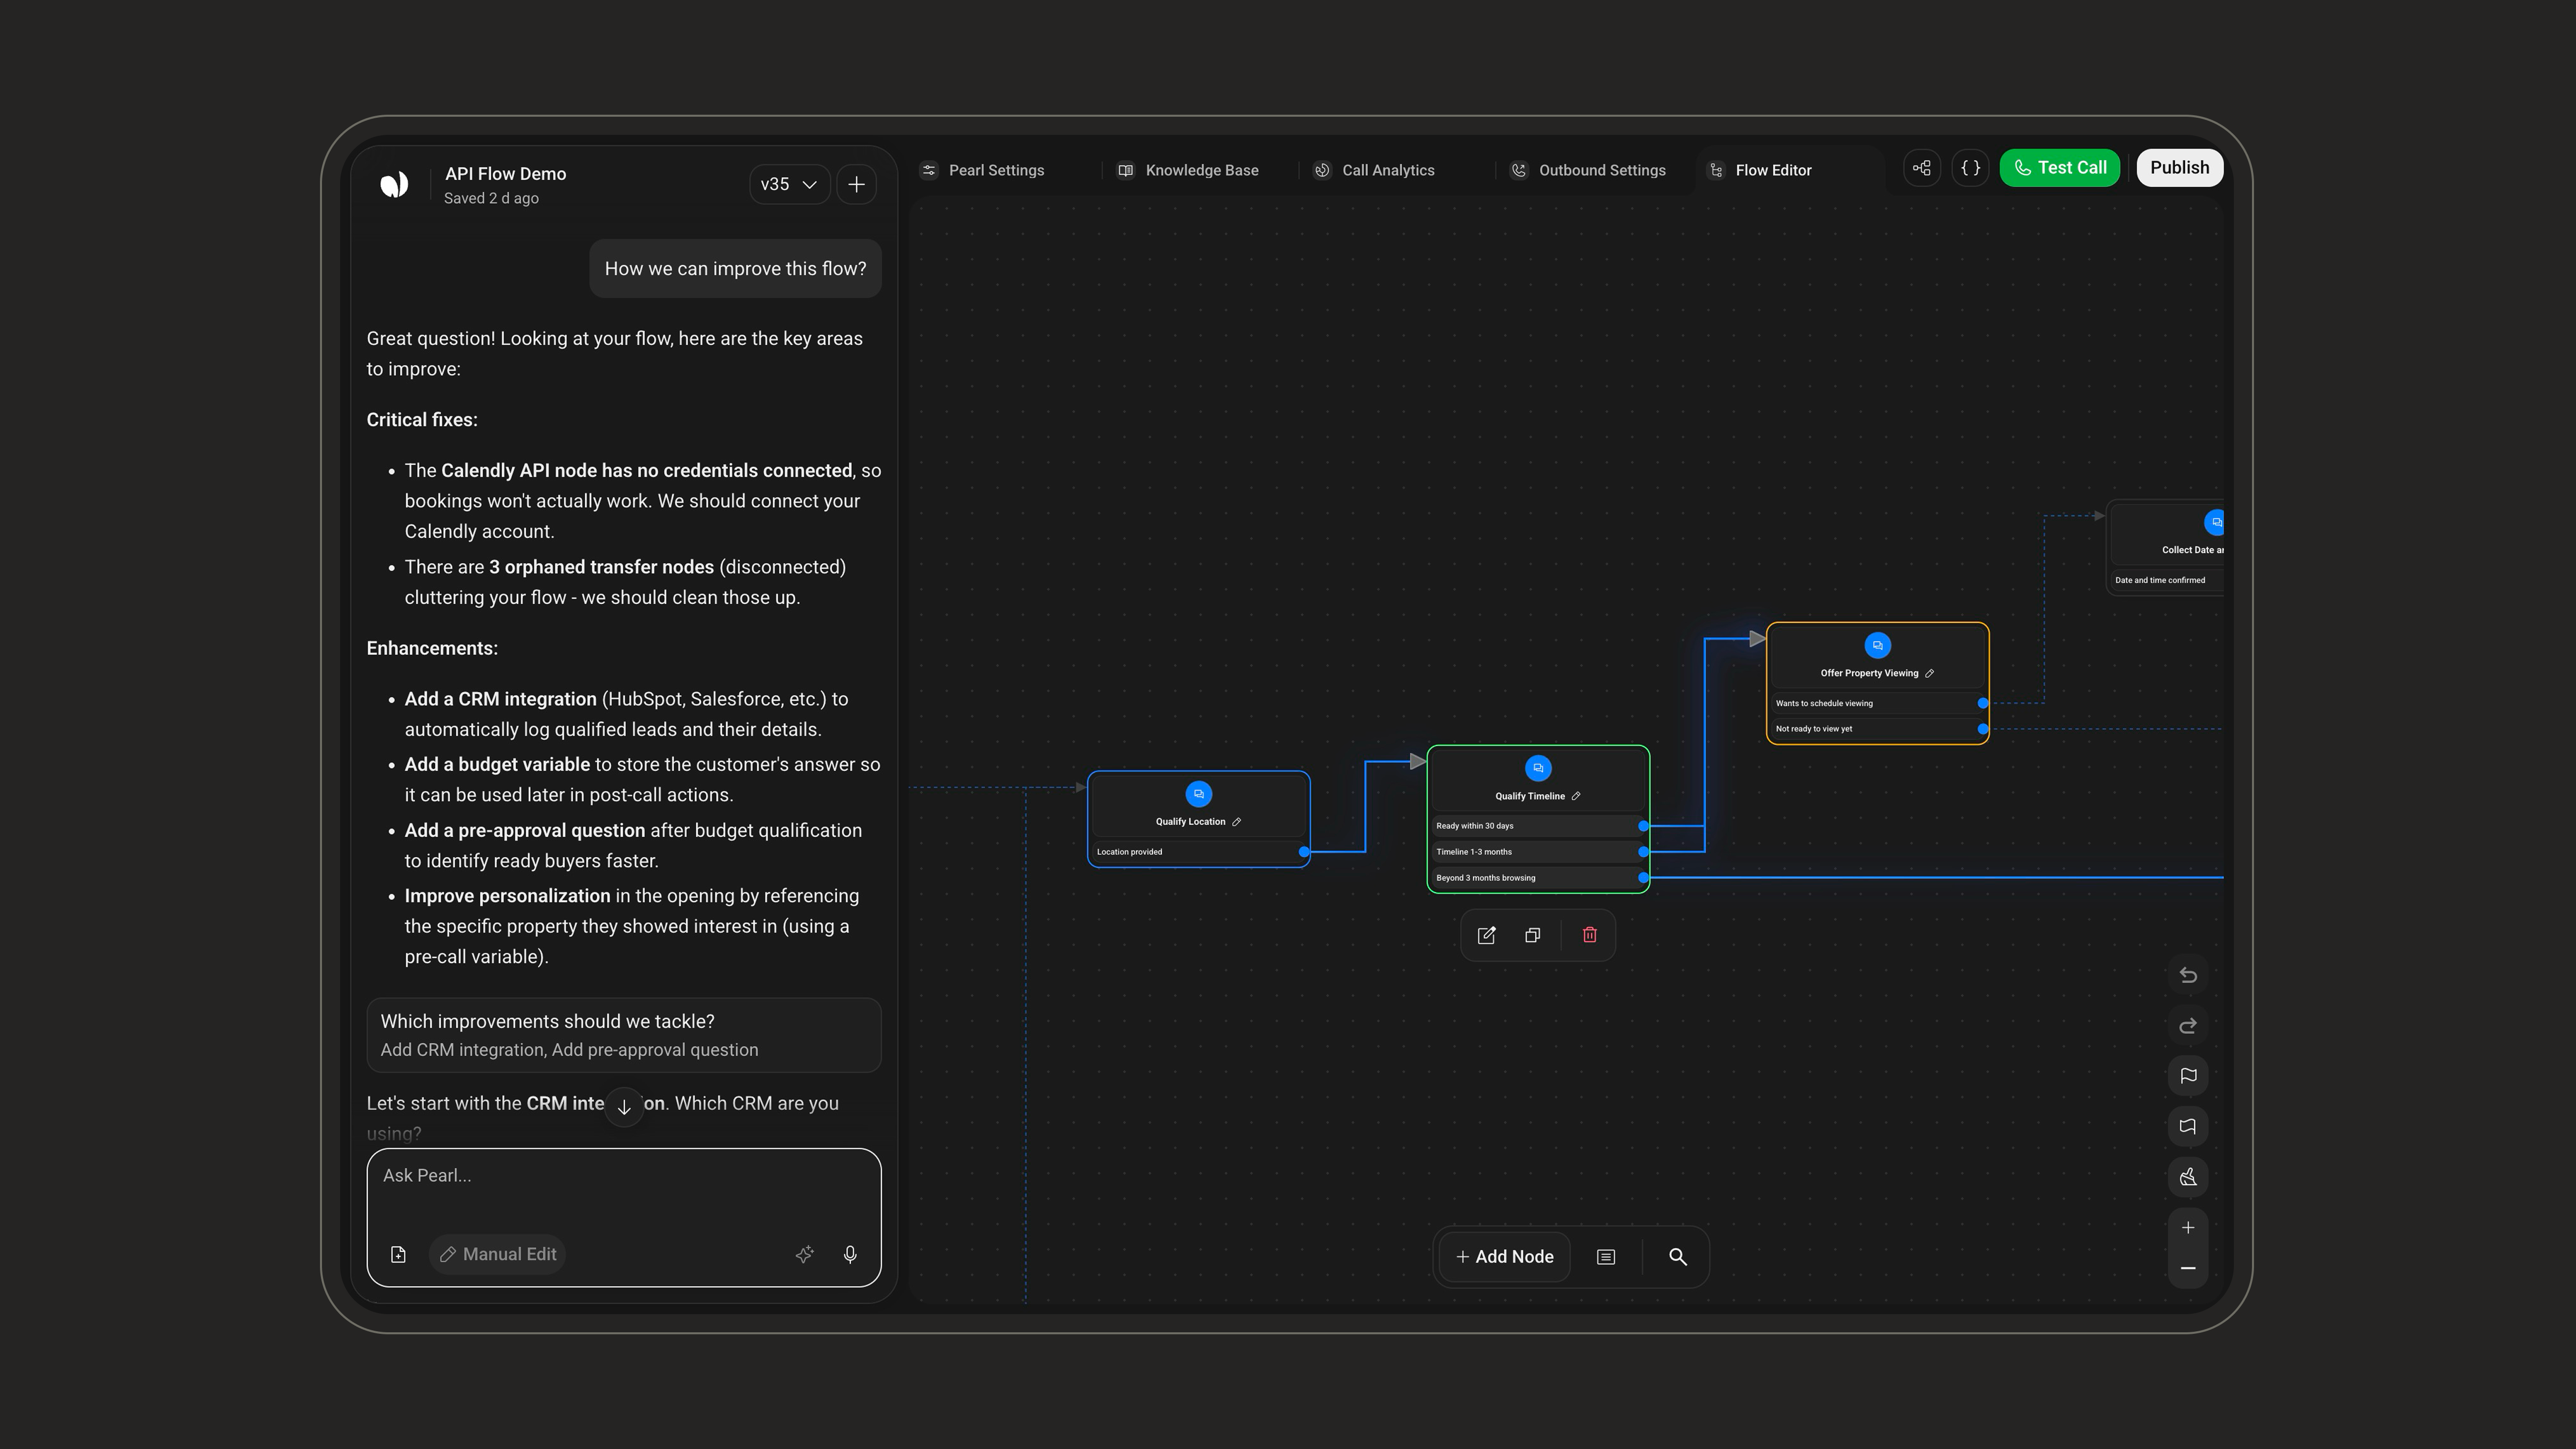
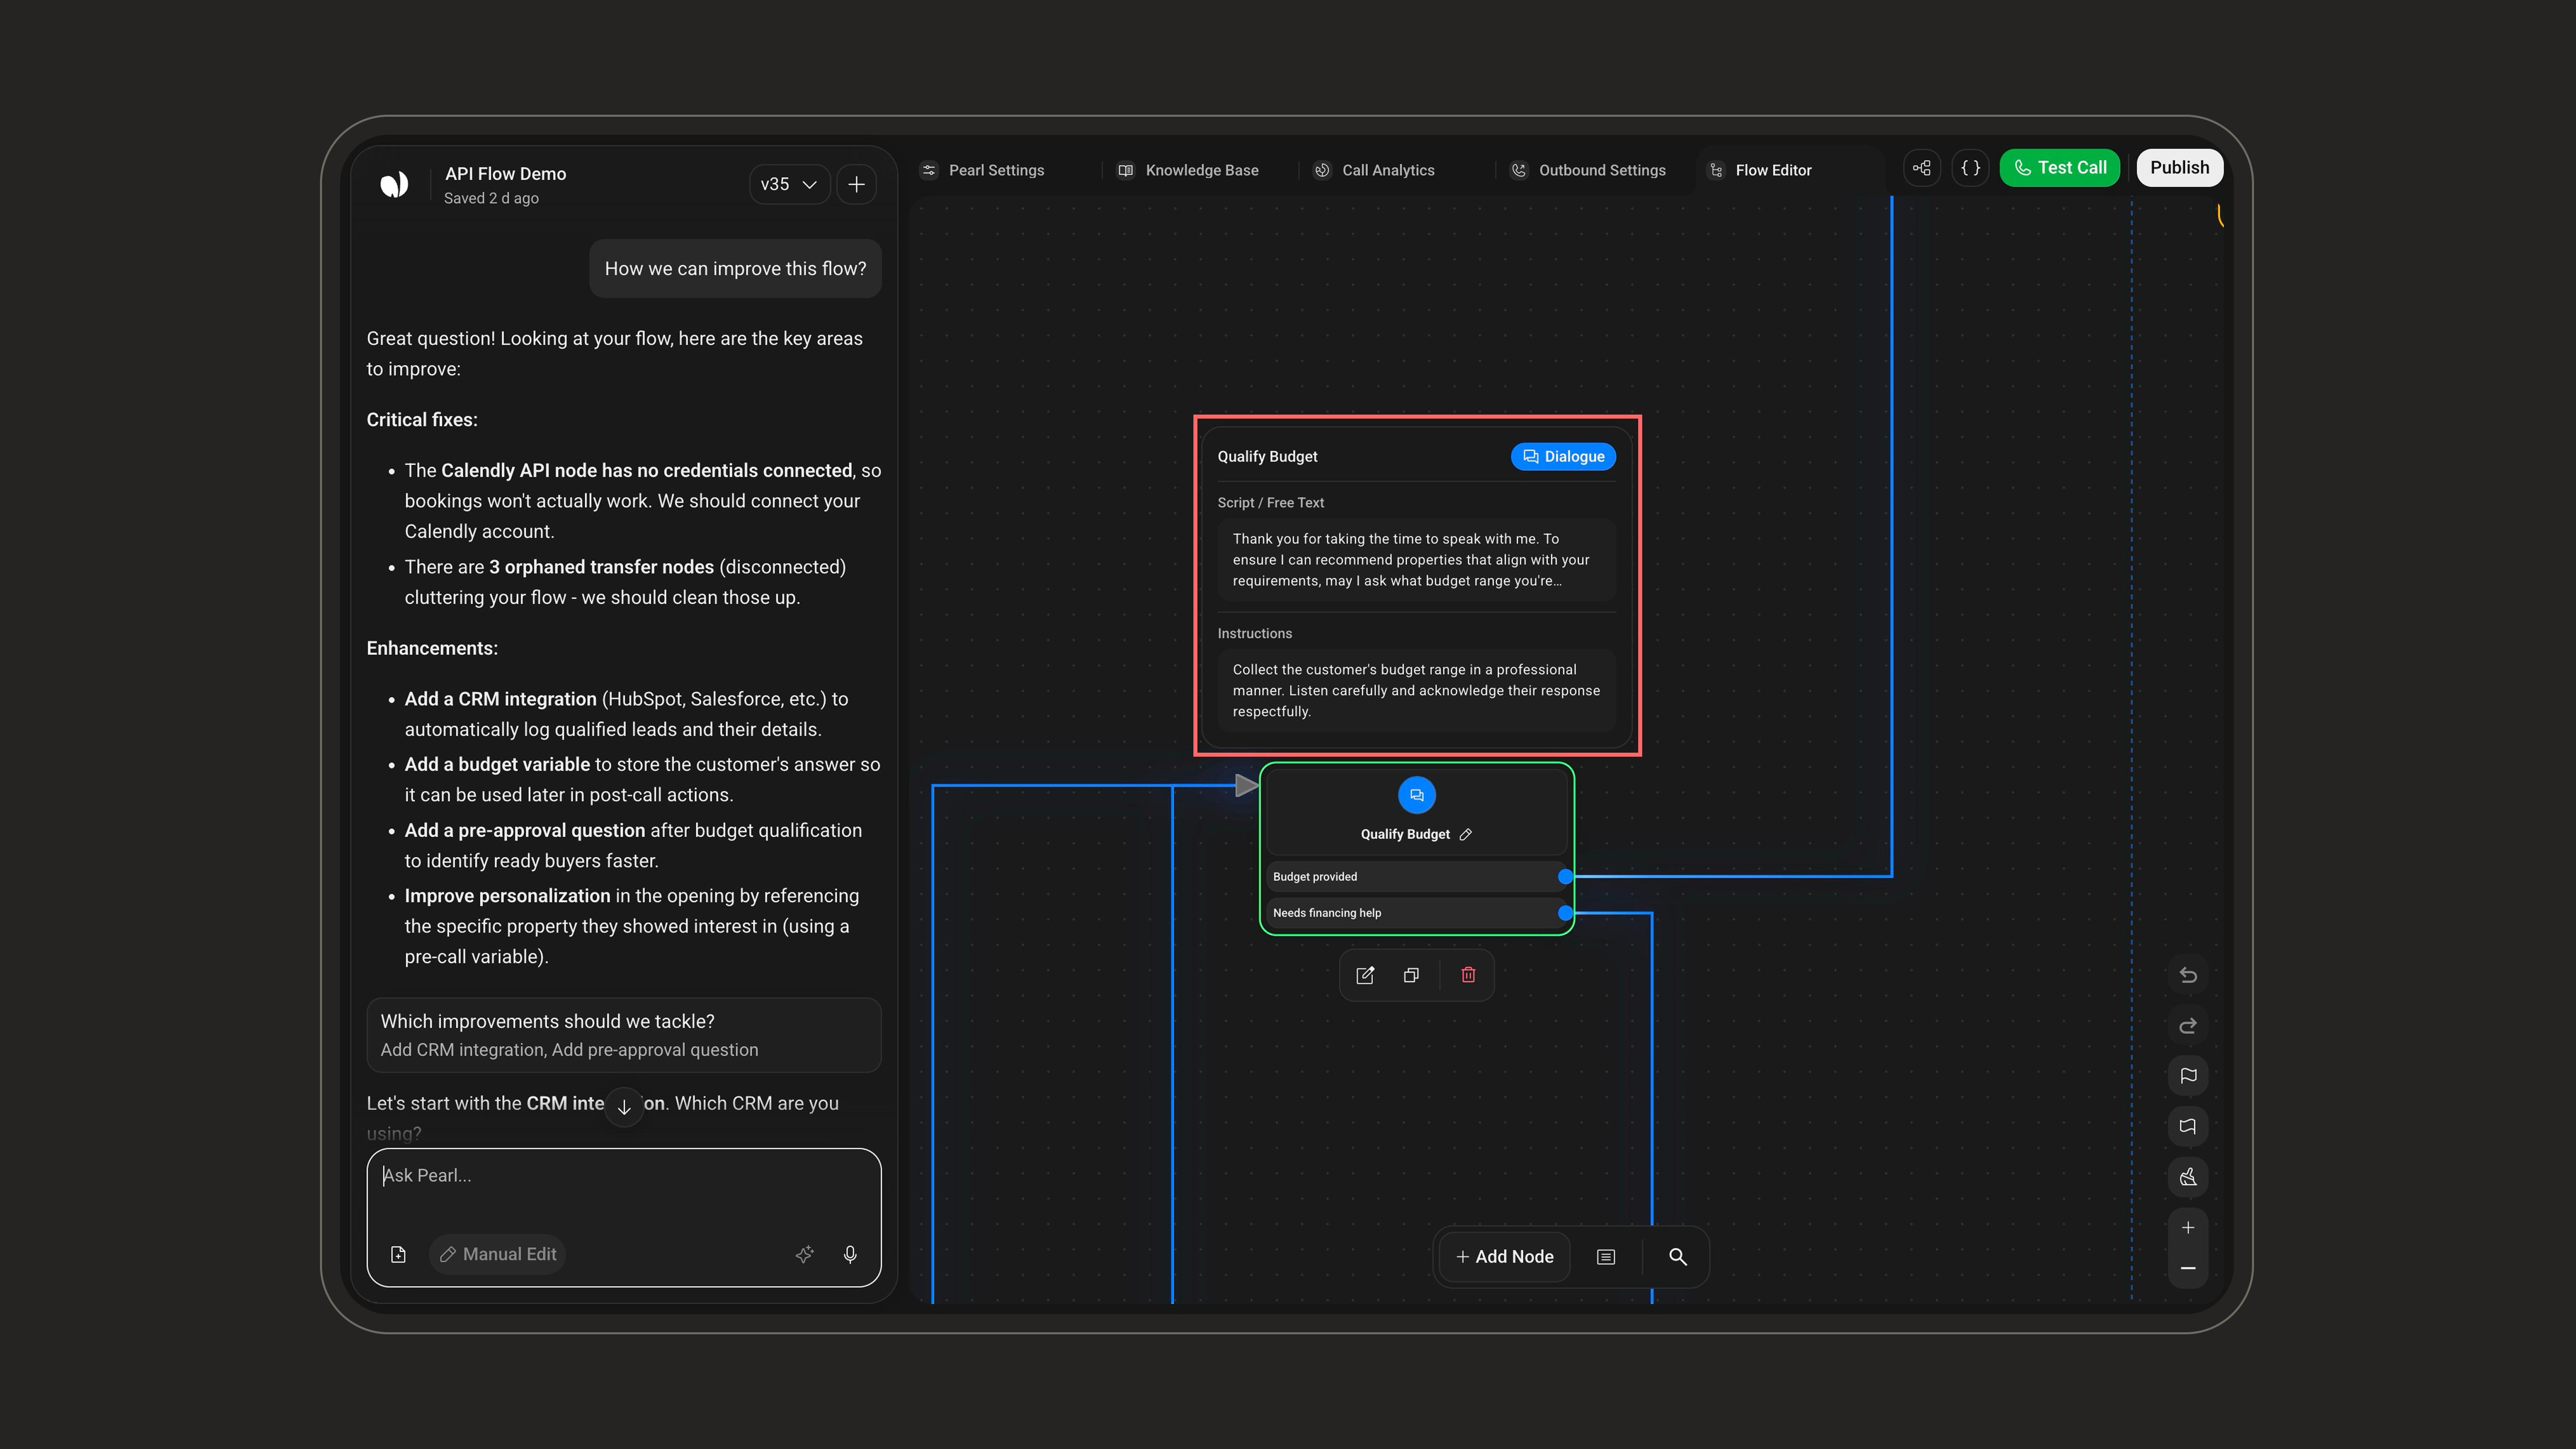
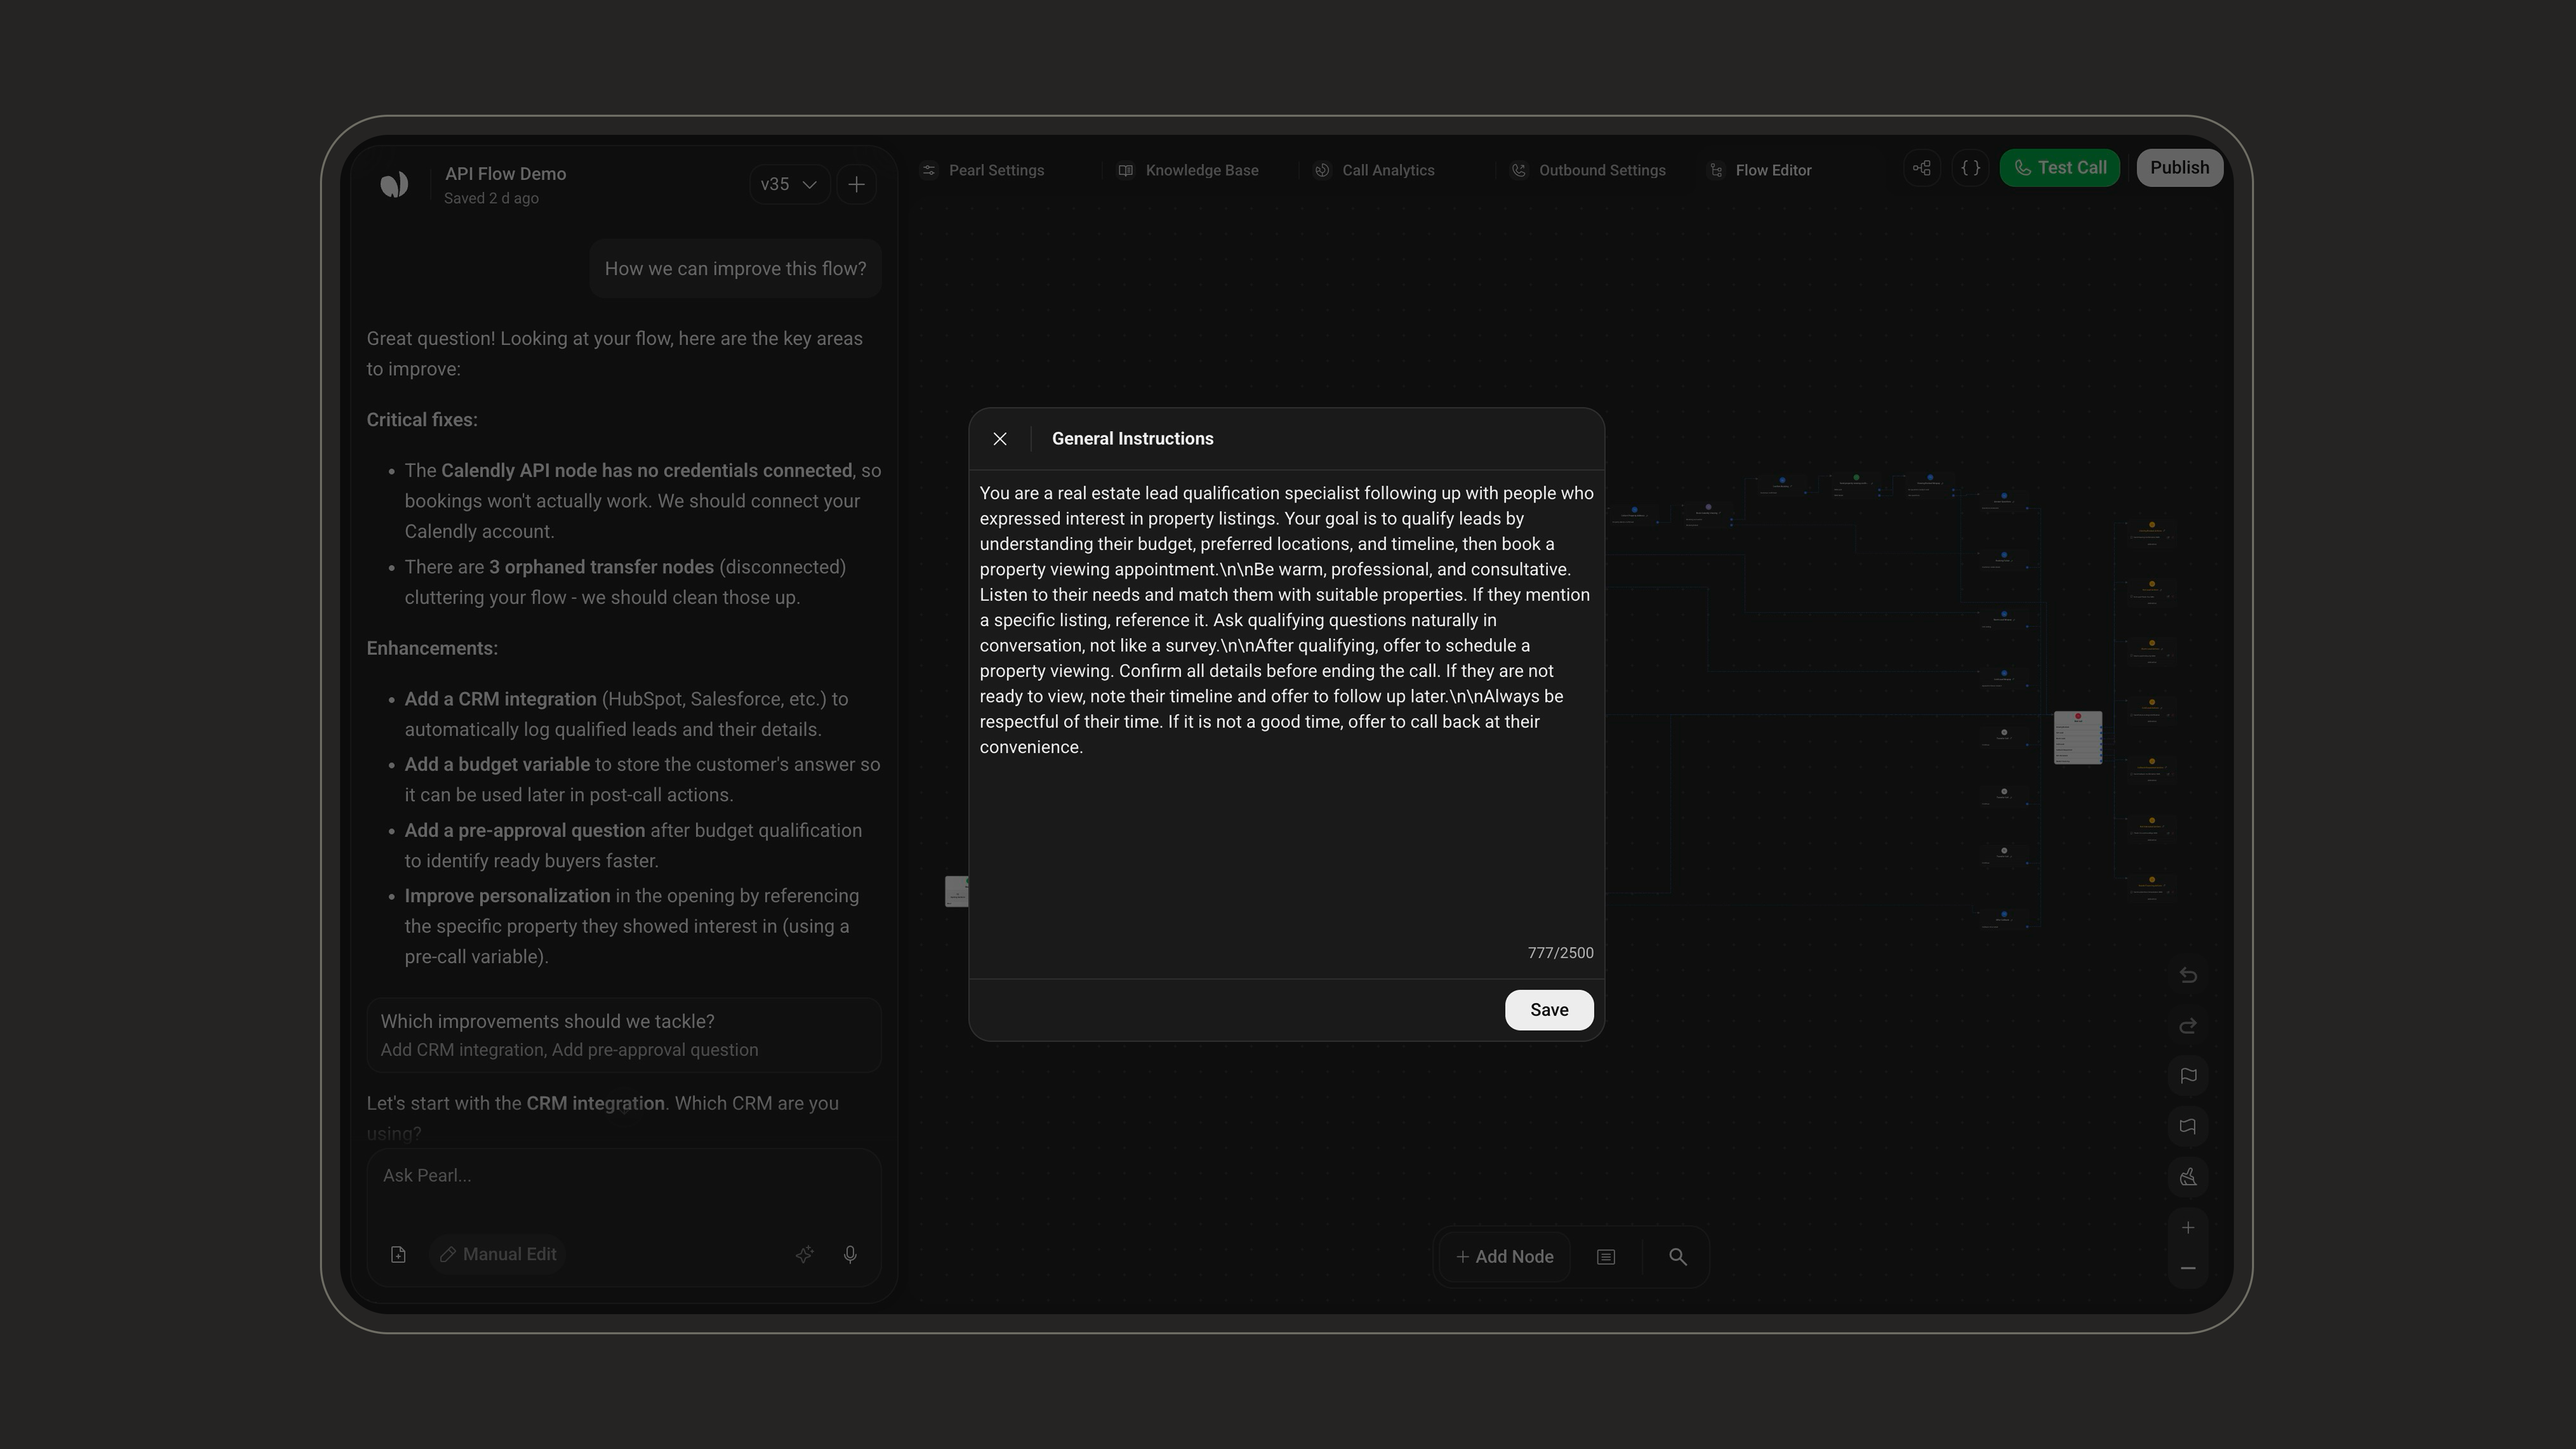
The chat sidebar is where you build your Pearl — either by talking to PearlVibe in natural language to create and edit your flow, or by switching to Manual Edit to configure things by hand.
All actions in this sidebar always apply to the node currently selected in the flow editor (unless explicitly noted as global, like General Instructions).
Chat (Ask Pearl)
Chat (Ask Pearl)

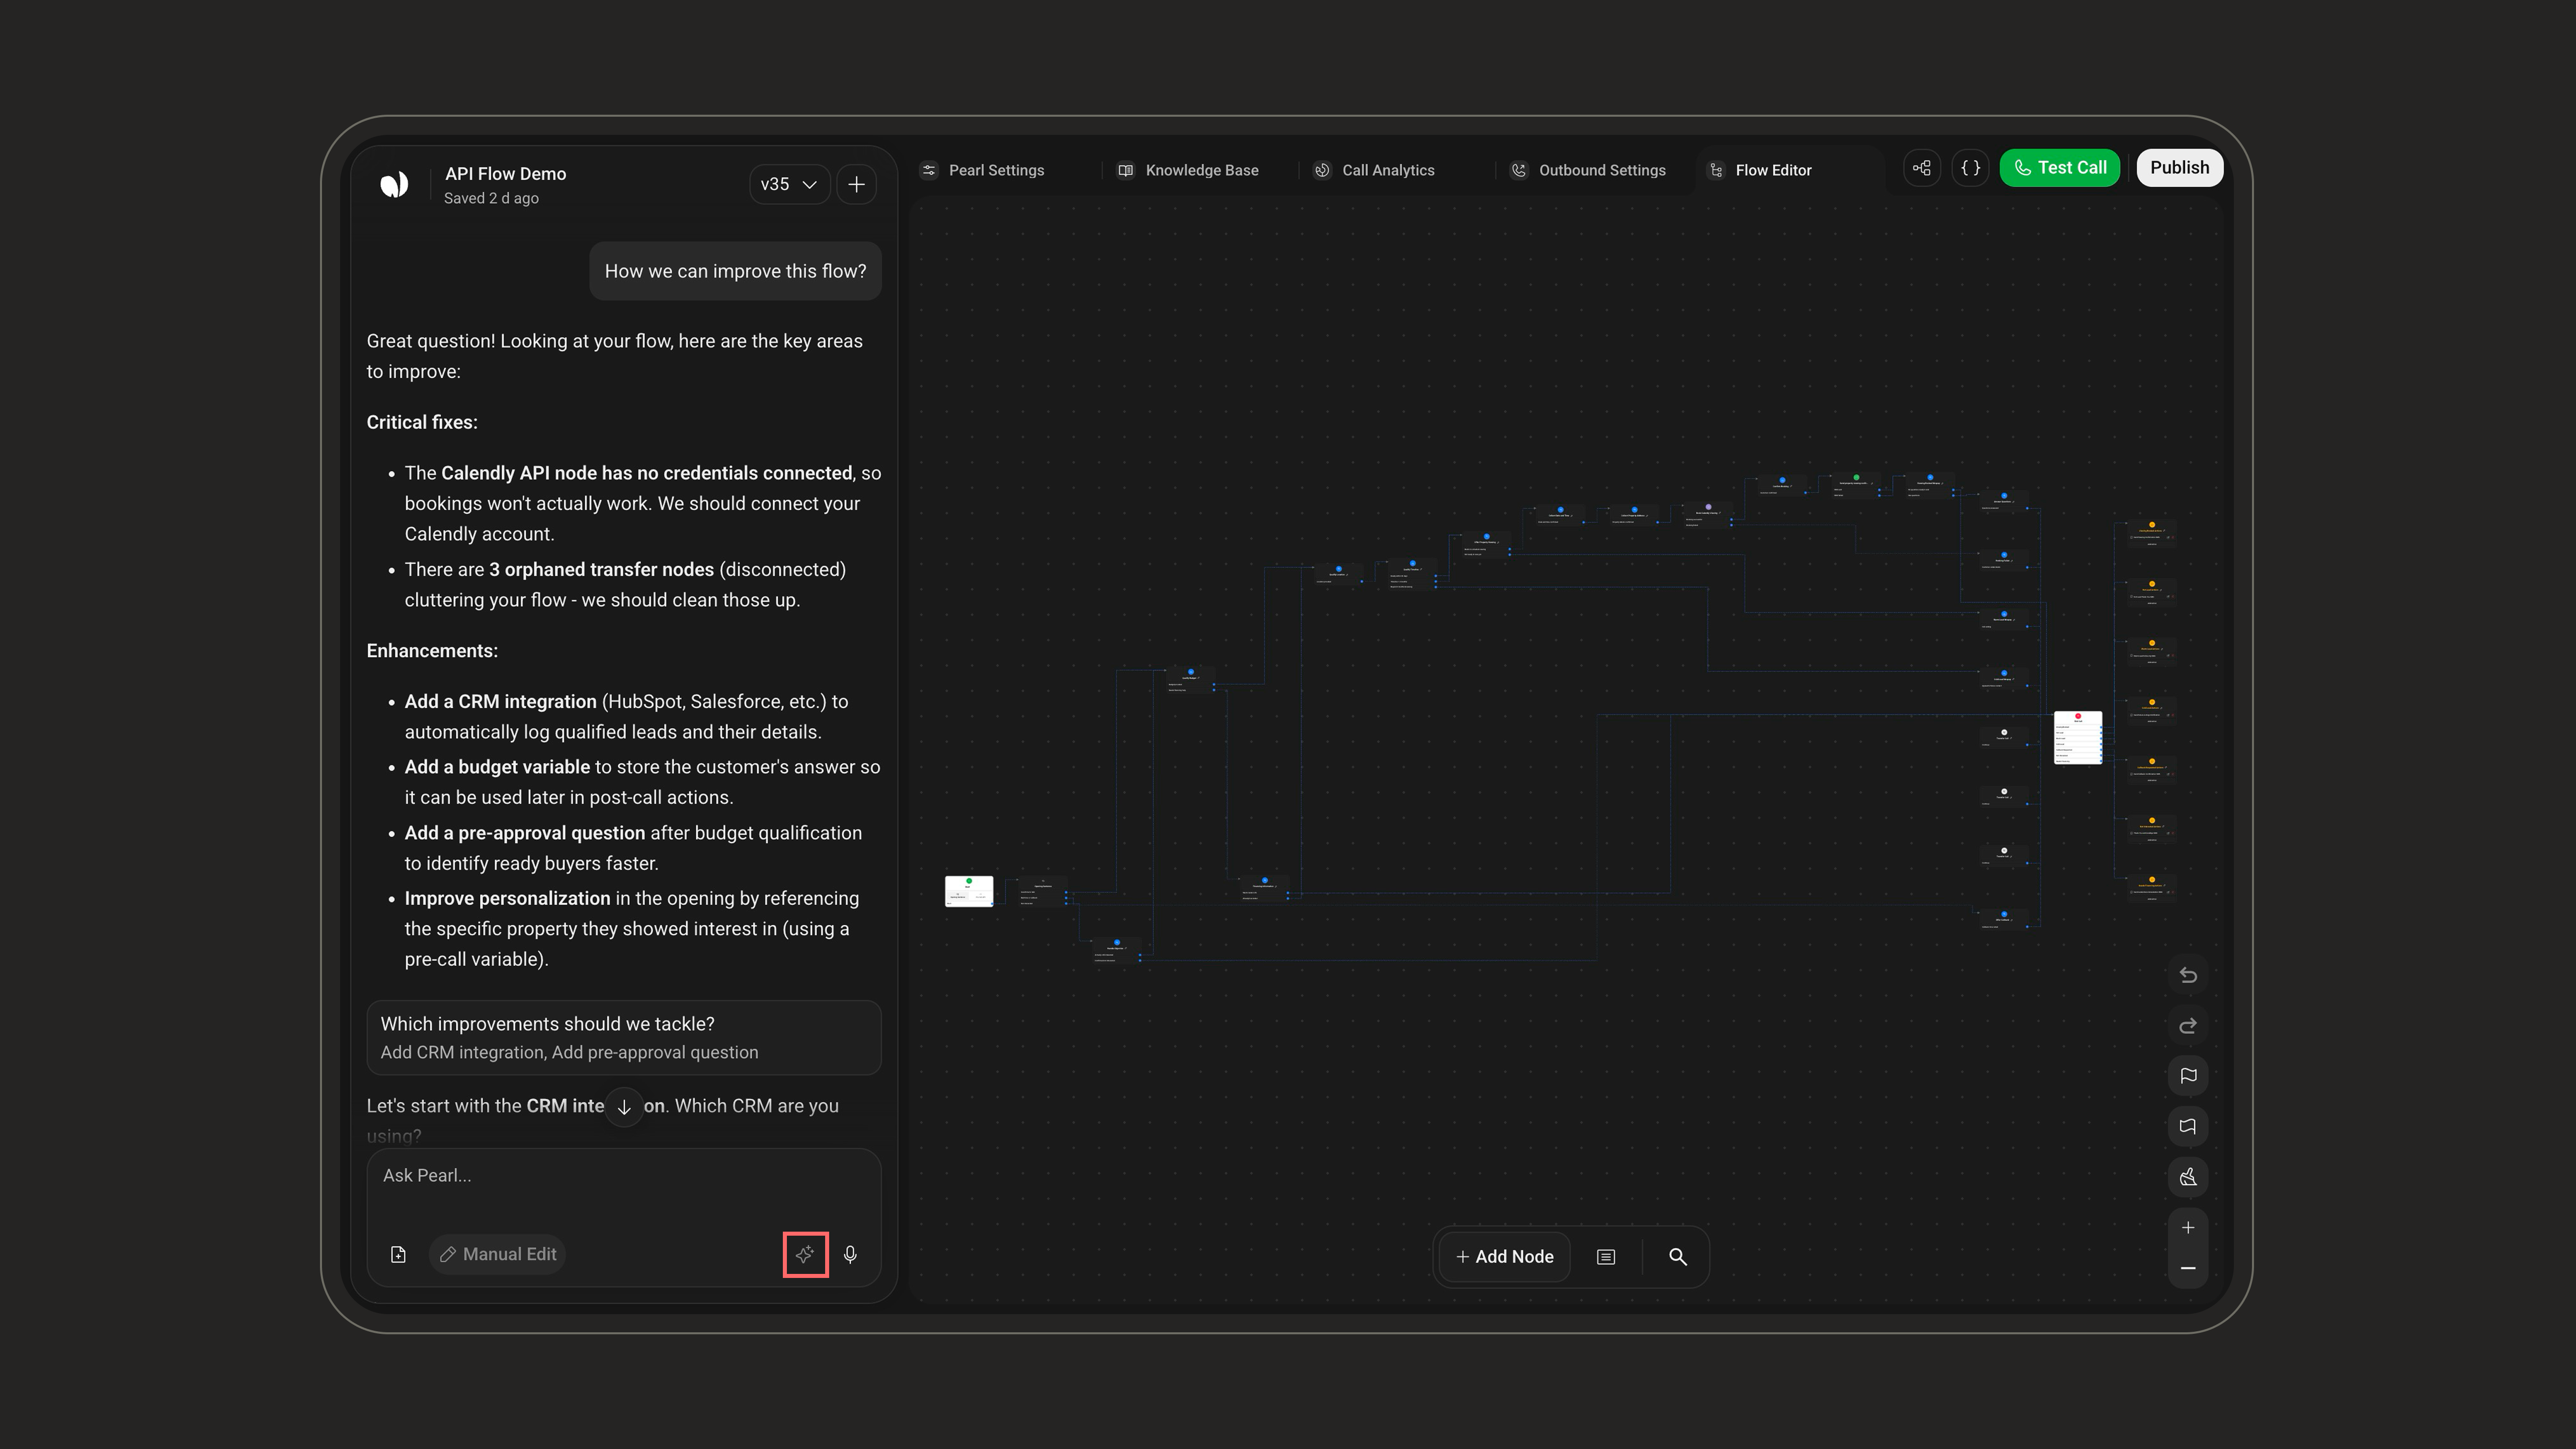
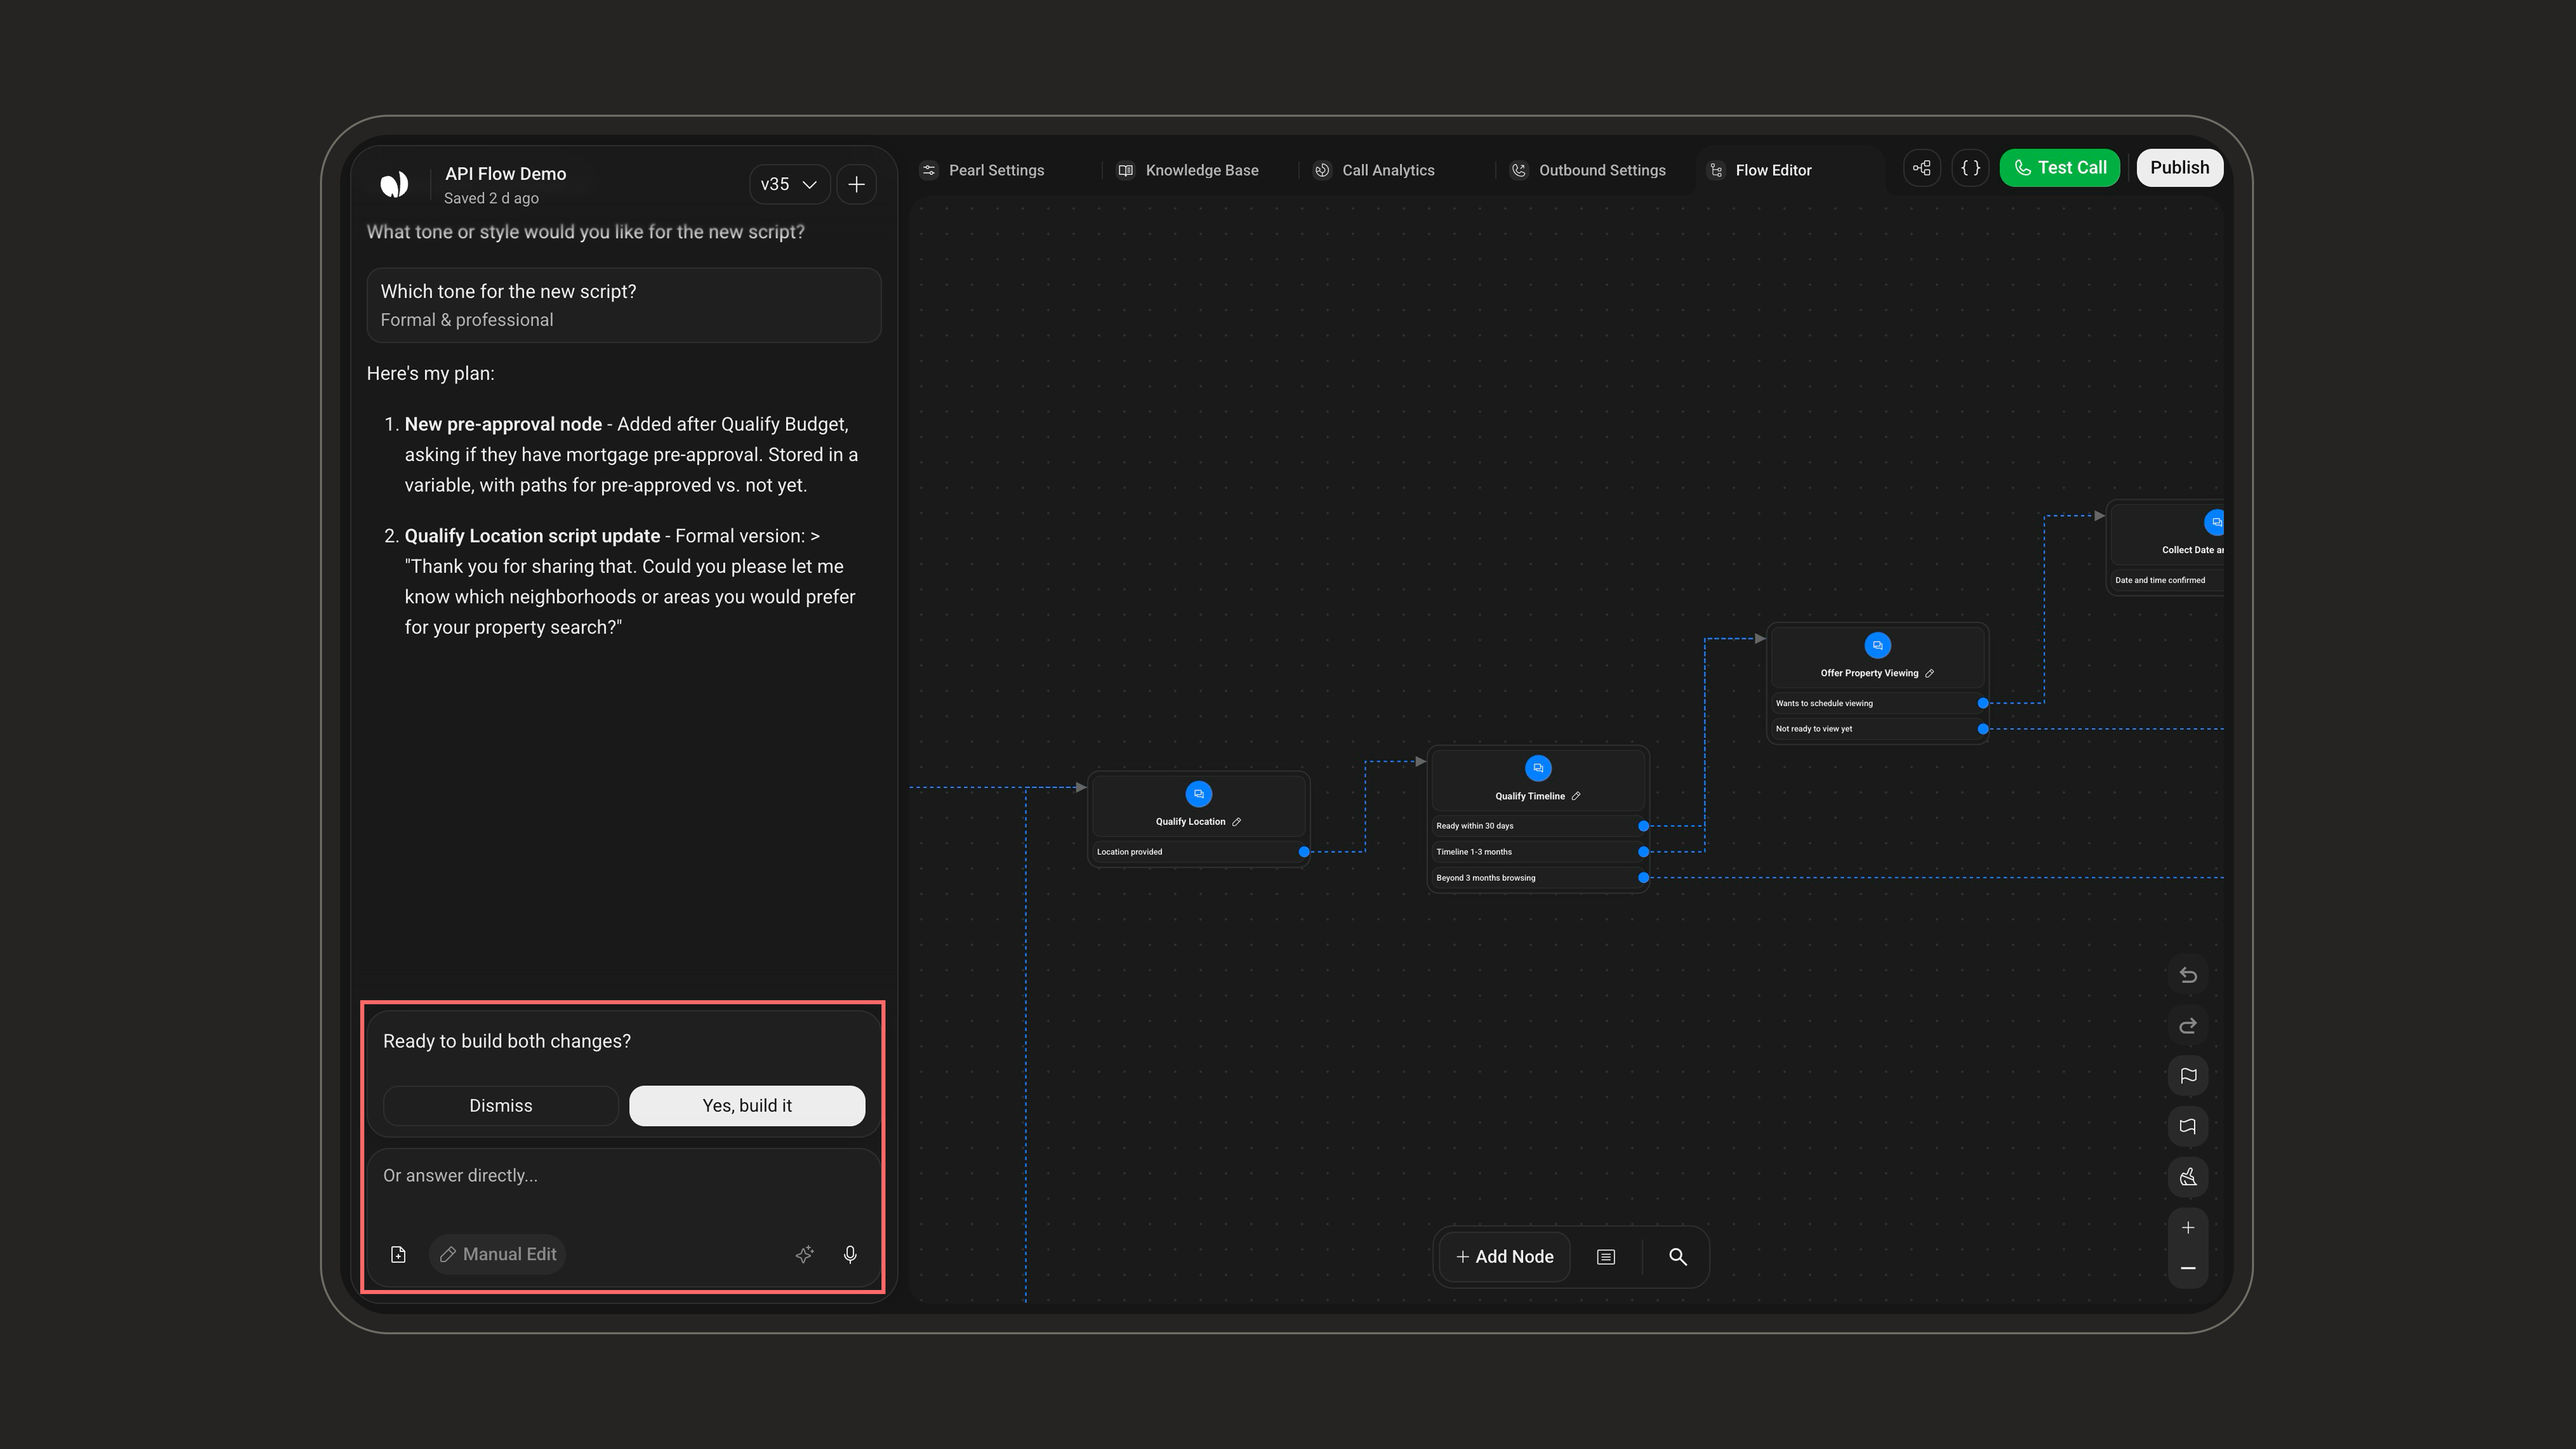
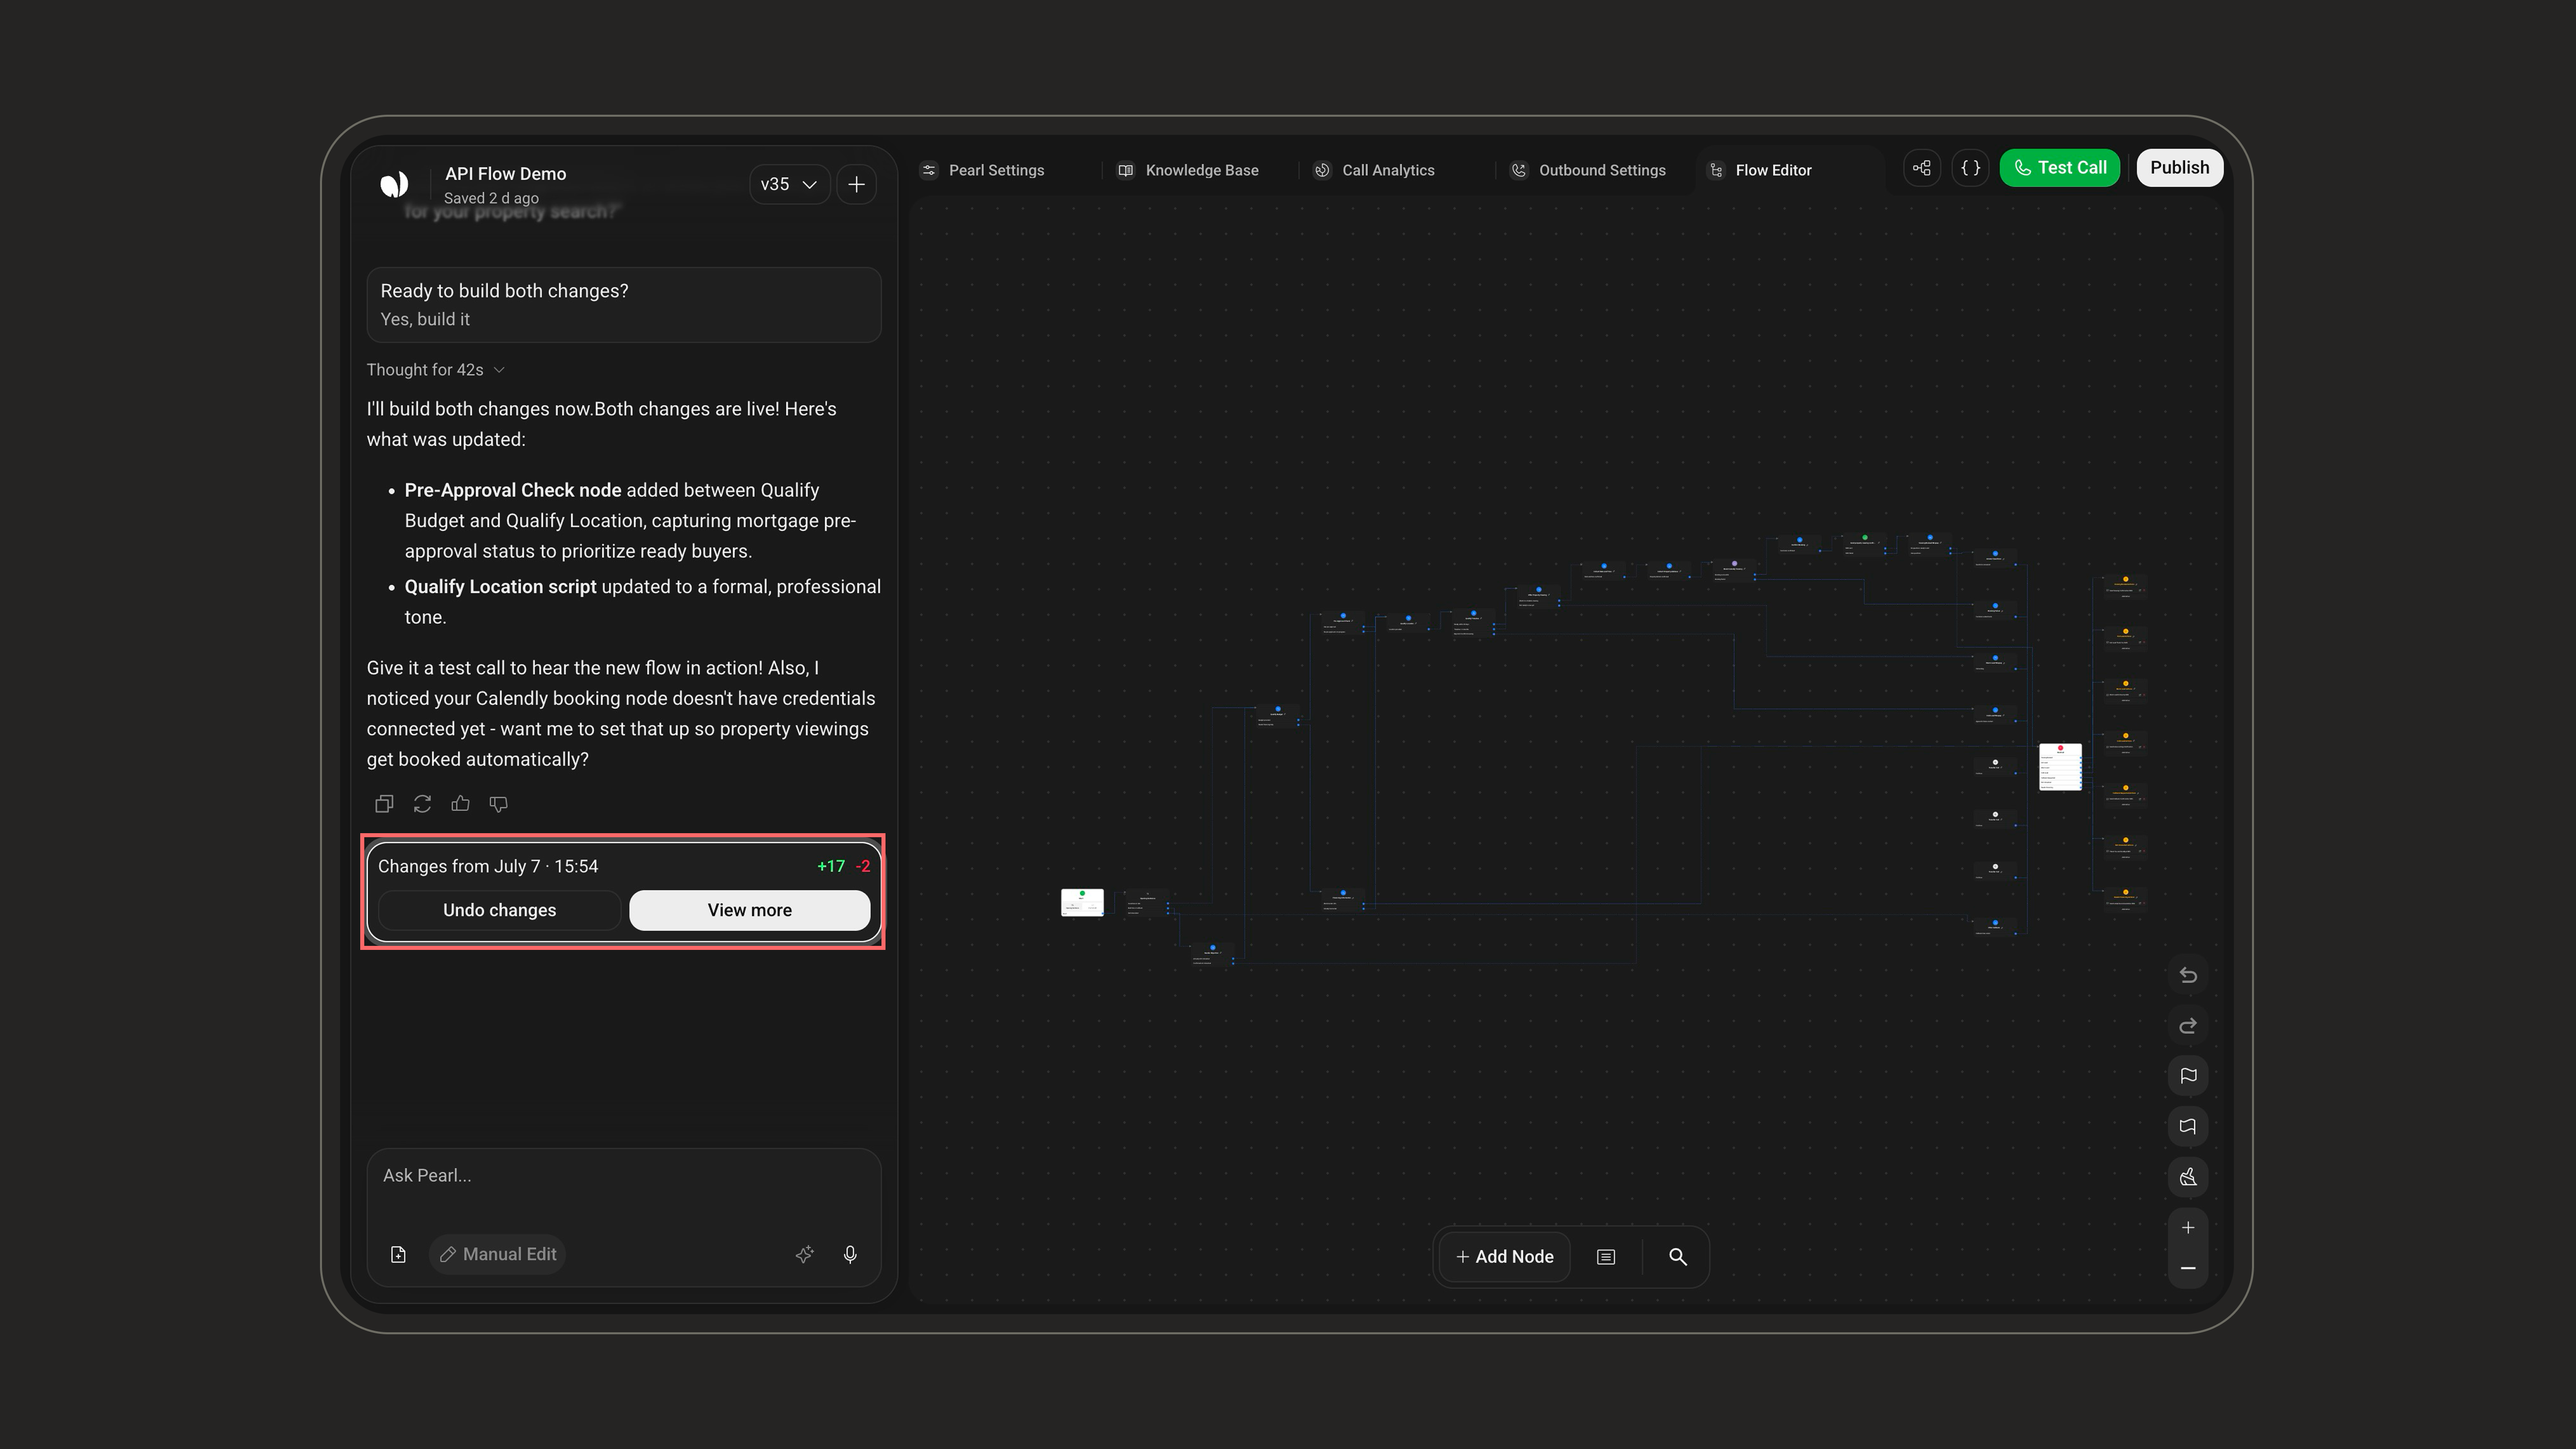
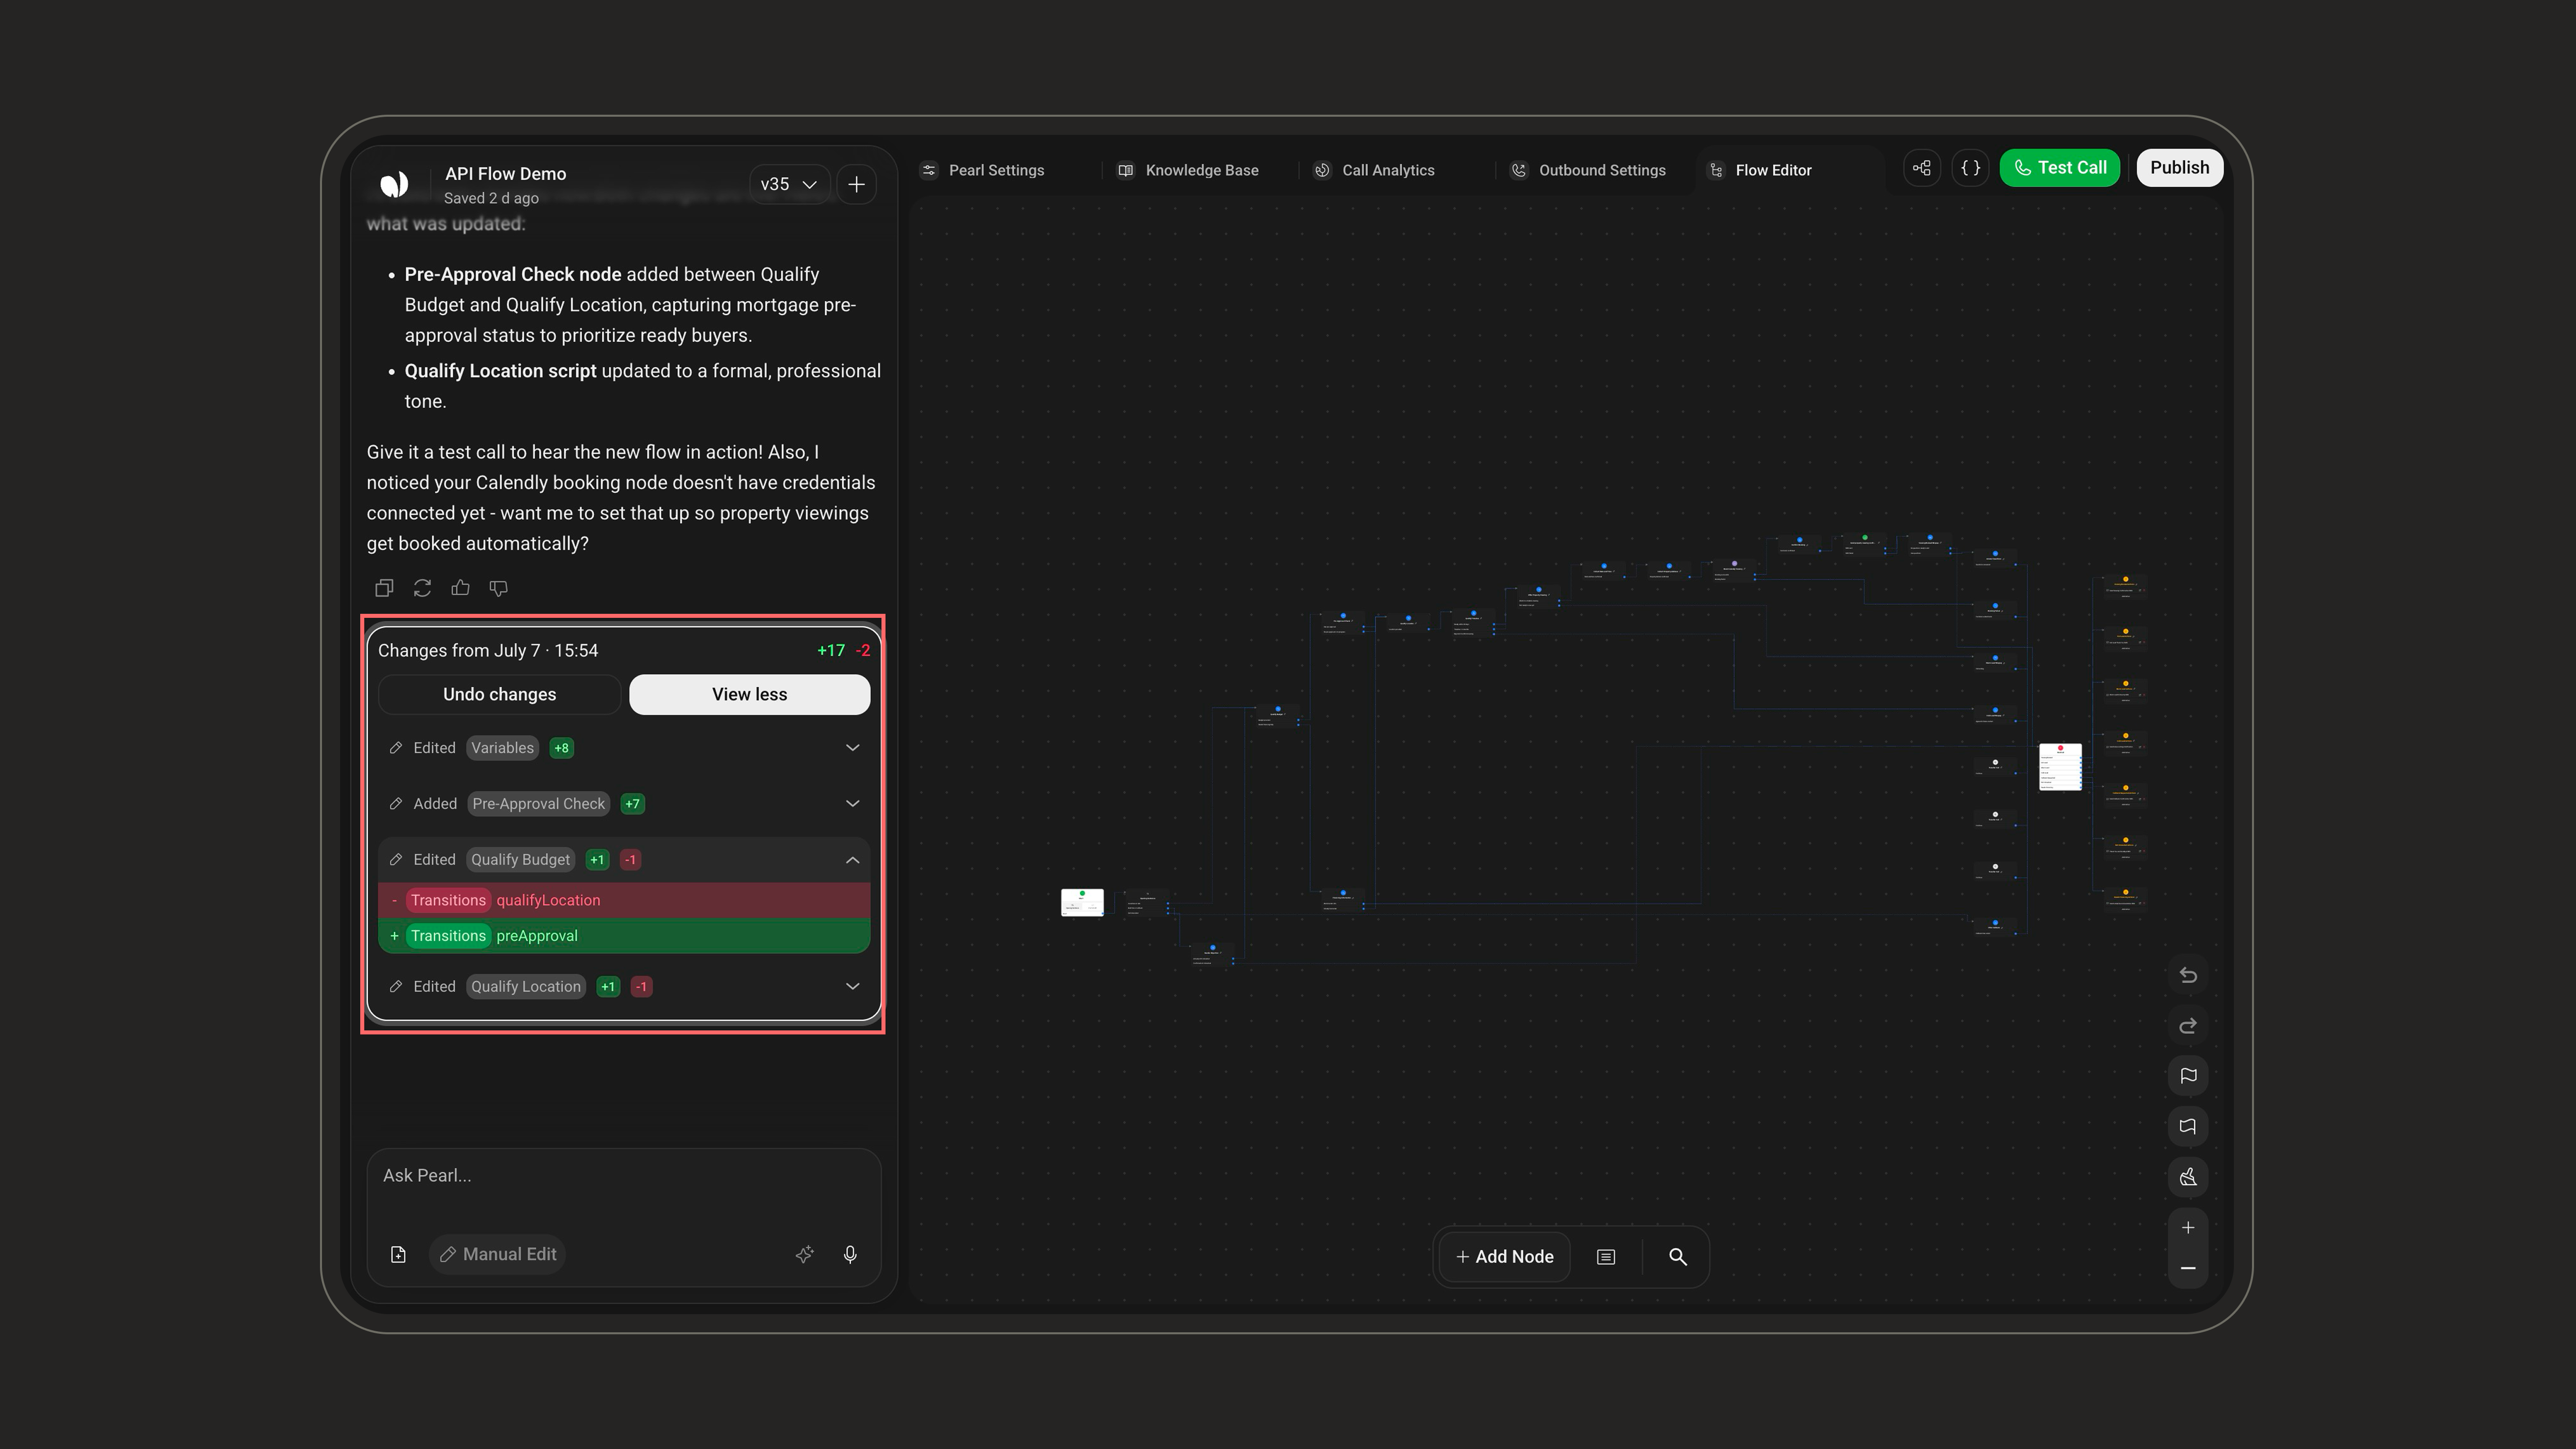
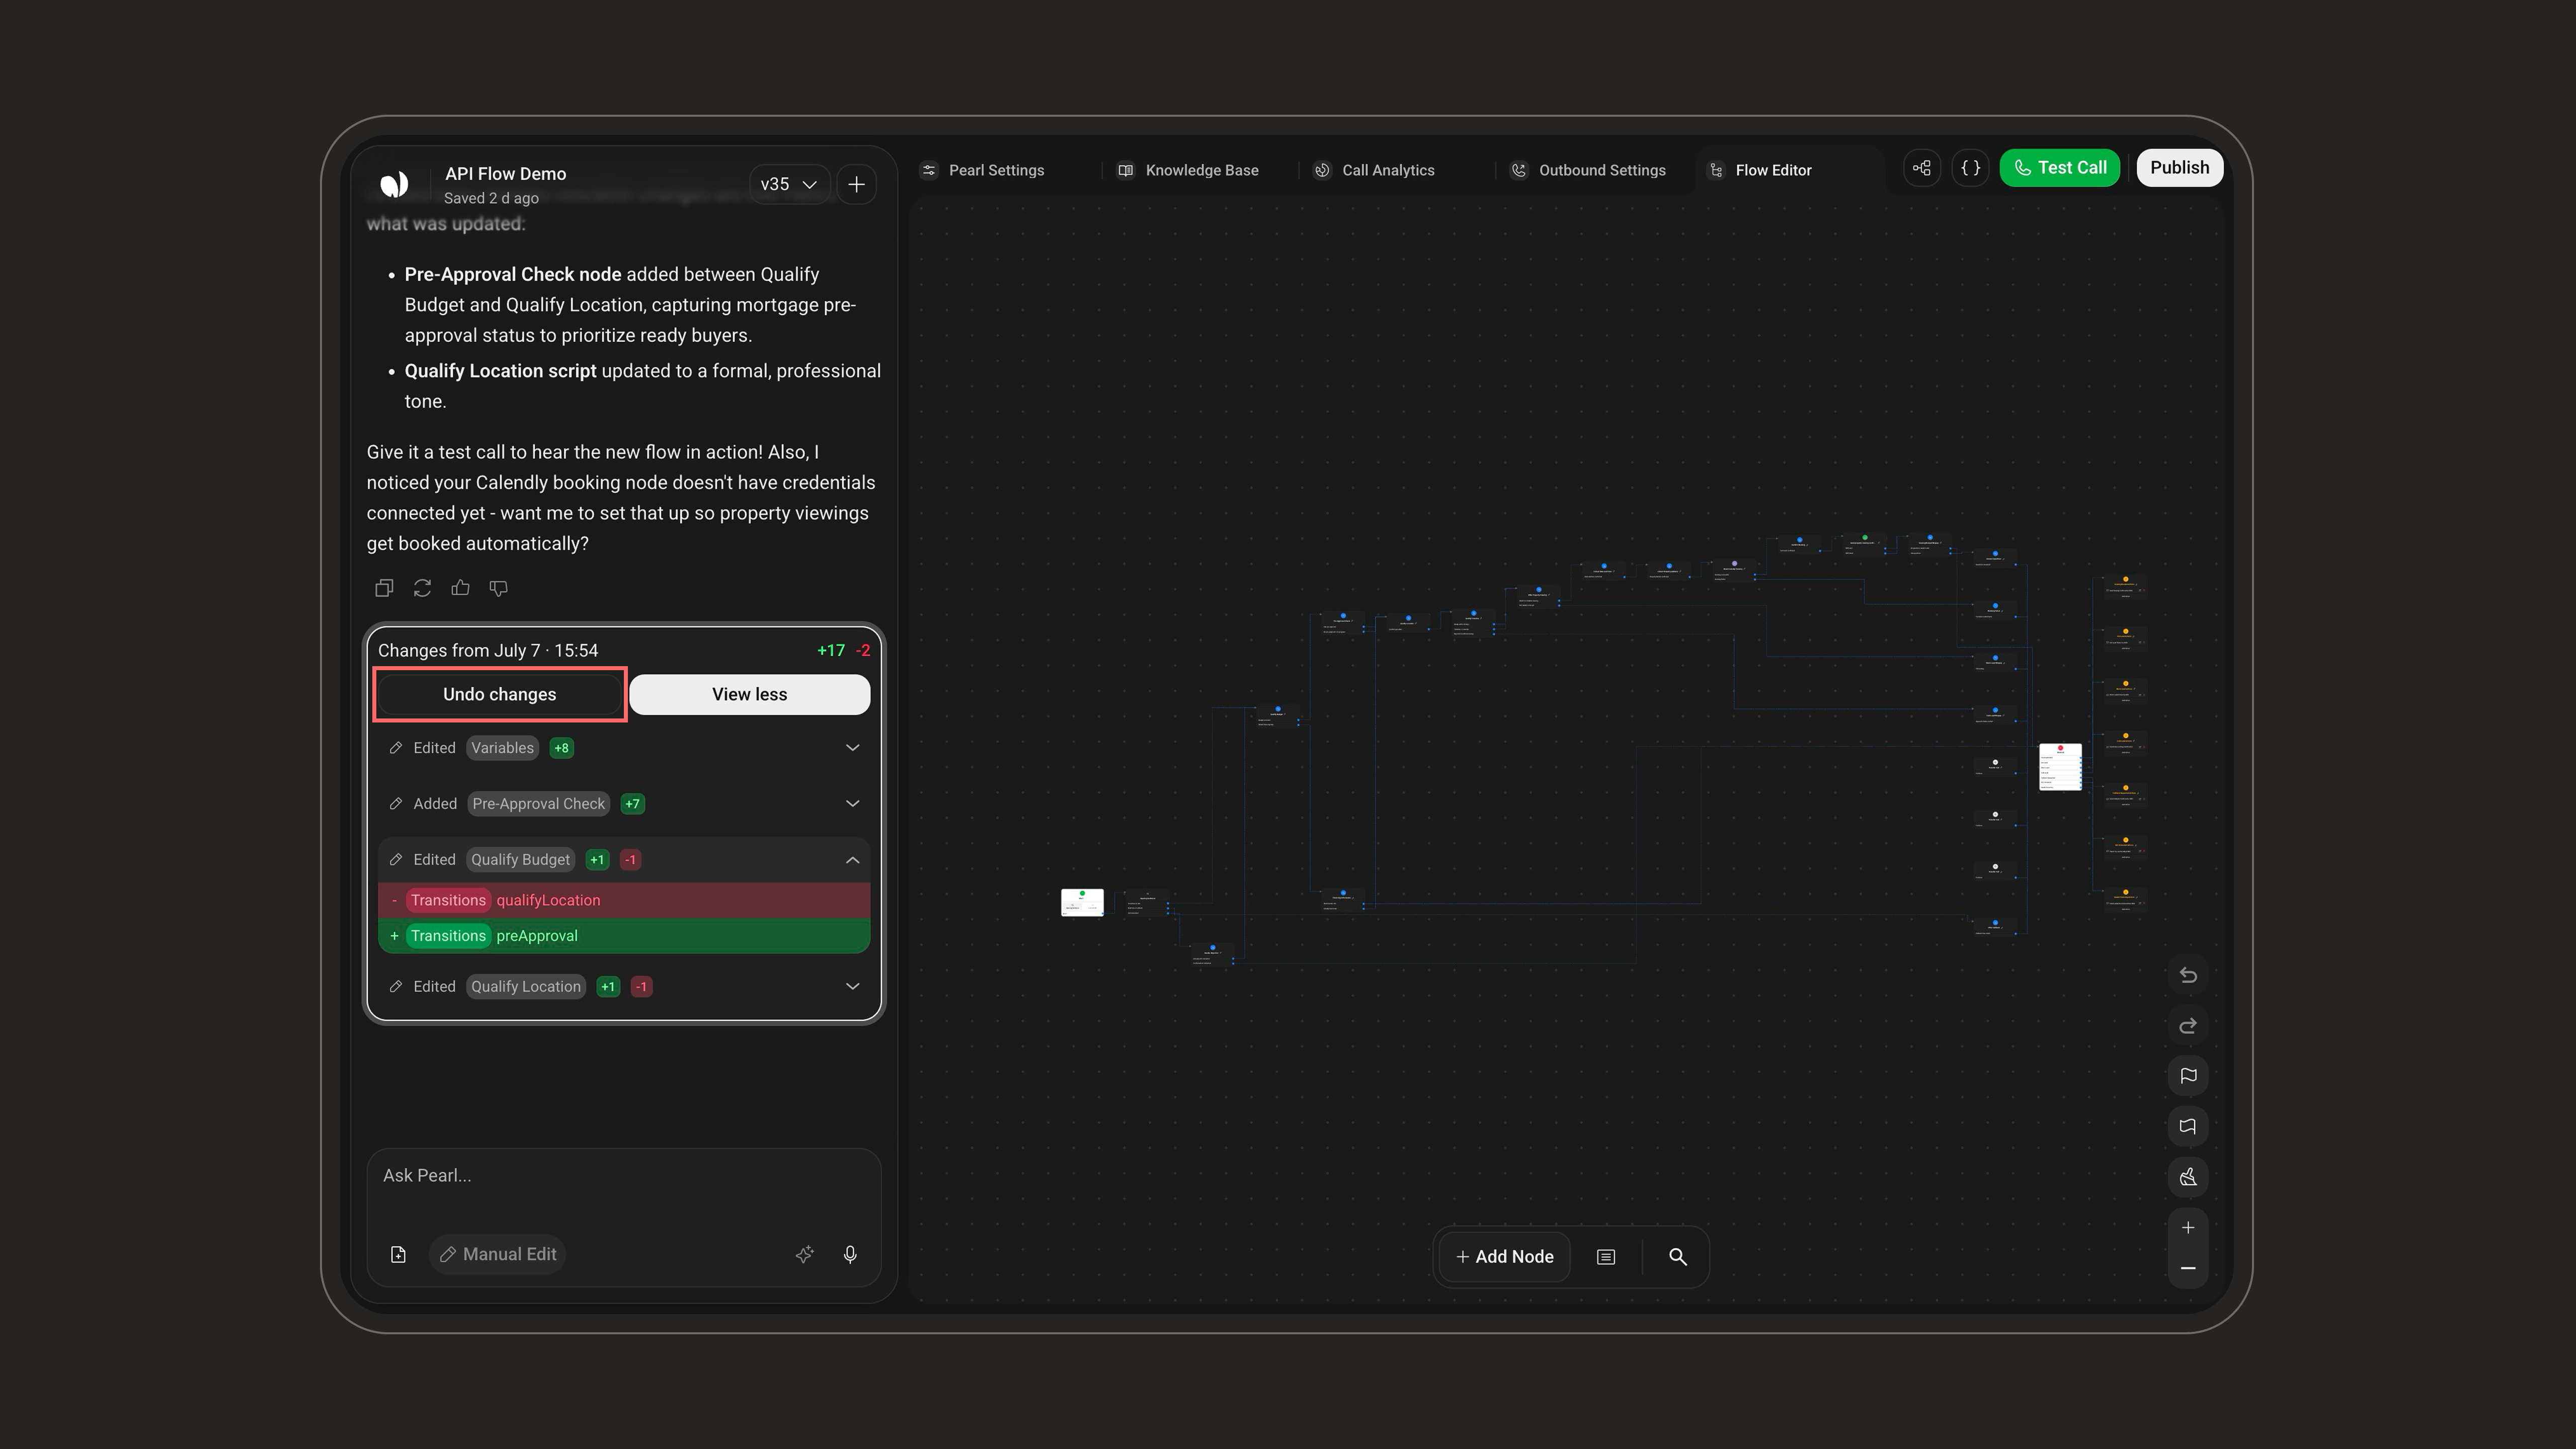
The composerType your instruction in the Ask Pearl… box — for example: “Split this node into three outcomes based on payment status.”, “After a successful payment, send a confirmation SMS and end the call.”, “Create a post-call node that logs the outcome to the CRM.” Press Send and the editor updates in real time.

- Attach files — add supporting material (FAQs, pricing sheets, policy docs, playbooks…) to enrich the Pearl’s knowledge and reference it in node prompts.
.pdf, .docx, .txt, .jpg, .jpeg, .png, .webp, .gif, .mp3, .m4a, .wav, .webm — up to 10 files per message.- Enhance prompt — rewrite a rough or short instruction into a clearer, more structured request before it runs.
- Voice input — dictate your instruction instead of typing it.

Manual Edit
Manual Edit
Select a node in the canvas, then click the Manual Edit button at the bottom of the sidebar to configure it by hand.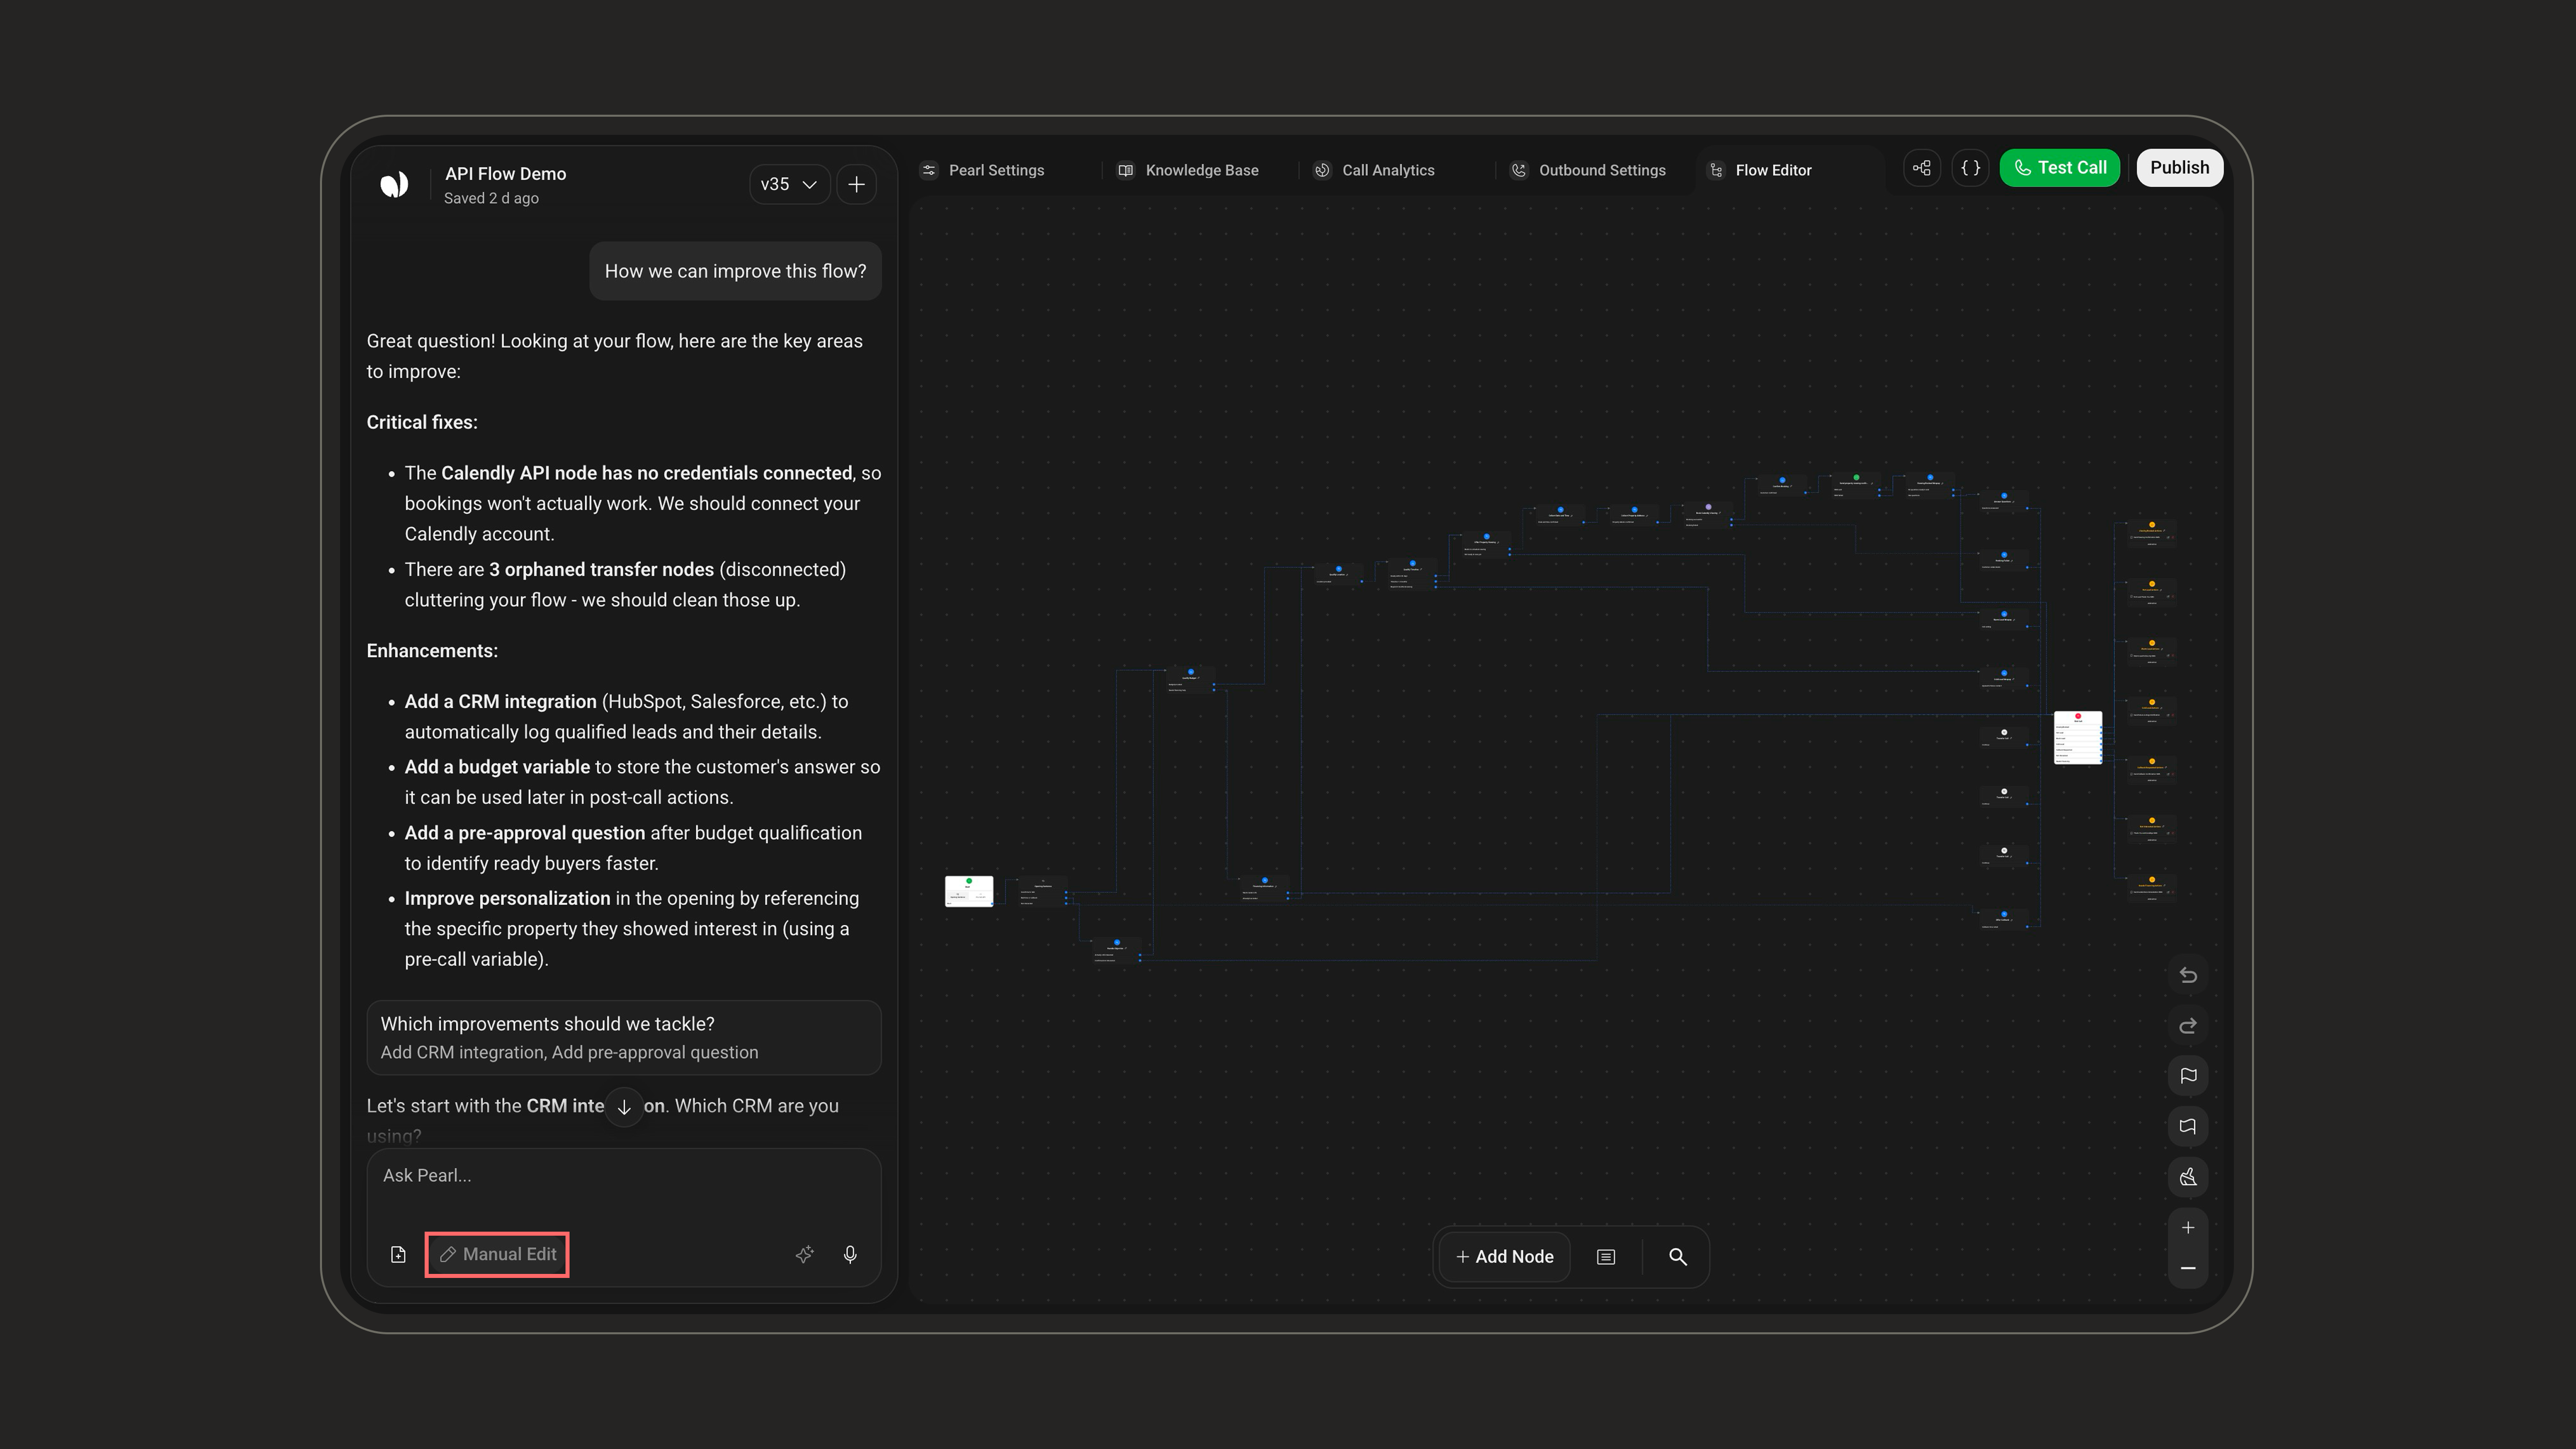
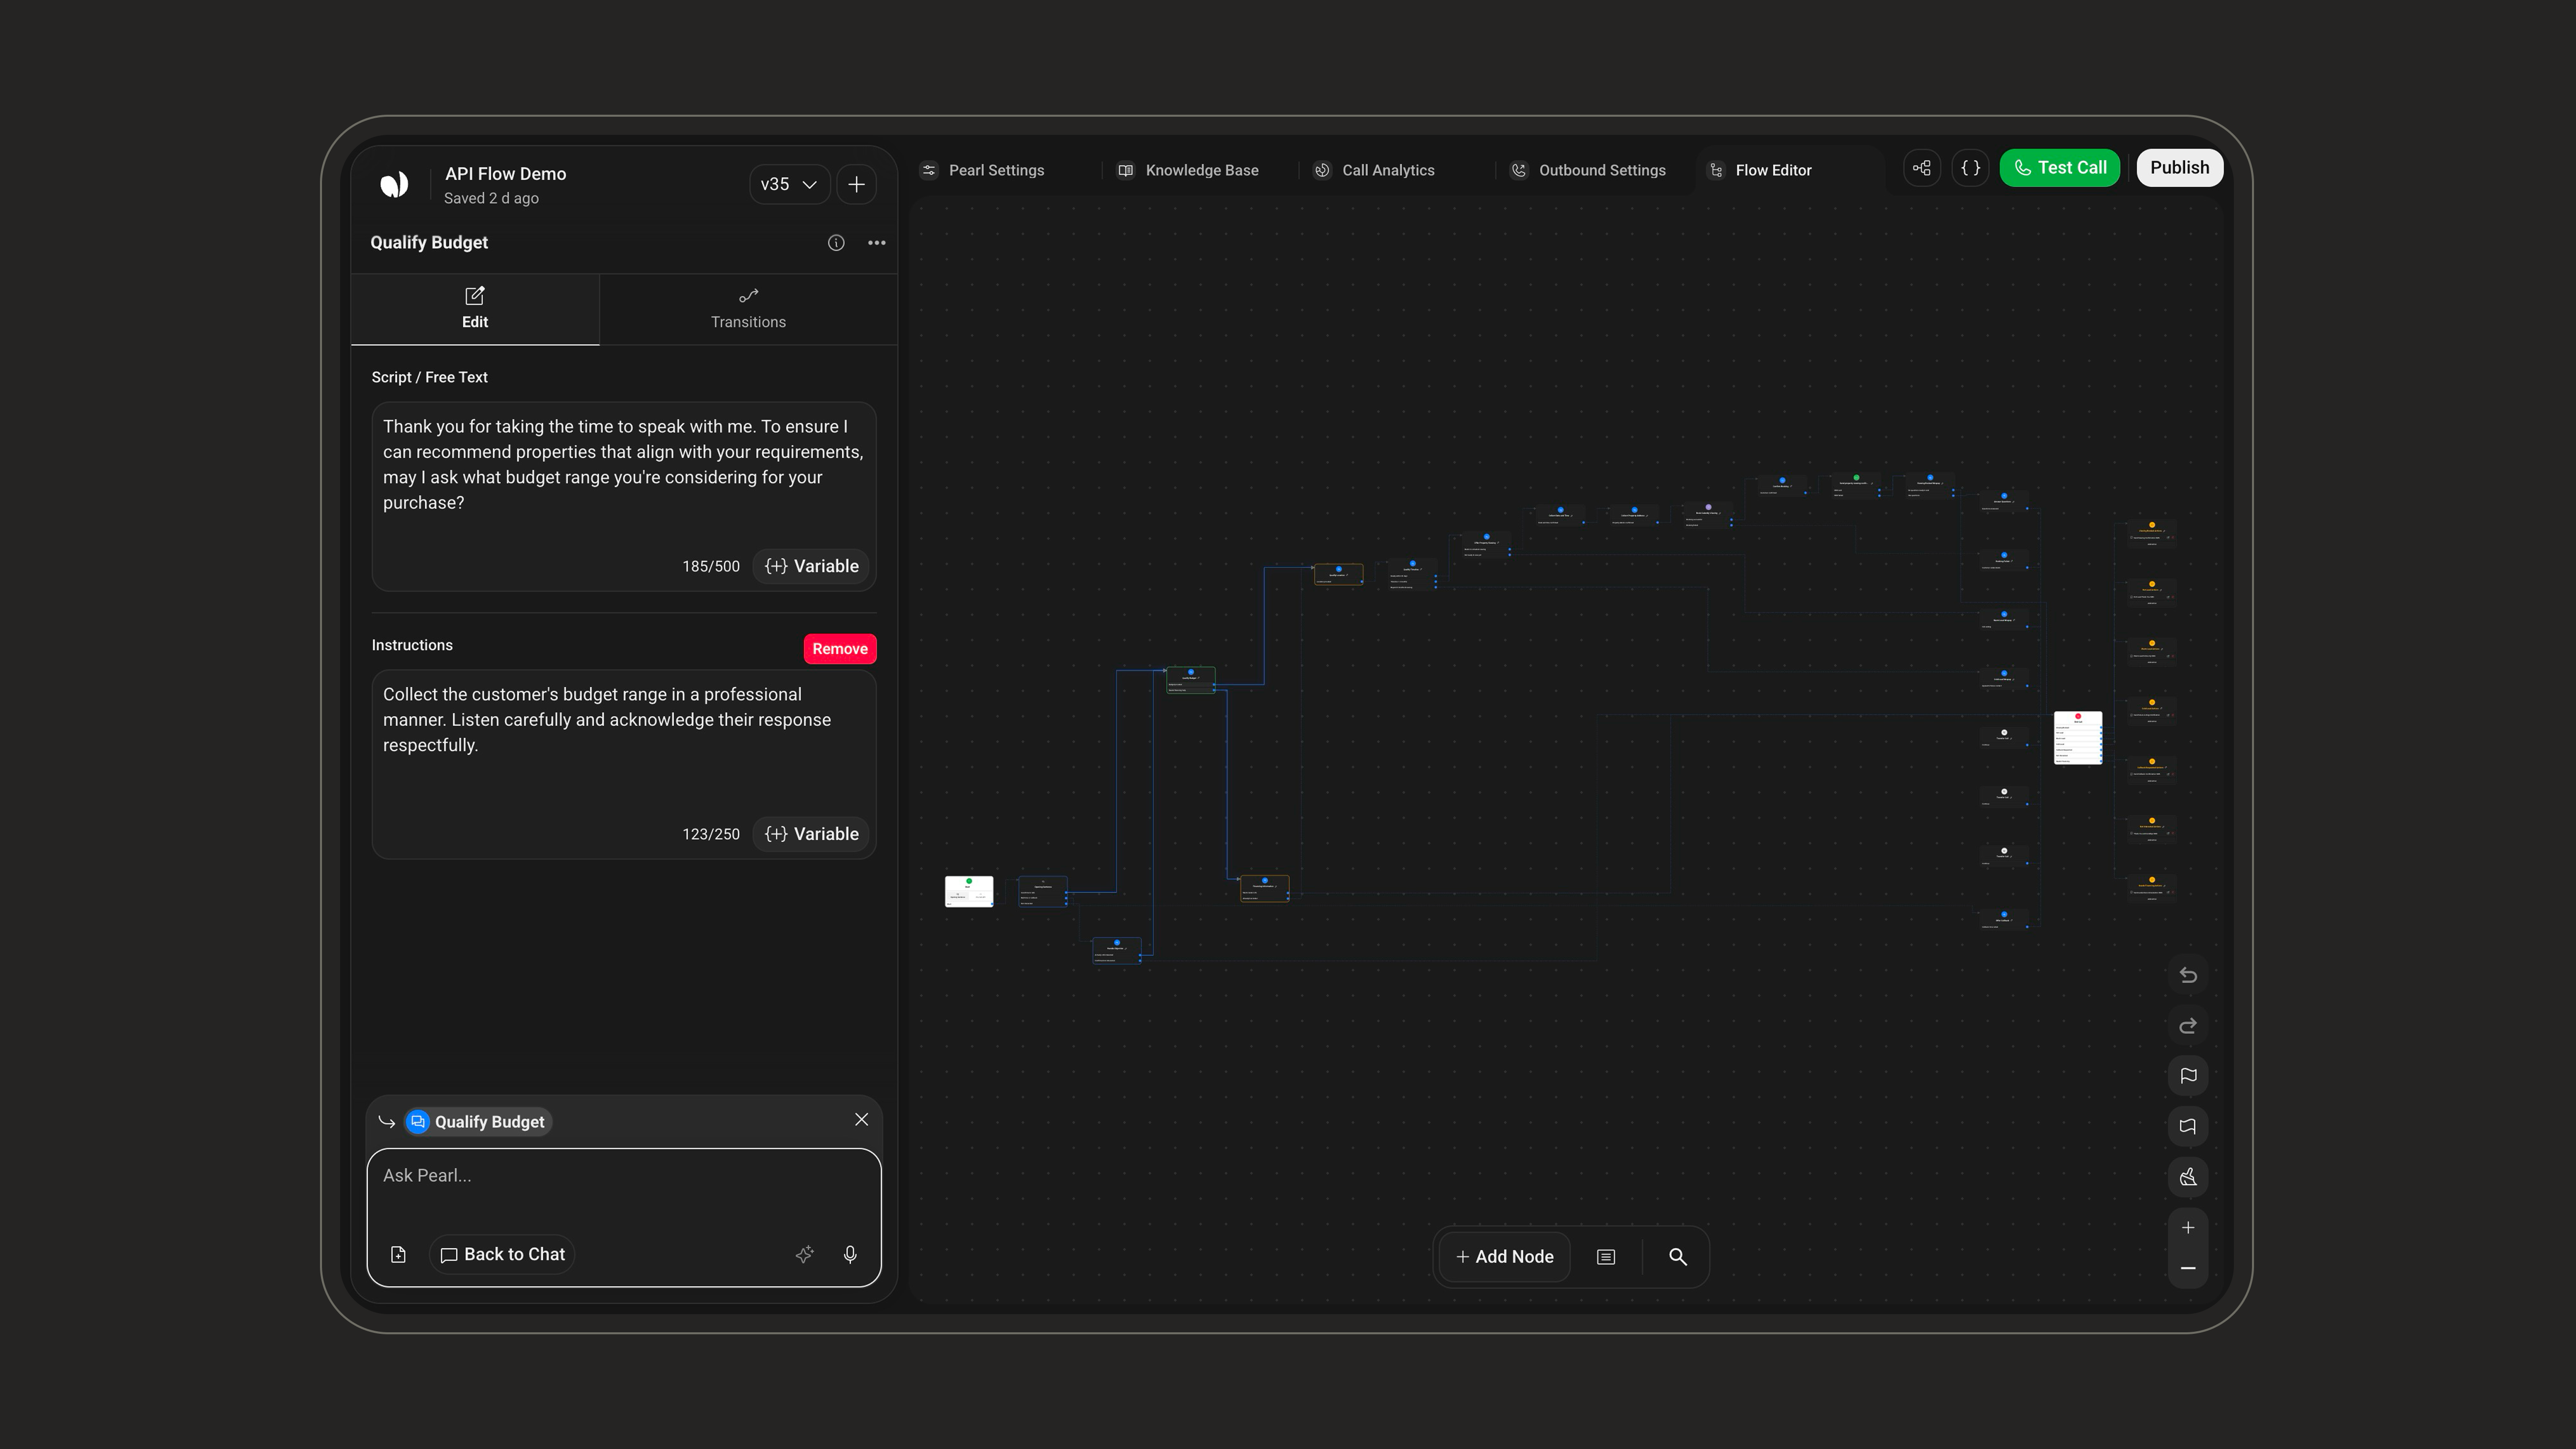
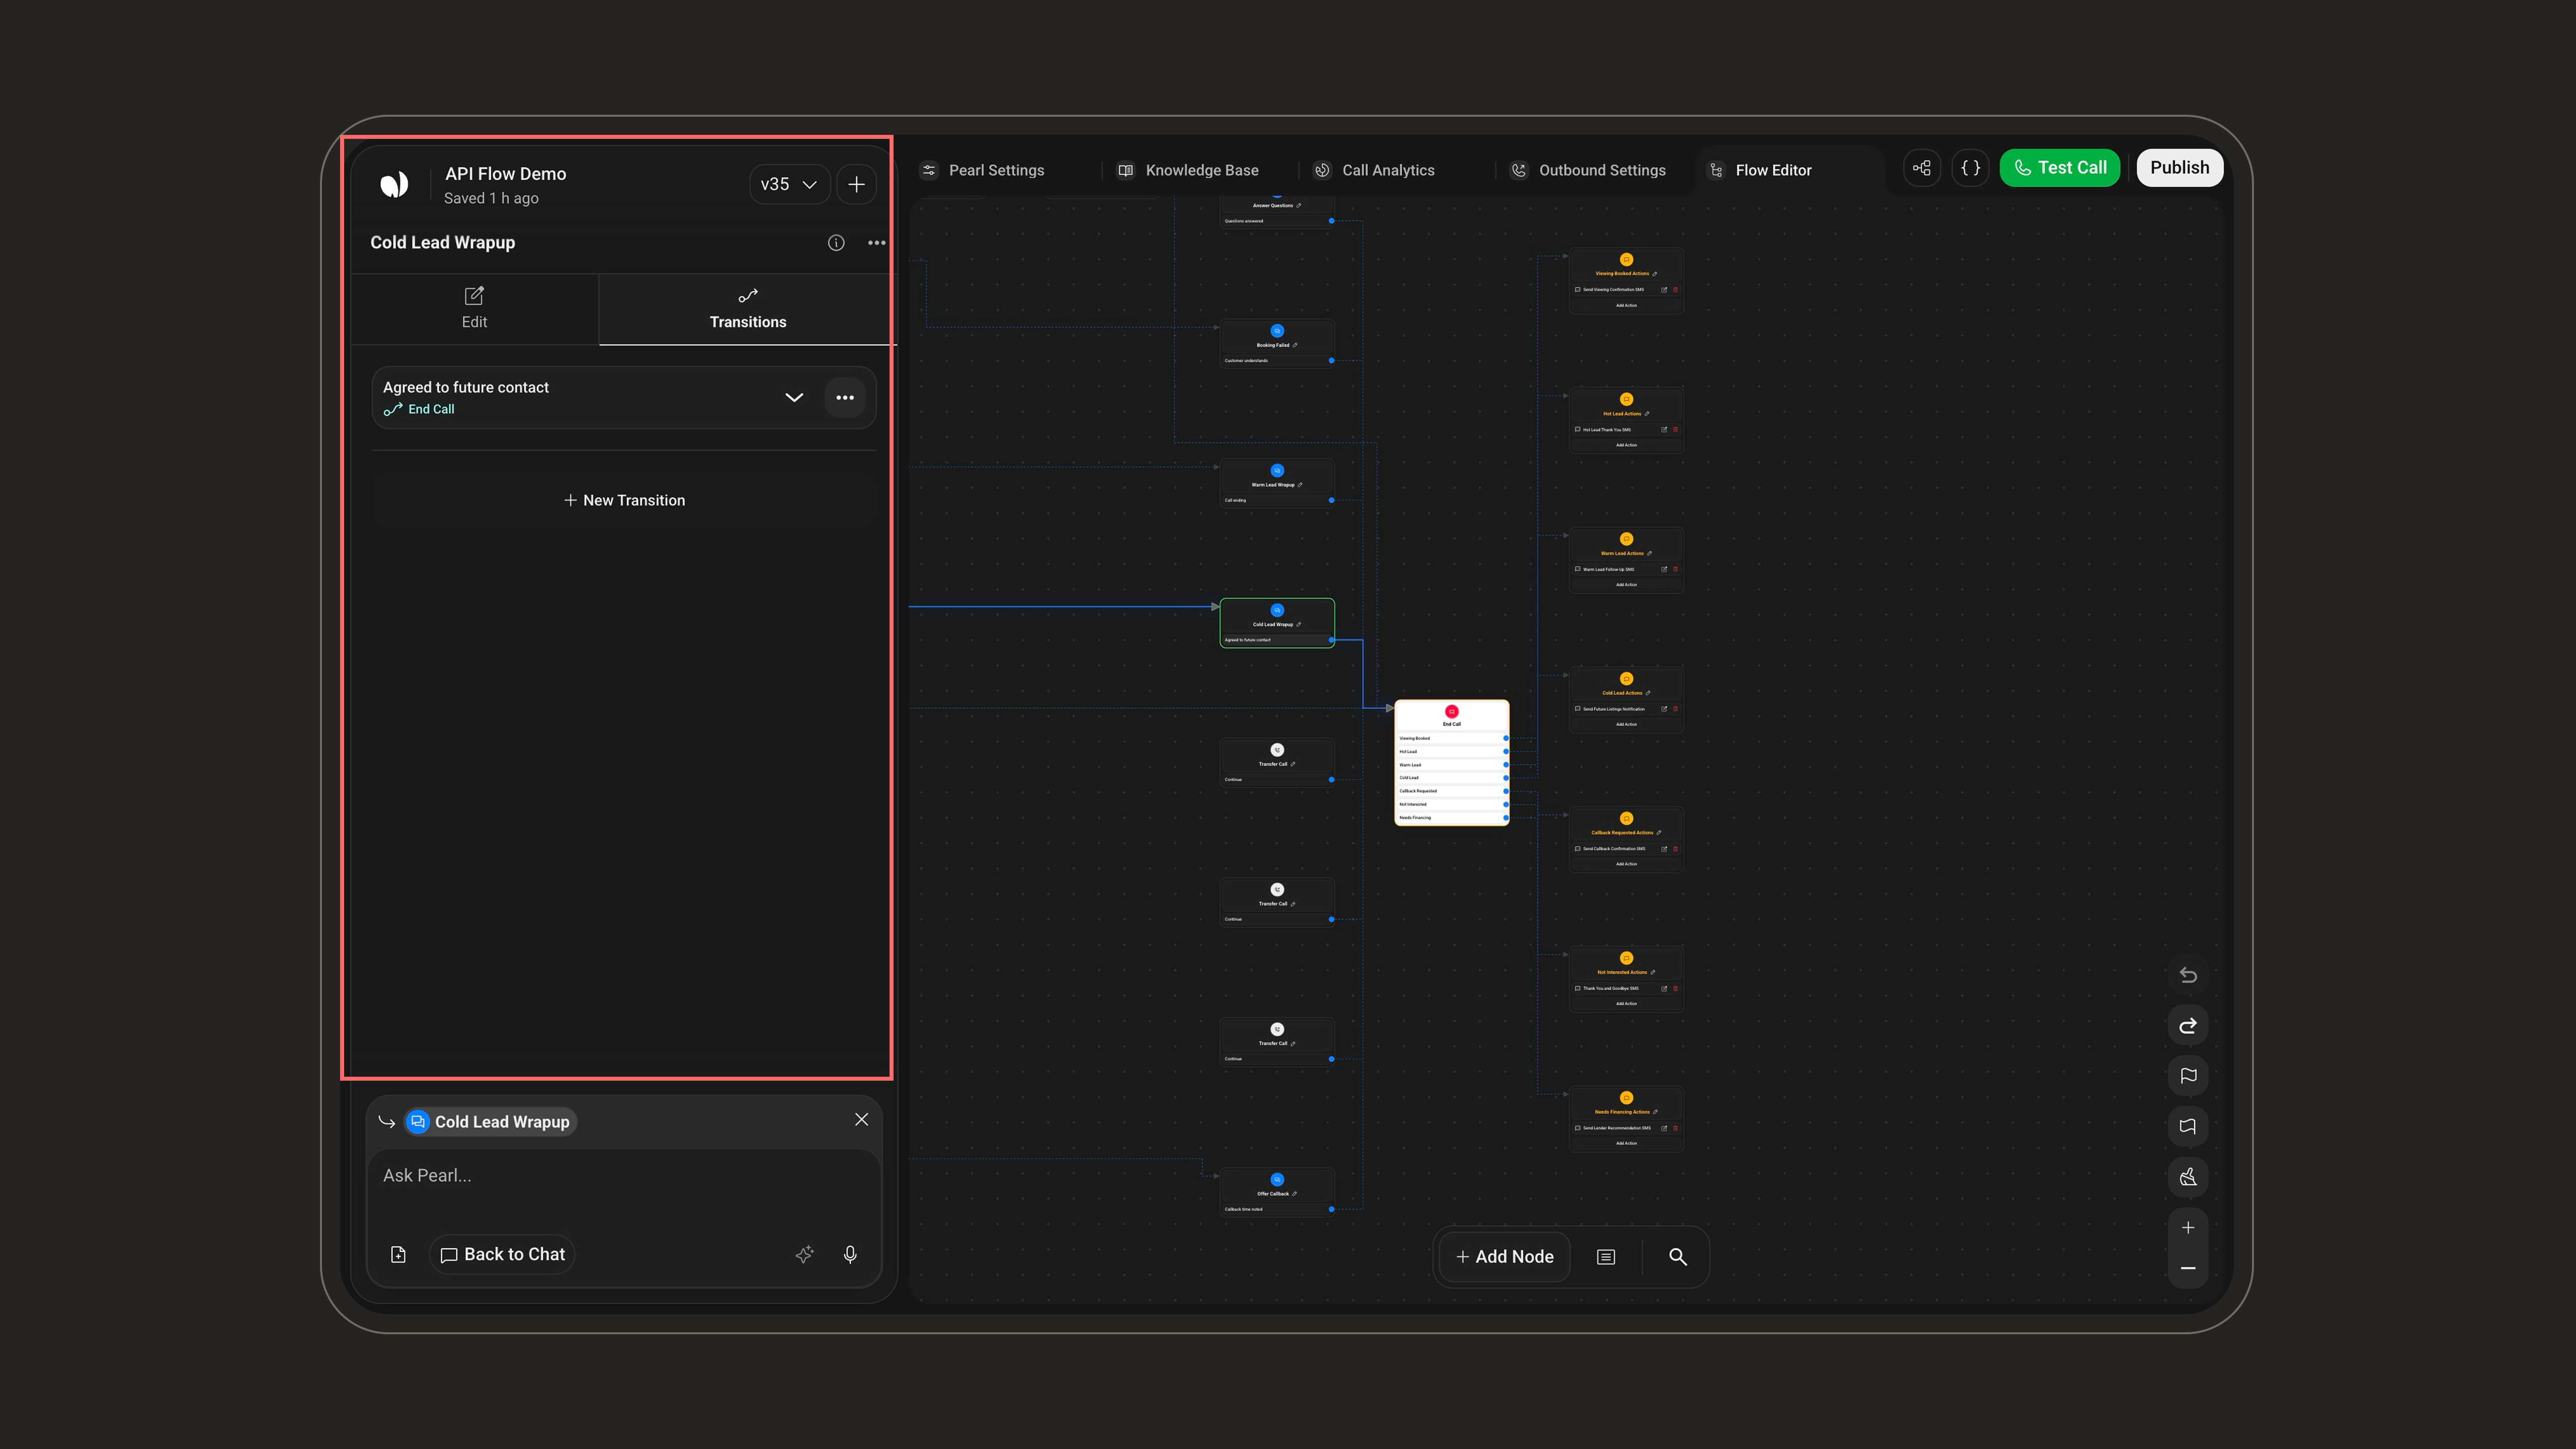
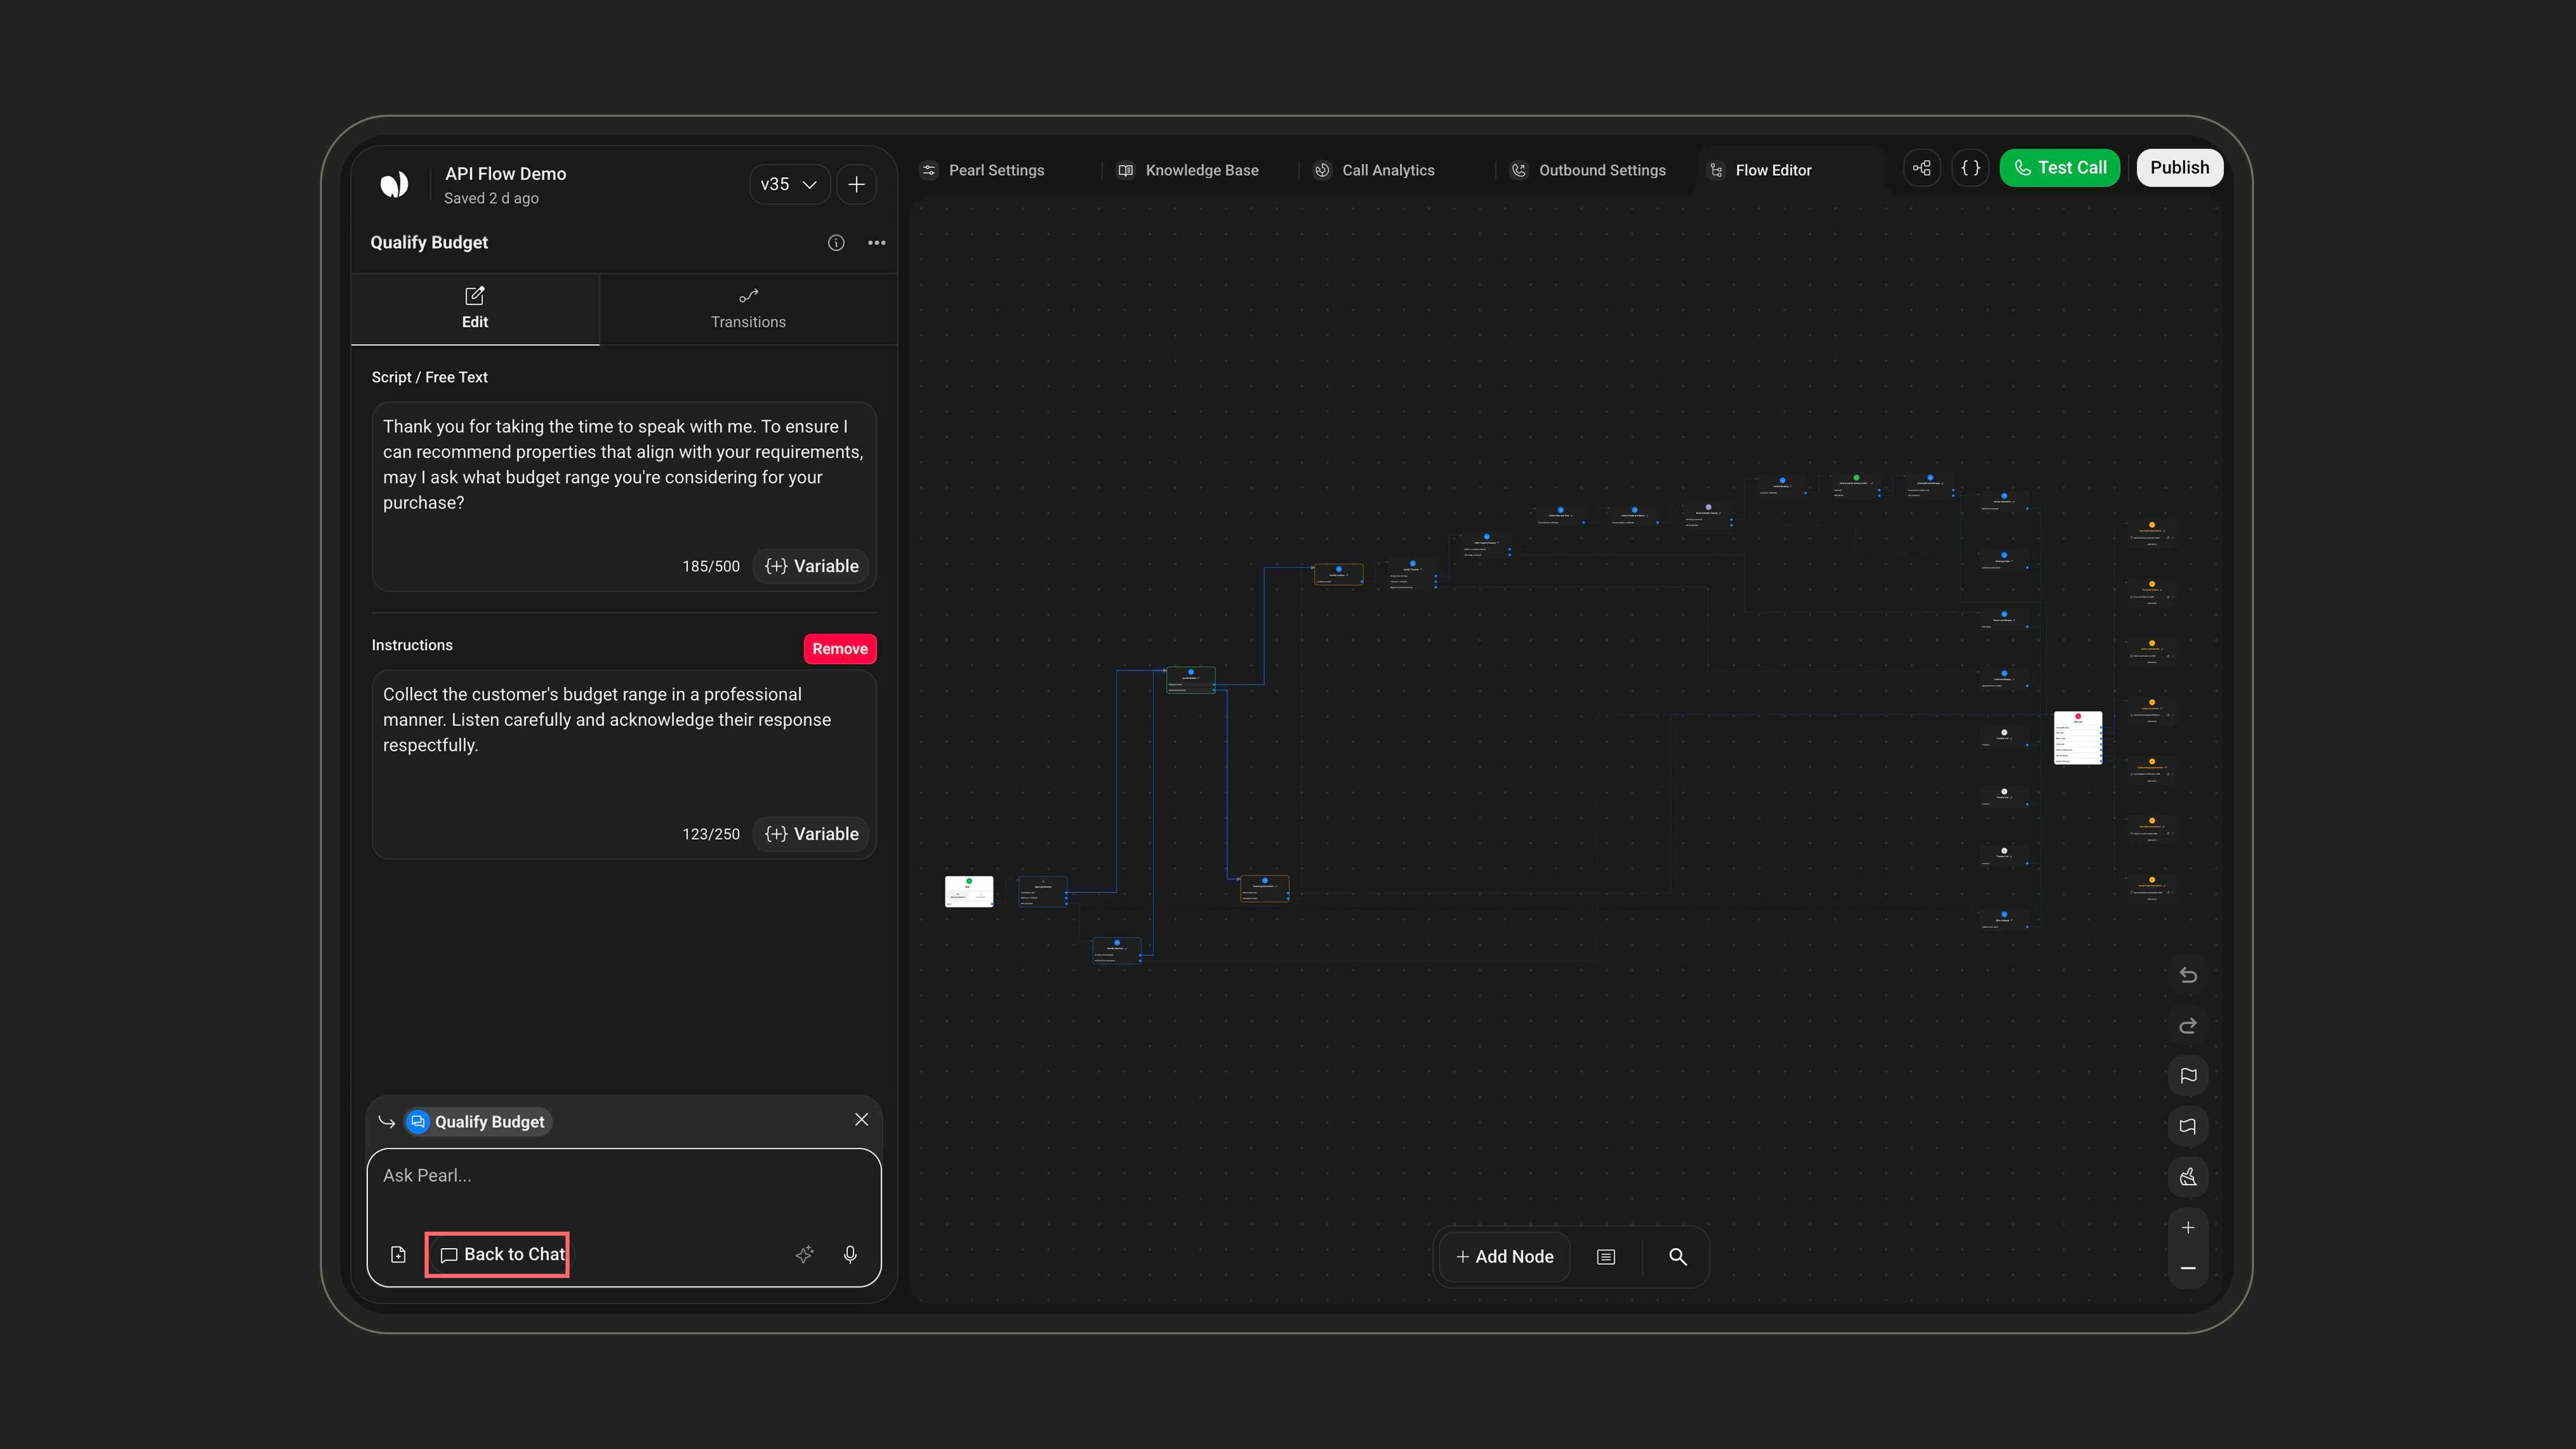
Routing to other nodes is not handled here, but in the Transitions tab.
- Create transitions – Add exits such as “Success”, “Failure”, “No answer”, “Customer asks for human”, etc.
- Connect transitions – Choose the target node for each transition to shape the path of the conversation.
- Edit or delete transitions – Rename transitions, change their destination, or remove them when they are no longer needed.
Any modification done in Manual Edit is immediately reflected in the visual flow and remains fully understood by Pearl.You can freely switch between Chat (Ask Pearl) and Manual Edit as you work on the same node.
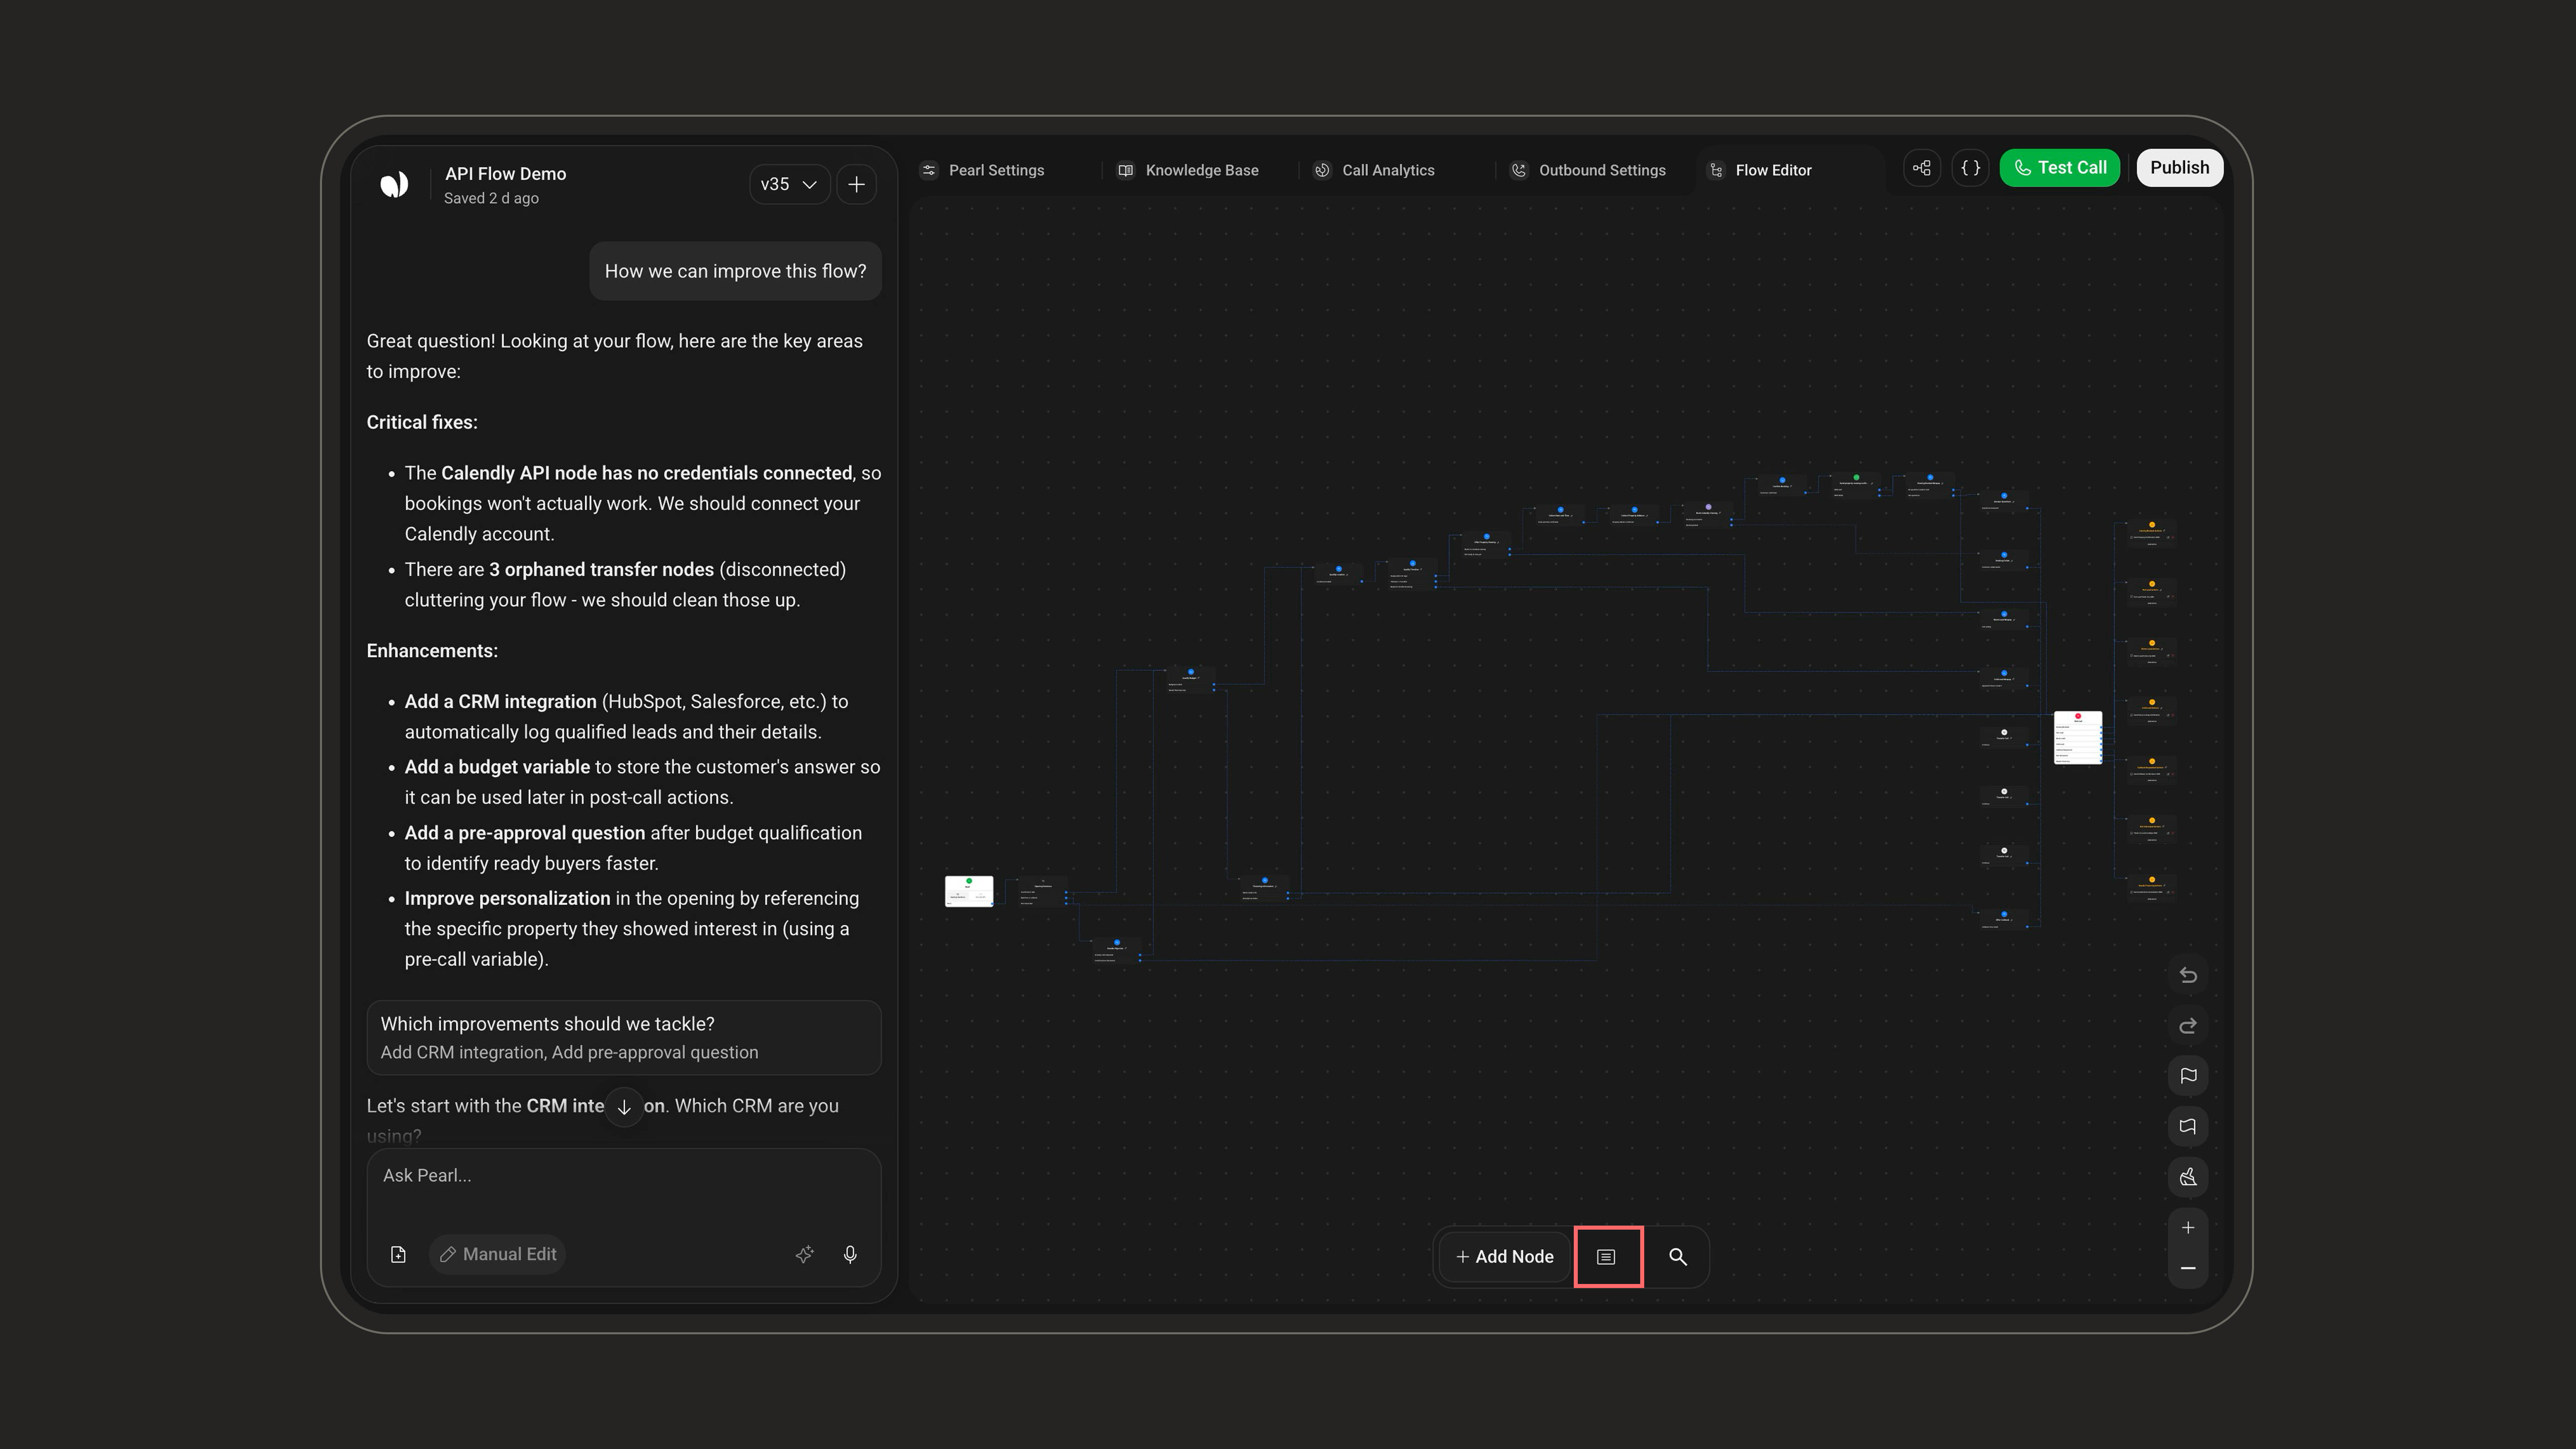
Central Canvas
The central canvas displays your flow as a graph of nodes and transitions.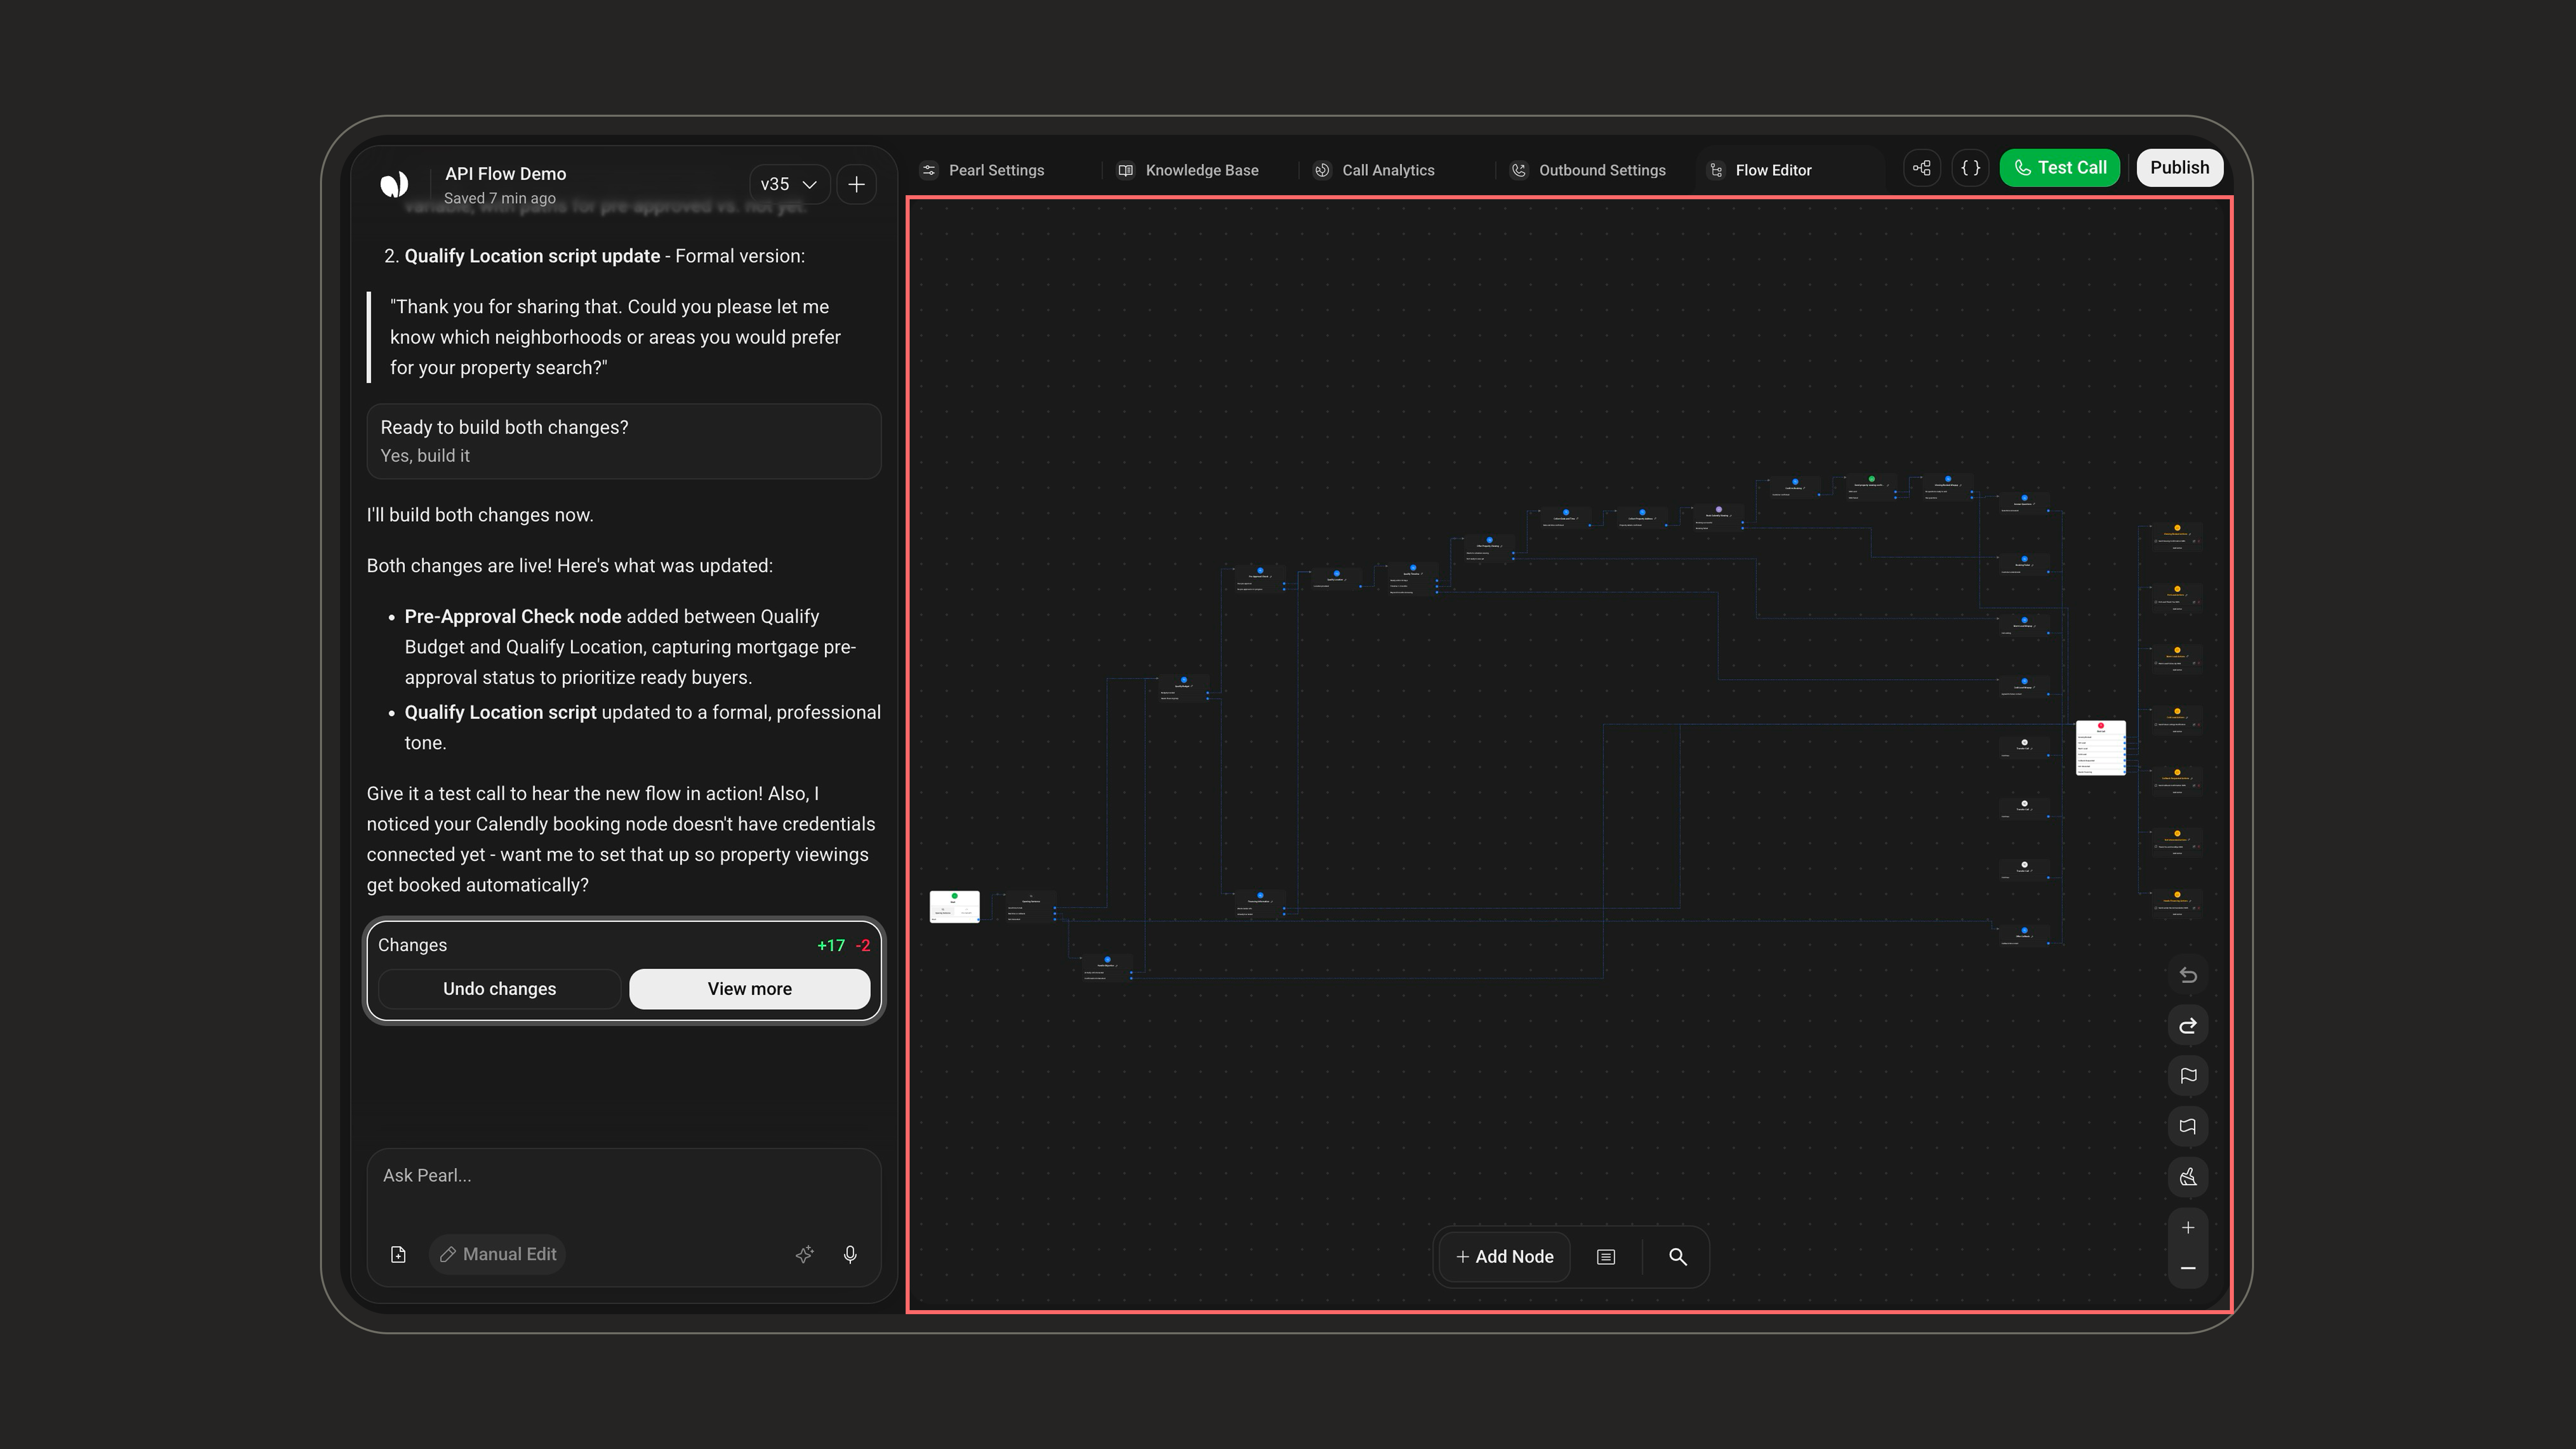
From the canvas you can:
The canvas has no minimap — use zoom, pan, Reorganize, and Search to move around instead.
Node Types Overview
Node Types Overview
Pearl Vibe supports several node types:
Understanding Node Types: Pre-Call, In-Call & Post-CallYour Pearl flow is built around three categories of nodes, each designed for a specific moment in the call lifecycle. Knowing the difference is essential to avoid misusing an action or expecting behavior that can’t happen at that stage.1. Pre-Call Nodes: Before the call startsThese nodes run prior to dialing or answering. They’re ideal for preparing context: fetching customer data, checking availability, validating an ID, loading account information. They cannot interact with the caller and cannot create or import leads.2. In-Call Nodes: During the conversationThese nodes control everything that happens while the caller and the agent are connected. Dialogue, decision logic, sending SMS/emails, API calls, and CRM updates all happen here in real time. This is the core of your conversational flow.3. Post-Call Nodes: After the call endsOnce the call is finished, these nodes handle asynchronous tasks: writing CRM logs, creating leads, triggering webhooks, updating databases, or launching follow-up workflows. They cannot affect what happened during the call, only what happens after.
Start Node
Start Node
Every flow begins with a Start node. It controls how the conversation is initiated.
The Pre-Call API cannot be used to import leads into your Pearl. Its purpose is strictly to enrich or prepare contextual data before the call starts
In‑Call Nodes
In‑Call Nodes
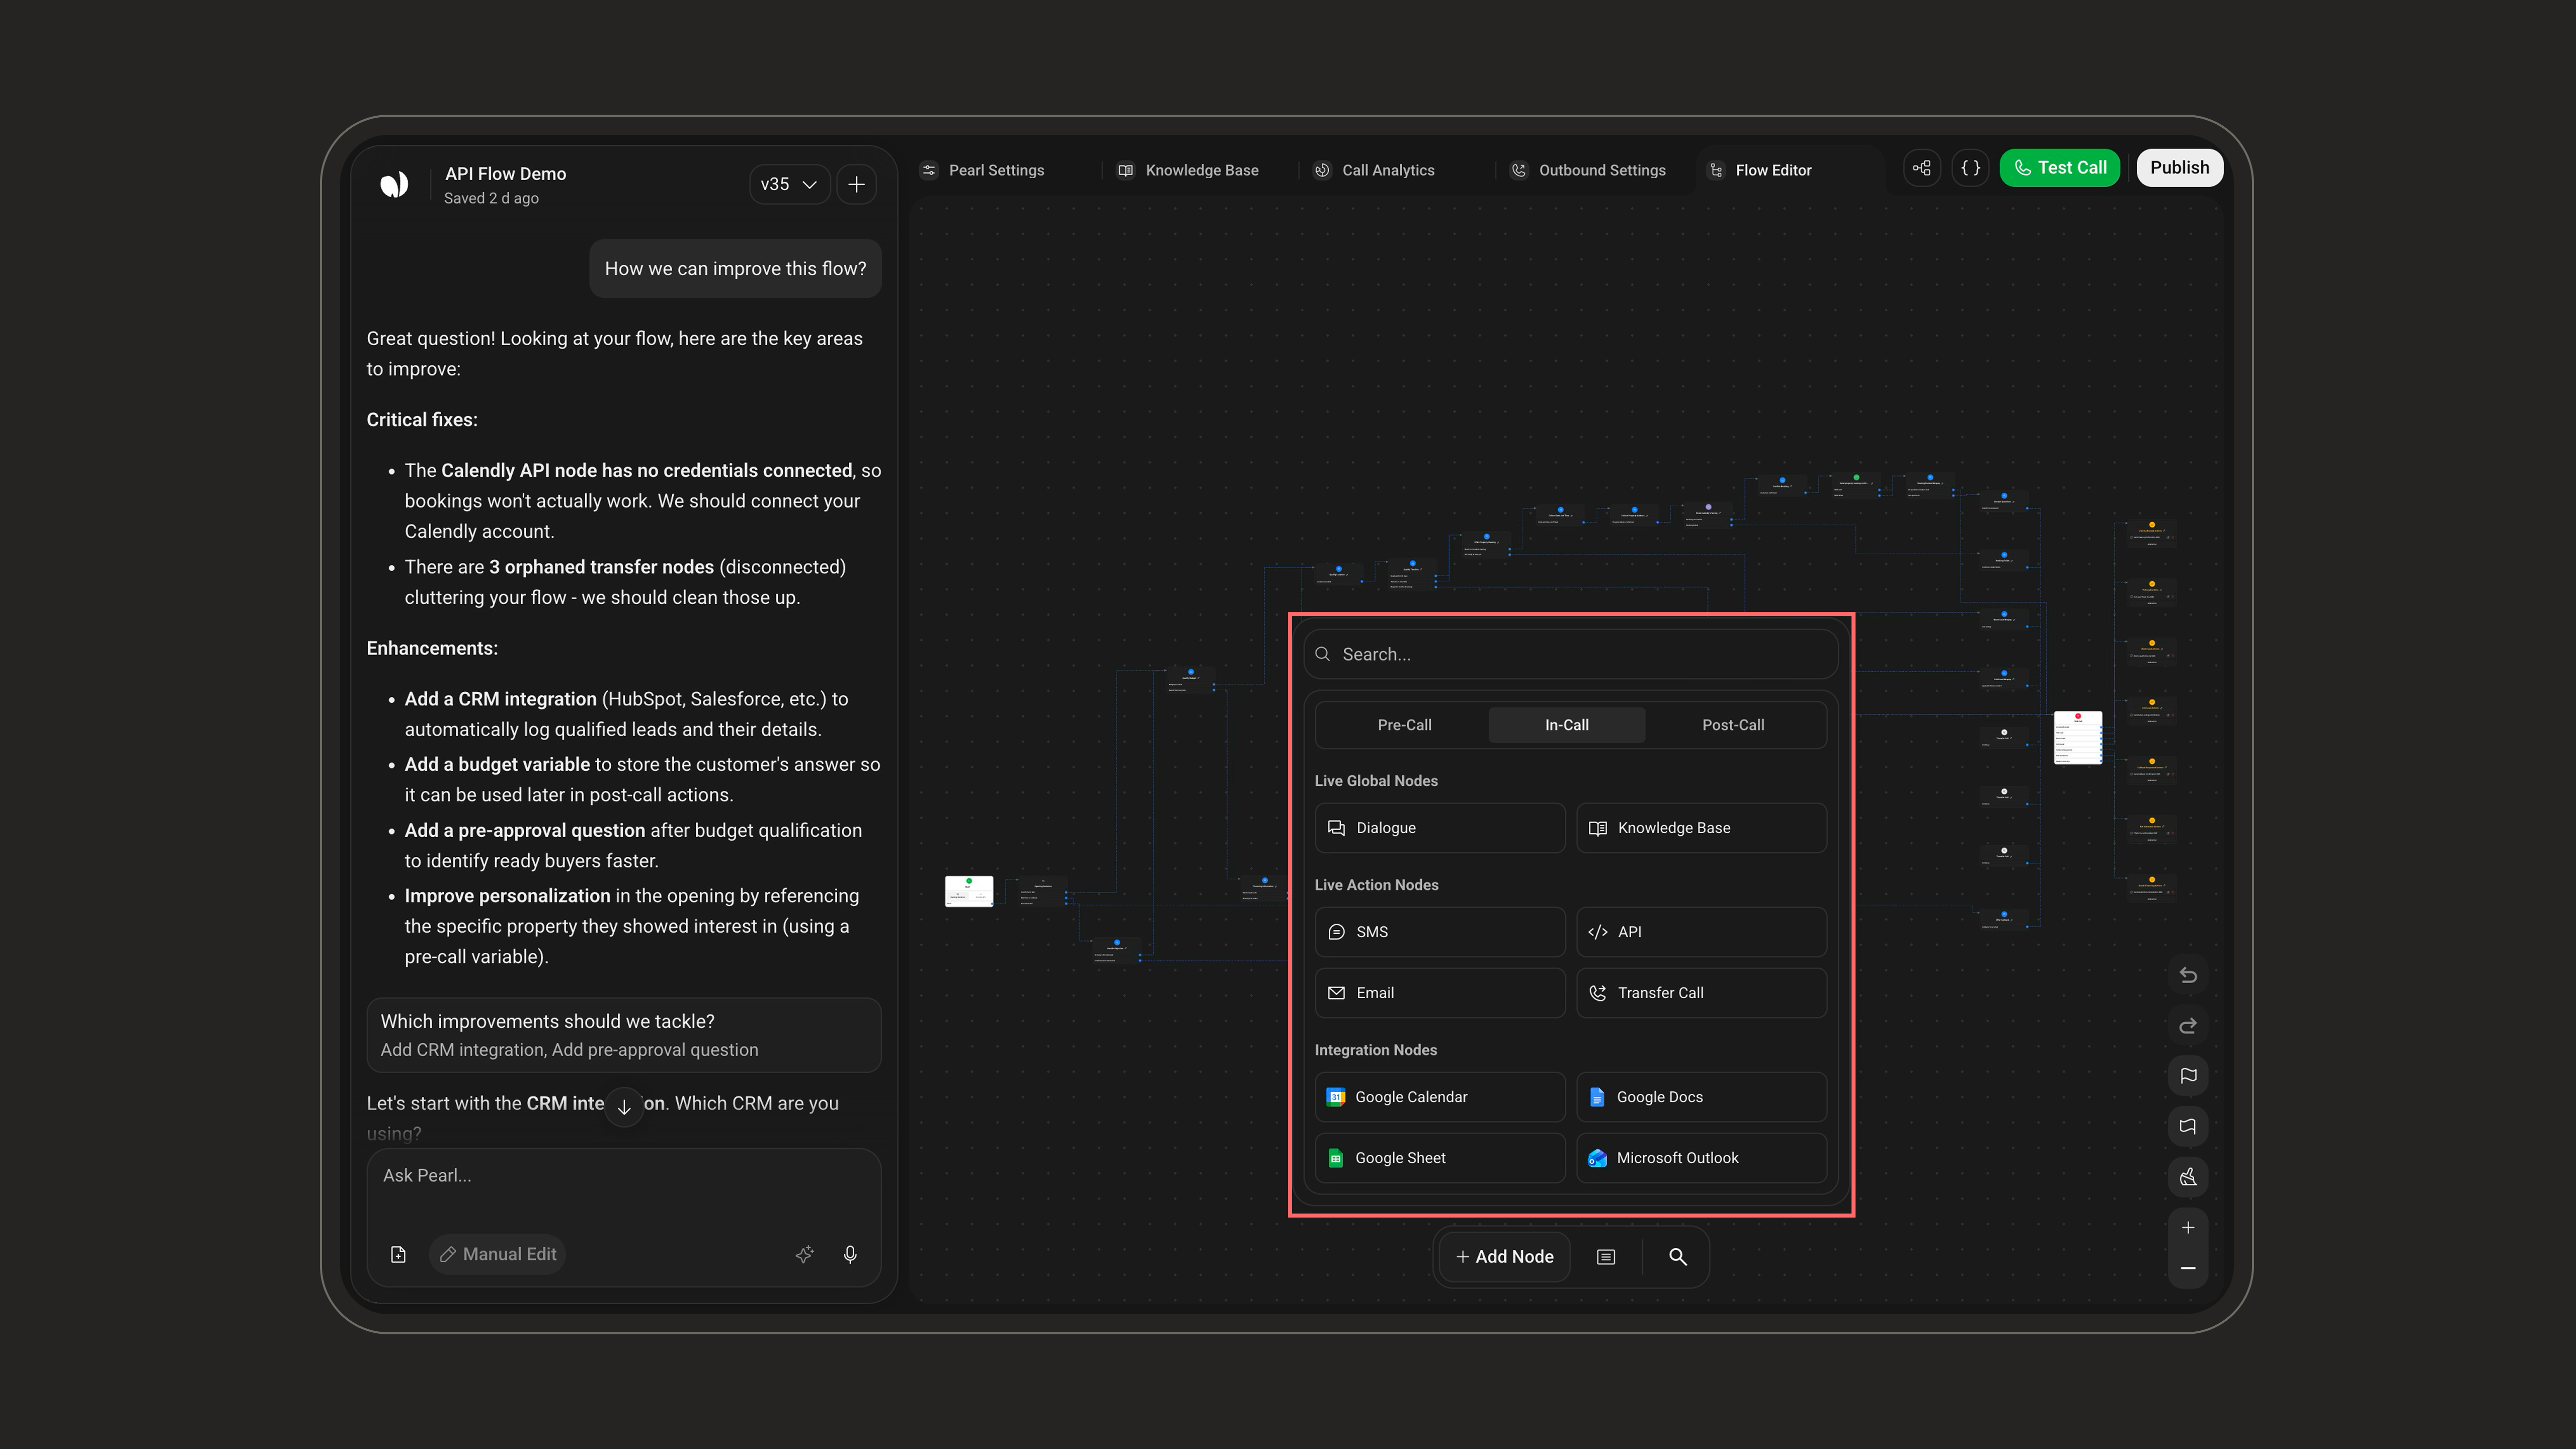
In‑Call nodes represent the actions and dialogues that happen during the conversation. In the Add Node picker they’re split into Live Global Nodes (Dialogue, Knowledge Base) and Live Action Nodes (SMS, Email, API, Transfer Call).
Integration-specific actions (e.g. Google Calendar, Salesforce) appear in a separate Integration Nodes group of the picker — see below.
Integration Nodes
Integration Nodes
Integration nodes let your Pearl interact directly with external tools and services without writing any API code yourself. Technically, each one is an API node pre-configured with an integration credential from the Credentials Manager — it handles authentication, request formatting, and data mapping for you. They appear in a dedicated Integration Nodes group of the Add Node picker.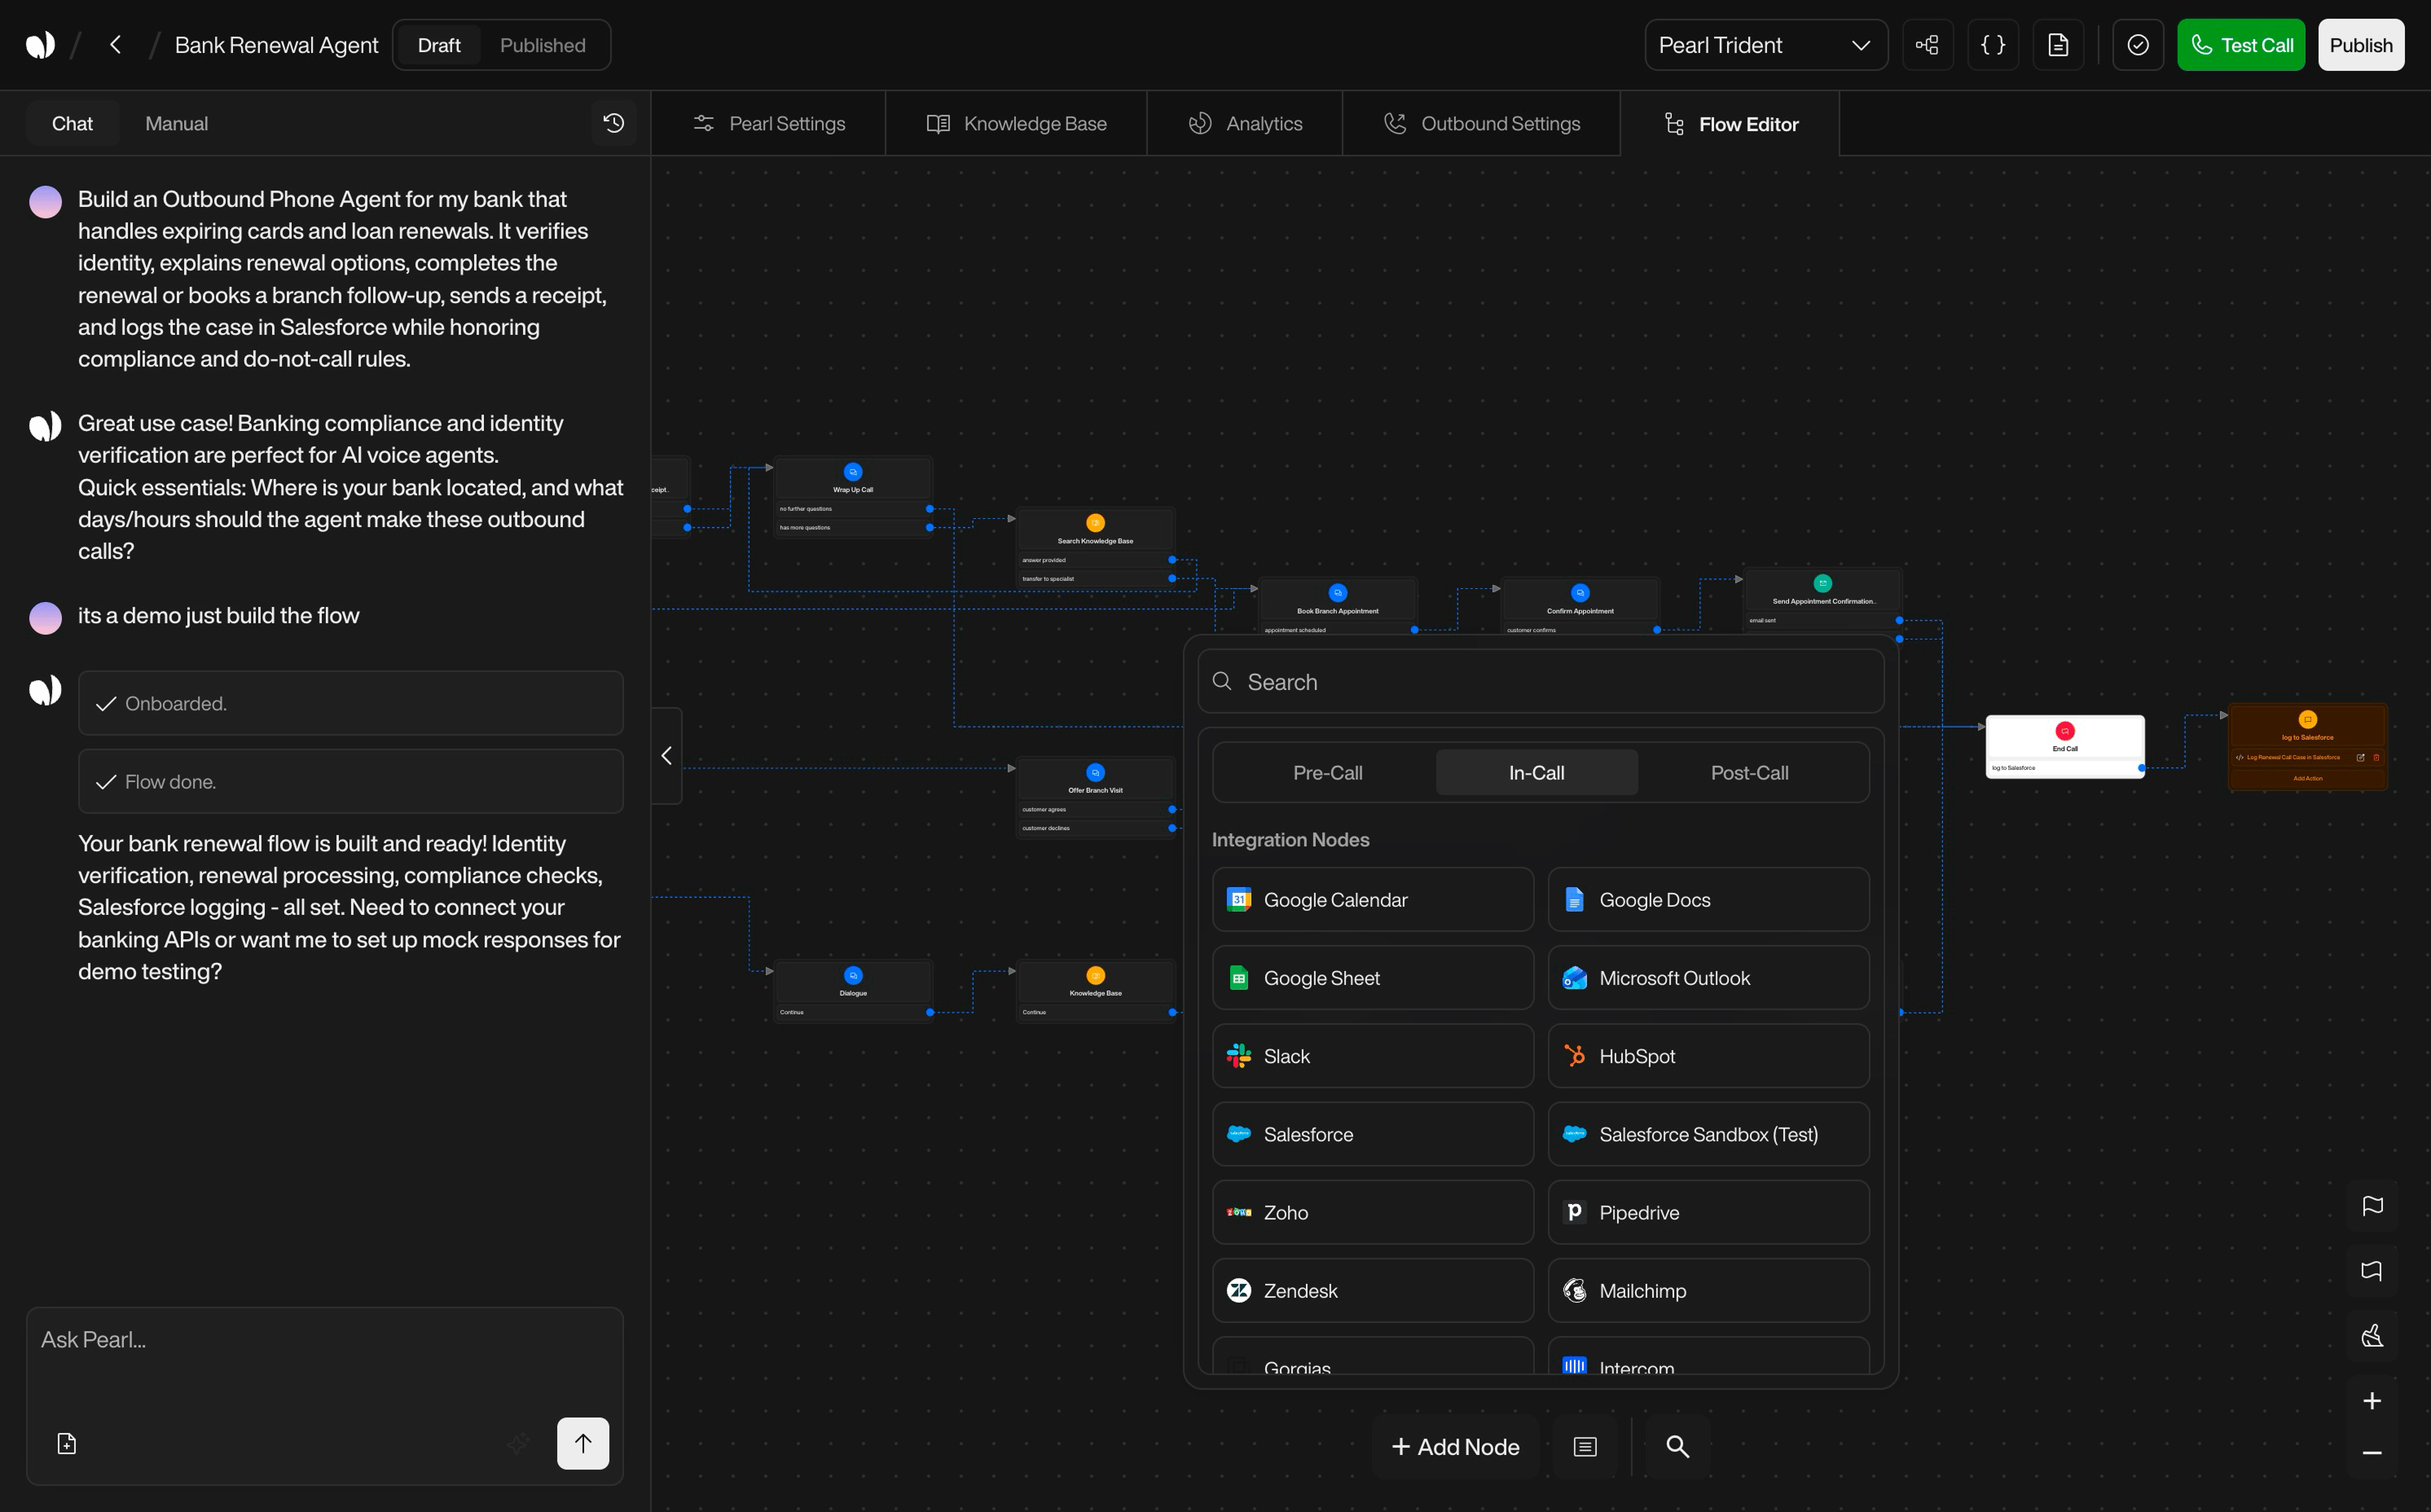
 ActiveCampaign
 Airtable
 Algolia
 Anthropic
 AssemblyAI
 Backblaze
 Baserow
 Bitly
Bitly Brevo
Brevo Cal.com
 Calendly
 Clearbit
 ClickUp
 Cloudflare
 Cohere
 Contentful
 Convertkit
 Customer.io
 Datadog
 DeepL
DeepL DigitalOcean
 Discord
 Elasticsearch
 Freshdesk
 Ghost
Ghost Google Calendar
 Google Docs
 Google Sheets
 Grafana
 Groq
Groq Hetzner
 HubSpot
 HuggingFace
 Hunter
 InfluxDB
 JotForm
 Lemlist
 Magento
 MailerLite
 Mailgun
 Mailjet
 Mandrill
 Matrix
 Mattermost
 MessageBird
 Metabase
 Microsoft Outlook
 MinIO
MinIO Mistral AI
 Mocean
 MongoDB
 MQTT
MQTT MSG91
MSG91 MySQL
MySQL Netlify
 New Relic
 NocoDB
 OpenAI
 OpenRouter
 OpenWeatherMap
 Pabbly
 Paddle
 PagerDuty
 Perplexity
 Pinecone
 Plivo
Plivo PostHog
 PostgreSQL
 Postmark
 Pushover
 Qdrant
 RabbitMQ
 Redis
Redis Replicate
 Rocketchat
 Salesforce
 SendGrid
 Sendy
Sendy Sentry
 Serp
Serp SIGNL4
 SparkPost
 Square
 Stability AI
 Strapi
 Supabase
 Telegram
 Together AI
 Twilio
 Typeform
 Vercel
 Vonage
 Wasabi
 Weaviate
 WooCommerce
 WordPress
 Wufoo
Wufoo Yourls
 Zulip
Zulip
What Integration Nodes DoIntegration nodes encapsulate tasks such as:
How They Work
Available Integrations
End Call & Post‑Call Nodes
End Call & Post‑Call Nodes
End Call nodeThis node closes the conversation gracefully (e.g. “Thanks for your time, goodbye.”). It is typically the last in‑call node. On text Pearls it’s labeled End Chat.
- Sending a summary SMS.
- Writing a detailed log into your CRM.
- Triggering a webhook.
- Sending internal notifications to your team.
Post‑Call nodes support many of the same actions as In‑Call nodes but are not constrained by real‑time conversation. In the Add Node picker, the Post-Call tab offers SMS, Email, and API nodes.
Node Structure
Node Structure
Each node shares a common structure.Header
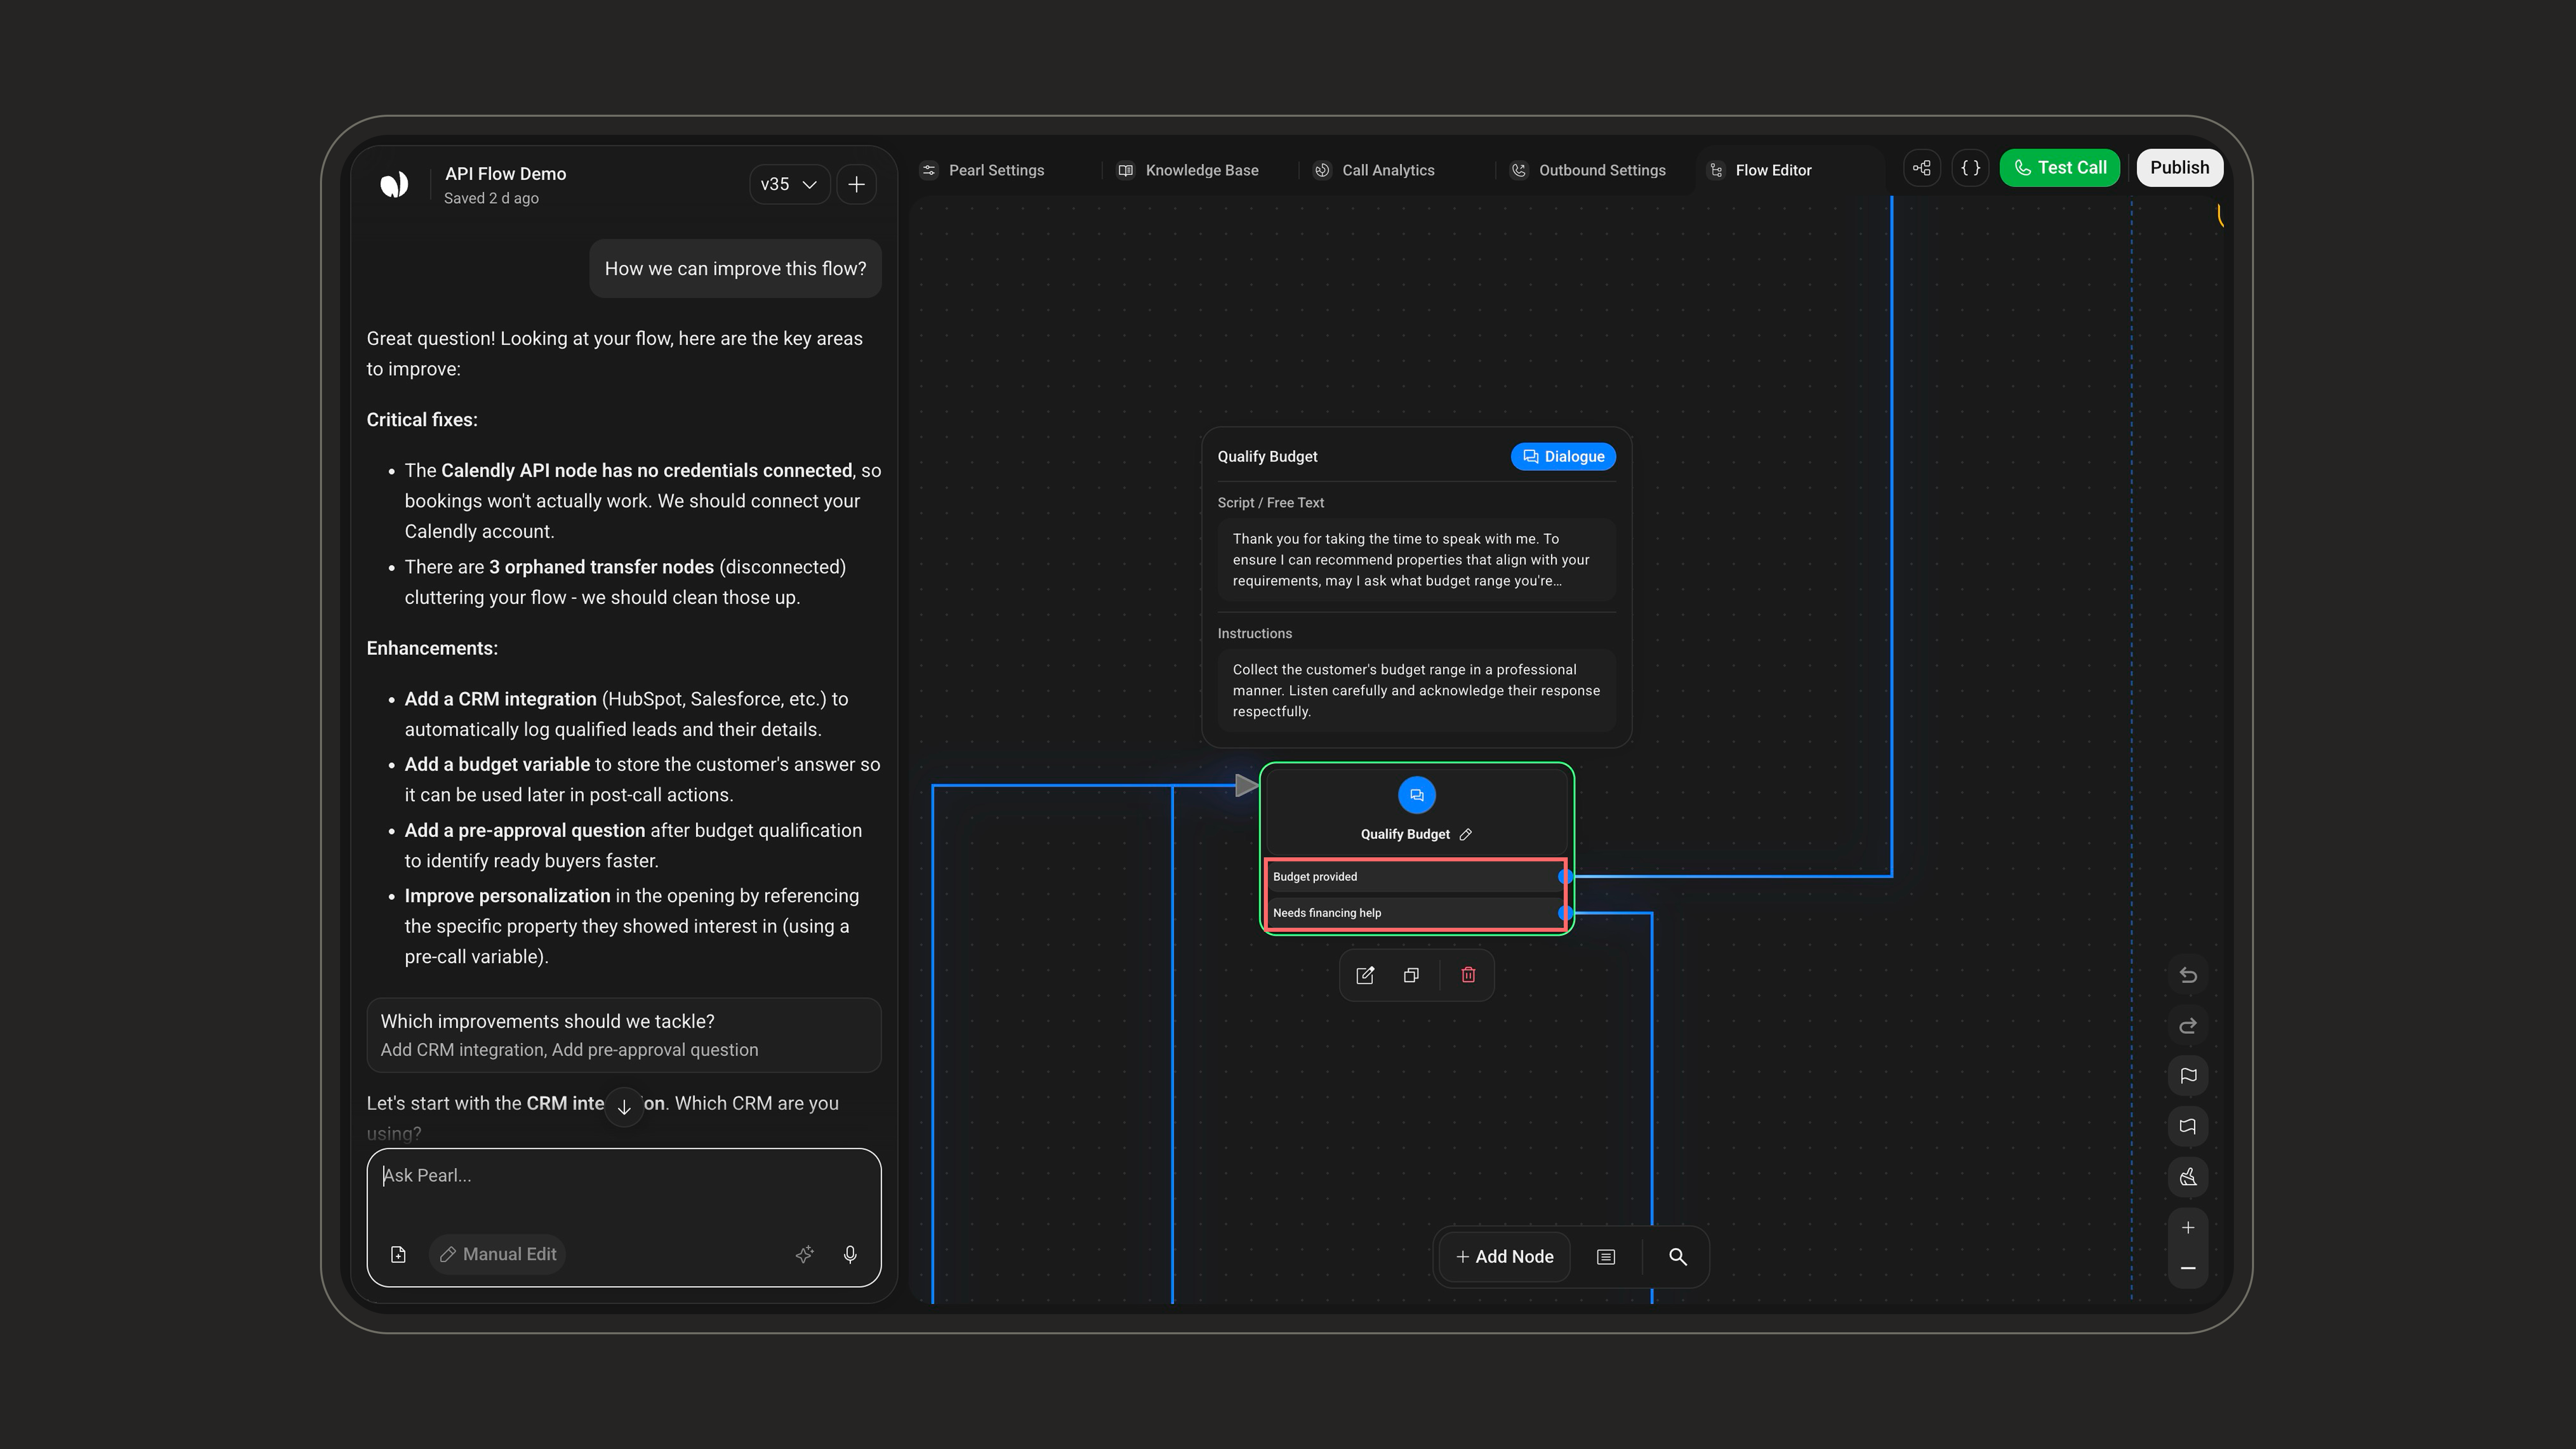
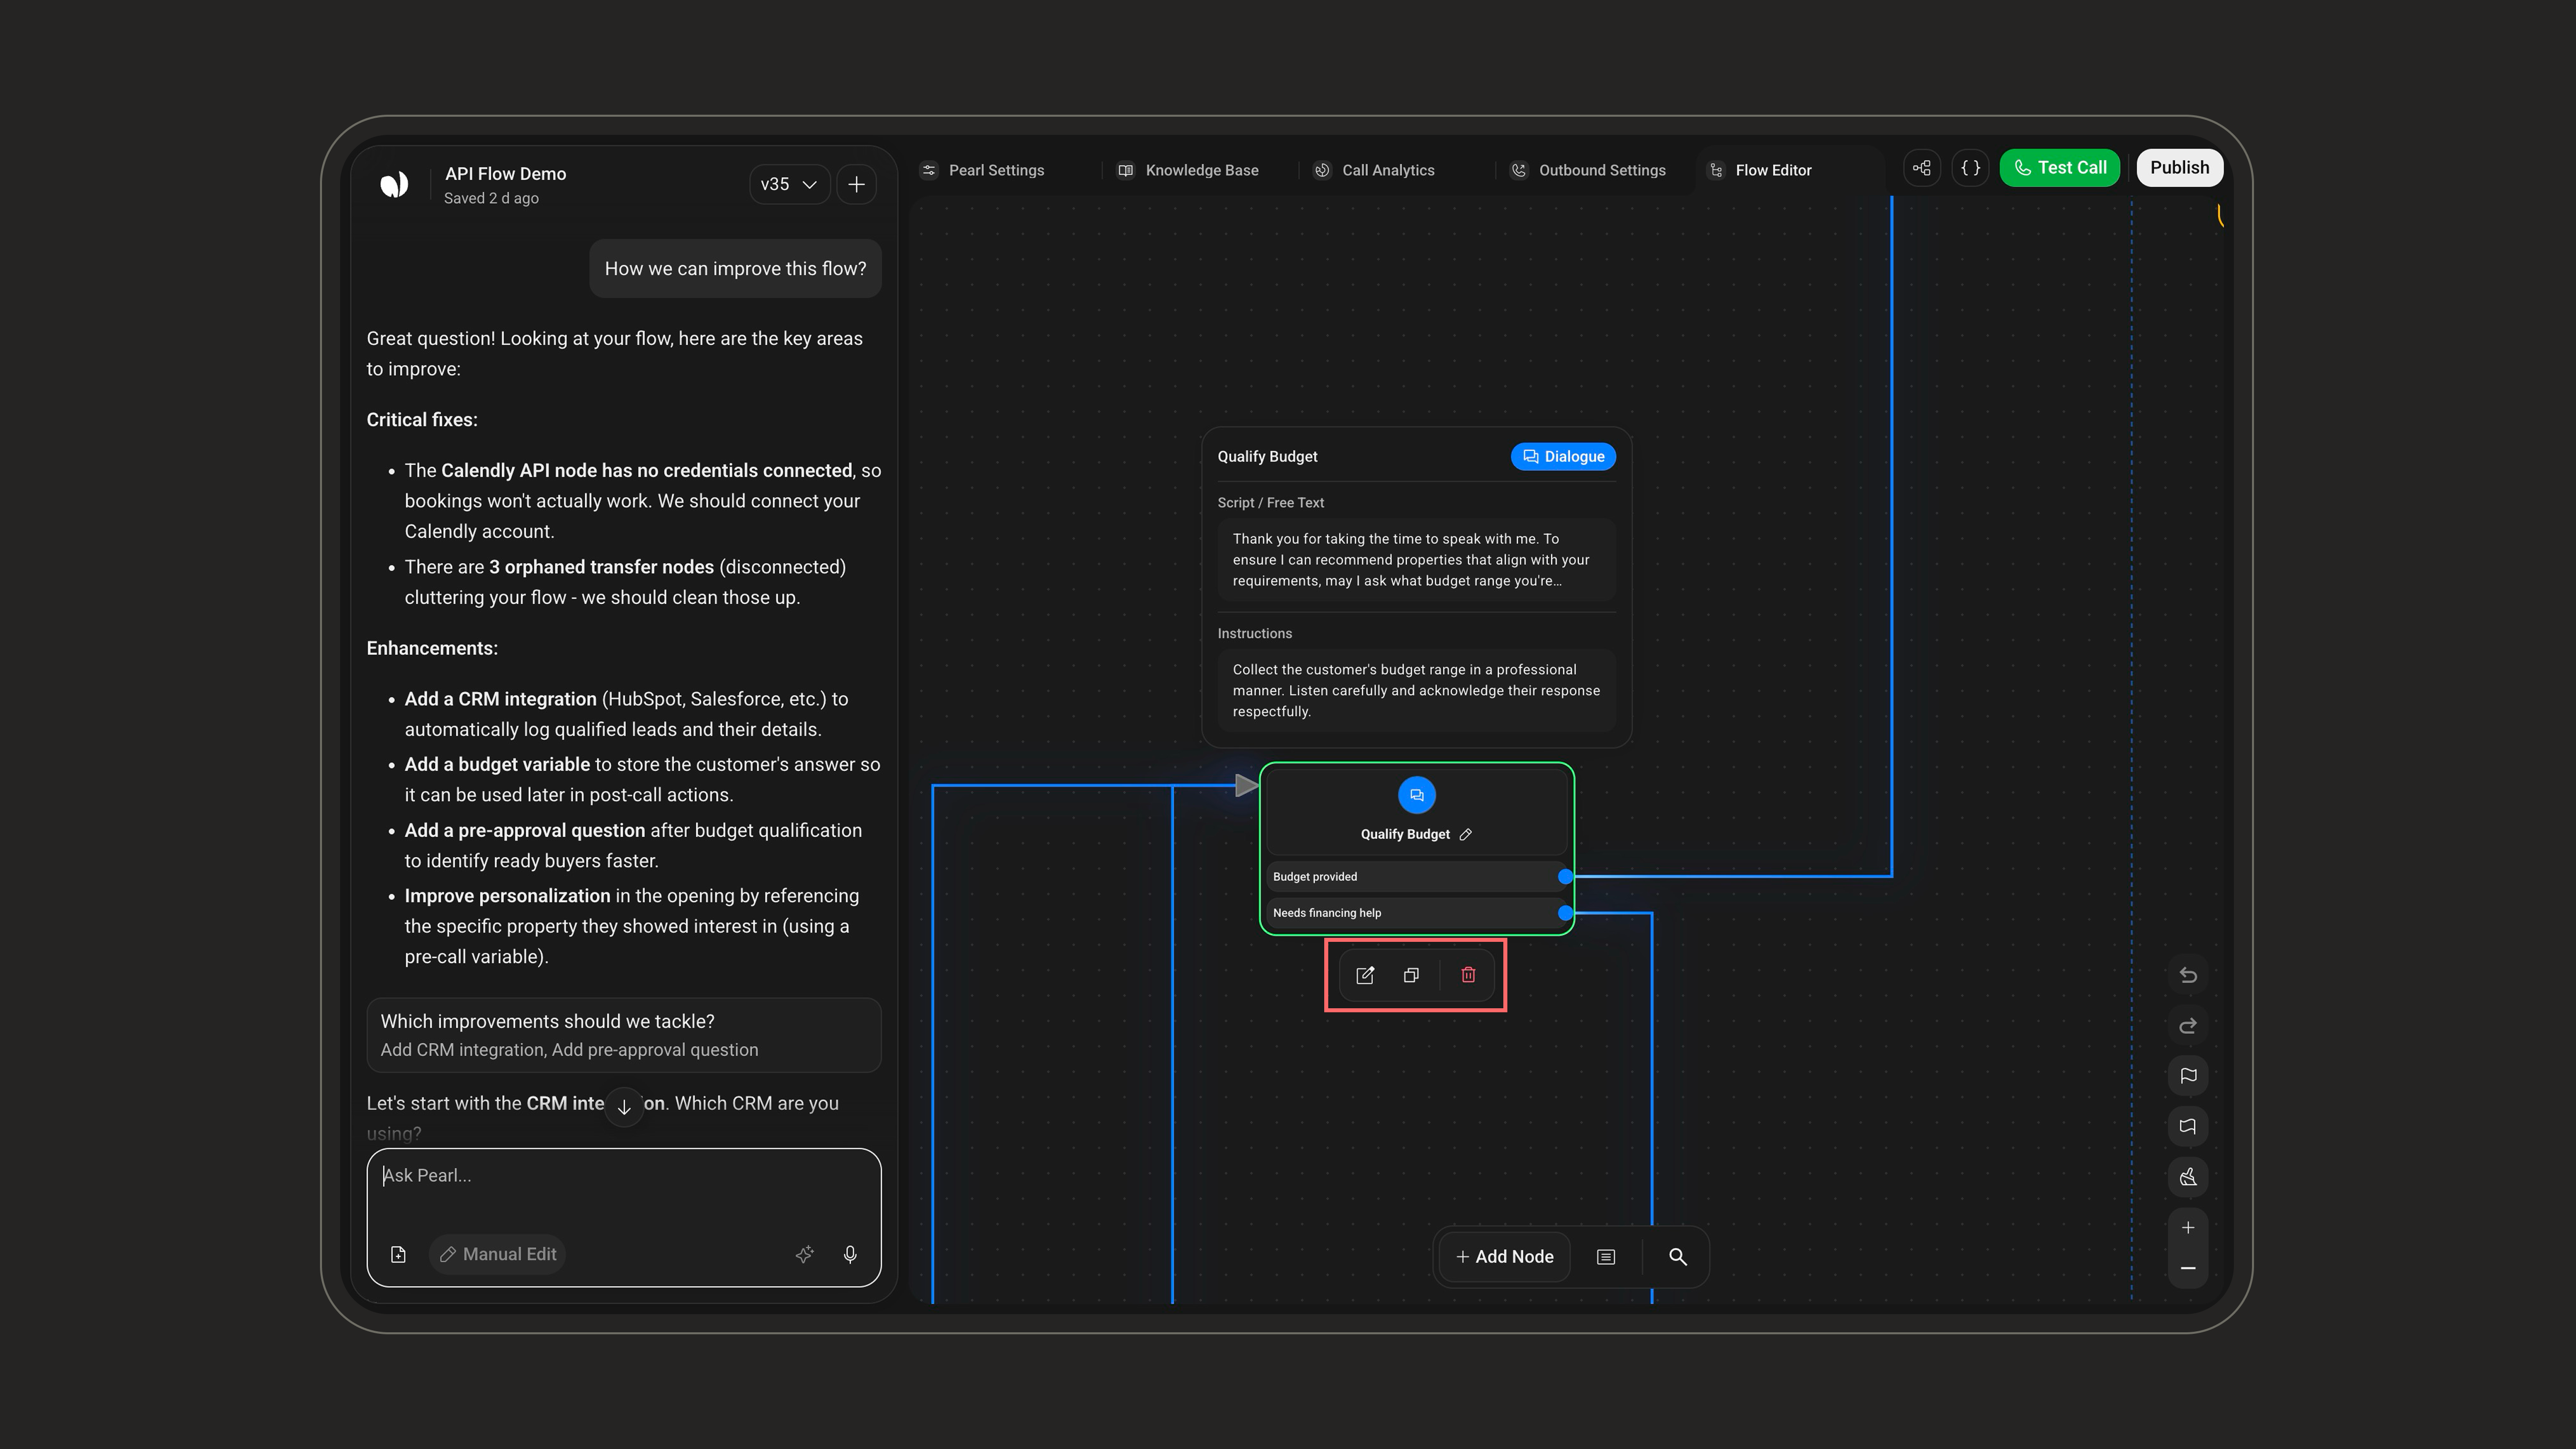
- Icon representing the type of node.
- Node name, editable to reflect its role (“Payment check”, “Qualification”, “Post‑call CRM update”…).
- See which node each transition points to.
- Click to navigate along the transition.
- Disconnect or reconnect transitions to reshape the flow.
Bottom tools
Bottom tools
The toolbar at the bottom of the canvas groups three controls.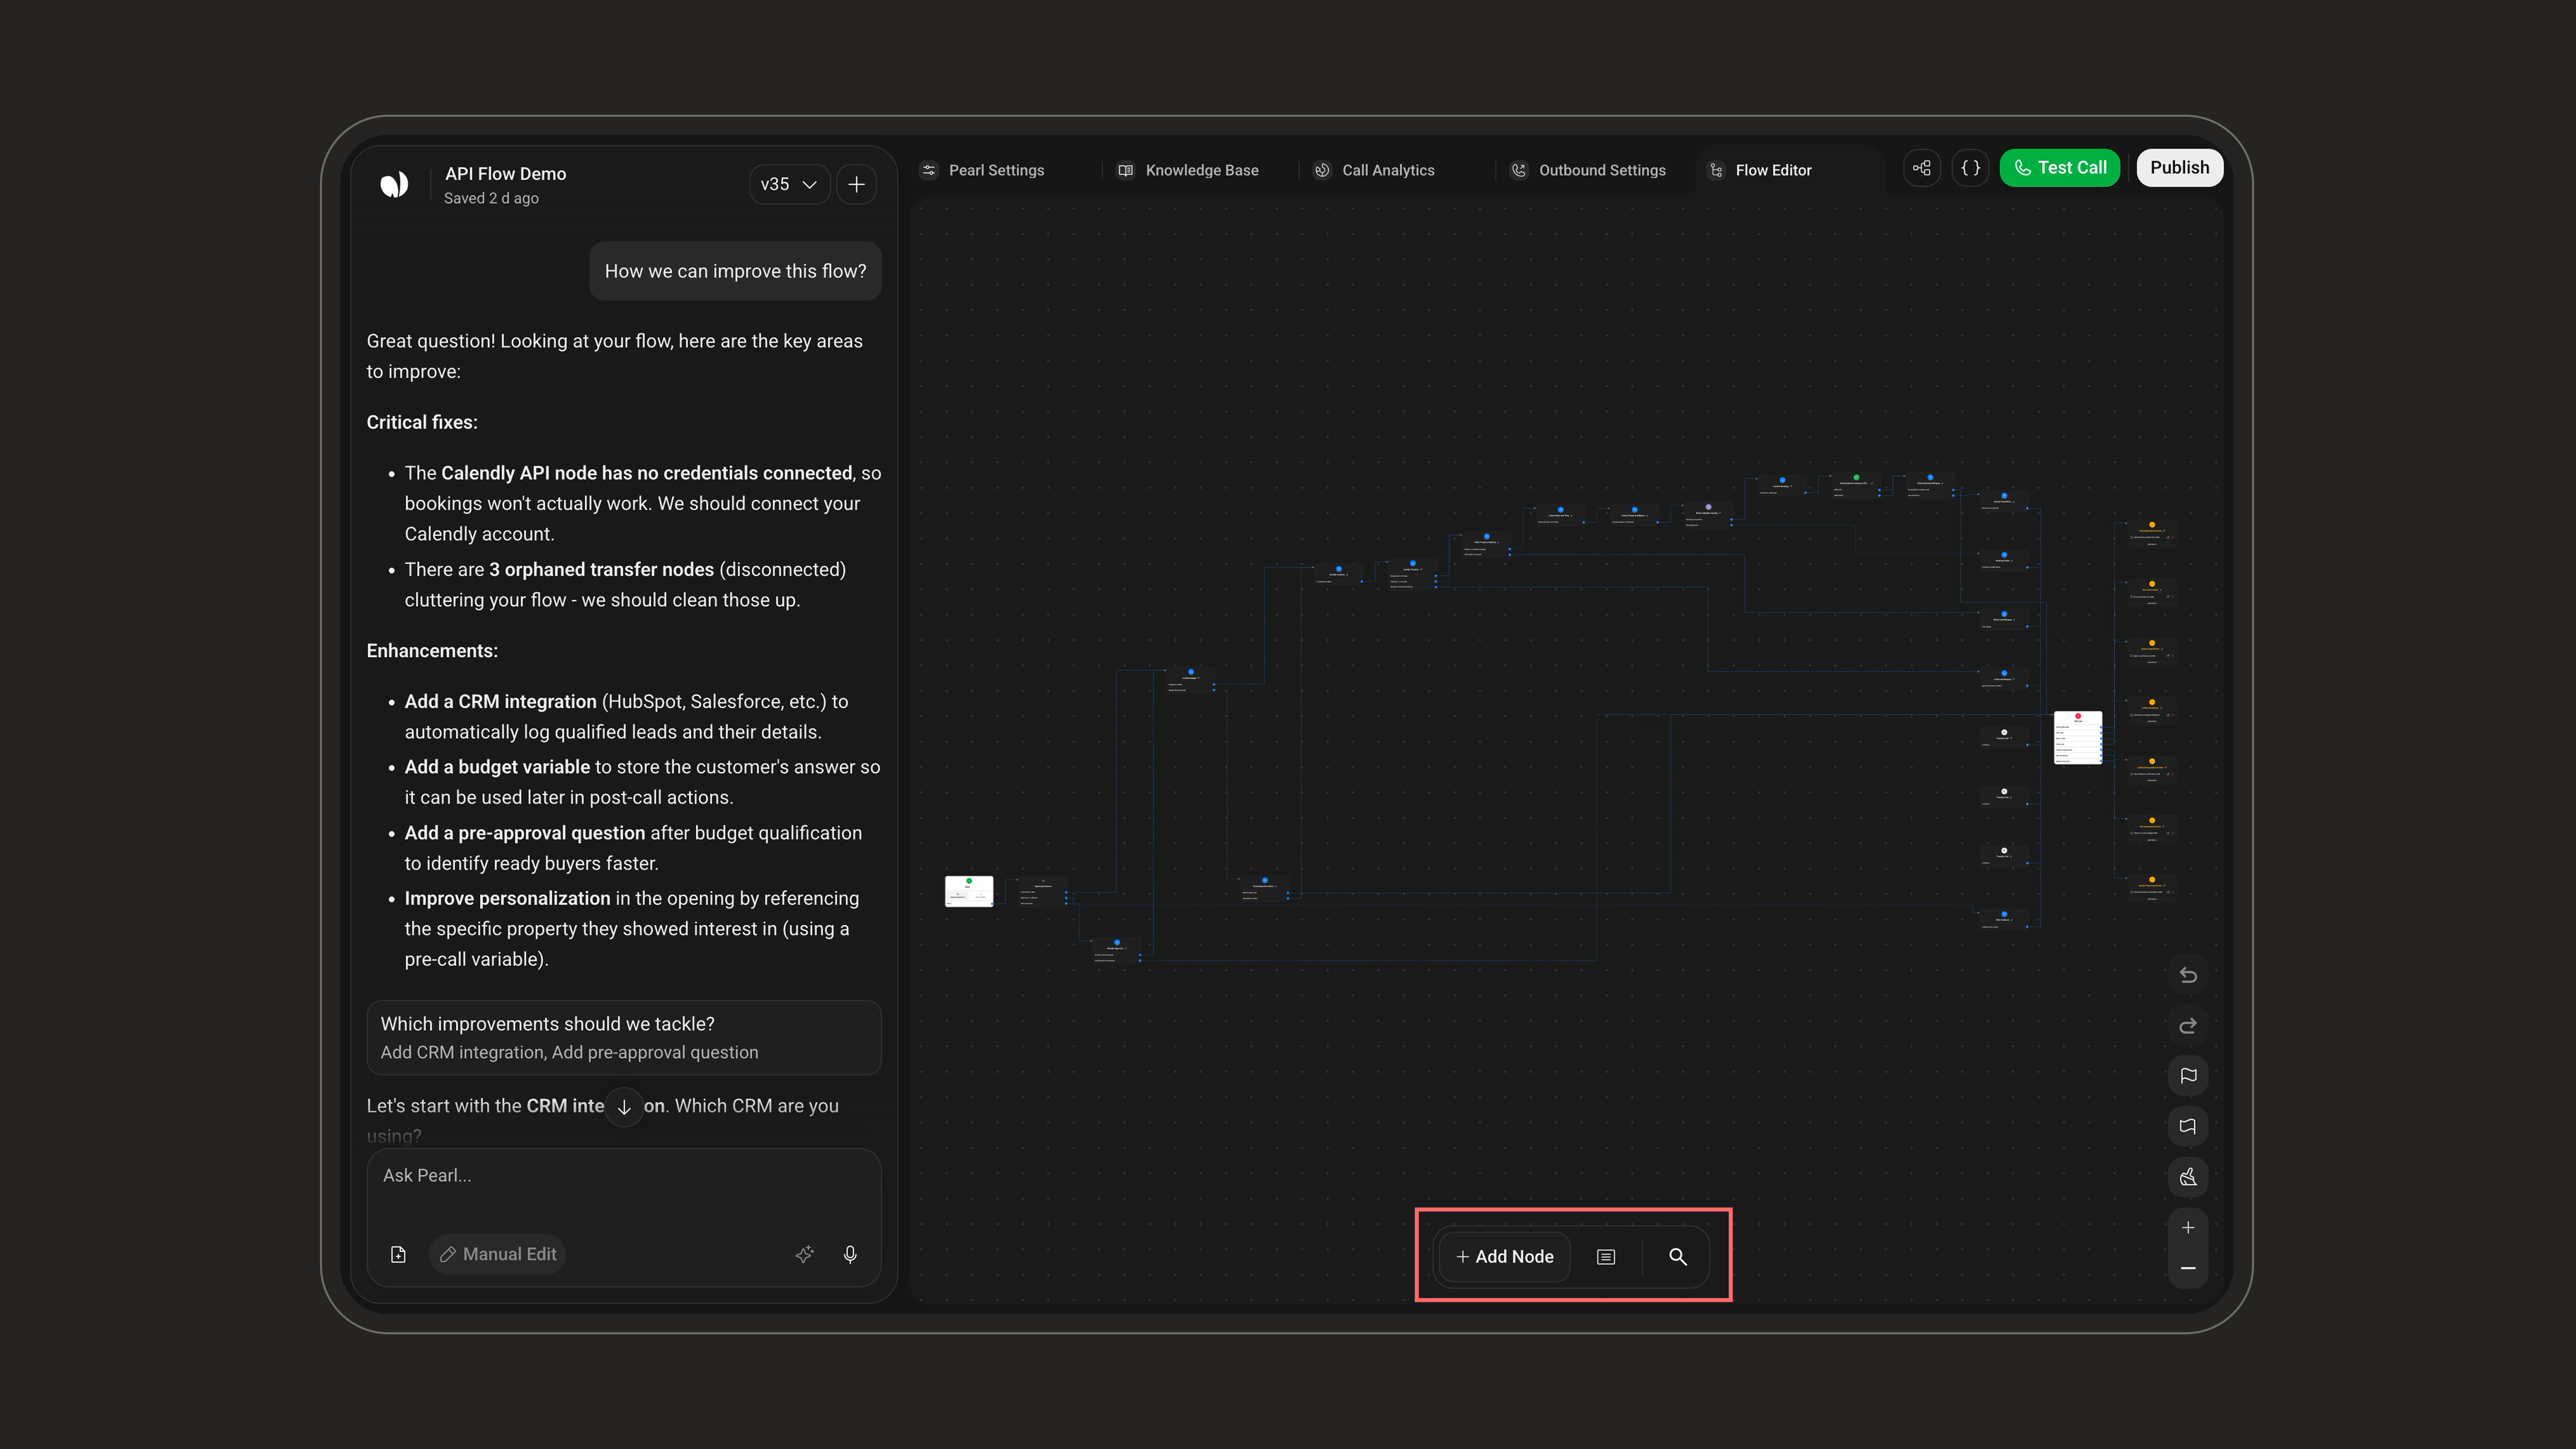
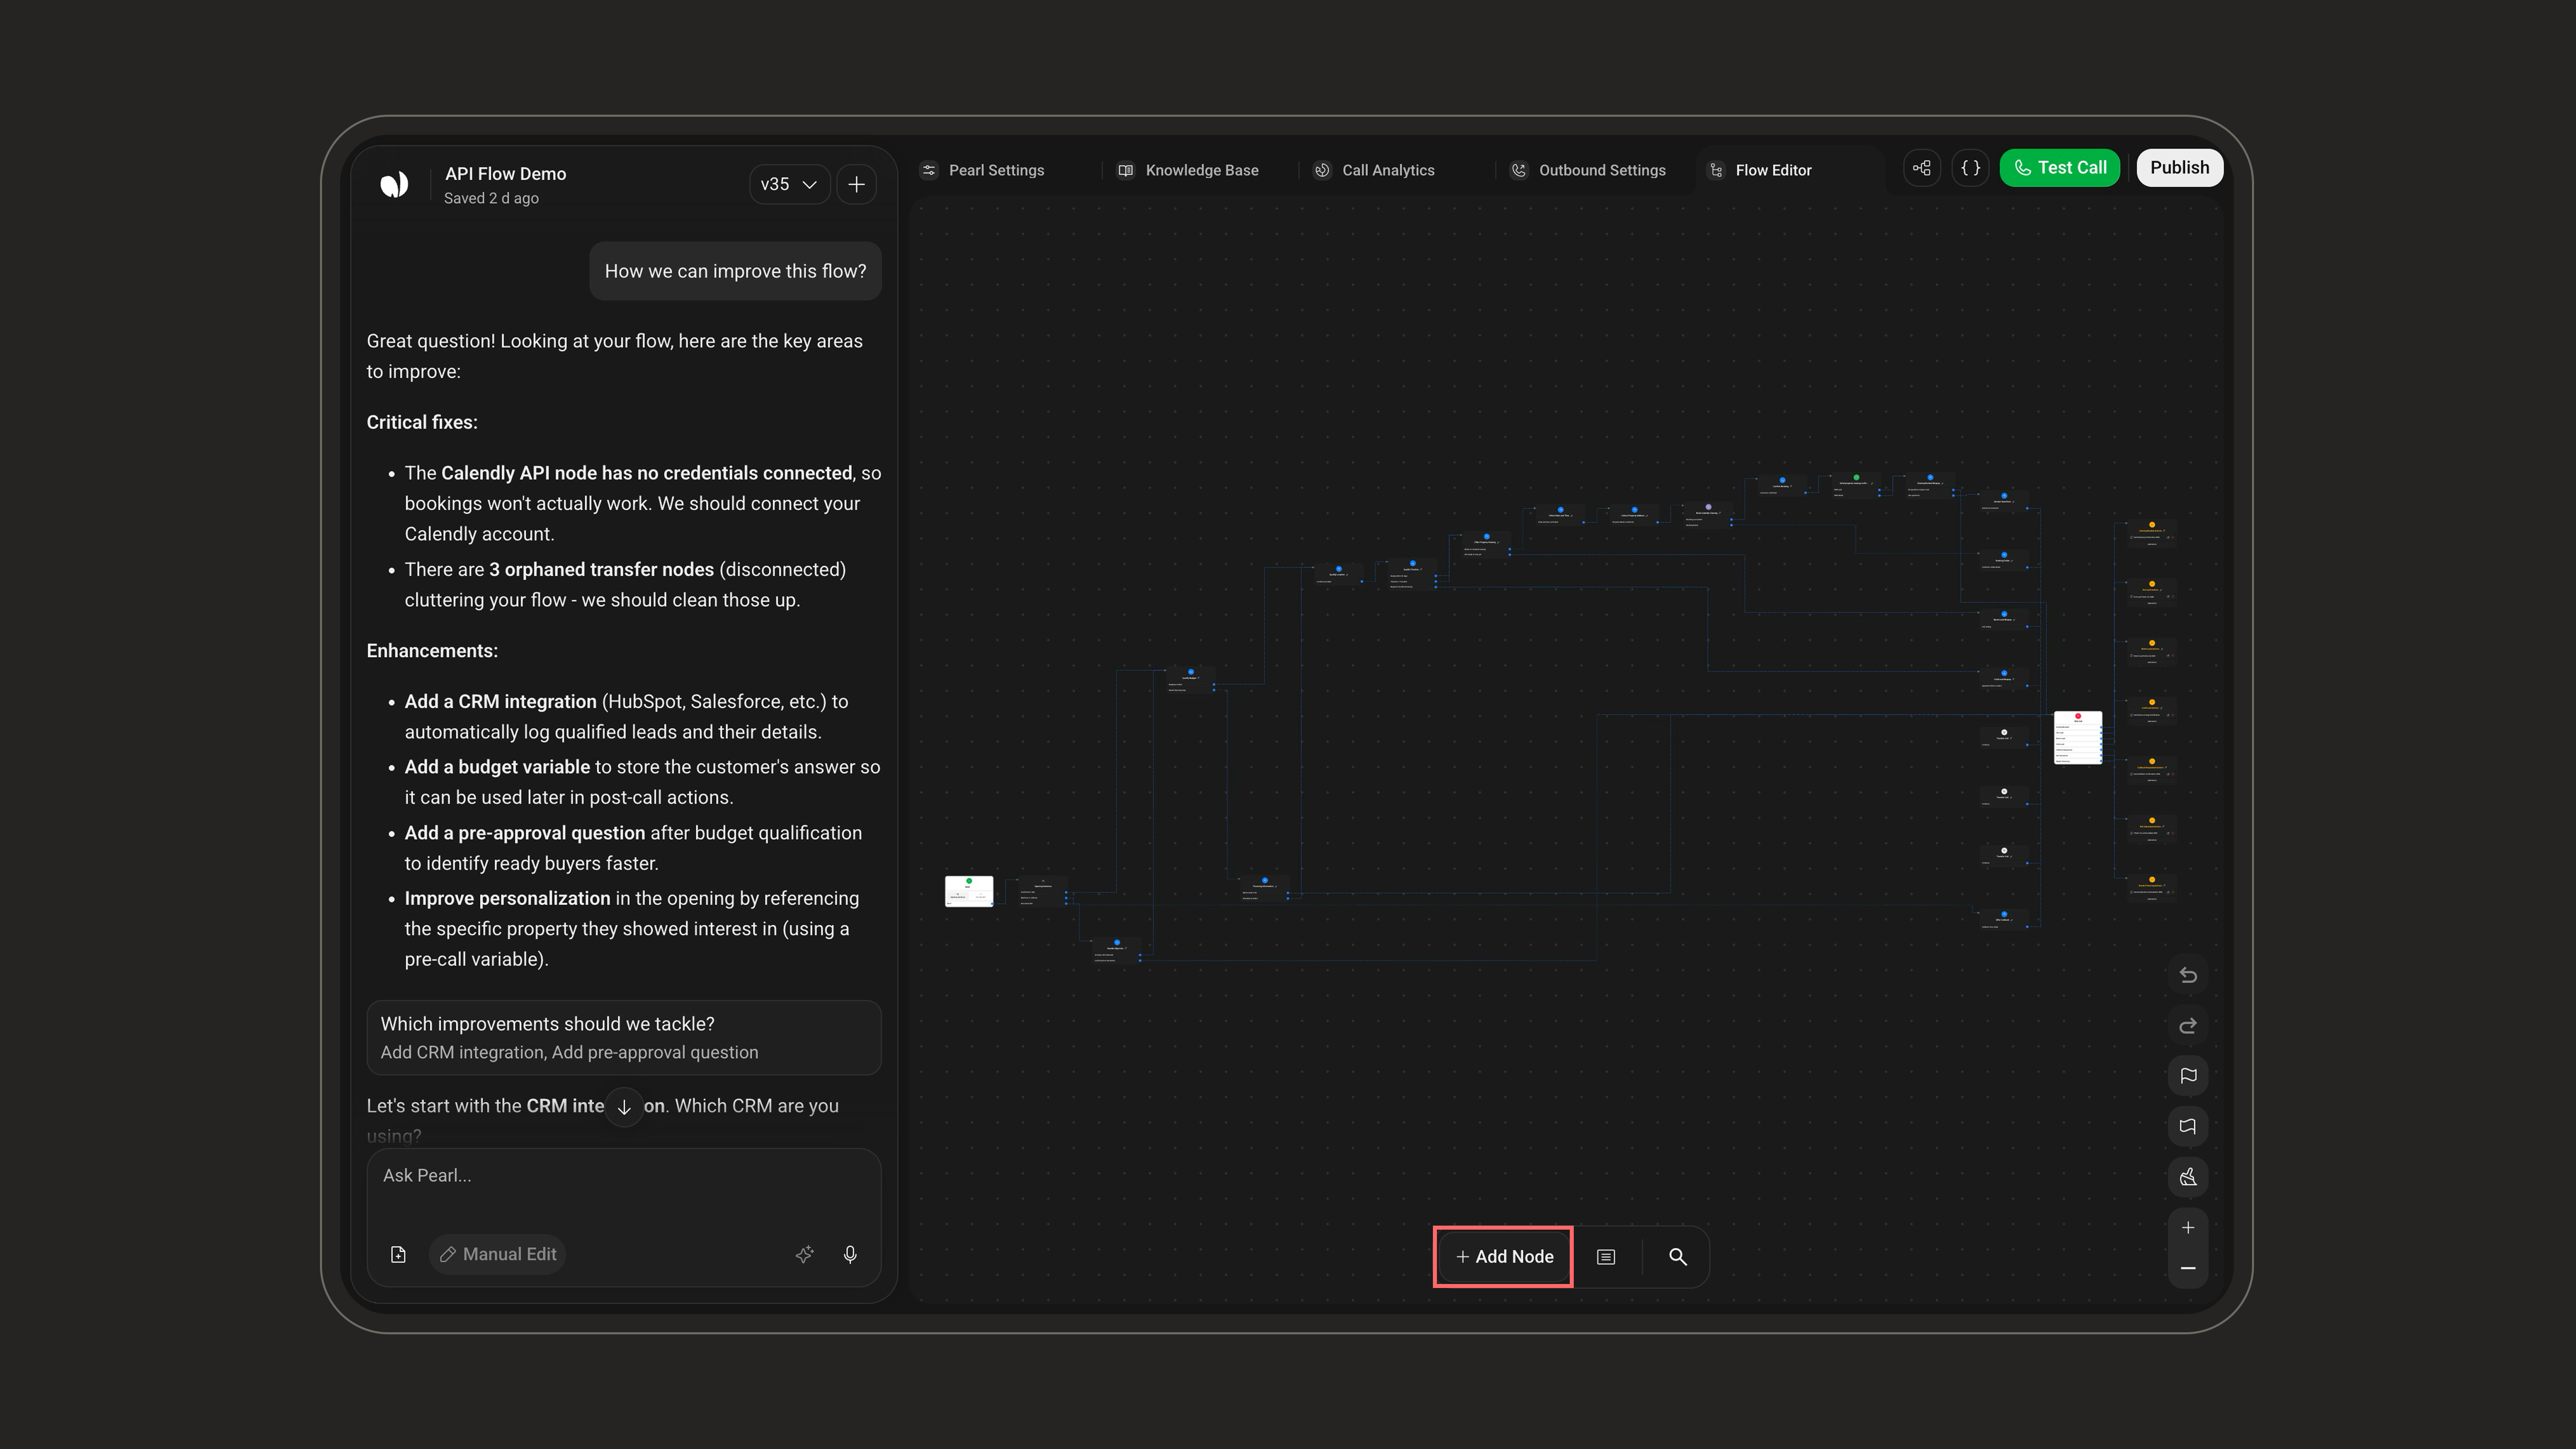
Add Node
*On text Pearls, SMS and Transfer Call are hidden from the picker, while Hand-Off is available only on text. Post-call SMS remains available for both.
Top Navigation tabs
The top navigation switches between the main workspaces of your Pearl. Flow Editor is the PearlVibe editor covered on this page; the other tabs configure your Pearl’s identity, knowledge, analytics, and campaign behavior.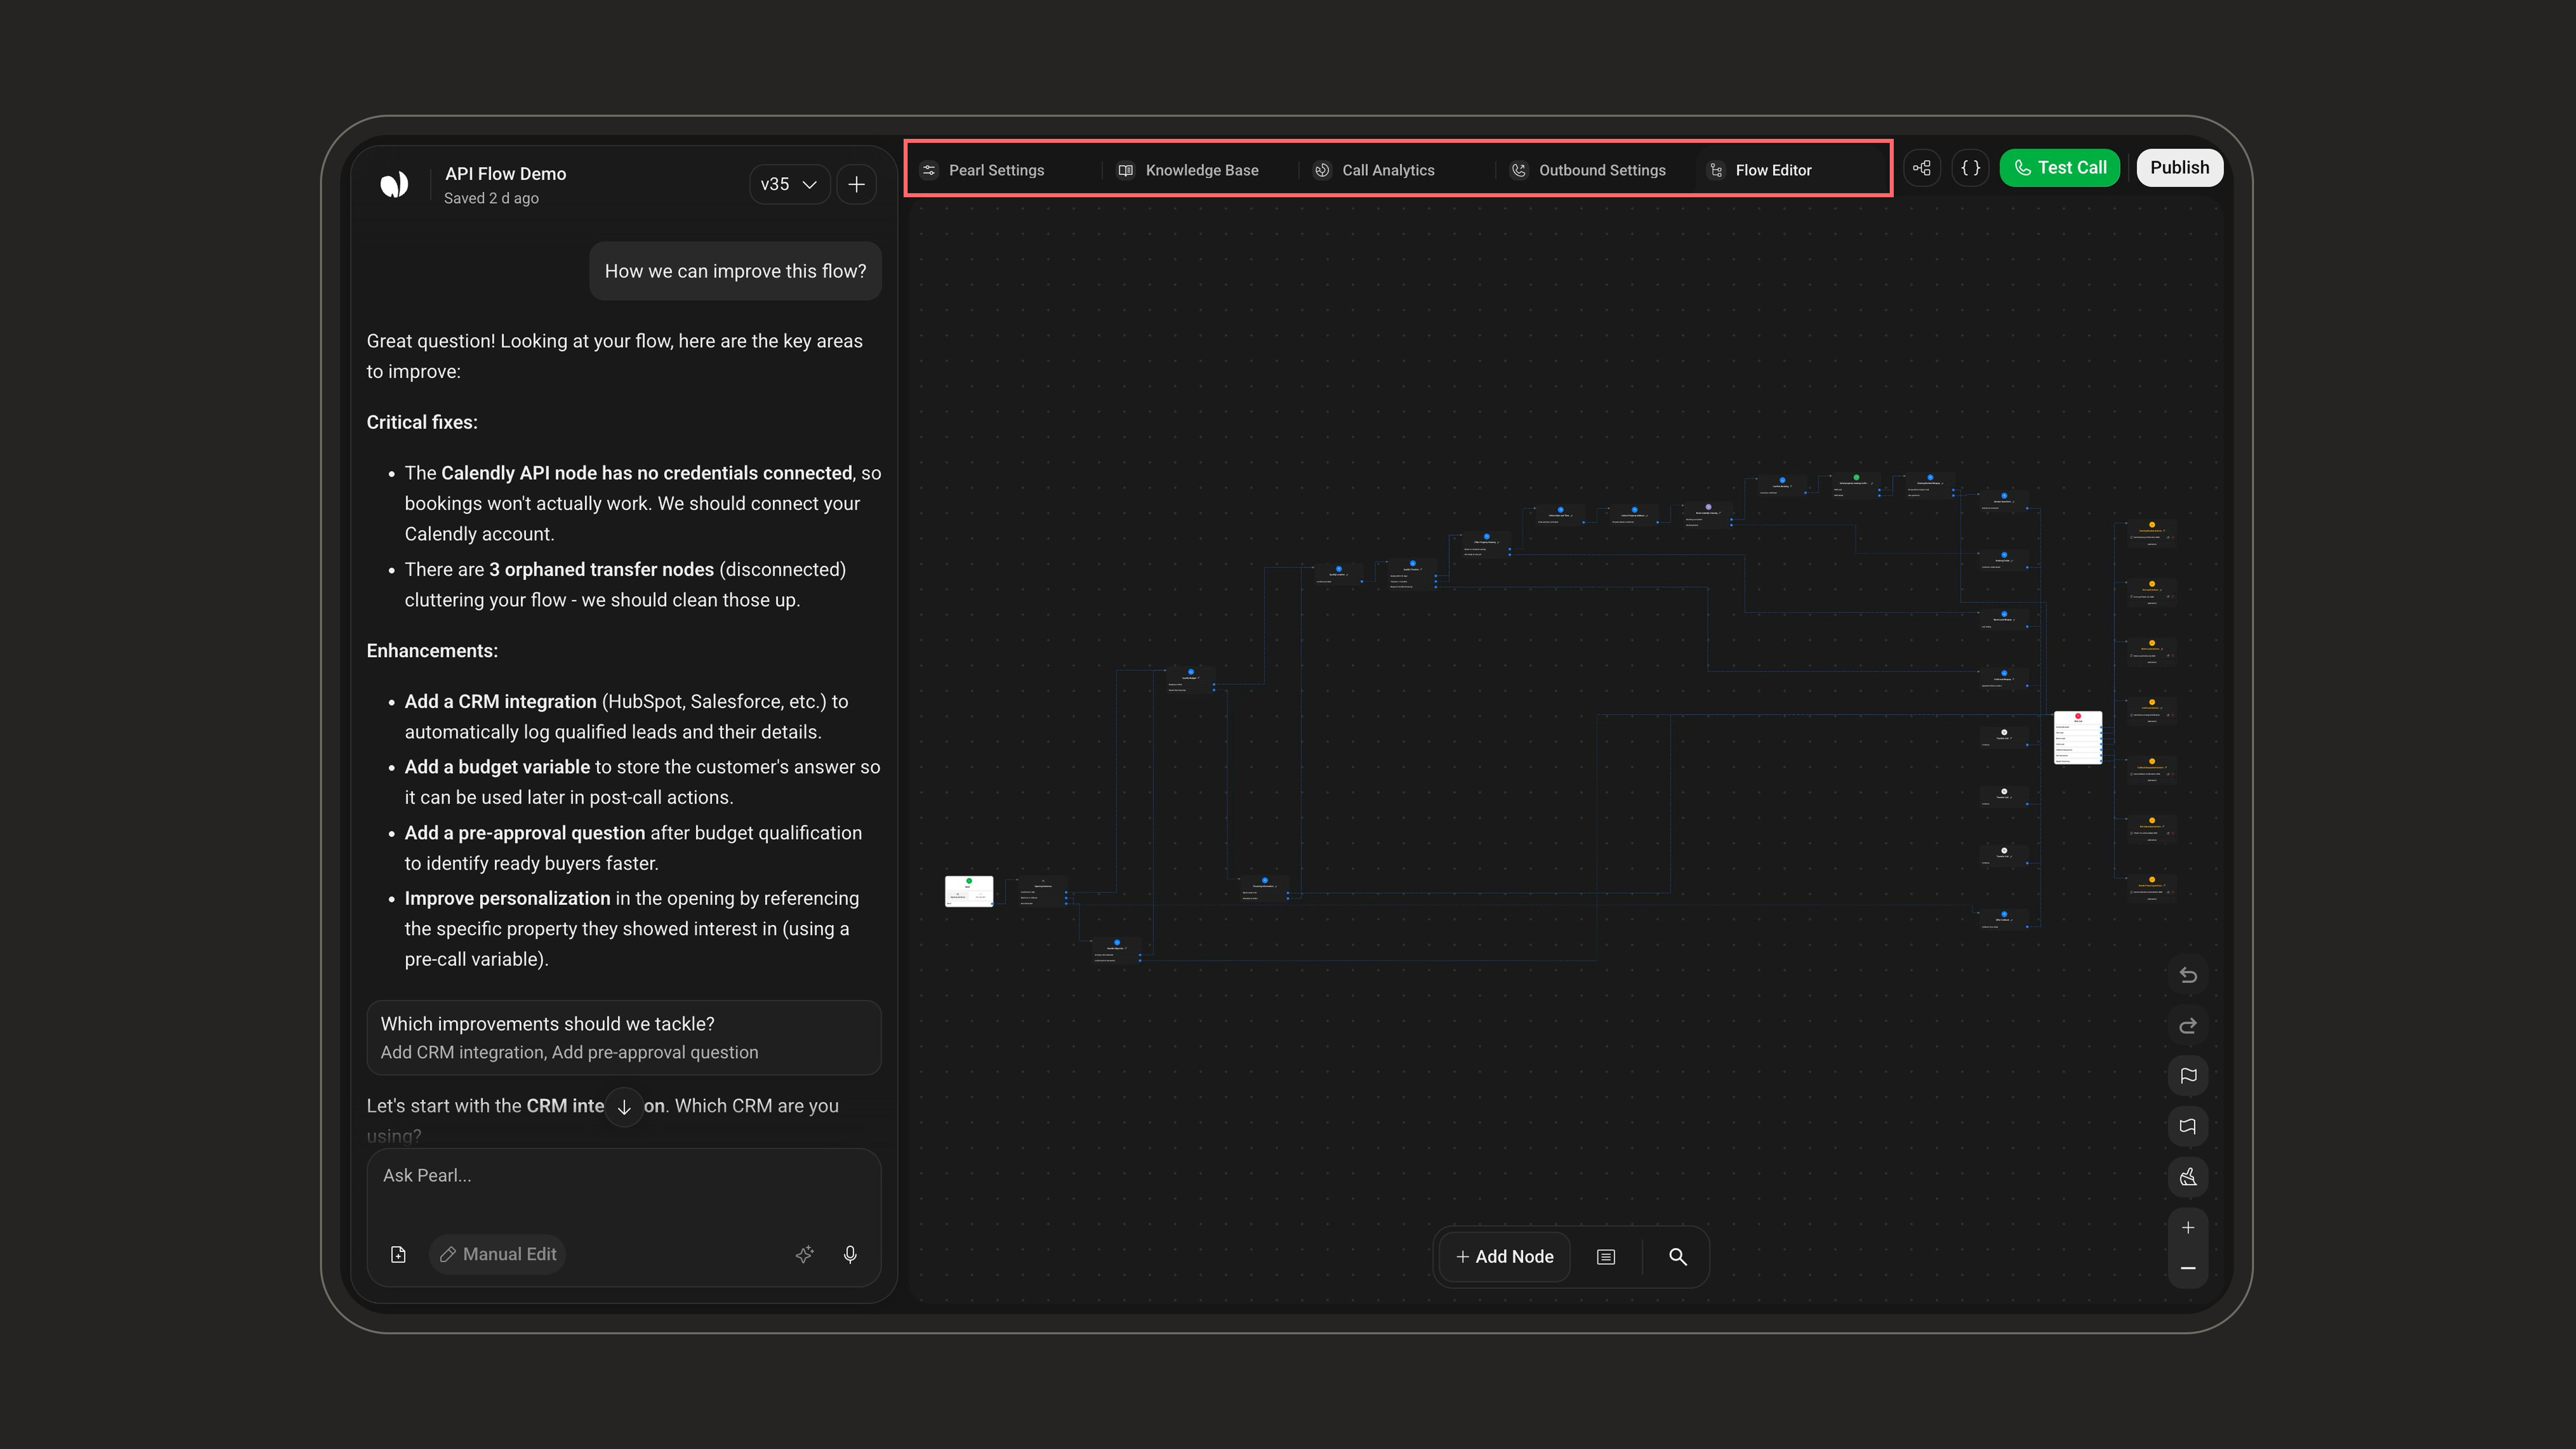
Pearl Settings
Set your agent’s name, language, voice, personality, and timezone.
Knowledge Base
Give Pearl the company context and knowledge it needs to answer accurately.
Analytics
Define success, apply indicator tags, and track your Pearl’s performance.
Inbound Settings
Configure how your Pearl answers incoming calls.
Outbound Settings
Configure how your Pearl runs outbound campaigns.