
Voice Studio is where you work with voices. Write a line, choose who says it, and hear it — then keep the voices you like, or clone one of your own from a short recording and use it across your Pearls.
Open it from Voice Studio in the left sidebar.
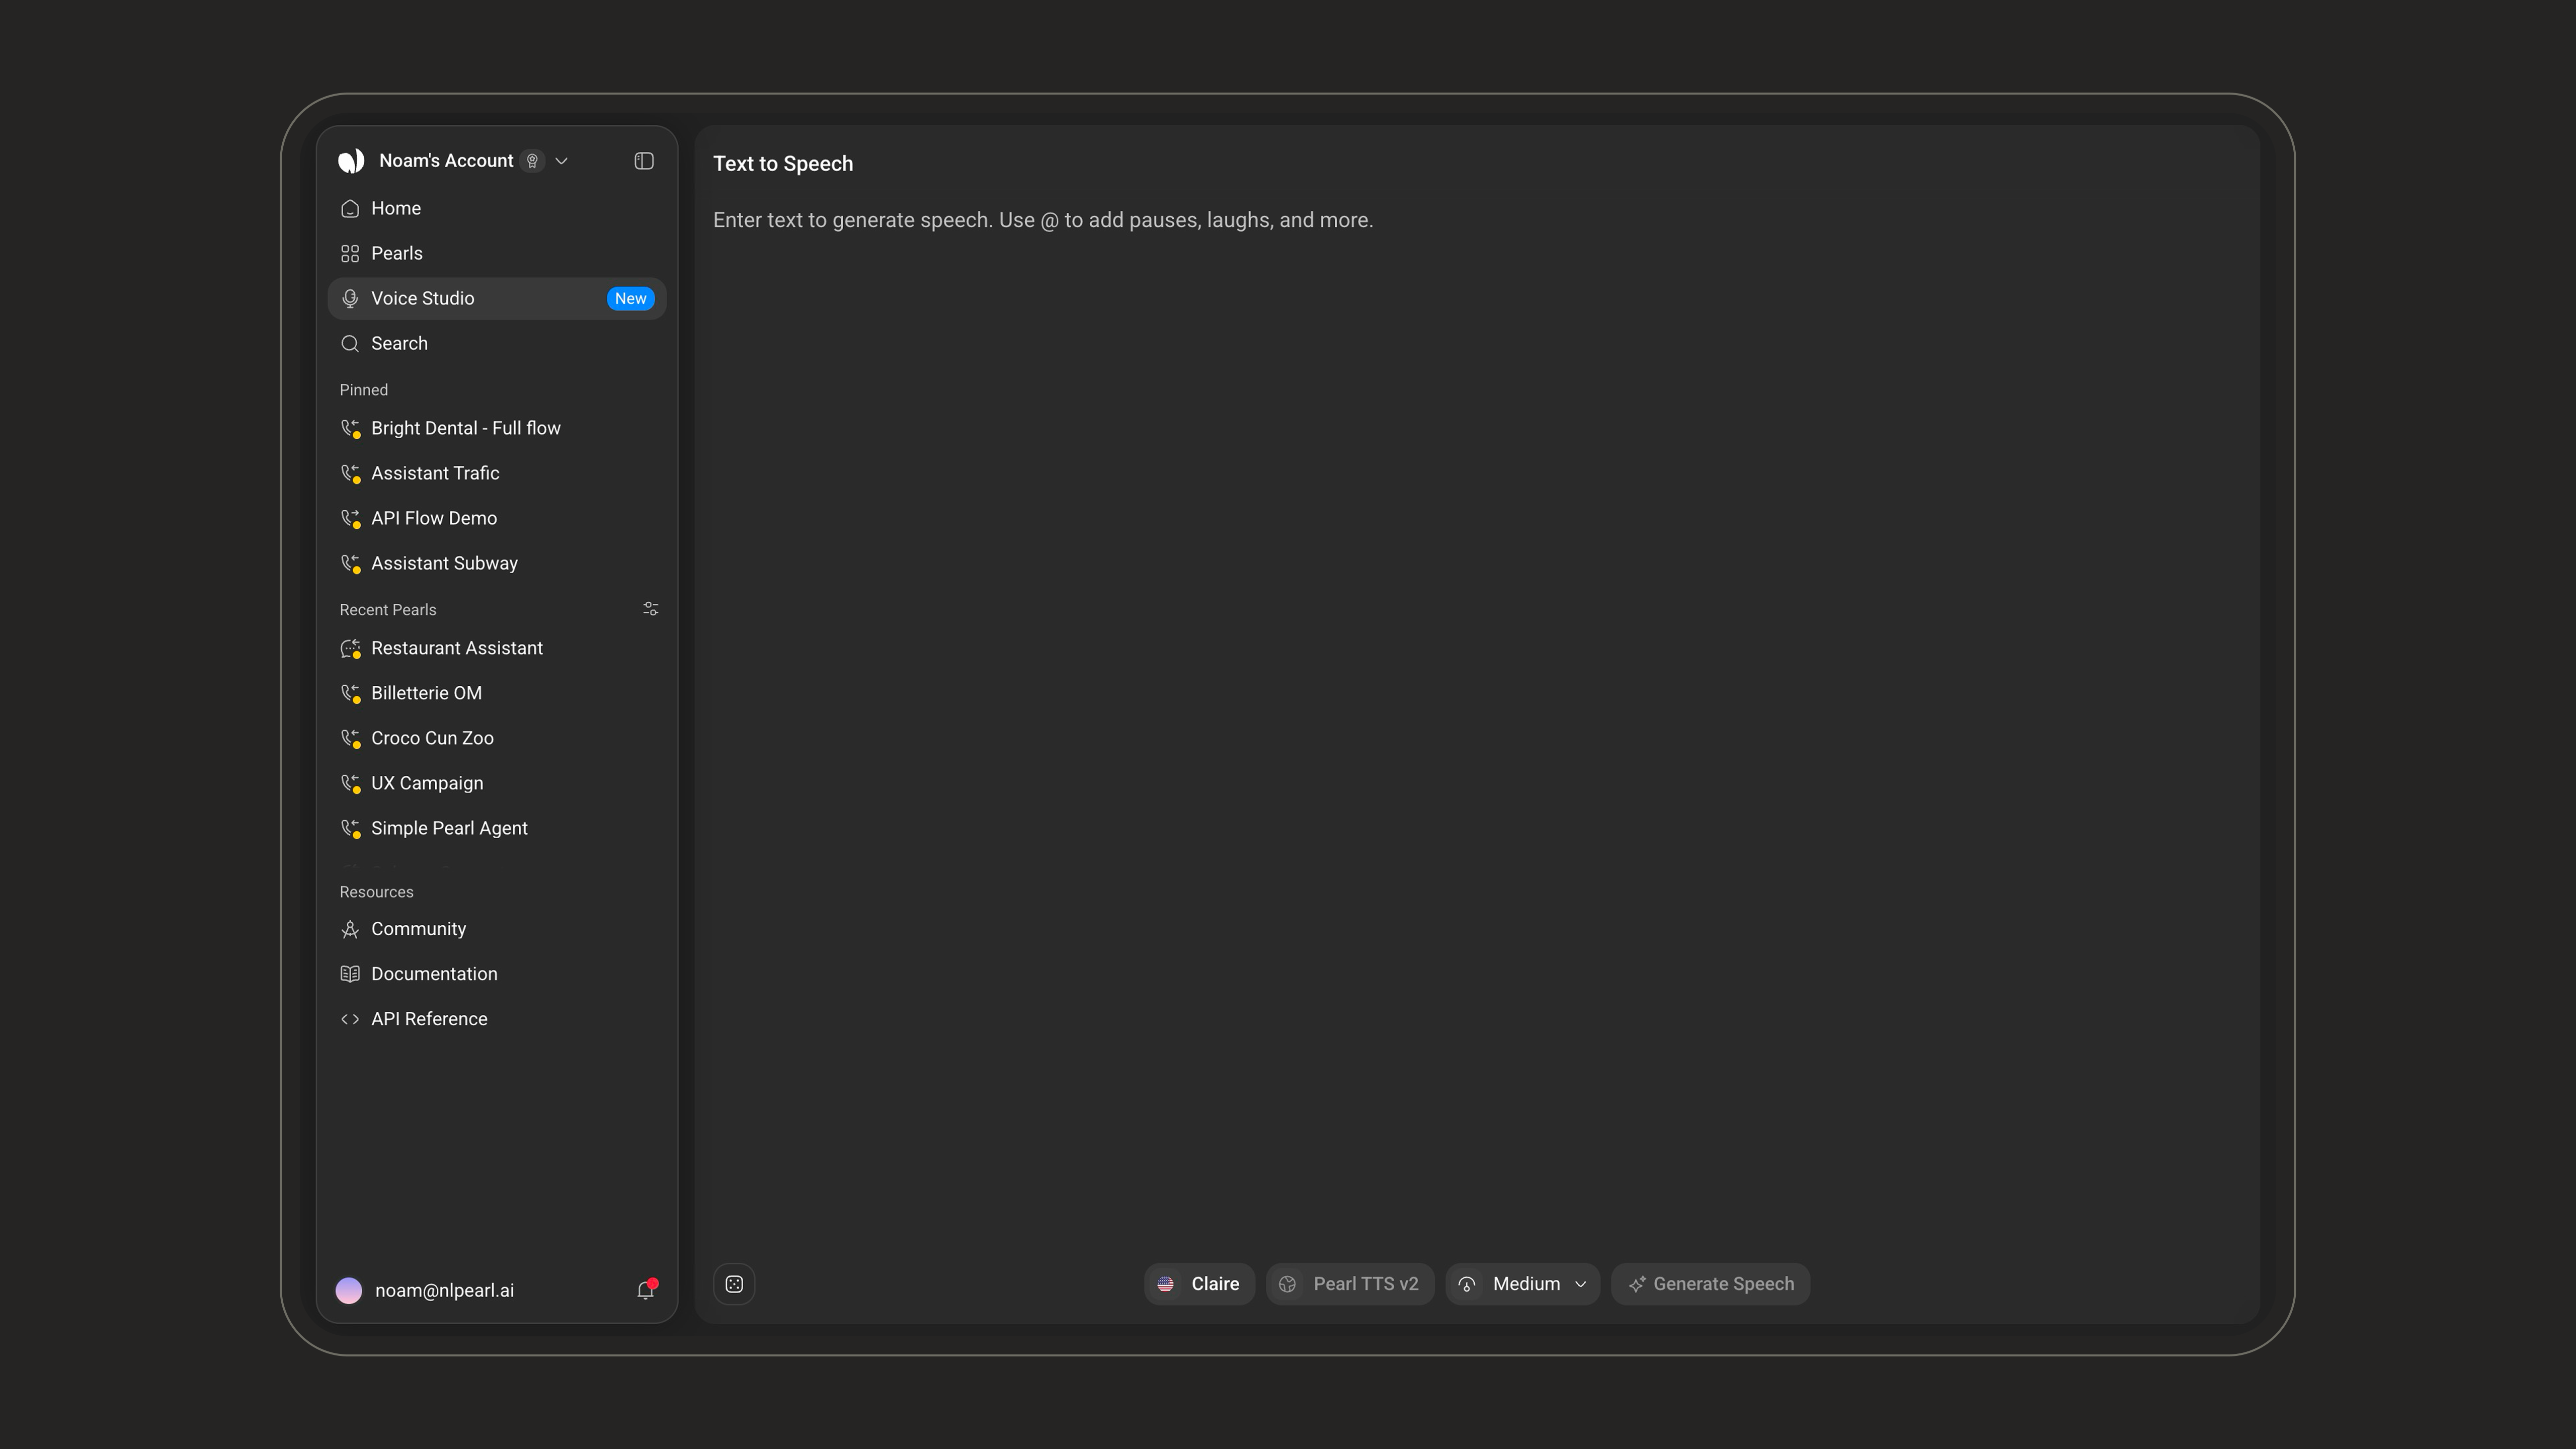
A voice is a speaker in a language, so choosing a voice already chooses the language it speaks. That’s why there is no separate language selector on this screen.
Generating speech
1
Write what the voice should say
Type into the main area of the page. A single take can be up to 4,000 characters. Past that limit, the page tells you by how much and the Generate Speech button stays disabled until you trim it.Type 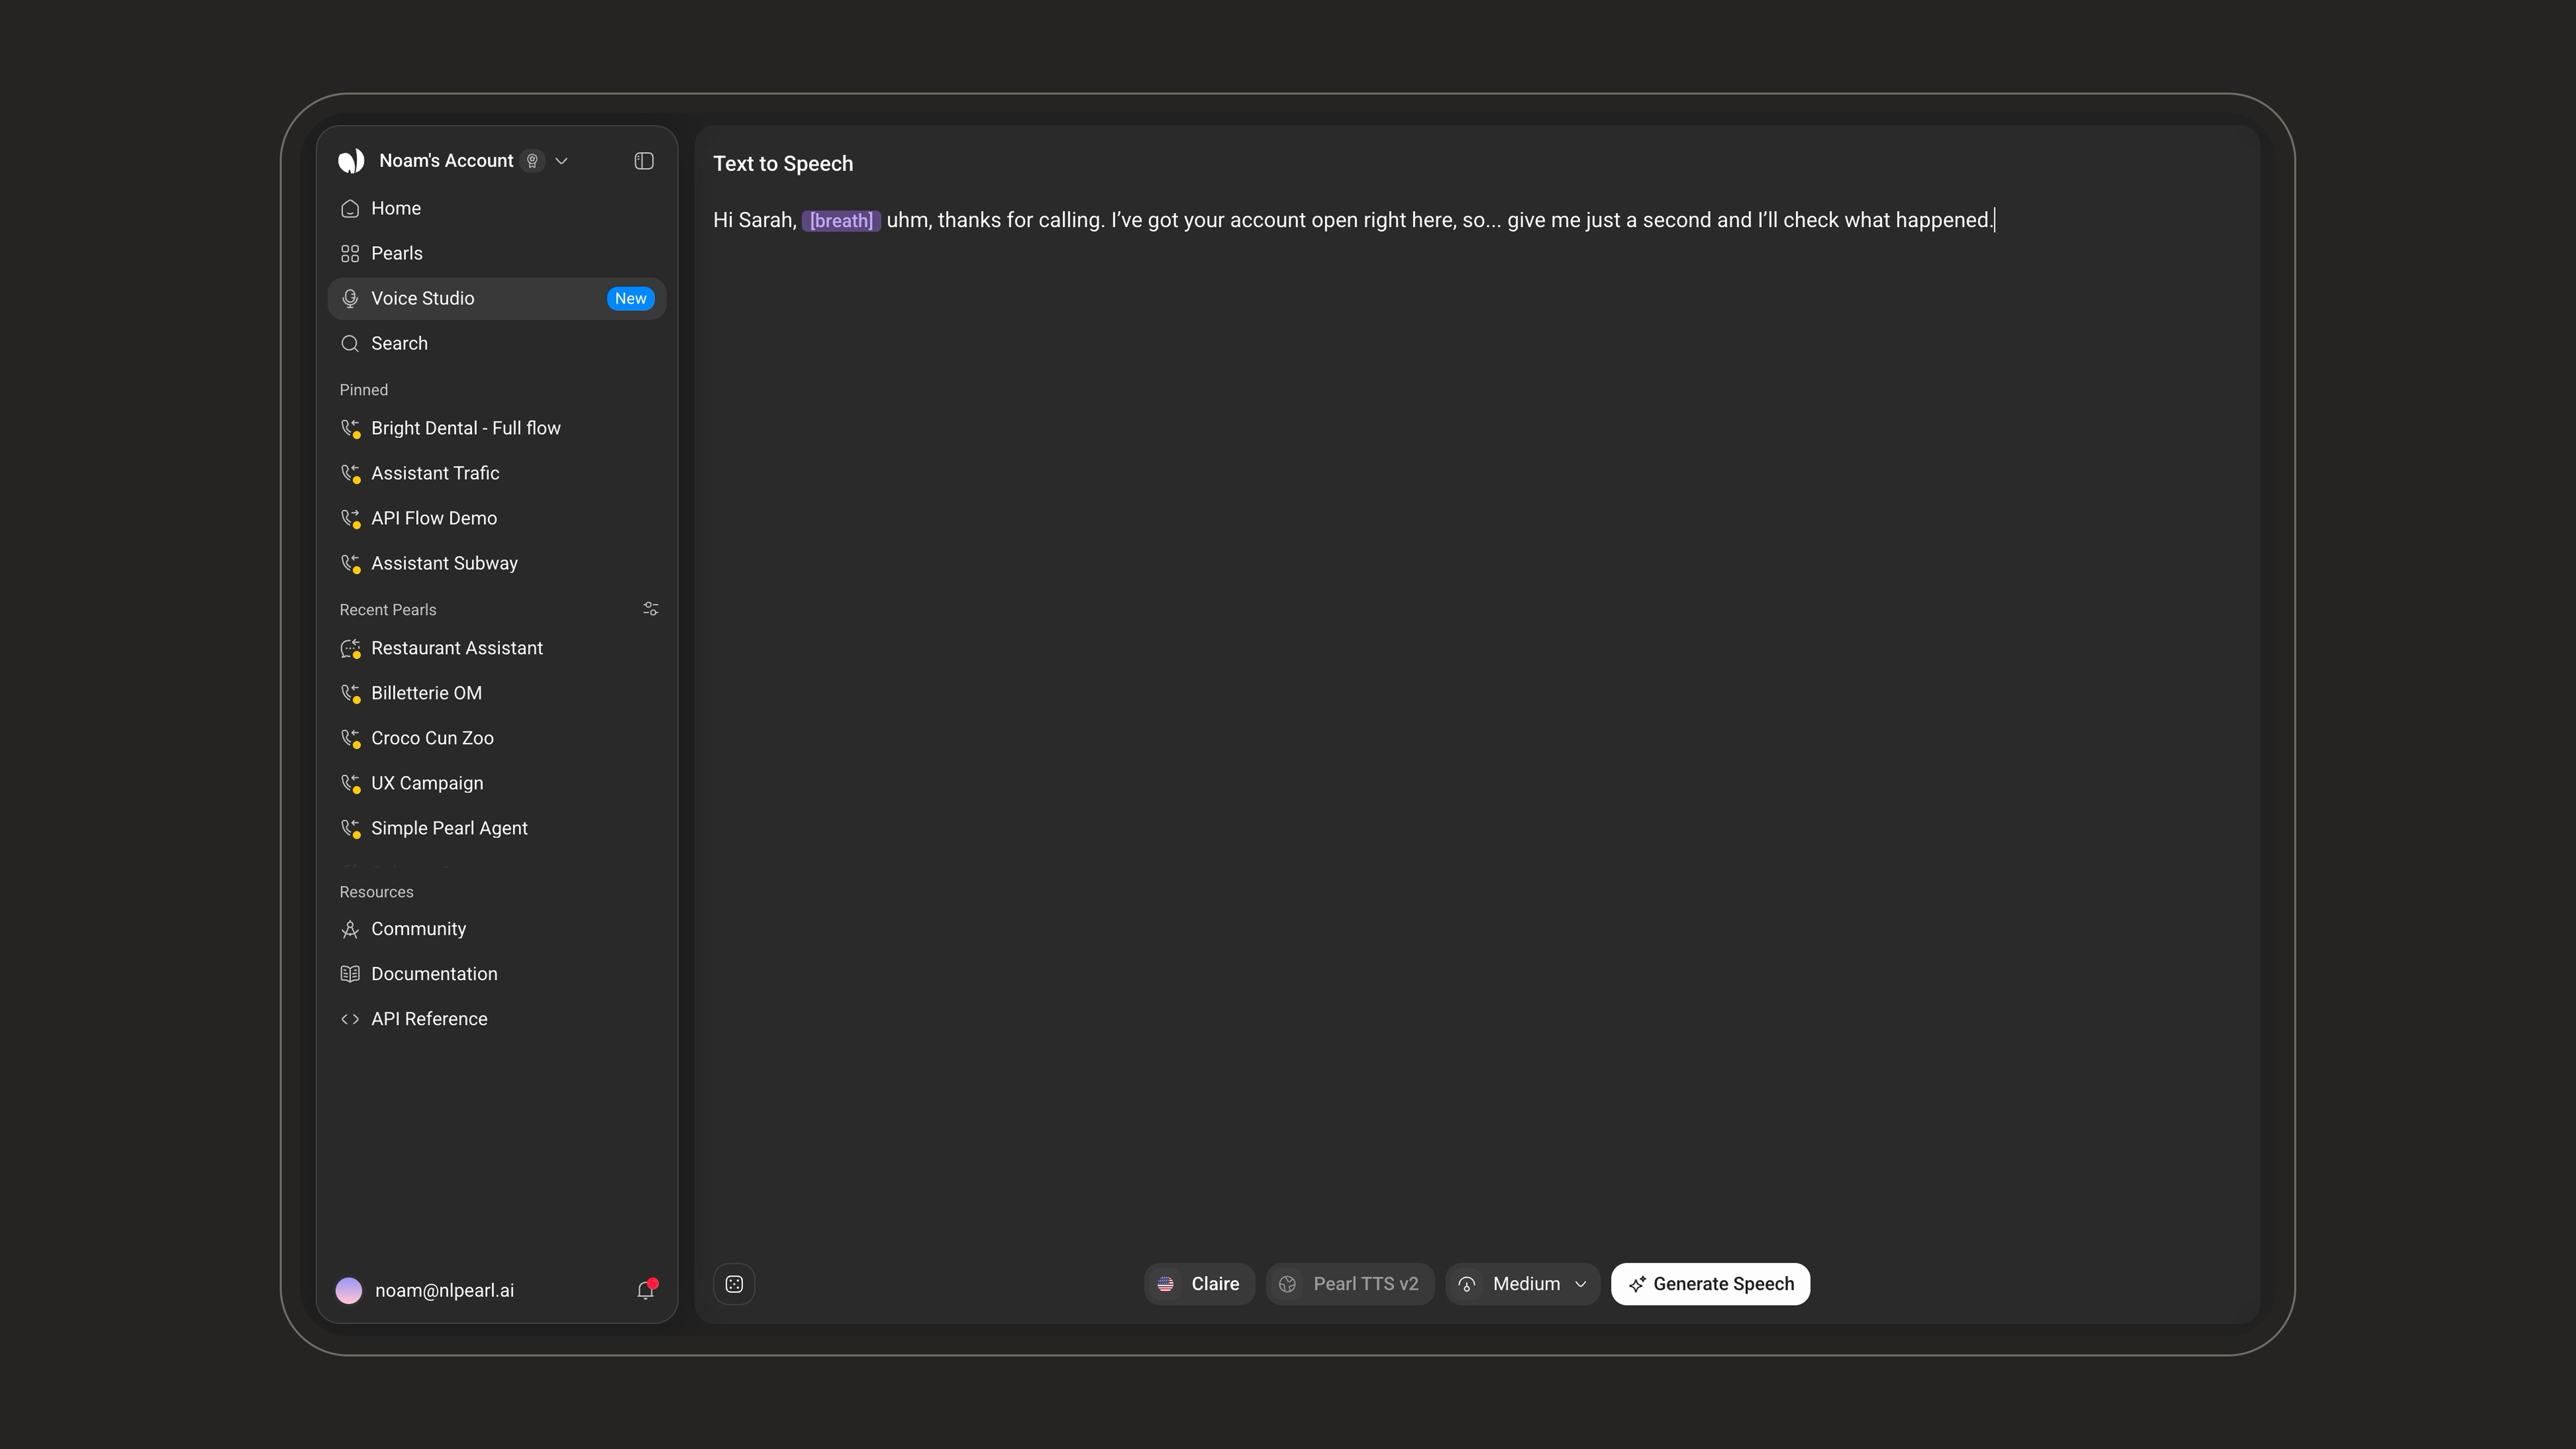
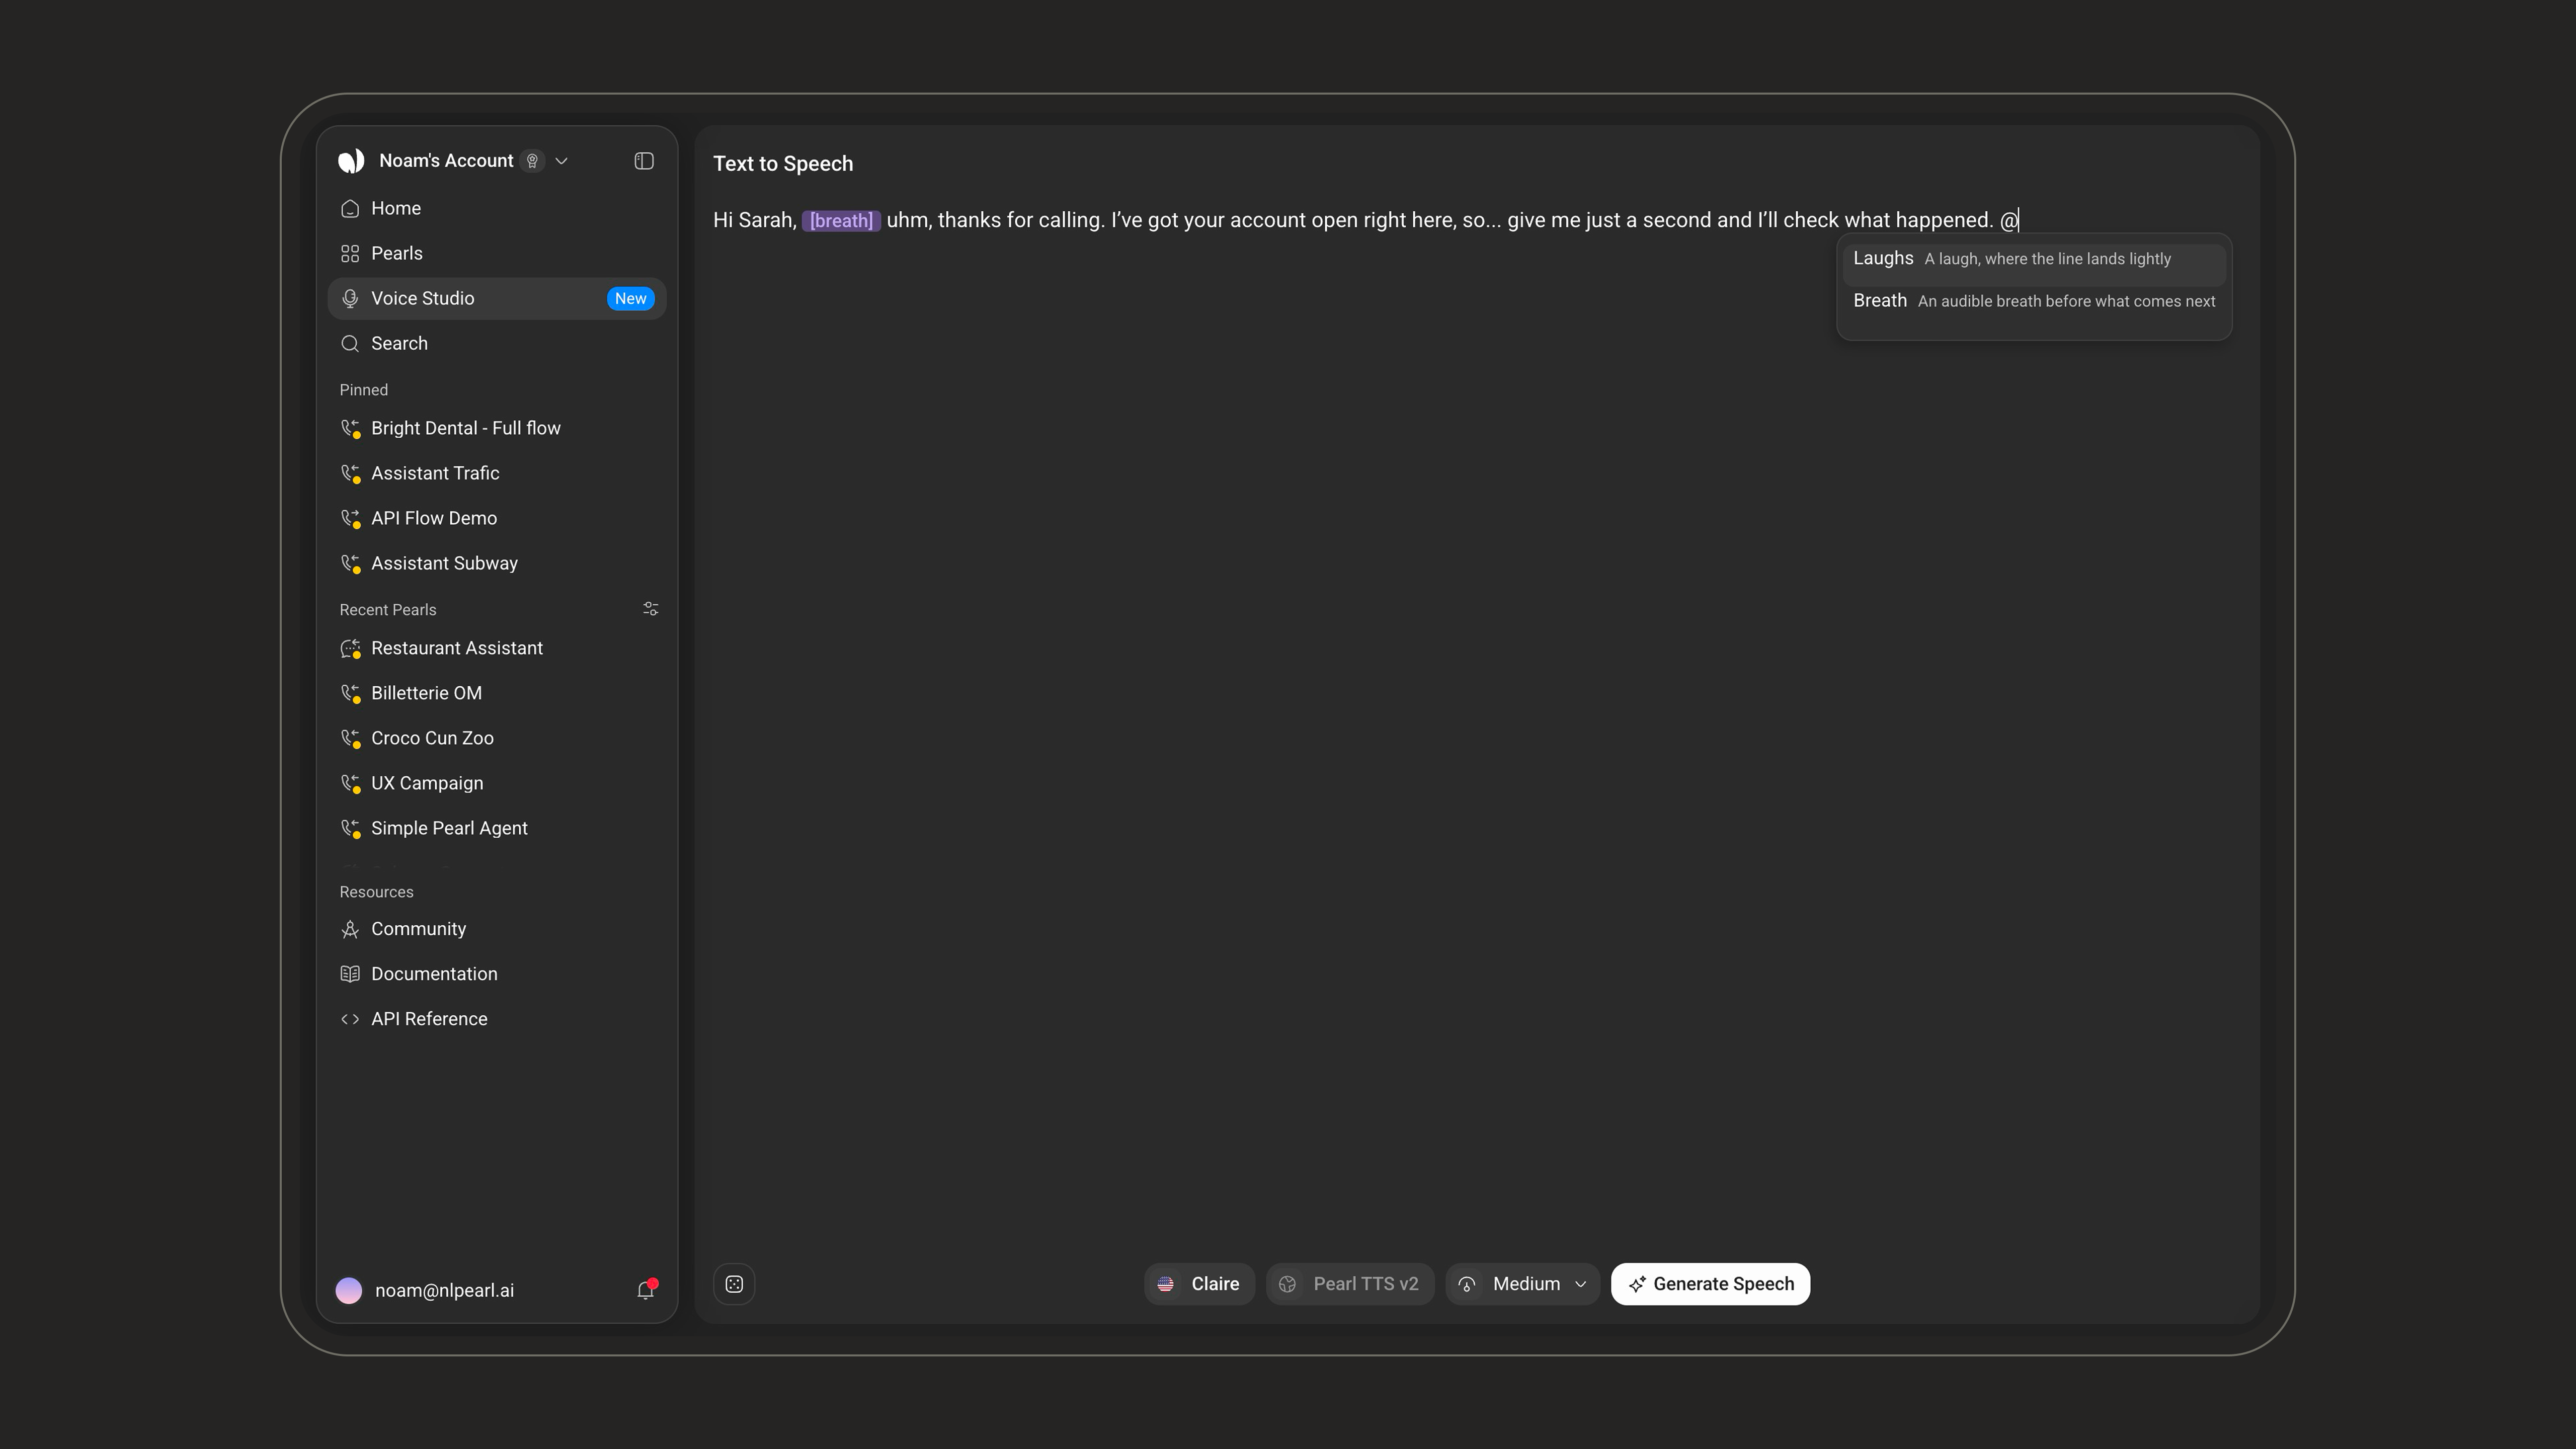
@ anywhere in your text to insert a speech marker — a short tag the model reads as an instruction rather than as words. See Speech markers below.2
Choose a voice
Click the voice chip in the bar at the bottom of the screen to open the voice picker. Browse the library, search, filter, and click a voice to select it. The chip then shows the voice’s language flag and its name.See The voice library for what the picker can do.
3
Set how fast the voice speaks
The speed control sets the delivery of the line — how slowly or quickly the voice reads it. Five levels are available, from Very slow to Very fast, with Medium as the default.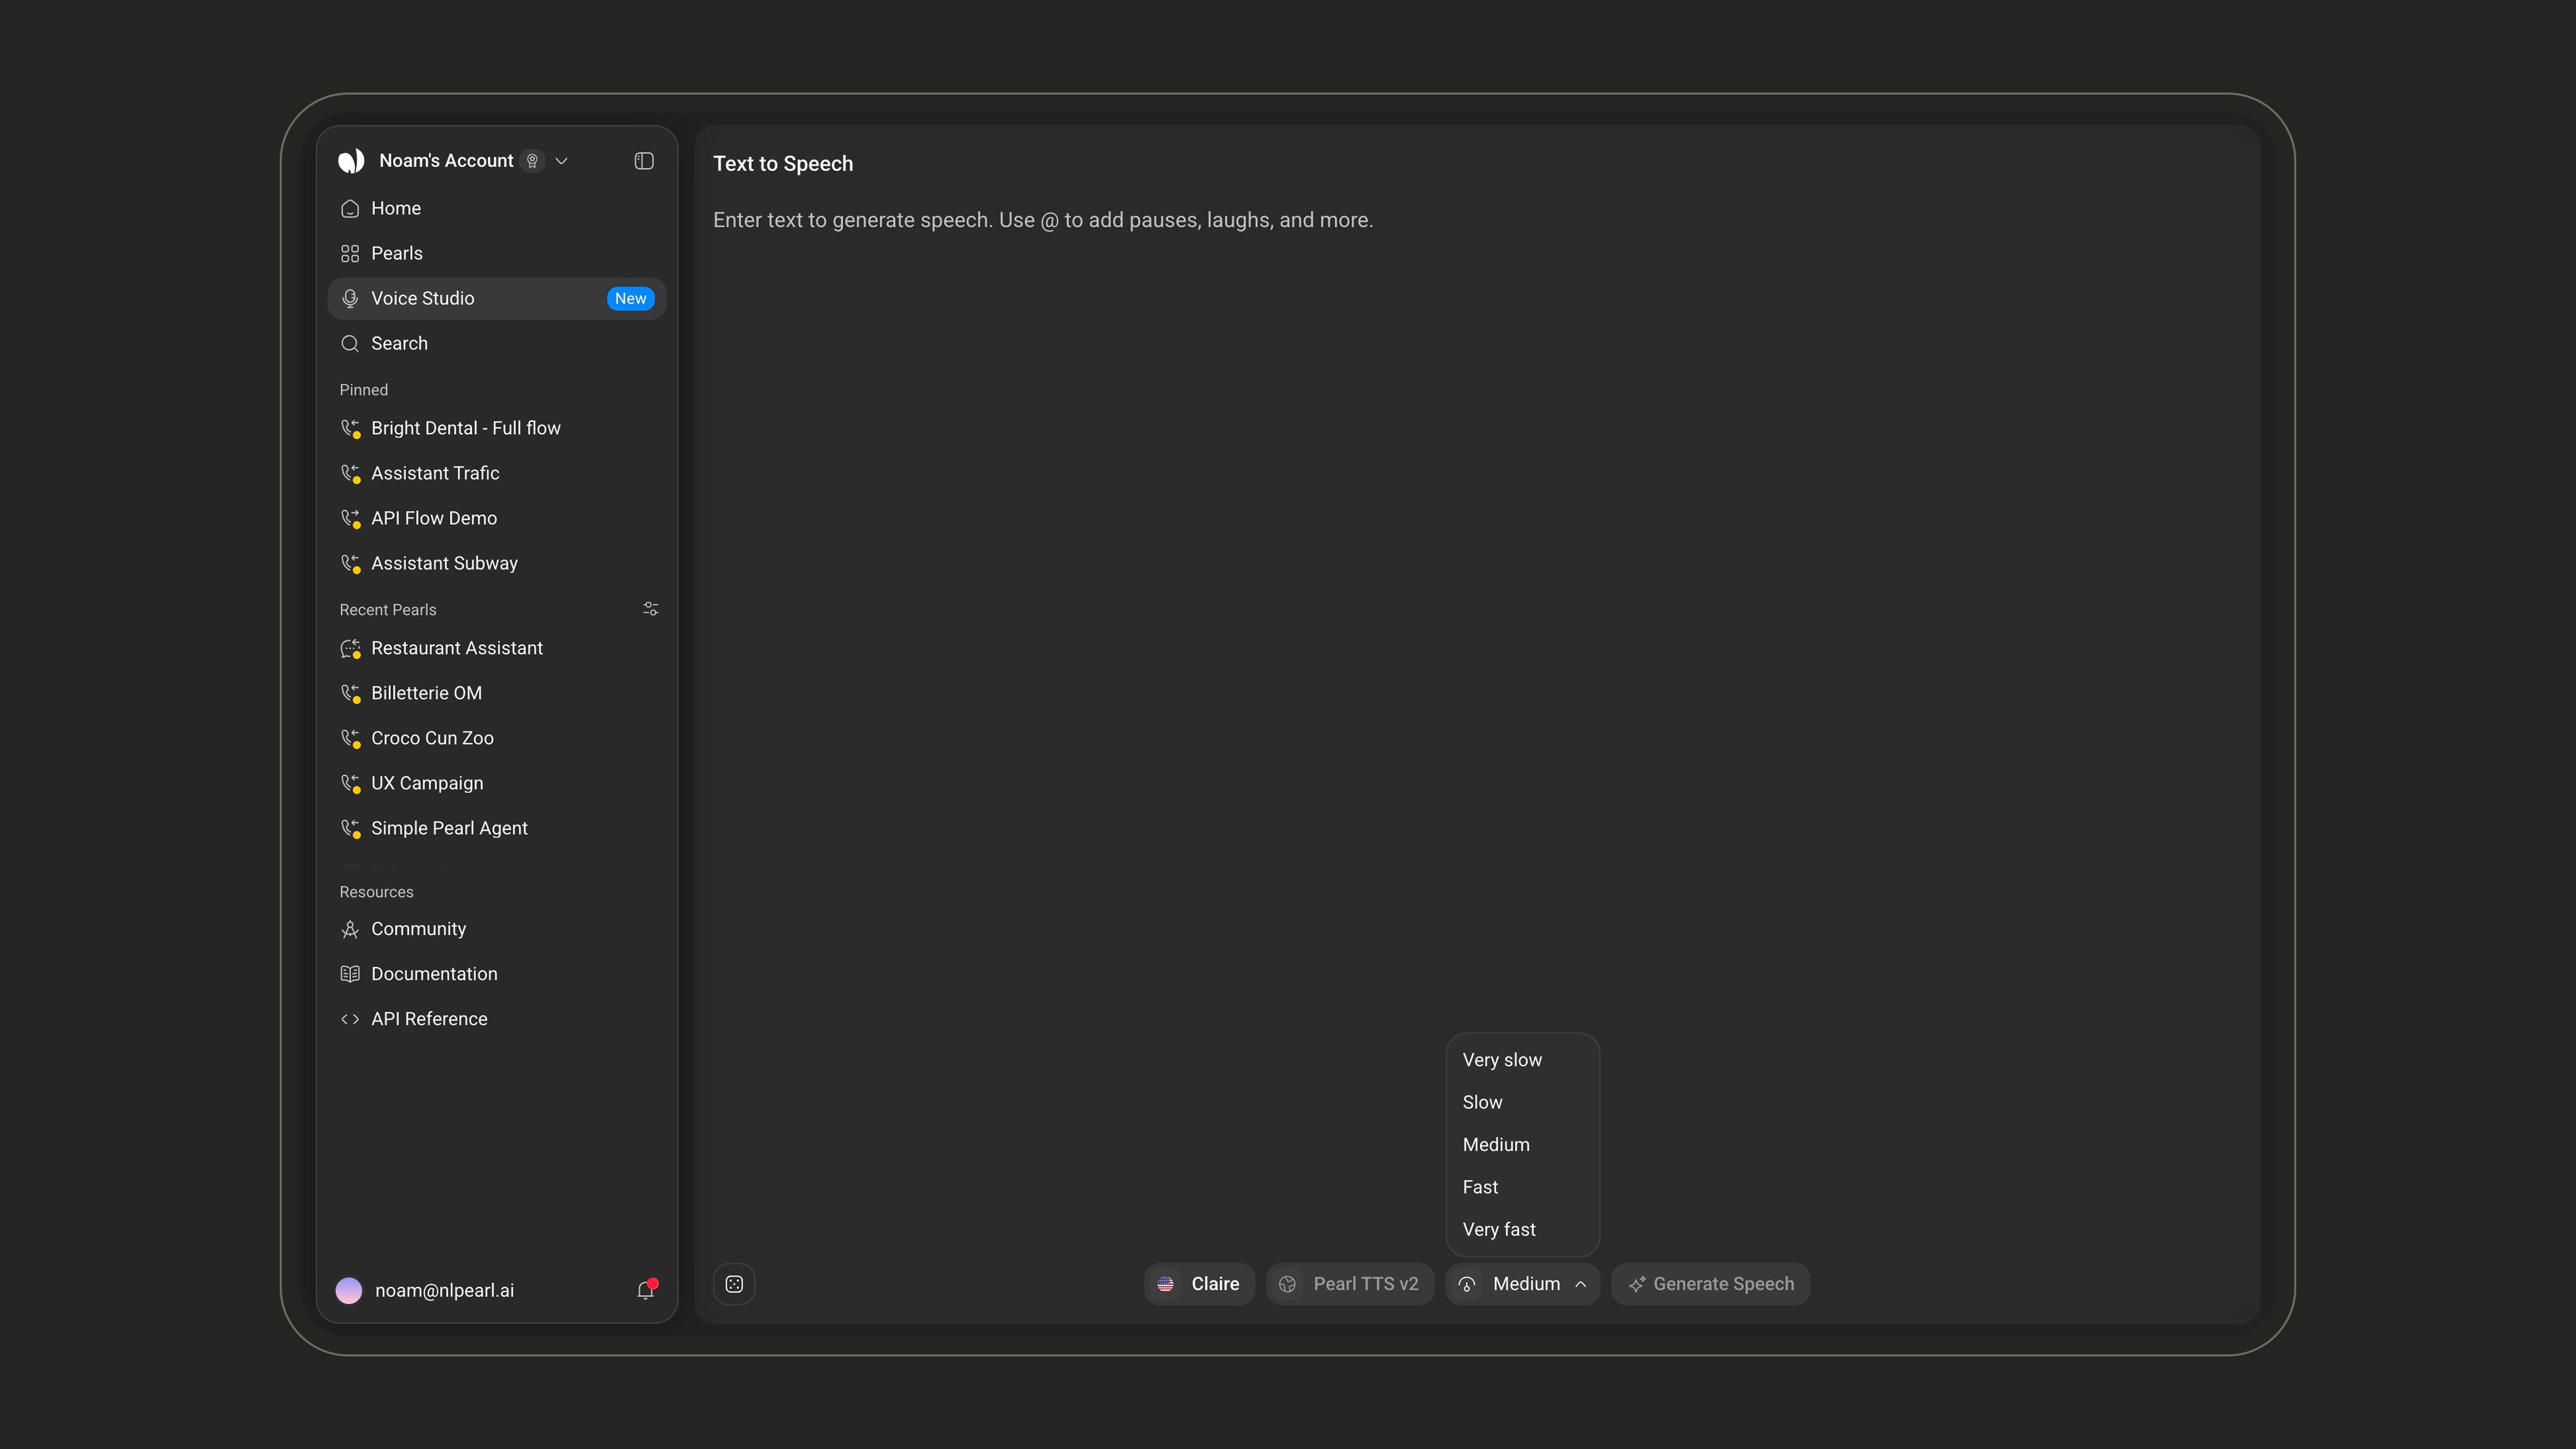
4
Generate and listen
Click Generate Speech. Playback starts as soon as the first audio is ready — you don’t wait for the whole take to finish generating, which matters for longer texts.When the take lands, a card appears with the text that was spoken, the voice that spoke it, and a player. From there you can:
- Play, pause and scrub through the take.
- Download the audio.
- Minimize the card to a single line to get your draft back in full view.
Speech markers
Markers are tags the speech model reads as instructions, not as words. Type@ in your draft to open the marker menu at your cursor, then pick one.
Speaking to a man or a woman
Hebrew writes the same sentence differently depending on who is being addressed: the second person is inflected, so one written line is two different spoken ones. When you select a Hebrew voice, a Speaking to control appears under your draft. Set it to the gender of the person being spoken to.This is the listener, not the speaker. The voice’s own gender is a property of the voice and is never something you set here. A female voice addressing a man is an ordinary call.
The voice library
The voice picker is where you browse, filter and manage the voices available to your account.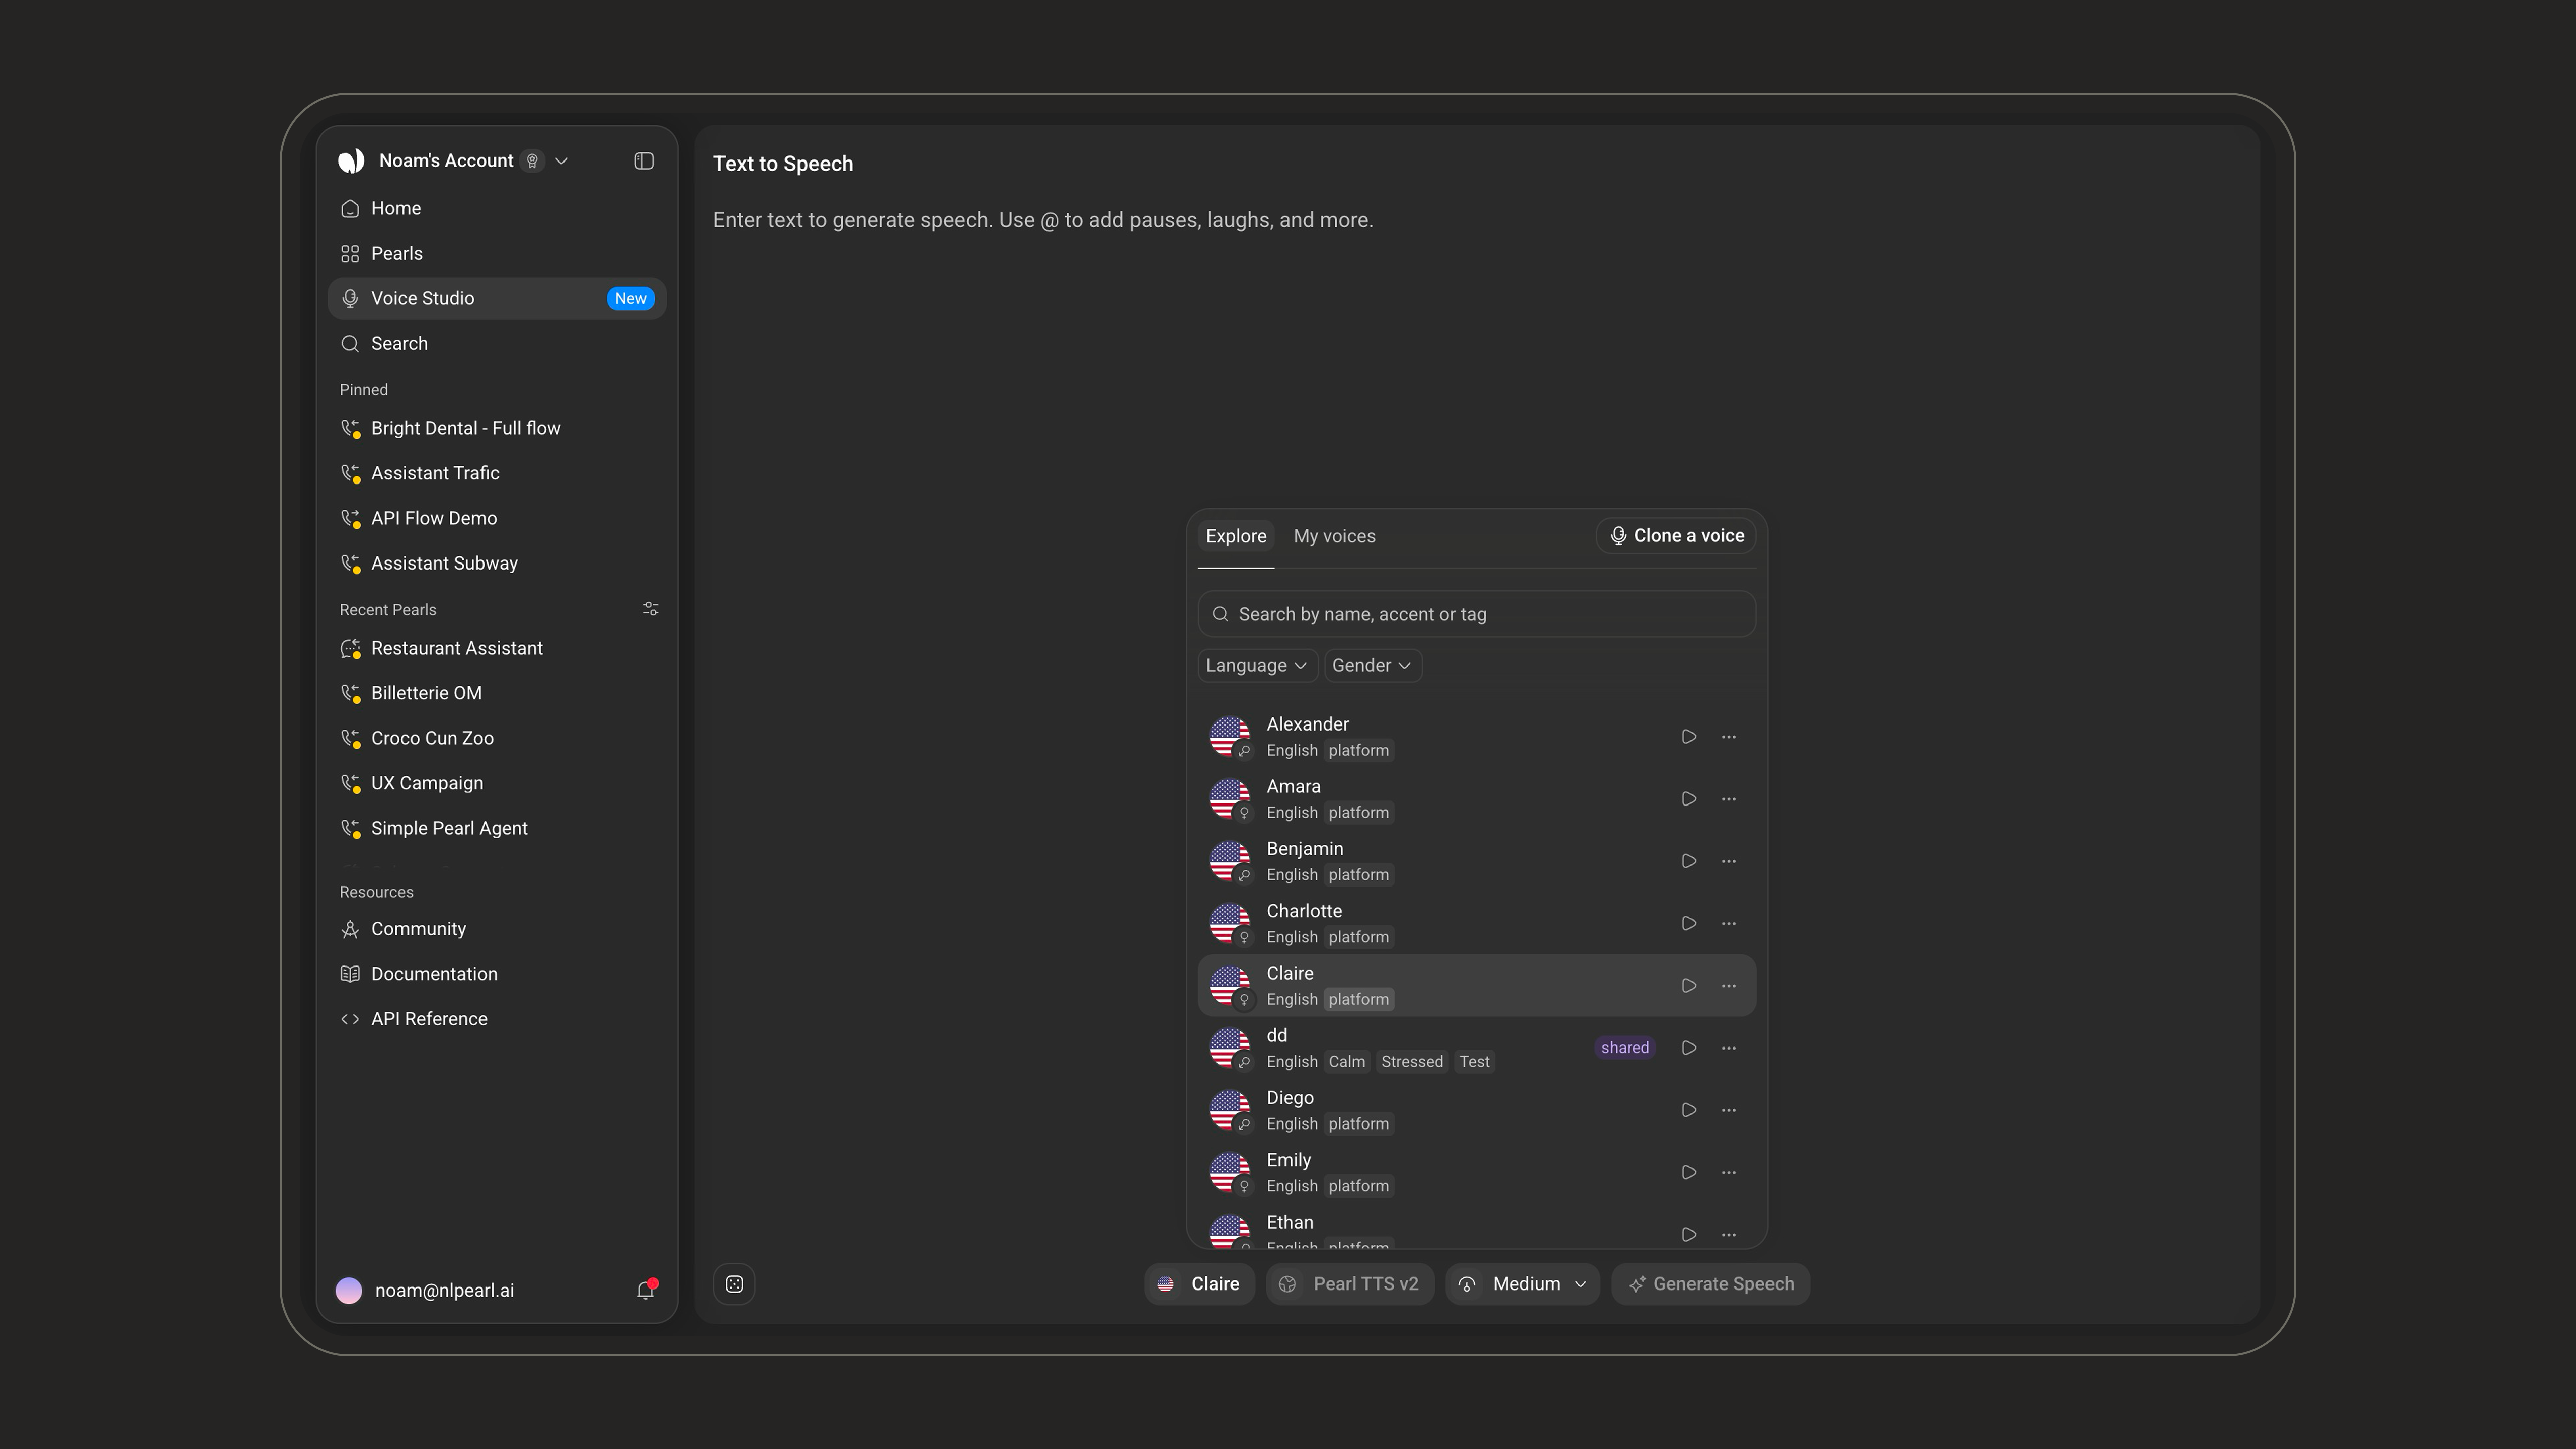
Explore
Every voice available to you, for choosing: the NLPearl voices, your own clones, and voices other accounts have published.
My voices
Your account’s own list, for managing. This is the list your Pearls can pick from.
Searching and filtering
Search by name, accent or tag, and narrow the list with the filters:- Language
- Accent — appears once you’ve picked a language, and only for languages that have accent variants.
- Gender
Reading a row
Each row shows the language flag, a gender mark, the voice’s name, and its language, accent and tags. Some rows also carry a label:
Click the play button on a row to hear the voice without leaving the picker. A voice you cloned plays back the same line you auditioned when you created it, so what you hear here is what you approved.
Playing a voice doesn’t generate a new take — the clip is rendered once and reused, so every play after the first is instant.
Managing a voice
The ⋯ button on a row opens its menu: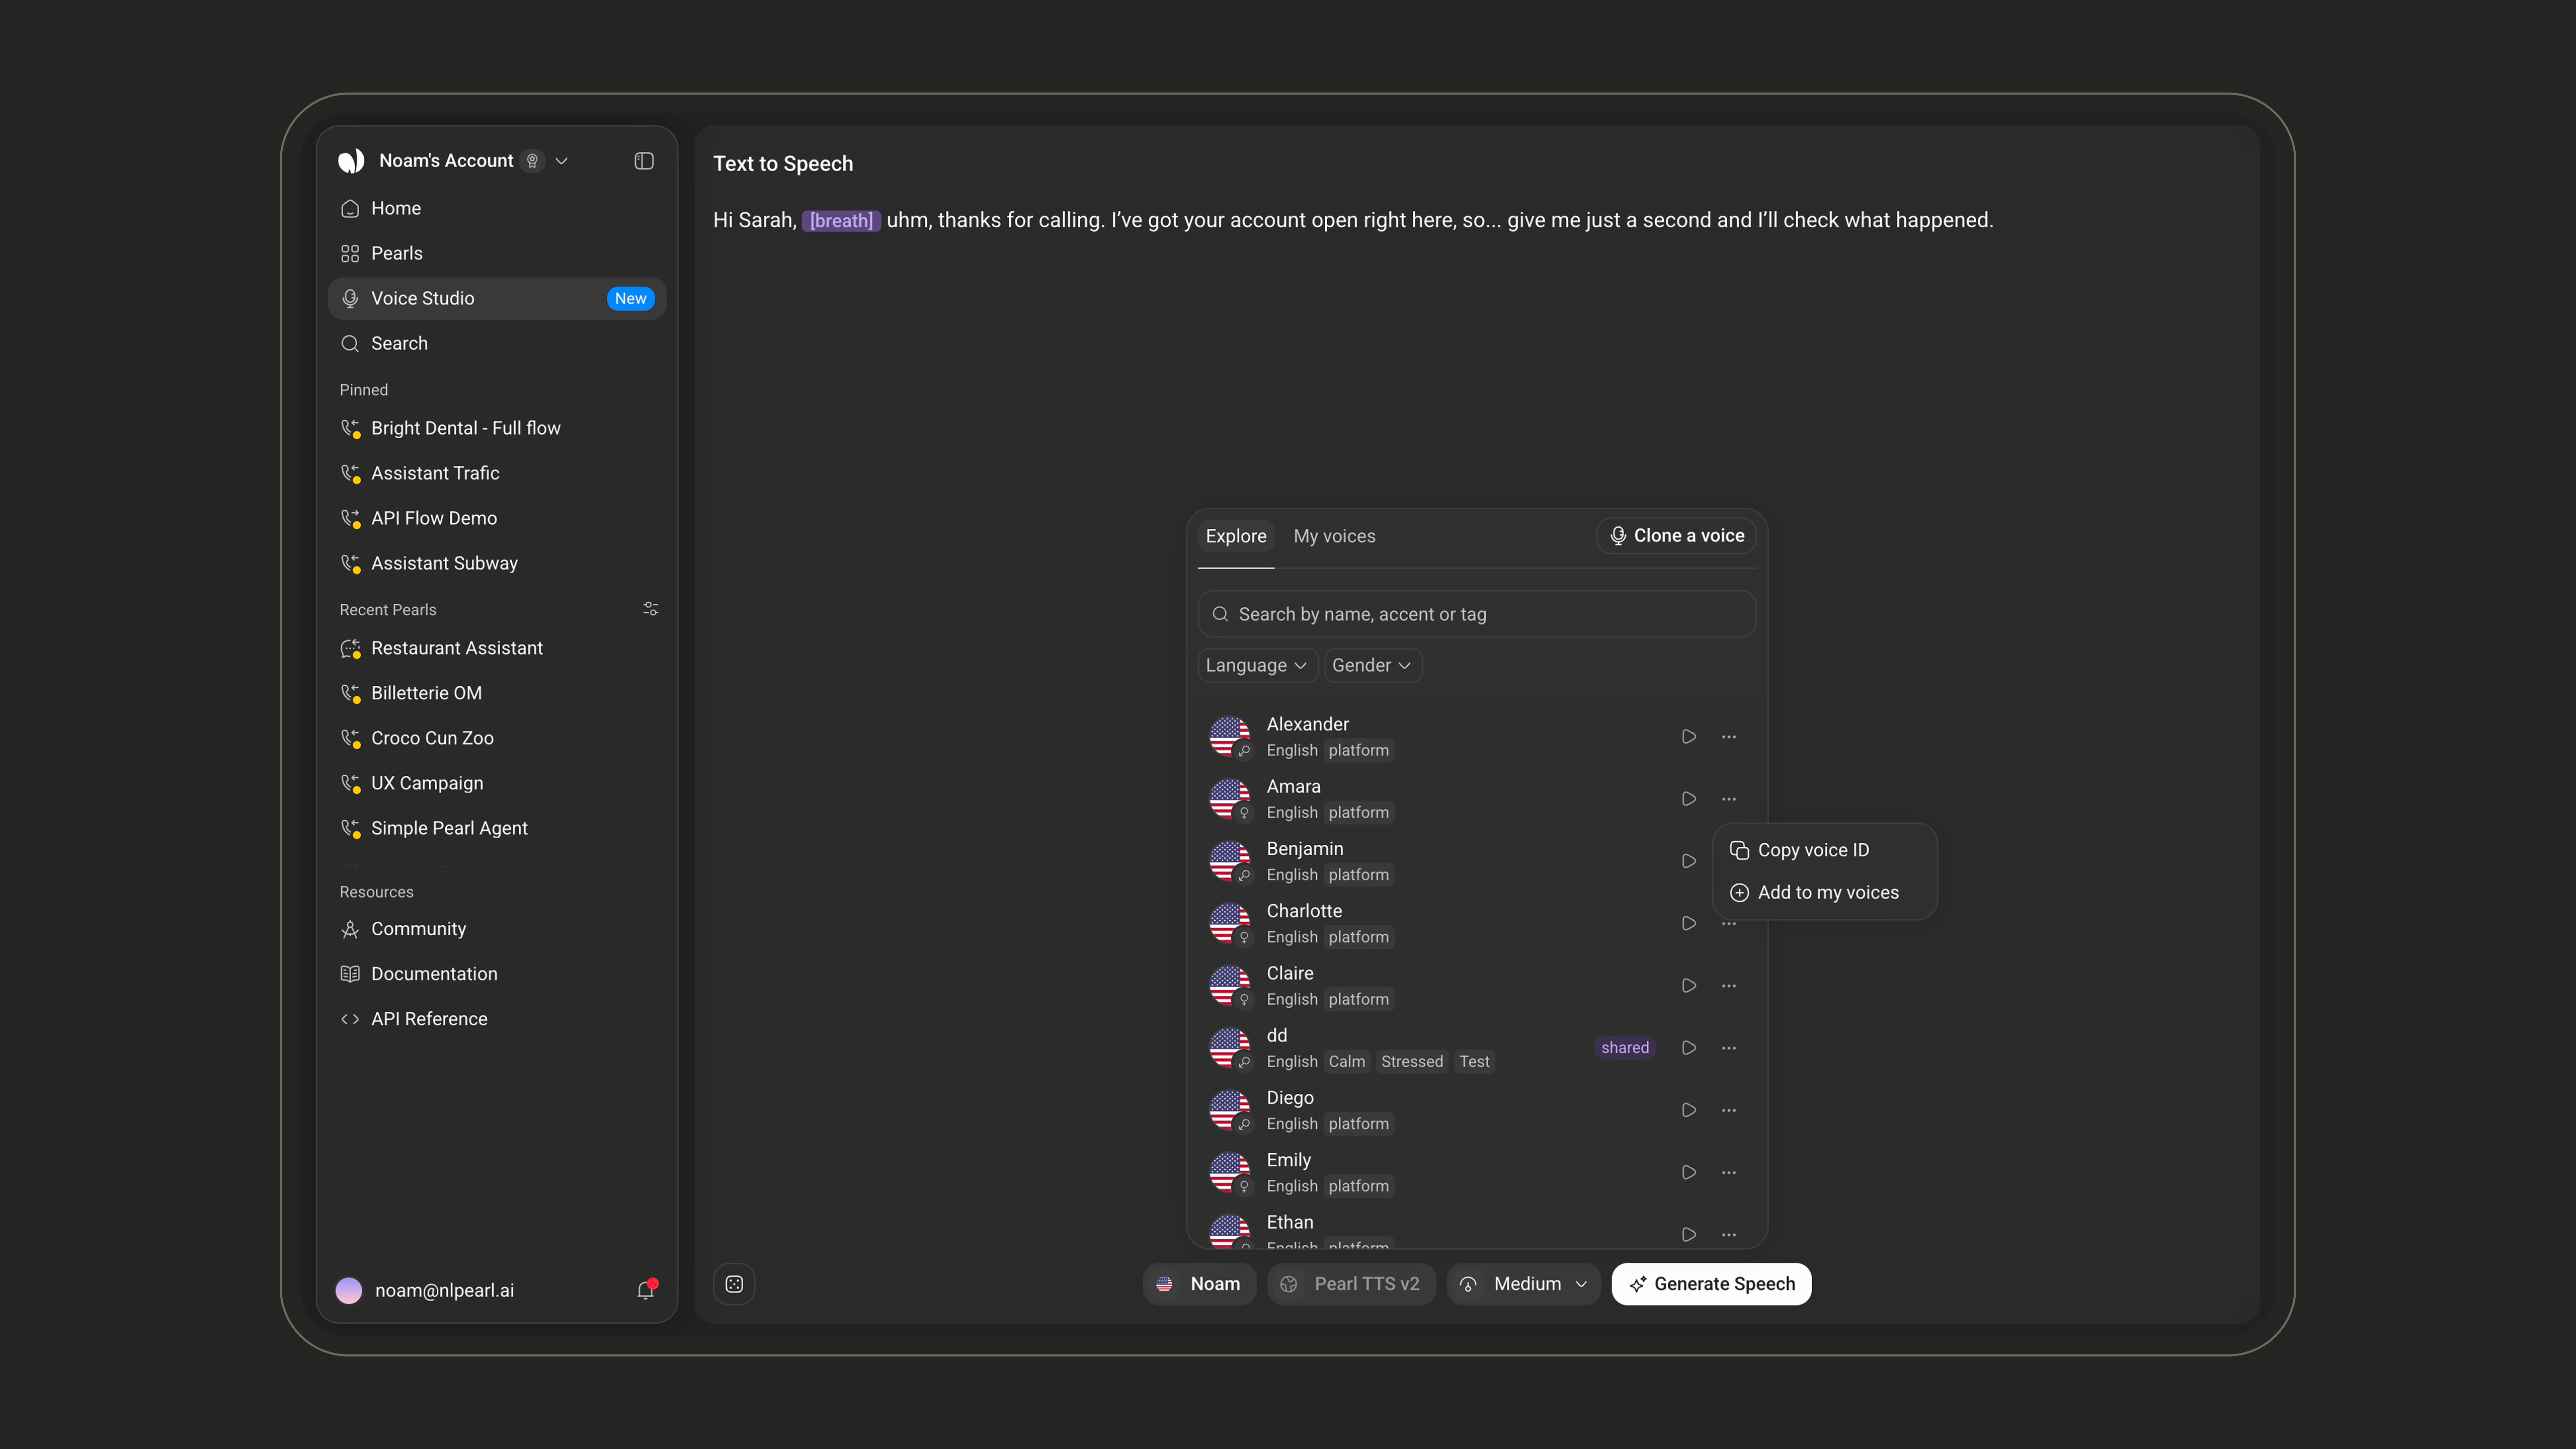
Cloning a voice
You can build a voice from a short recording of someone speaking, then use it like any other voice on the platform. Open the voice picker and click Clone a voice.1
Provide one recording
Drag an audio file anywhere onto the popup, click Browse files, or click Record audio to record straight from your microphone.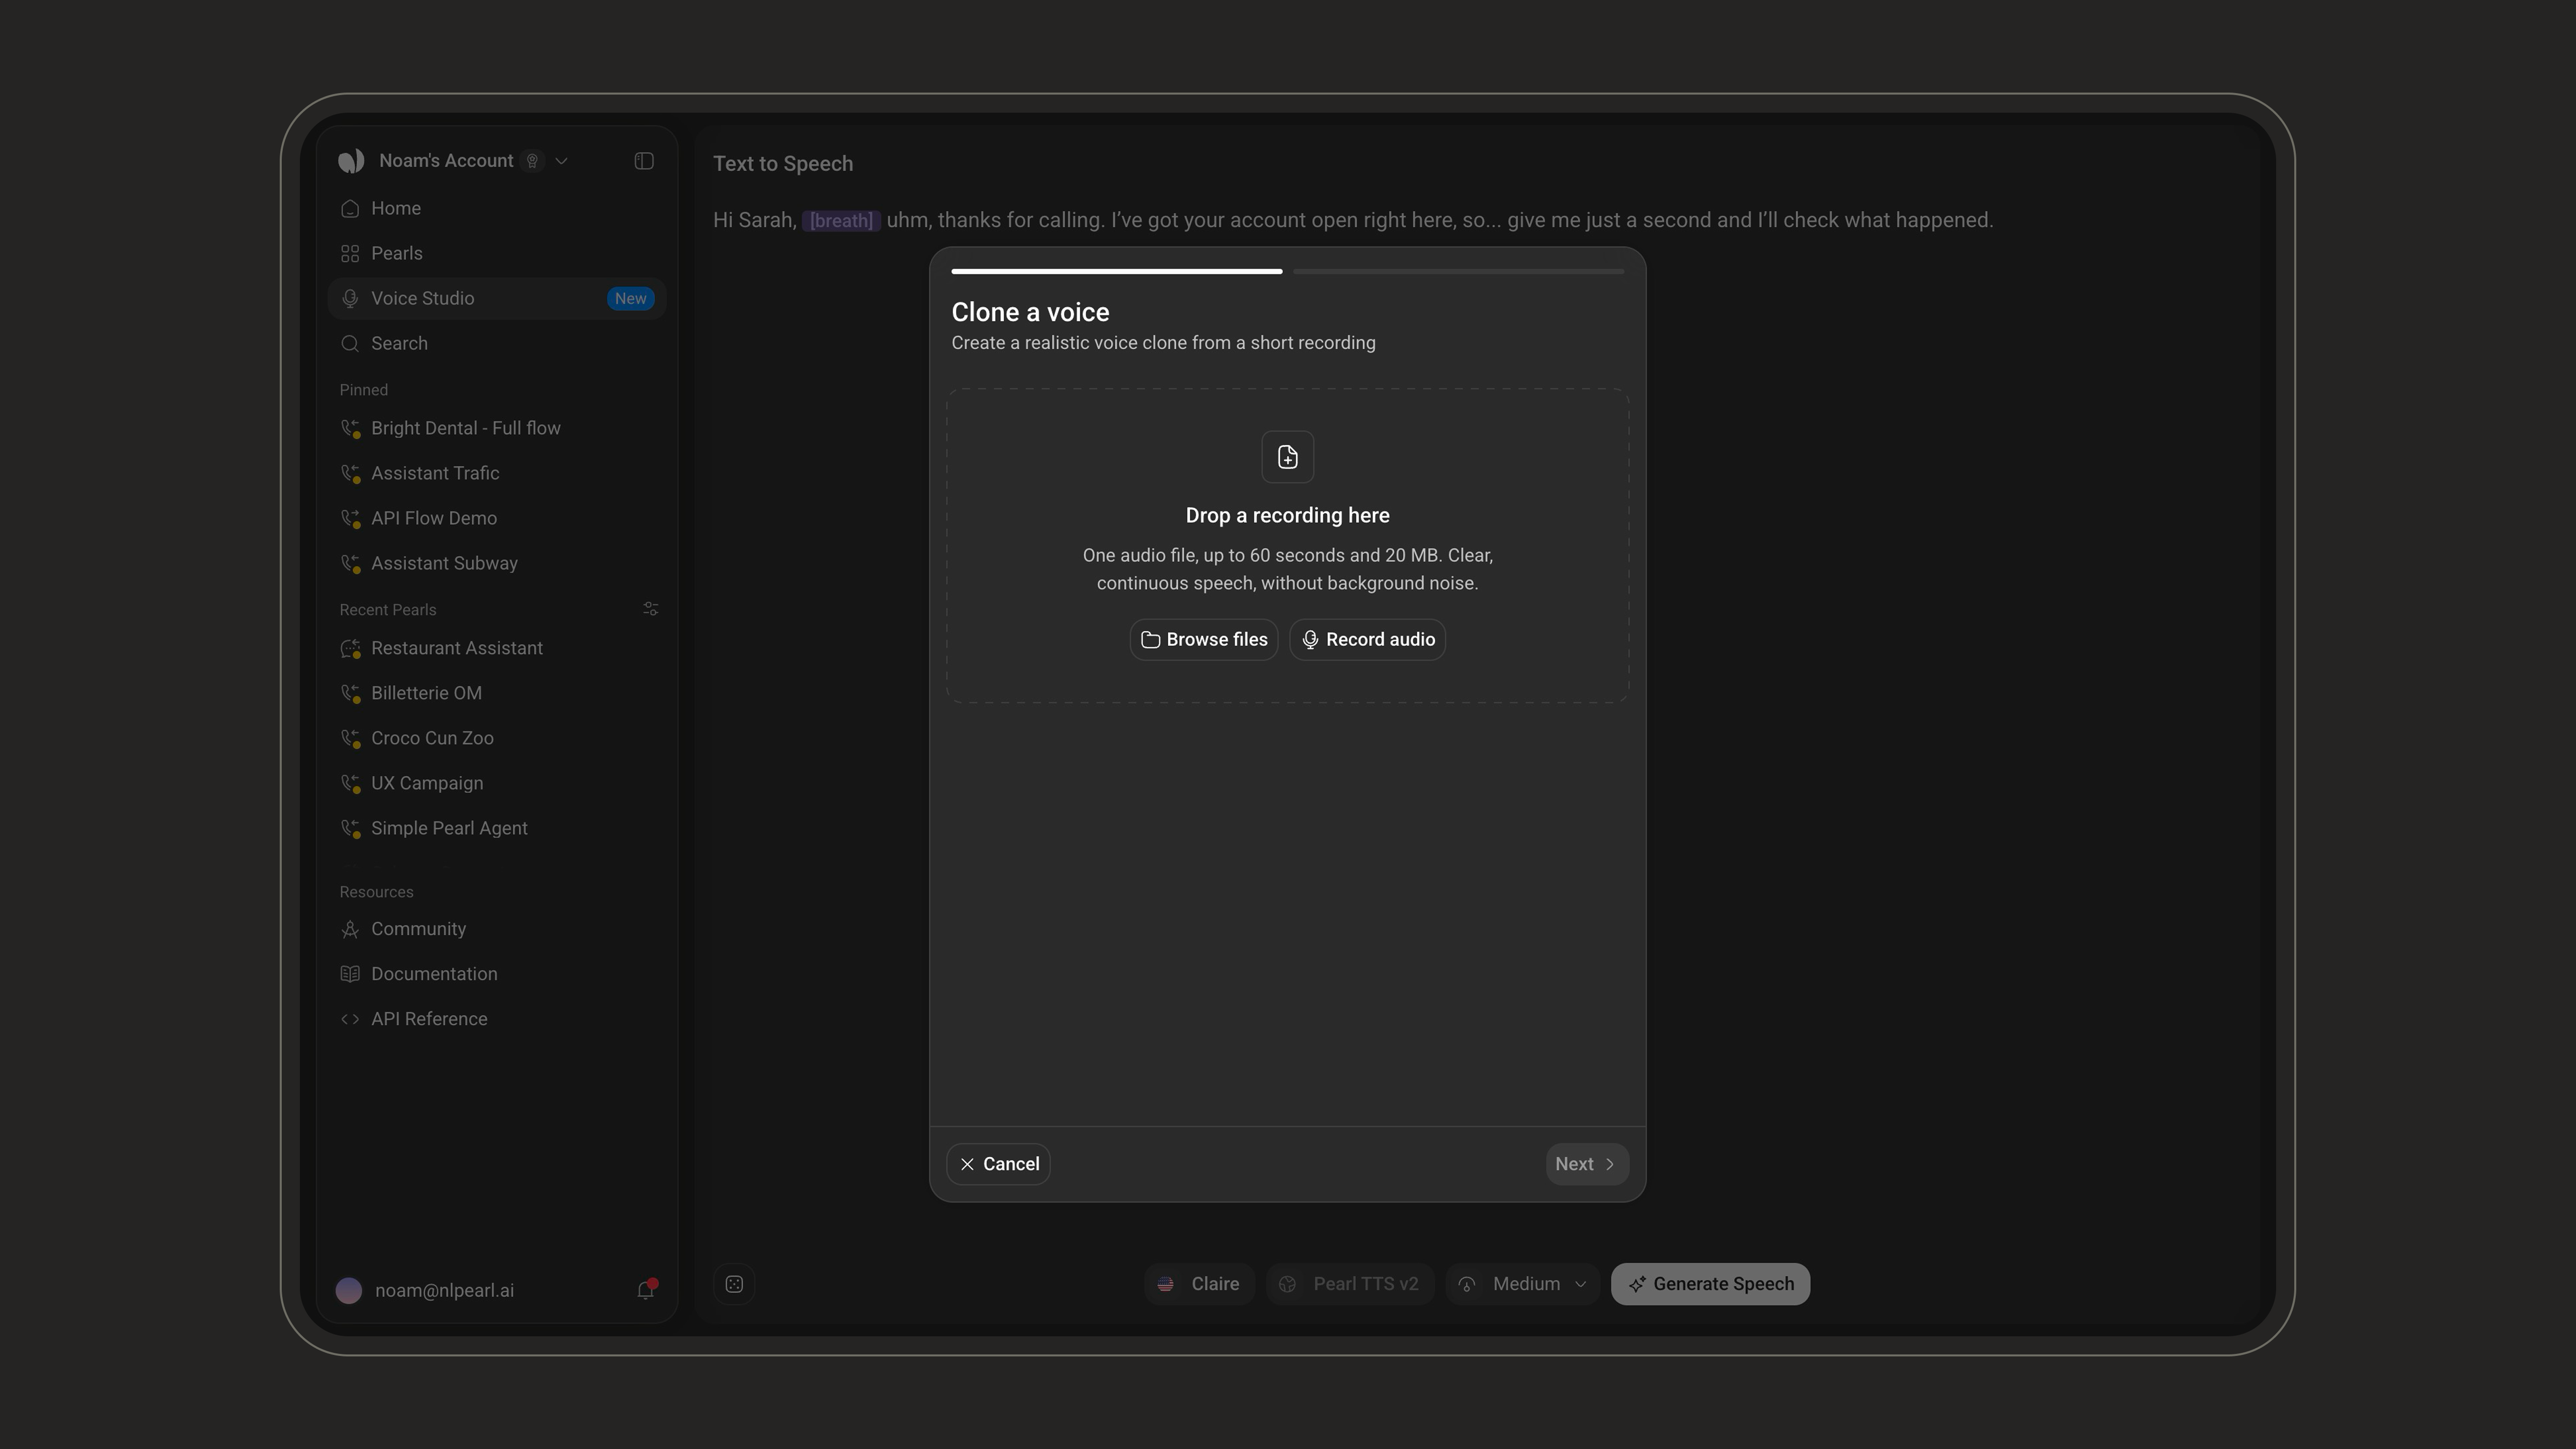
A voice is built from a single recording. Dropping a second file replaces the first rather than adding to it.
2
Describe the voice
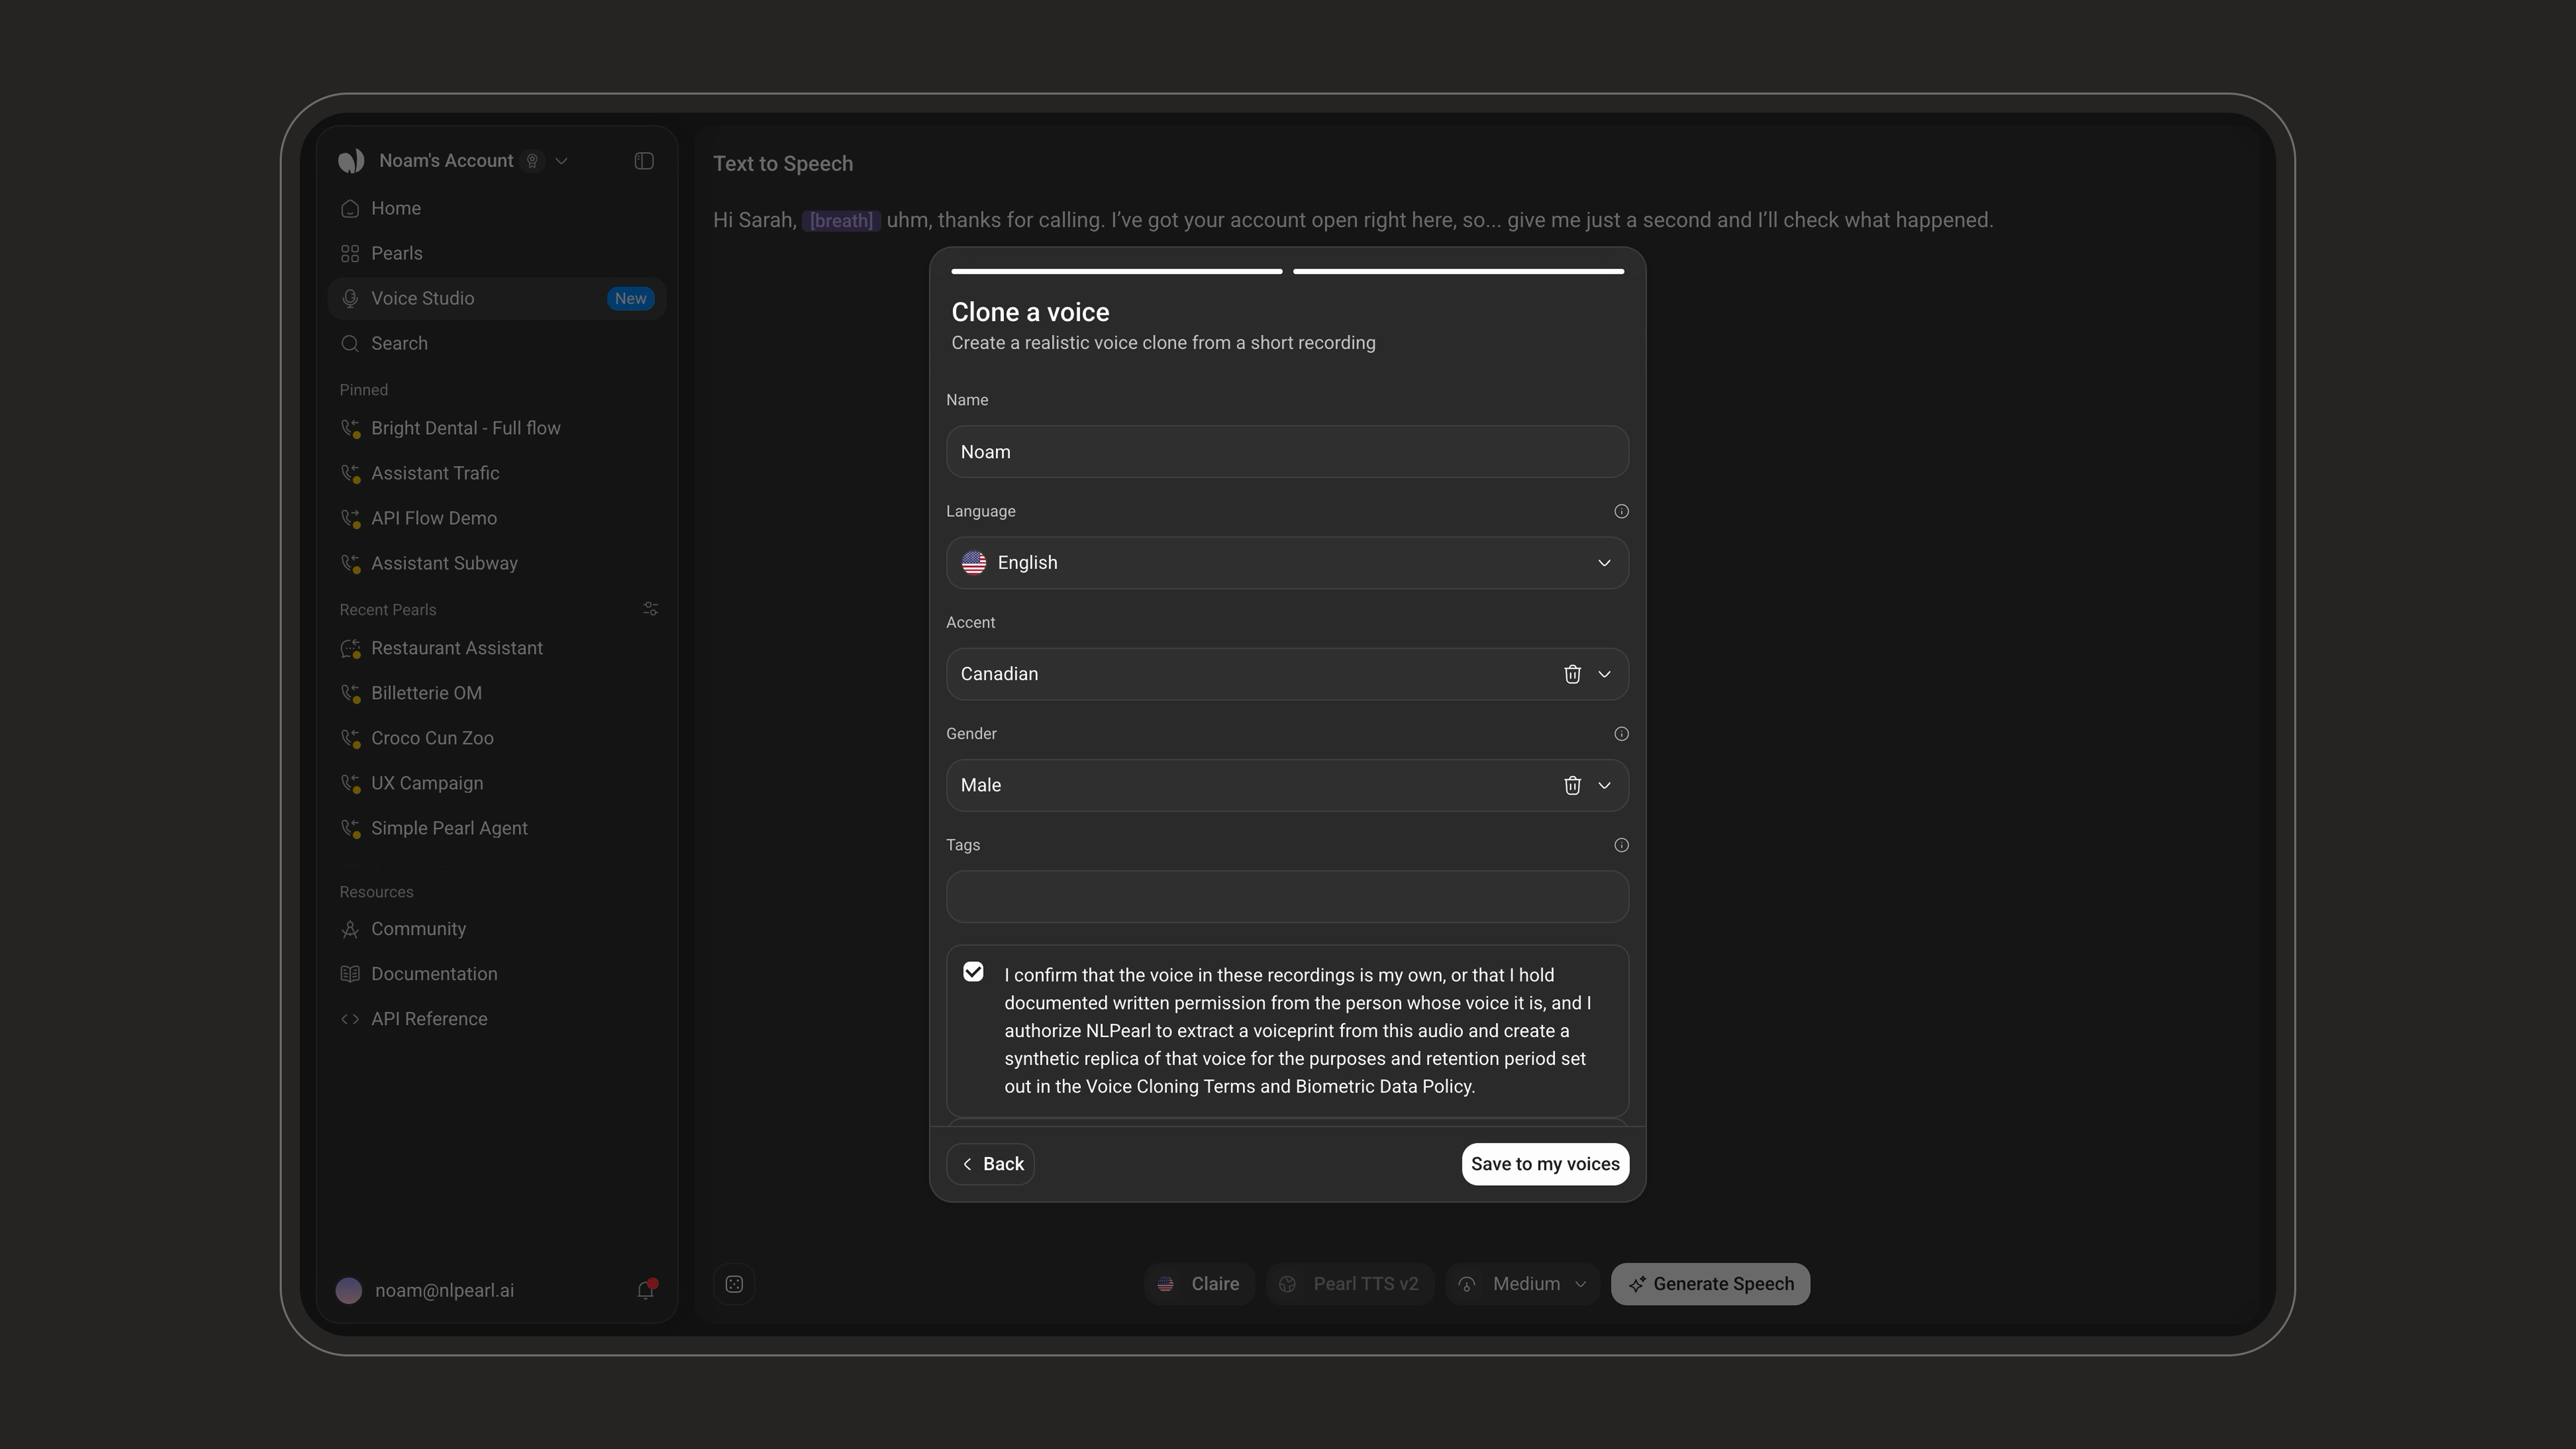
3
Confirm you have permission
You must confirm that the voice in the recording is your own, or that you hold documented written permission from the person whose voice it is, before the voice can be created.
4
Hear it before you keep it
Click Hear this voice to audition the clone. It reads a short line back to you, so you know what you’re keeping before anything is saved.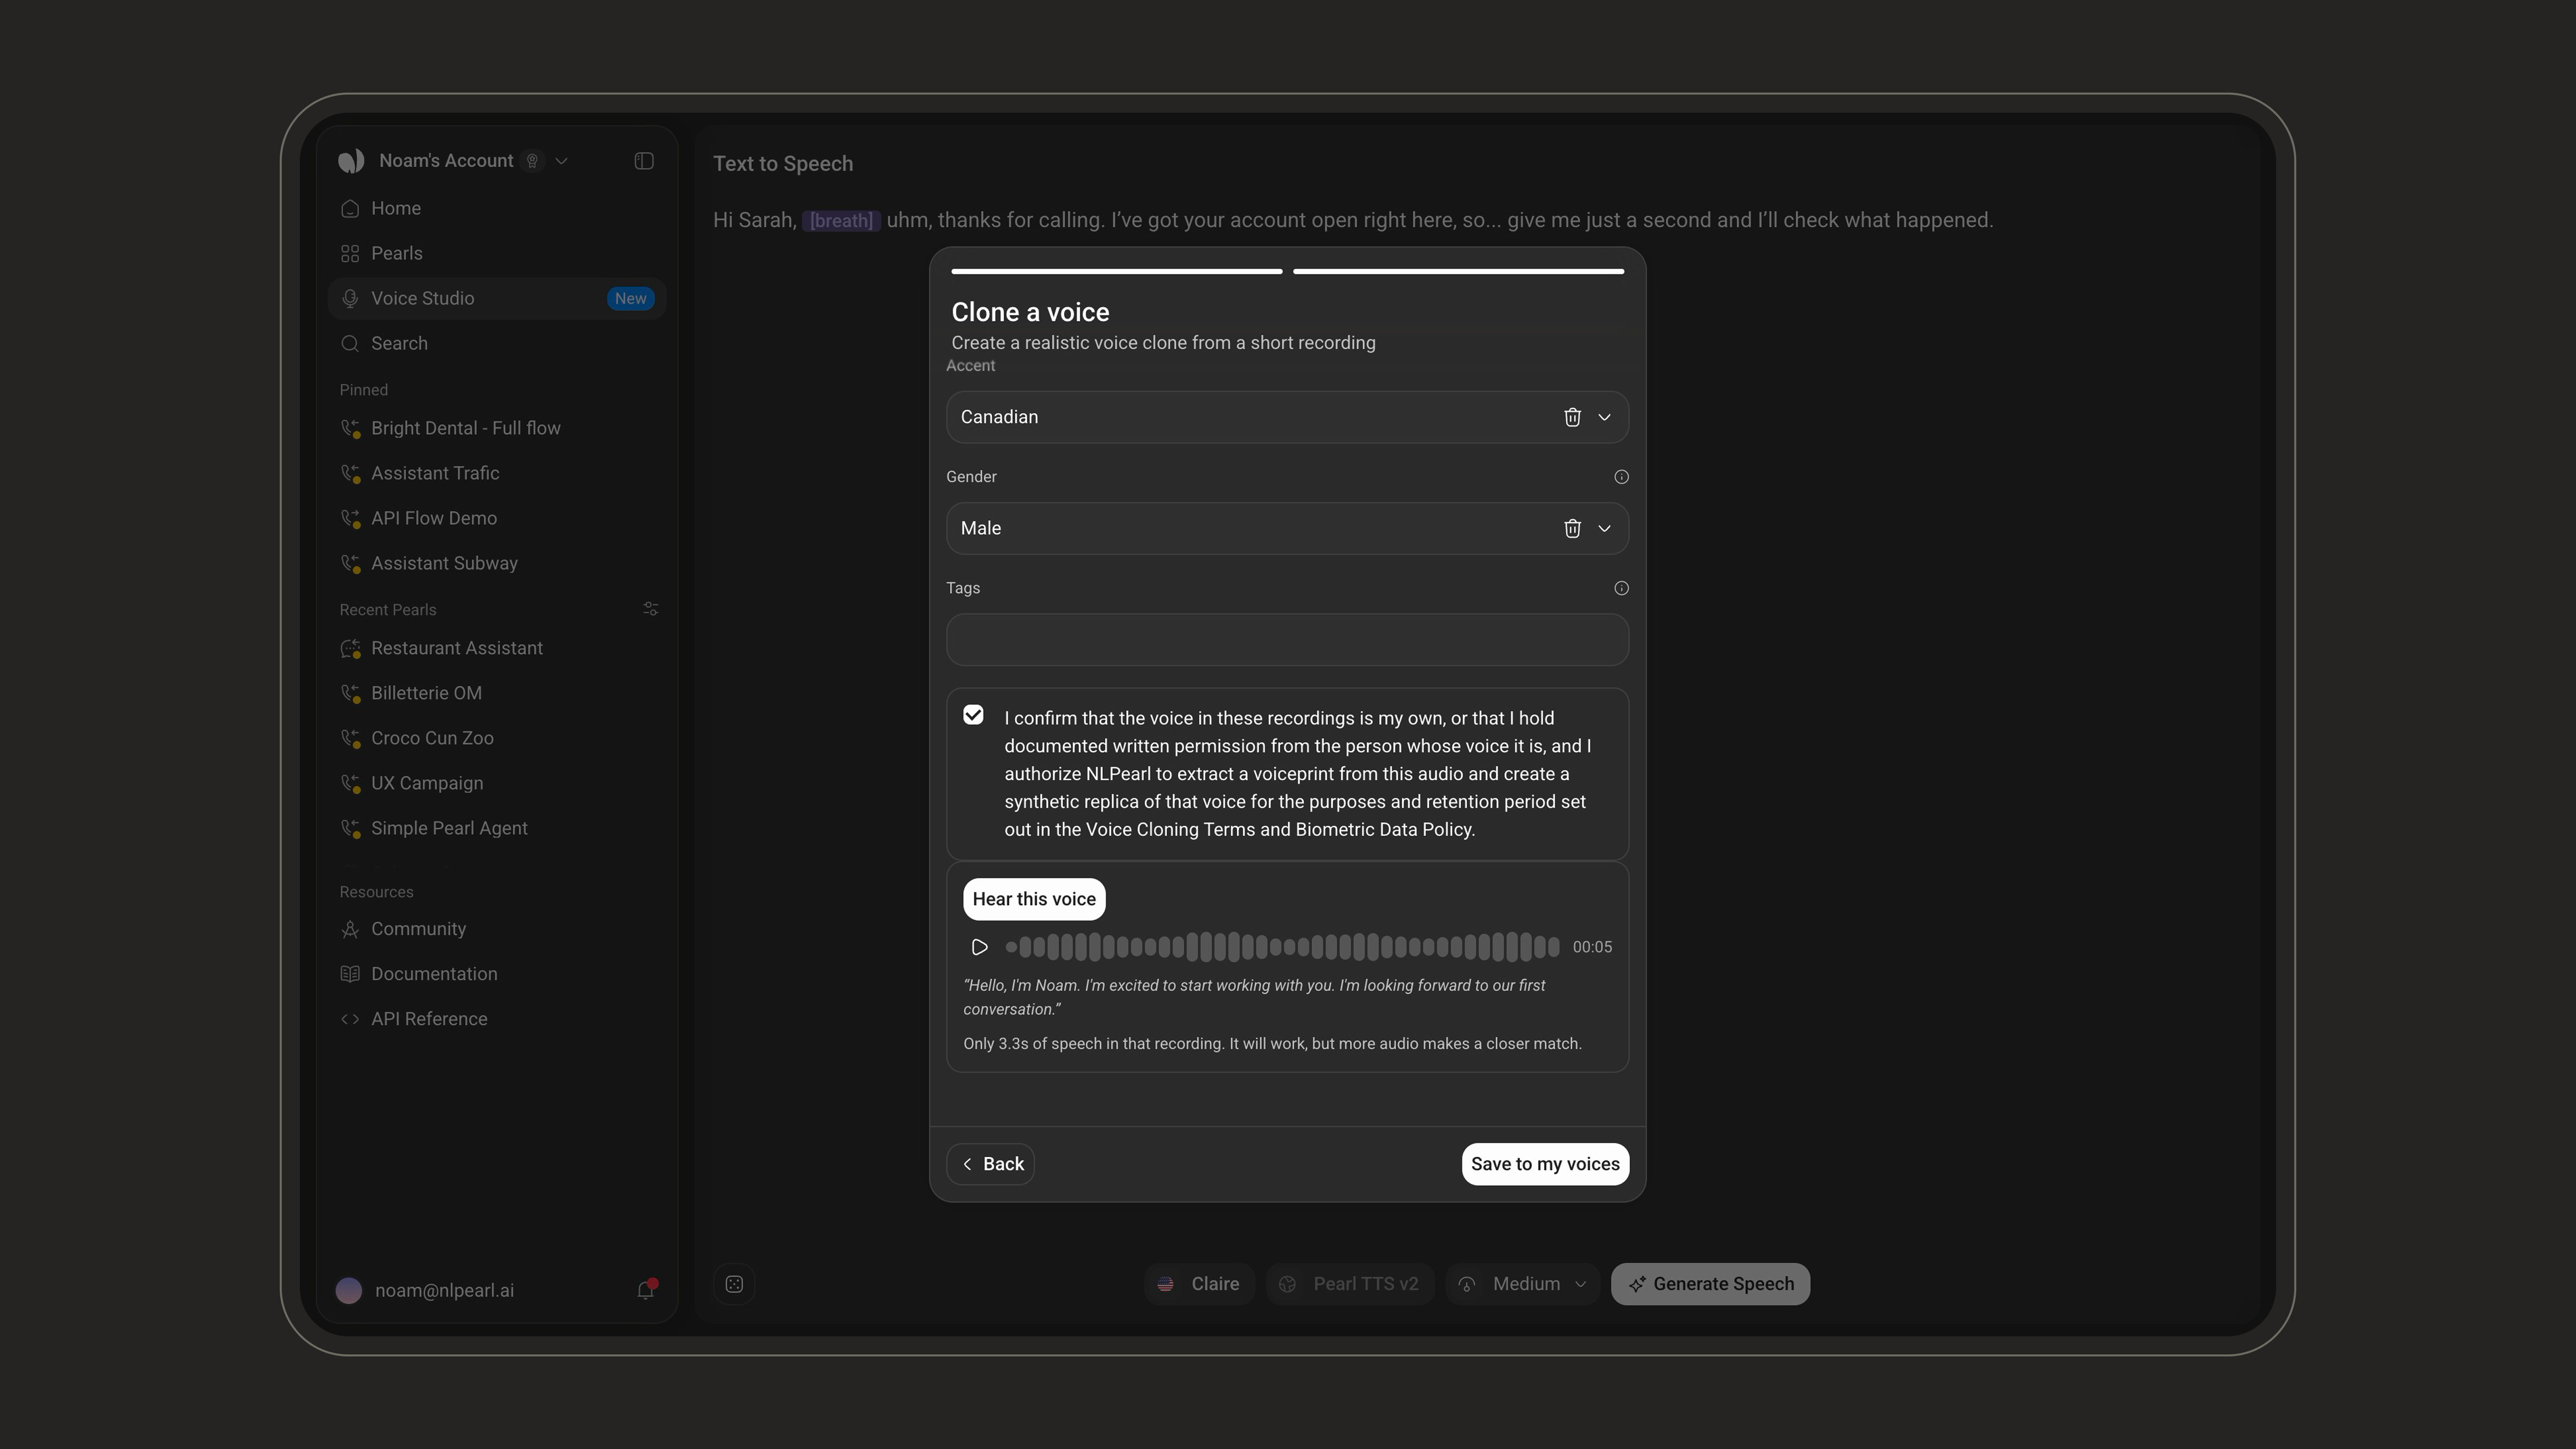
Auditioning stores nothing. Closing the popup at this point leaves no voice behind.
5
Save
Click Save to my voices. The file uploads, the voice is built — this takes a few seconds — and it appears in My voices right away, ready to select on the main screen.
If the recording is refused, the message tells you how much usable speech was actually measured. That’s the difference between try again and record a longer take.
Publishing a voice
Publishing puts one of your voices into the shared library, where every account on the platform can use it. Publishing is offered from the voice’s row menu in the picker, and only while the voice is still private. Once published, the option is gone.Using your voices in a Pearl
The voices in My voices are the ones your Pearls can be set to.1
Add the voice to your list
Clone it, or add it from Explore.
2
Open your Pearl's settings
Go to Pearl Settings → Agent Names, Languages & Voices.
3
Pick it for an agent
Open the agent’s Voice dropdown and select it. For the languages Voice Studio supports, the dropdown also offers Open Voice Studio at the bottom of the list, which opens the studio in a new tab so you can clone or audition a voice without losing your place in the form.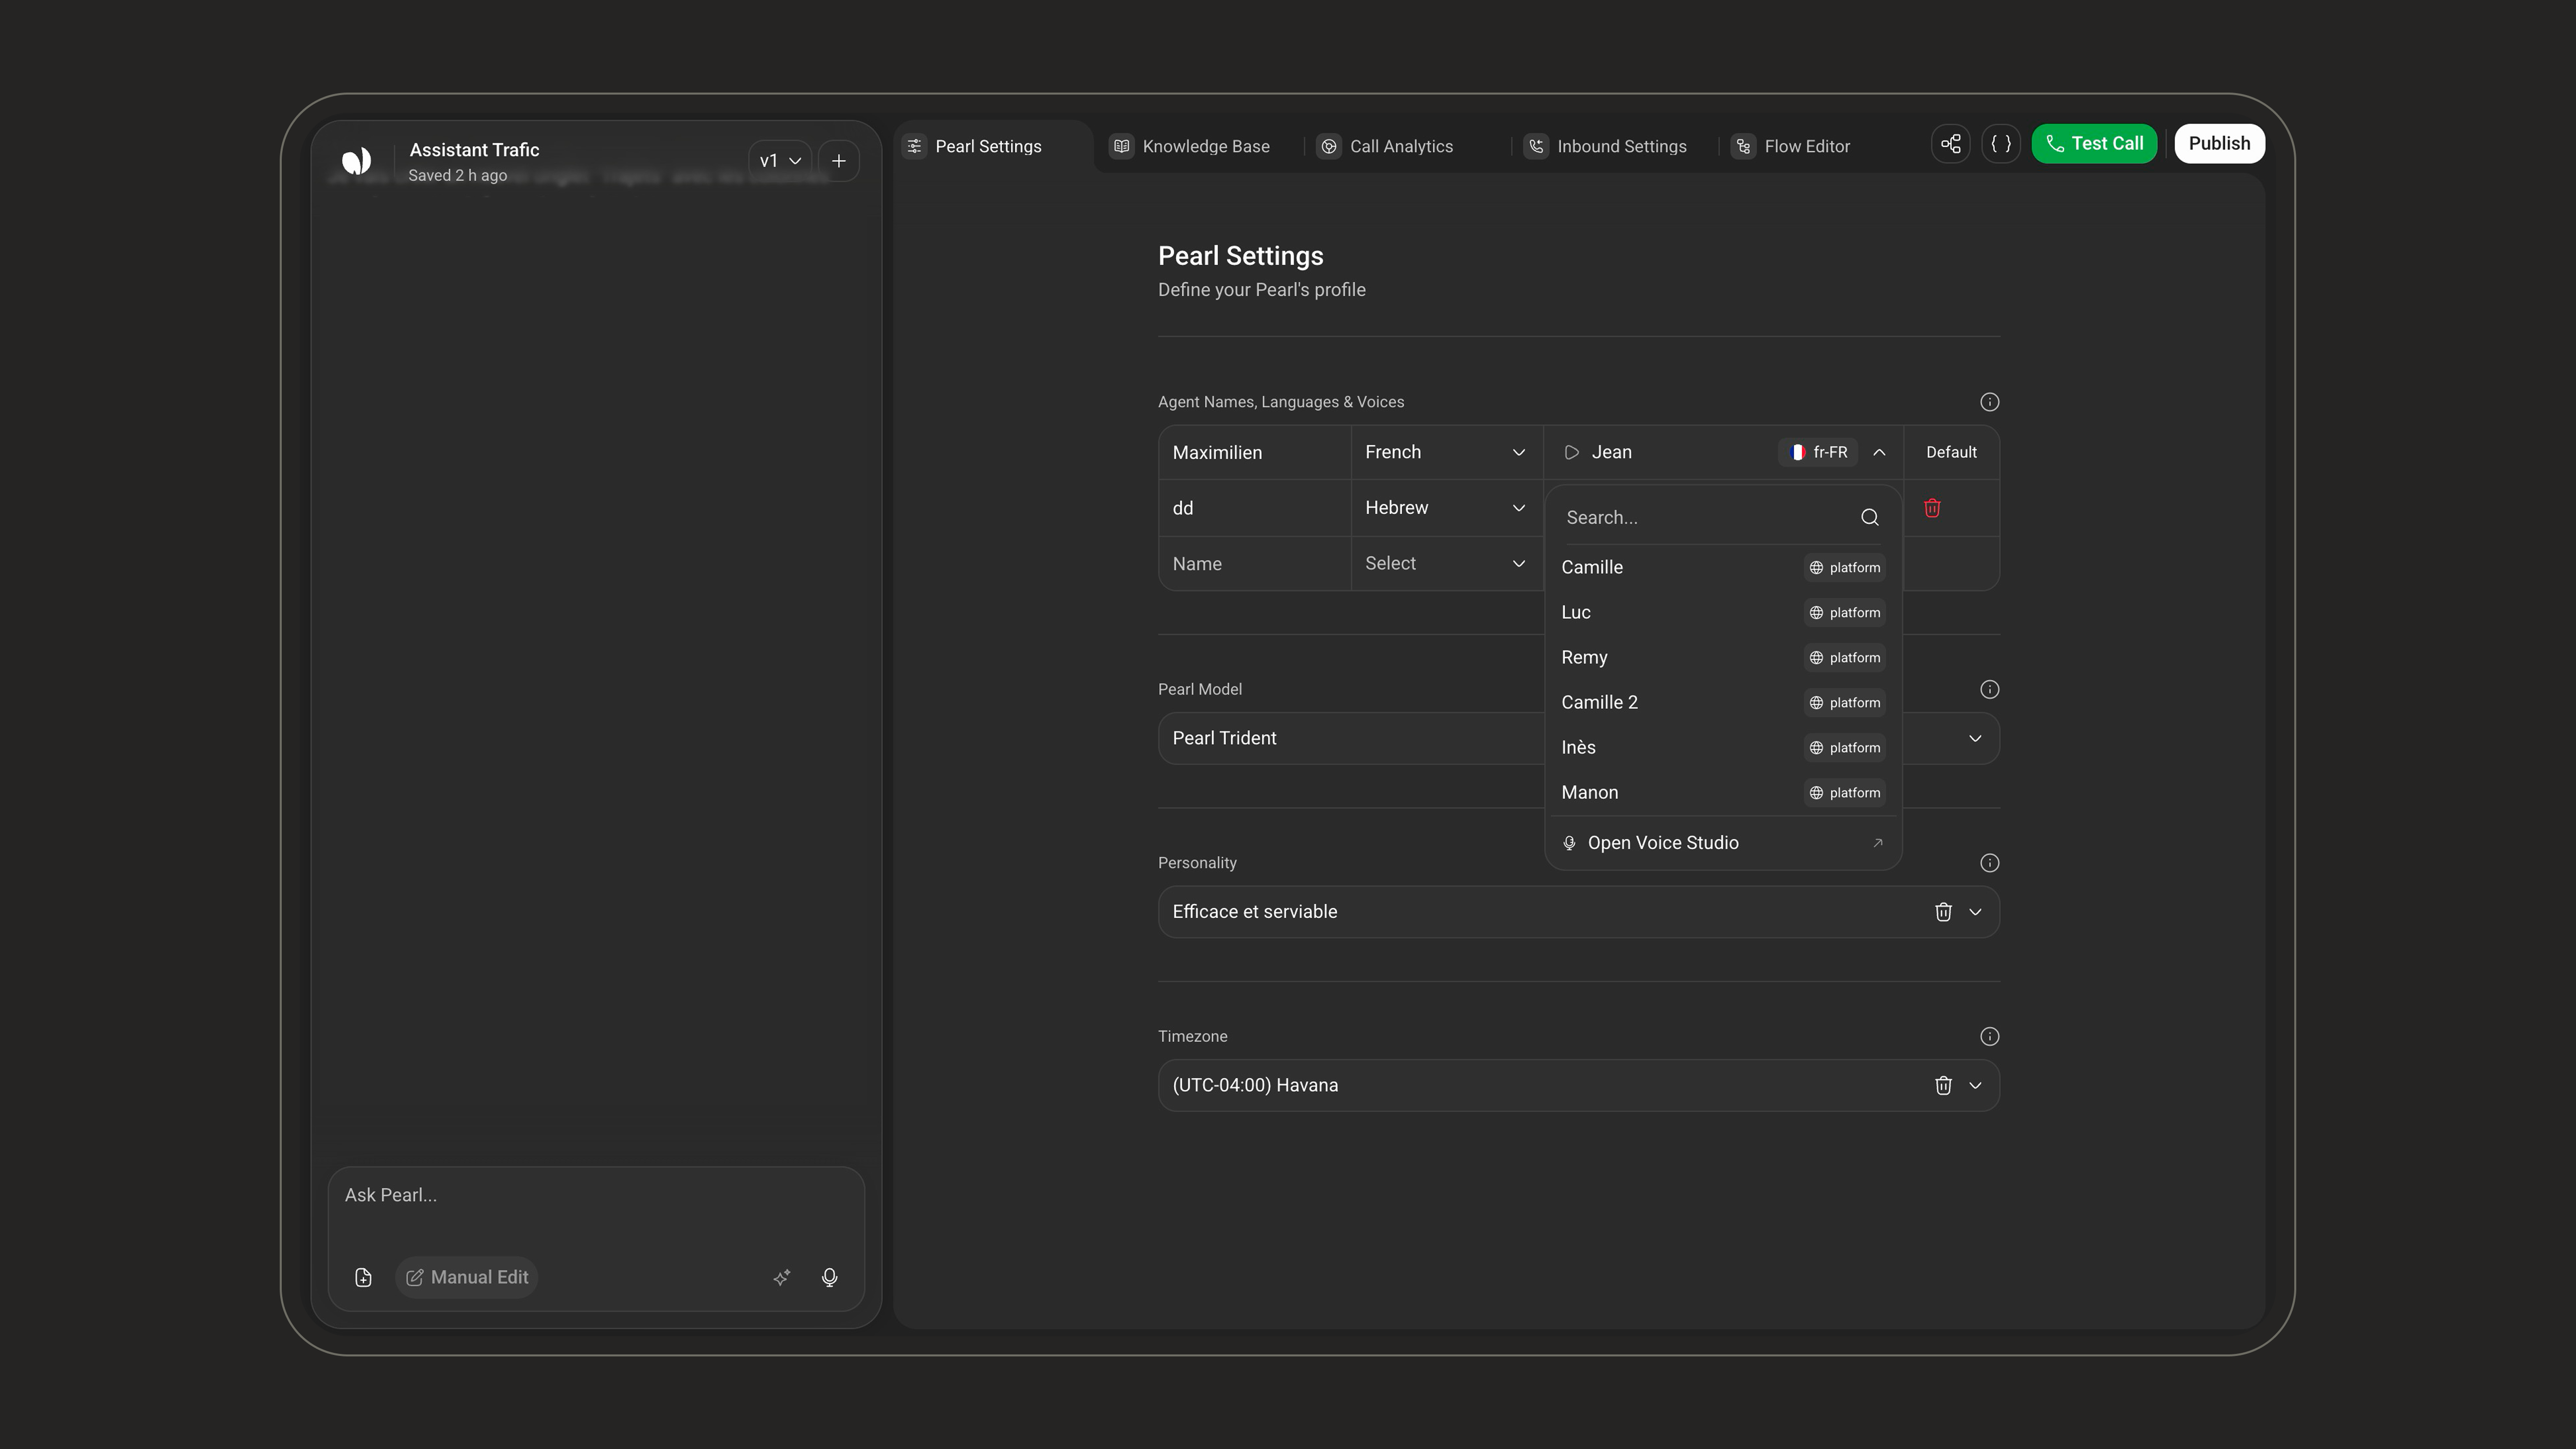
A voice cloned in one browser tab appears in the other tabs you have open, without reloading the platform.
Supported languages
Voice Studio generates speech in the following languages:This is the list of languages the speech model currently serves, which is narrower than the full set of languages a Pearl can speak. See Voices and Languages for everything the platform supports.
Your library may look empty the first time you open it. Only voices the speech model can currently use are listed — clone one from a recording to get started.
Voices and Languages
Configure agents, languages and voices for a Pearl.
Pearl Settings
Everything you can configure on a Pearl, including its agents.