> ## Documentation Index
> Fetch the complete documentation index at: https://developers.nlpearl.ai/llms.txt
> Use this file to discover all available pages before exploring further.
# Outbound
> Configure your text Pearl to run outbound campaigns, from budget and scheduling to message limits, inactivity handling, and leads.
***
## Setting Up Outbound Campaigns
Once you have created a Pearl, you can use it to run outbound text campaigns. Outbound settings are configured inside your Pearl, under **Outbound Settings**, so your Pearl starts conversations with your leads following the conversational flow you defined.
**What are outbound campaigns?**
Outbound campaigns let your Pearl start conversations with a list of leads through your connected messaging channels, following the conversational logic you defined for consistent and effective outreach.
***
## Connect a Channel
Unlike a voice campaign, an outbound text campaign isn't tied to a phone number, it's connected to a **messaging channel**. Once your Pearl is published, open its **overview** page and connect the channel your campaign will use.
NLPearl supports channels such as **WhatsApp**, **Telegram**, **SMS**, and **Glassix**. Follow the dedicated guides to set one up:
Connect your Pearl to SMS through Twilio to text with your customers.
Connect your Pearl to Telegram by linking a bot created with BotFather.
***
## Outbound Settings
Configure your campaign from the **Outbound Settings** tab of your Pearl, in the [PearlVibe](/pages/pearl_vibe) flow editor.
These settings apply to **text** Pearls only. A voice Pearl has a different set of outbound options.
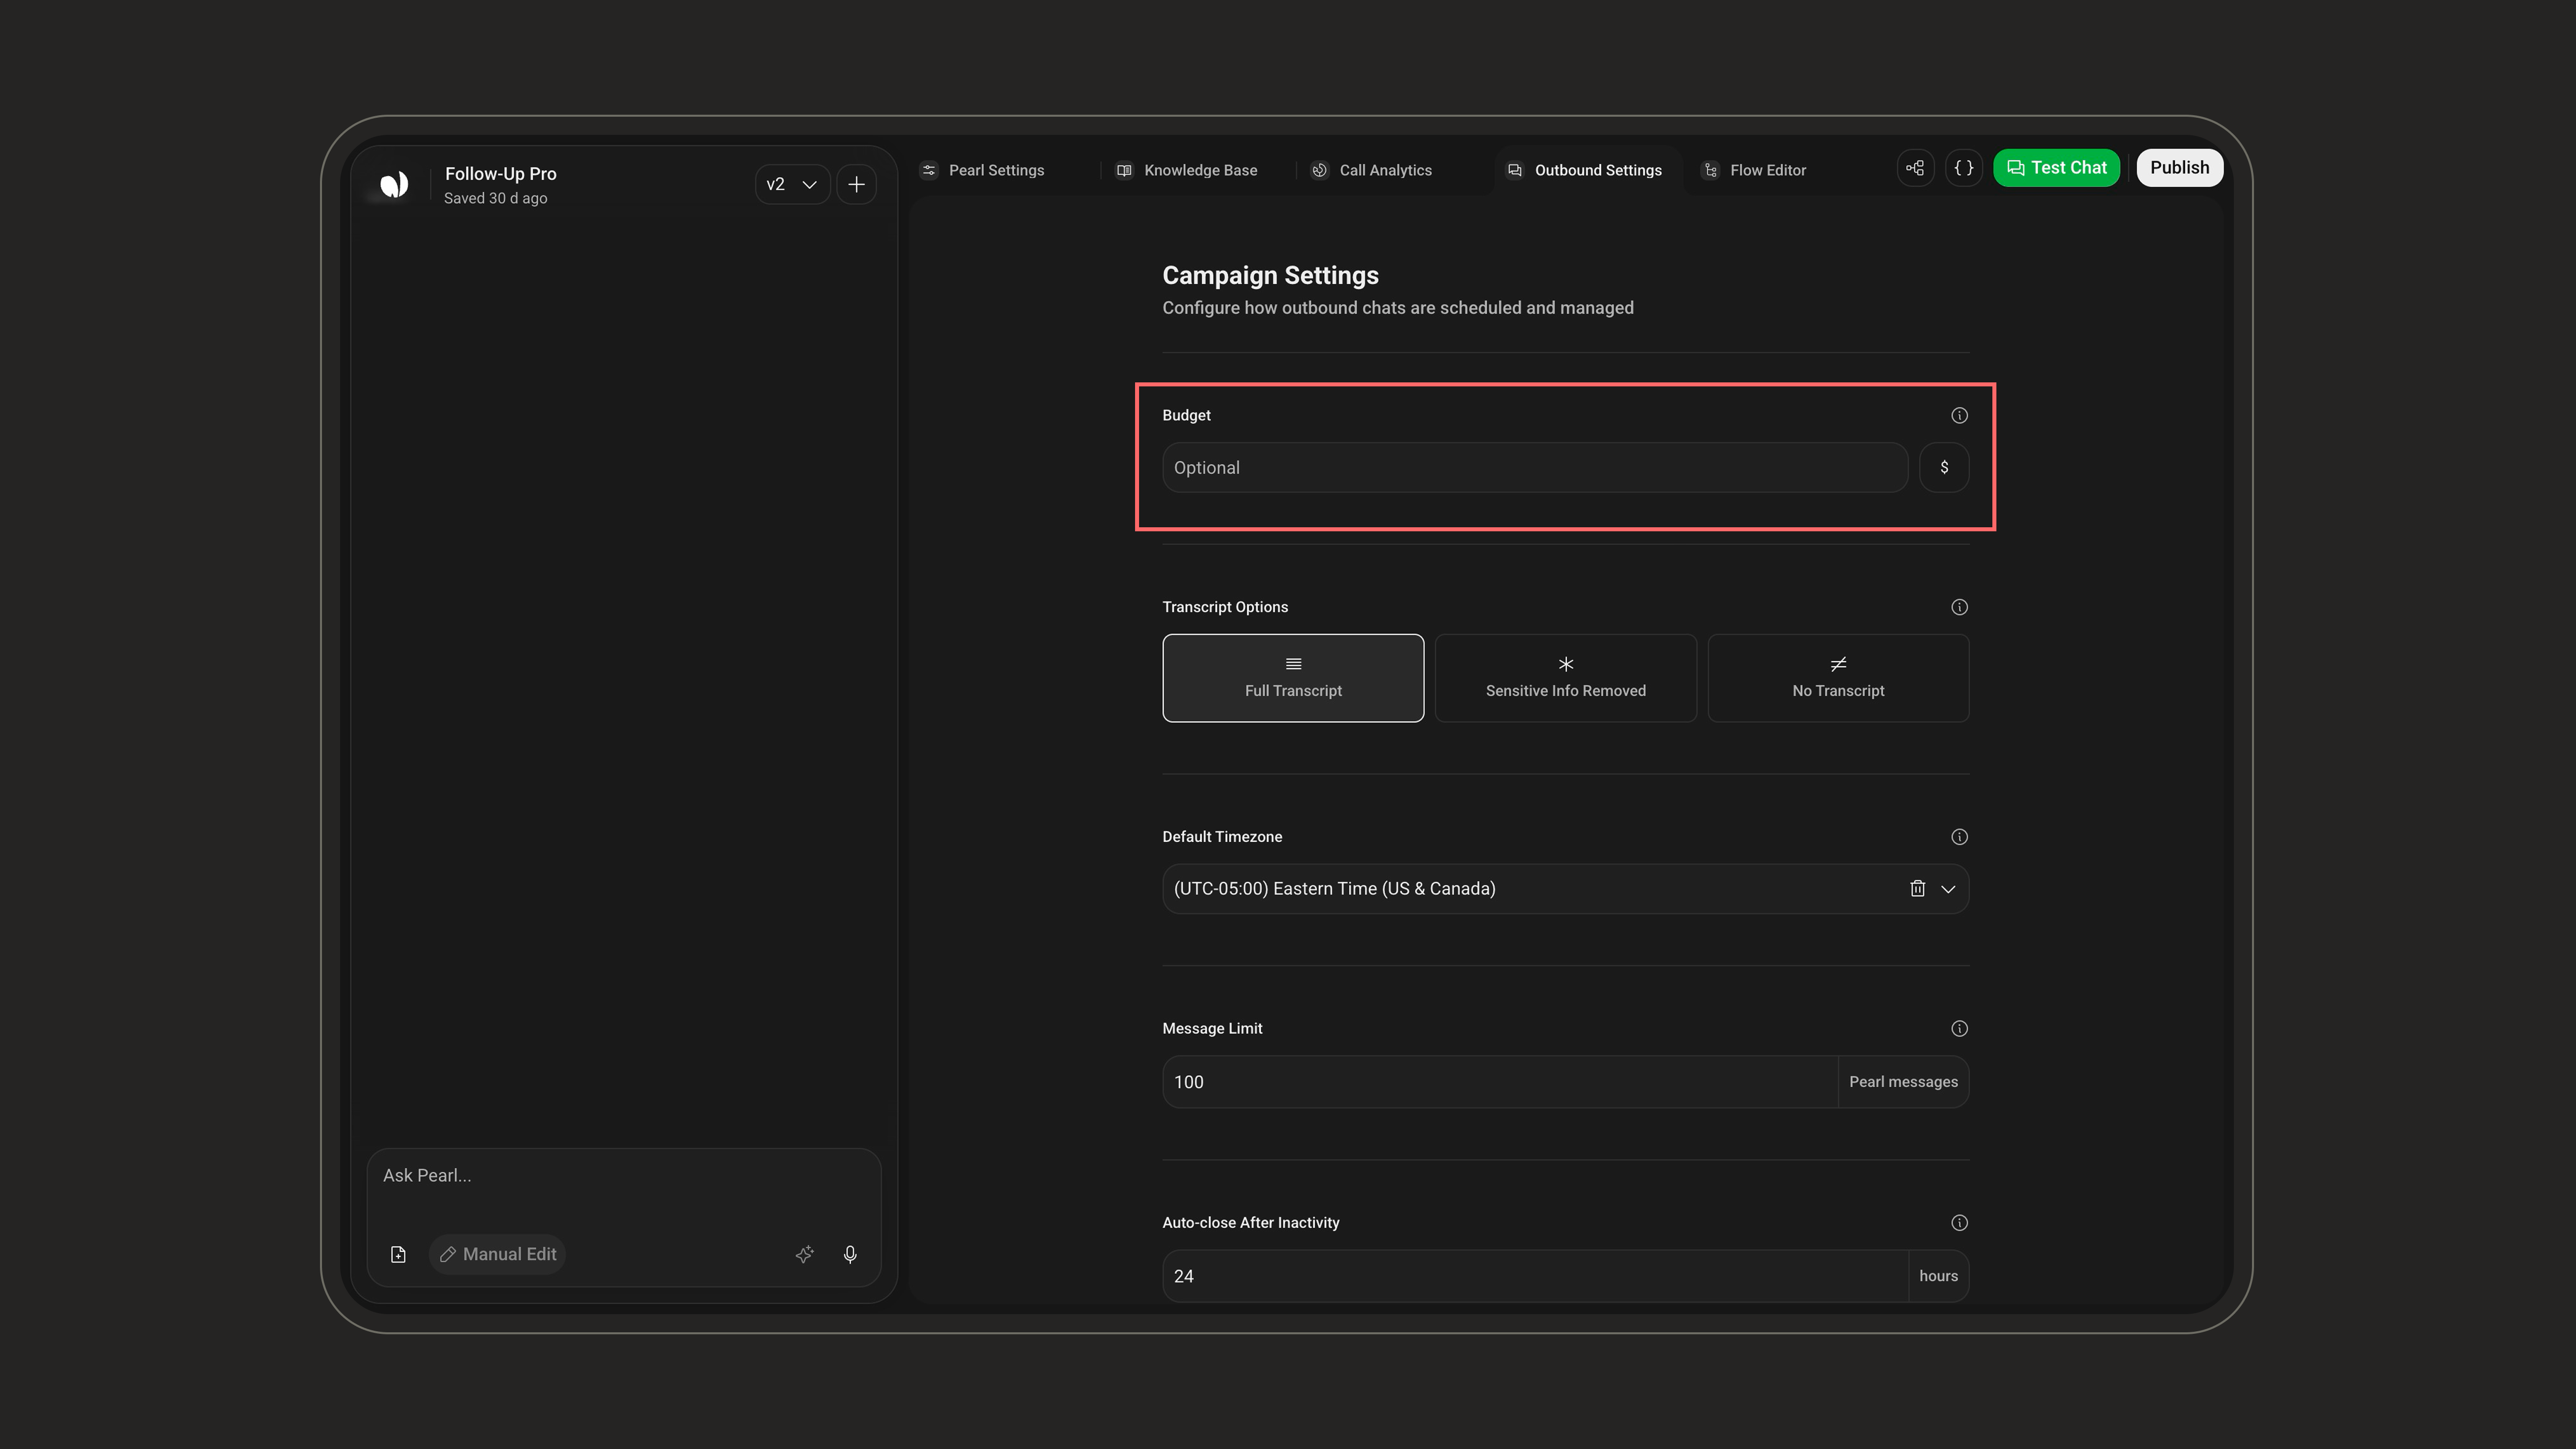
### Budget
Set an optional spending cap for the campaign, in dollars. Once the budget is reached, Pearl stops starting new conversations for that campaign. You can increase it at any time as long as you have enough credit on your account.
 ***
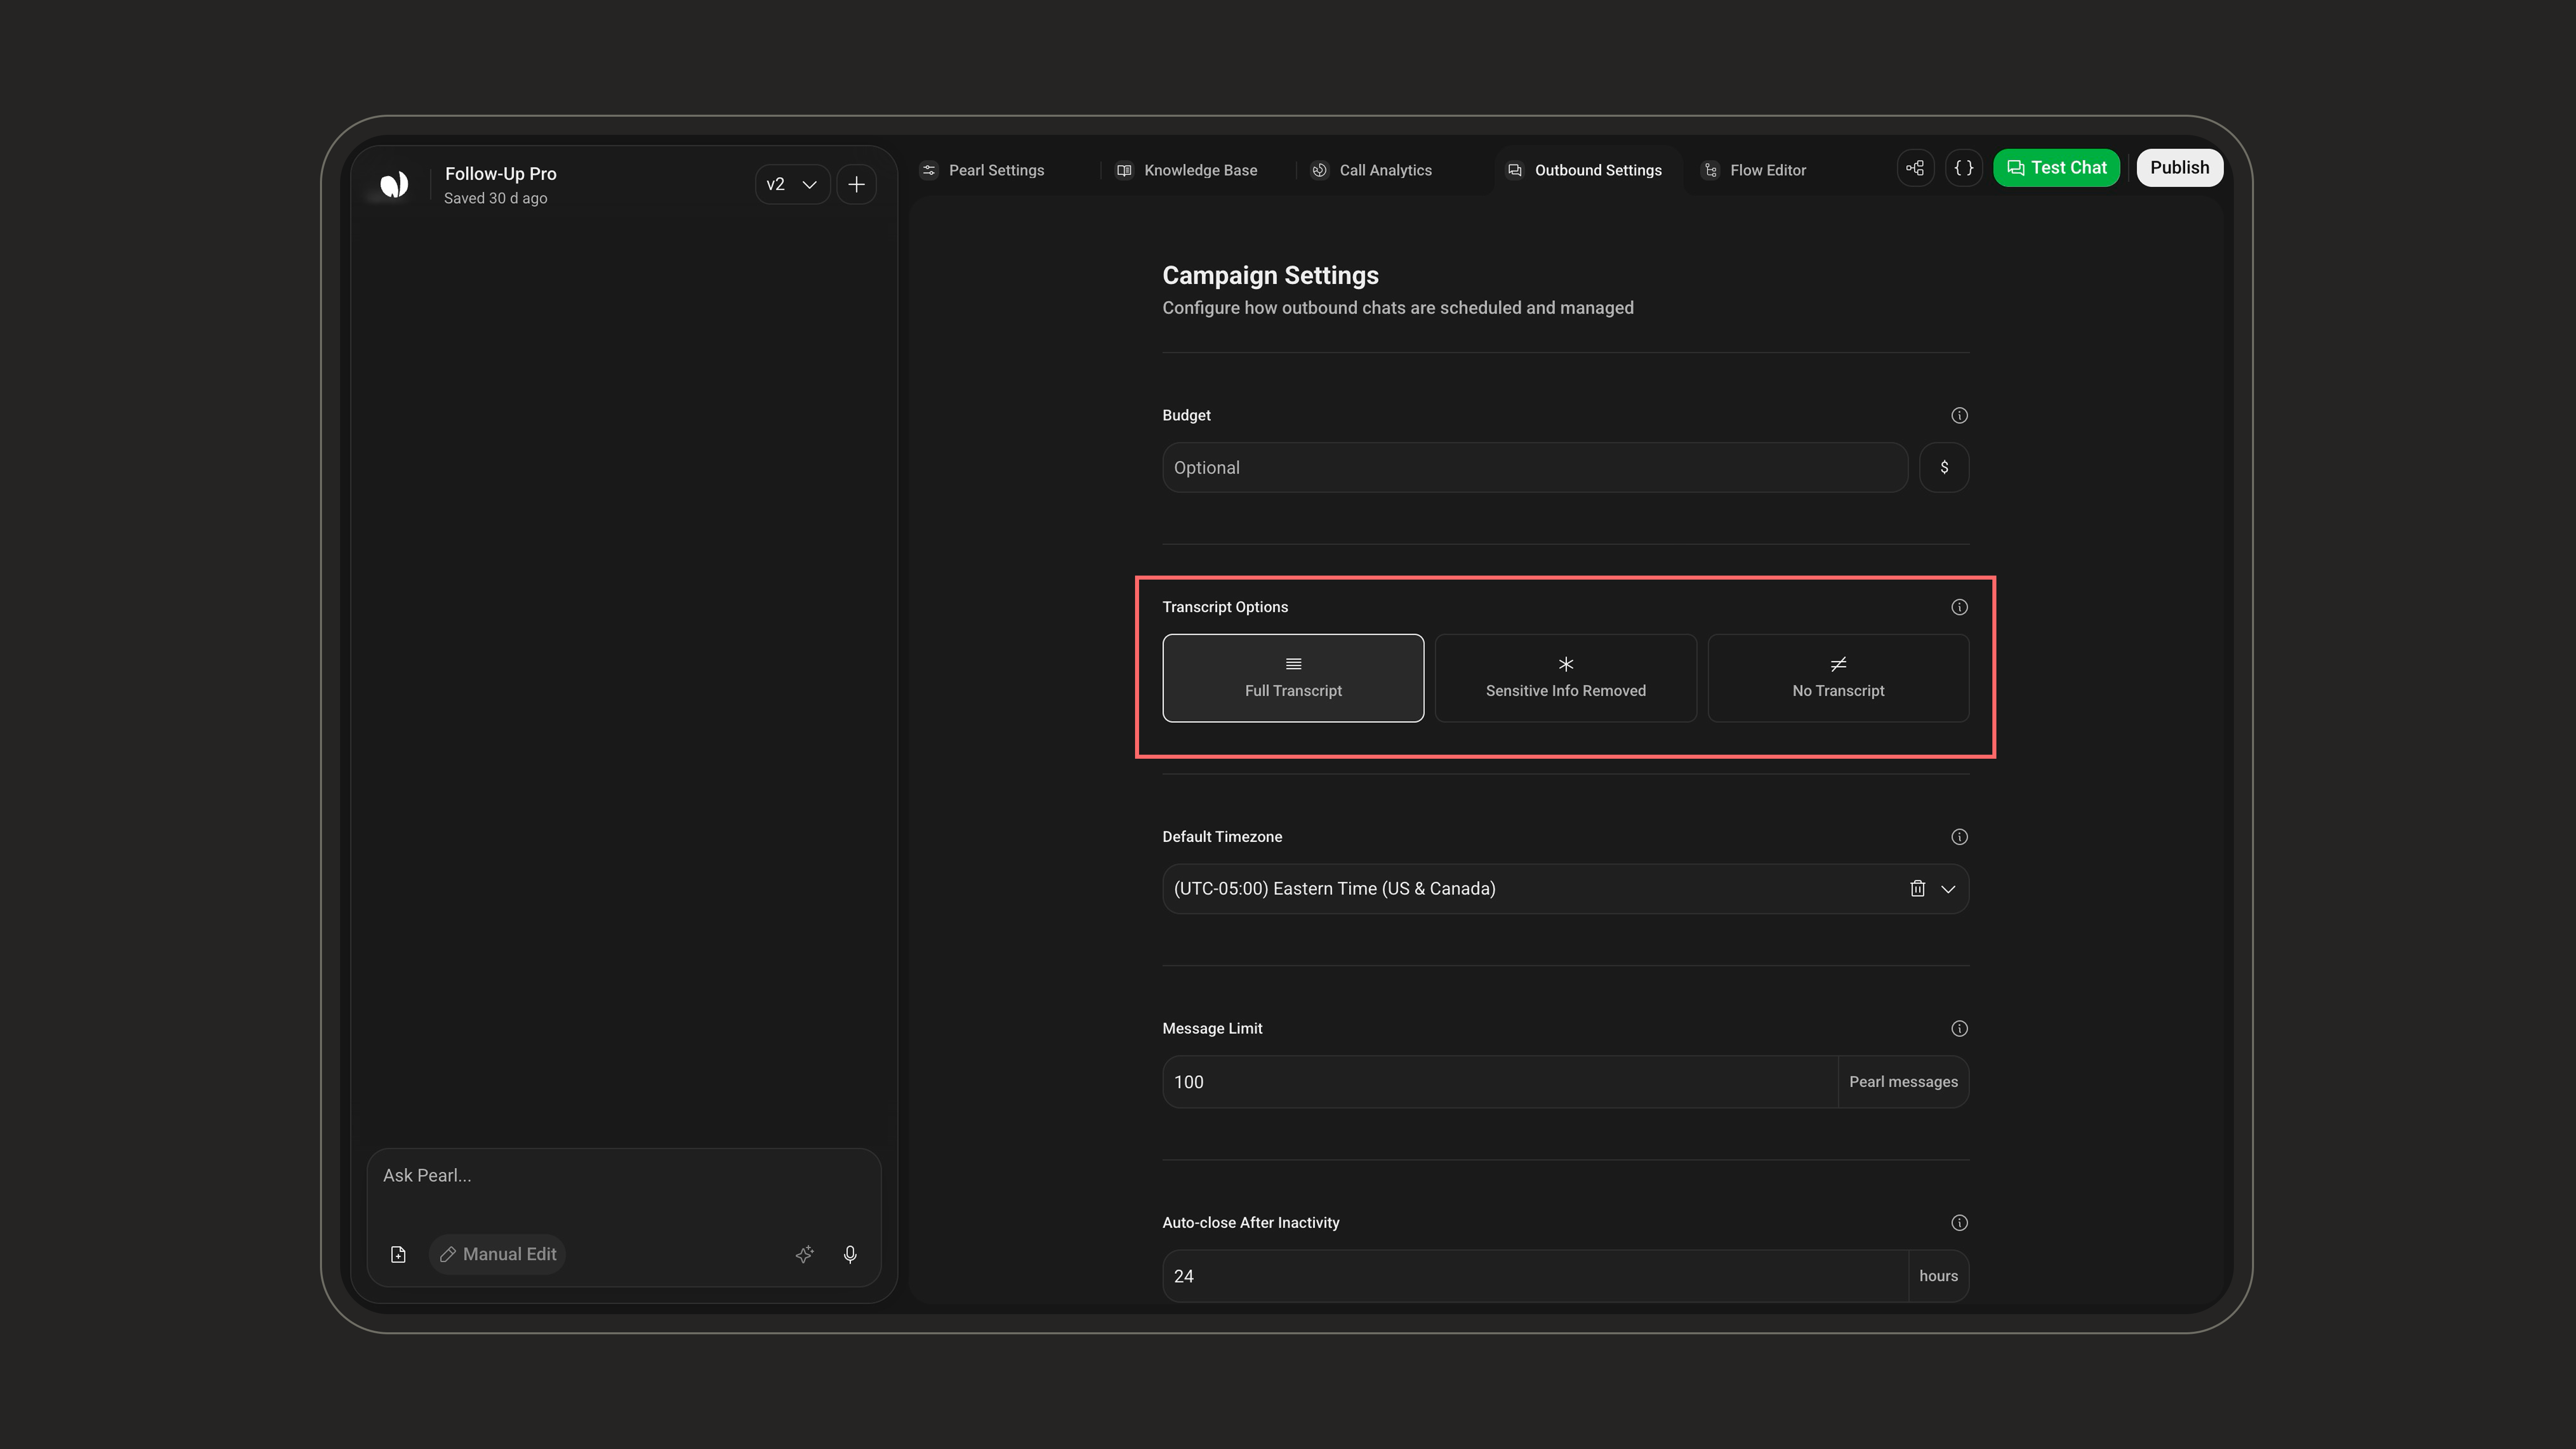
### Transcript Options
Choose what is kept from the conversation transcript. Transcripts appear in your conversation logs.
***
### Transcript Options
Choose what is kept from the conversation transcript. Transcripts appear in your conversation logs.
 | Option | Description | When to use |
| -------------------------- | ------------------------------------------------------------------------------------------------------------------------------------------------ | ------------------------------------ |
| **Full Transcript** | Keeps the entire conversation as-is. | Complete analysis, QA, and training. |
| **Sensitive Info Removed** | Automatically masks sensitive data (credit card numbers, Social Security numbers, personal identifiers) while keeping the conversation readable. | Compliance and PII protection. |
| **No Transcript** | No transcript is stored for the conversation. | Maximum privacy. |
With **Sensitive Info Removed**, if a customer writes *"My credit card number is 1234-5678-9012-3456"*, the transcript stores it as *"My credit card number is \*\*\*\*-3456"*, so you can review interactions safely without exposing sensitive data.
***
### Default Timezone
Set the timezone for the campaign so that calling hours and scheduling are applied at the right local time.
| Option | Description | When to use |
| -------------------------- | ------------------------------------------------------------------------------------------------------------------------------------------------ | ------------------------------------ |
| **Full Transcript** | Keeps the entire conversation as-is. | Complete analysis, QA, and training. |
| **Sensitive Info Removed** | Automatically masks sensitive data (credit card numbers, Social Security numbers, personal identifiers) while keeping the conversation readable. | Compliance and PII protection. |
| **No Transcript** | No transcript is stored for the conversation. | Maximum privacy. |
With **Sensitive Info Removed**, if a customer writes *"My credit card number is 1234-5678-9012-3456"*, the transcript stores it as *"My credit card number is \*\*\*\*-3456"*, so you can review interactions safely without exposing sensitive data.
***
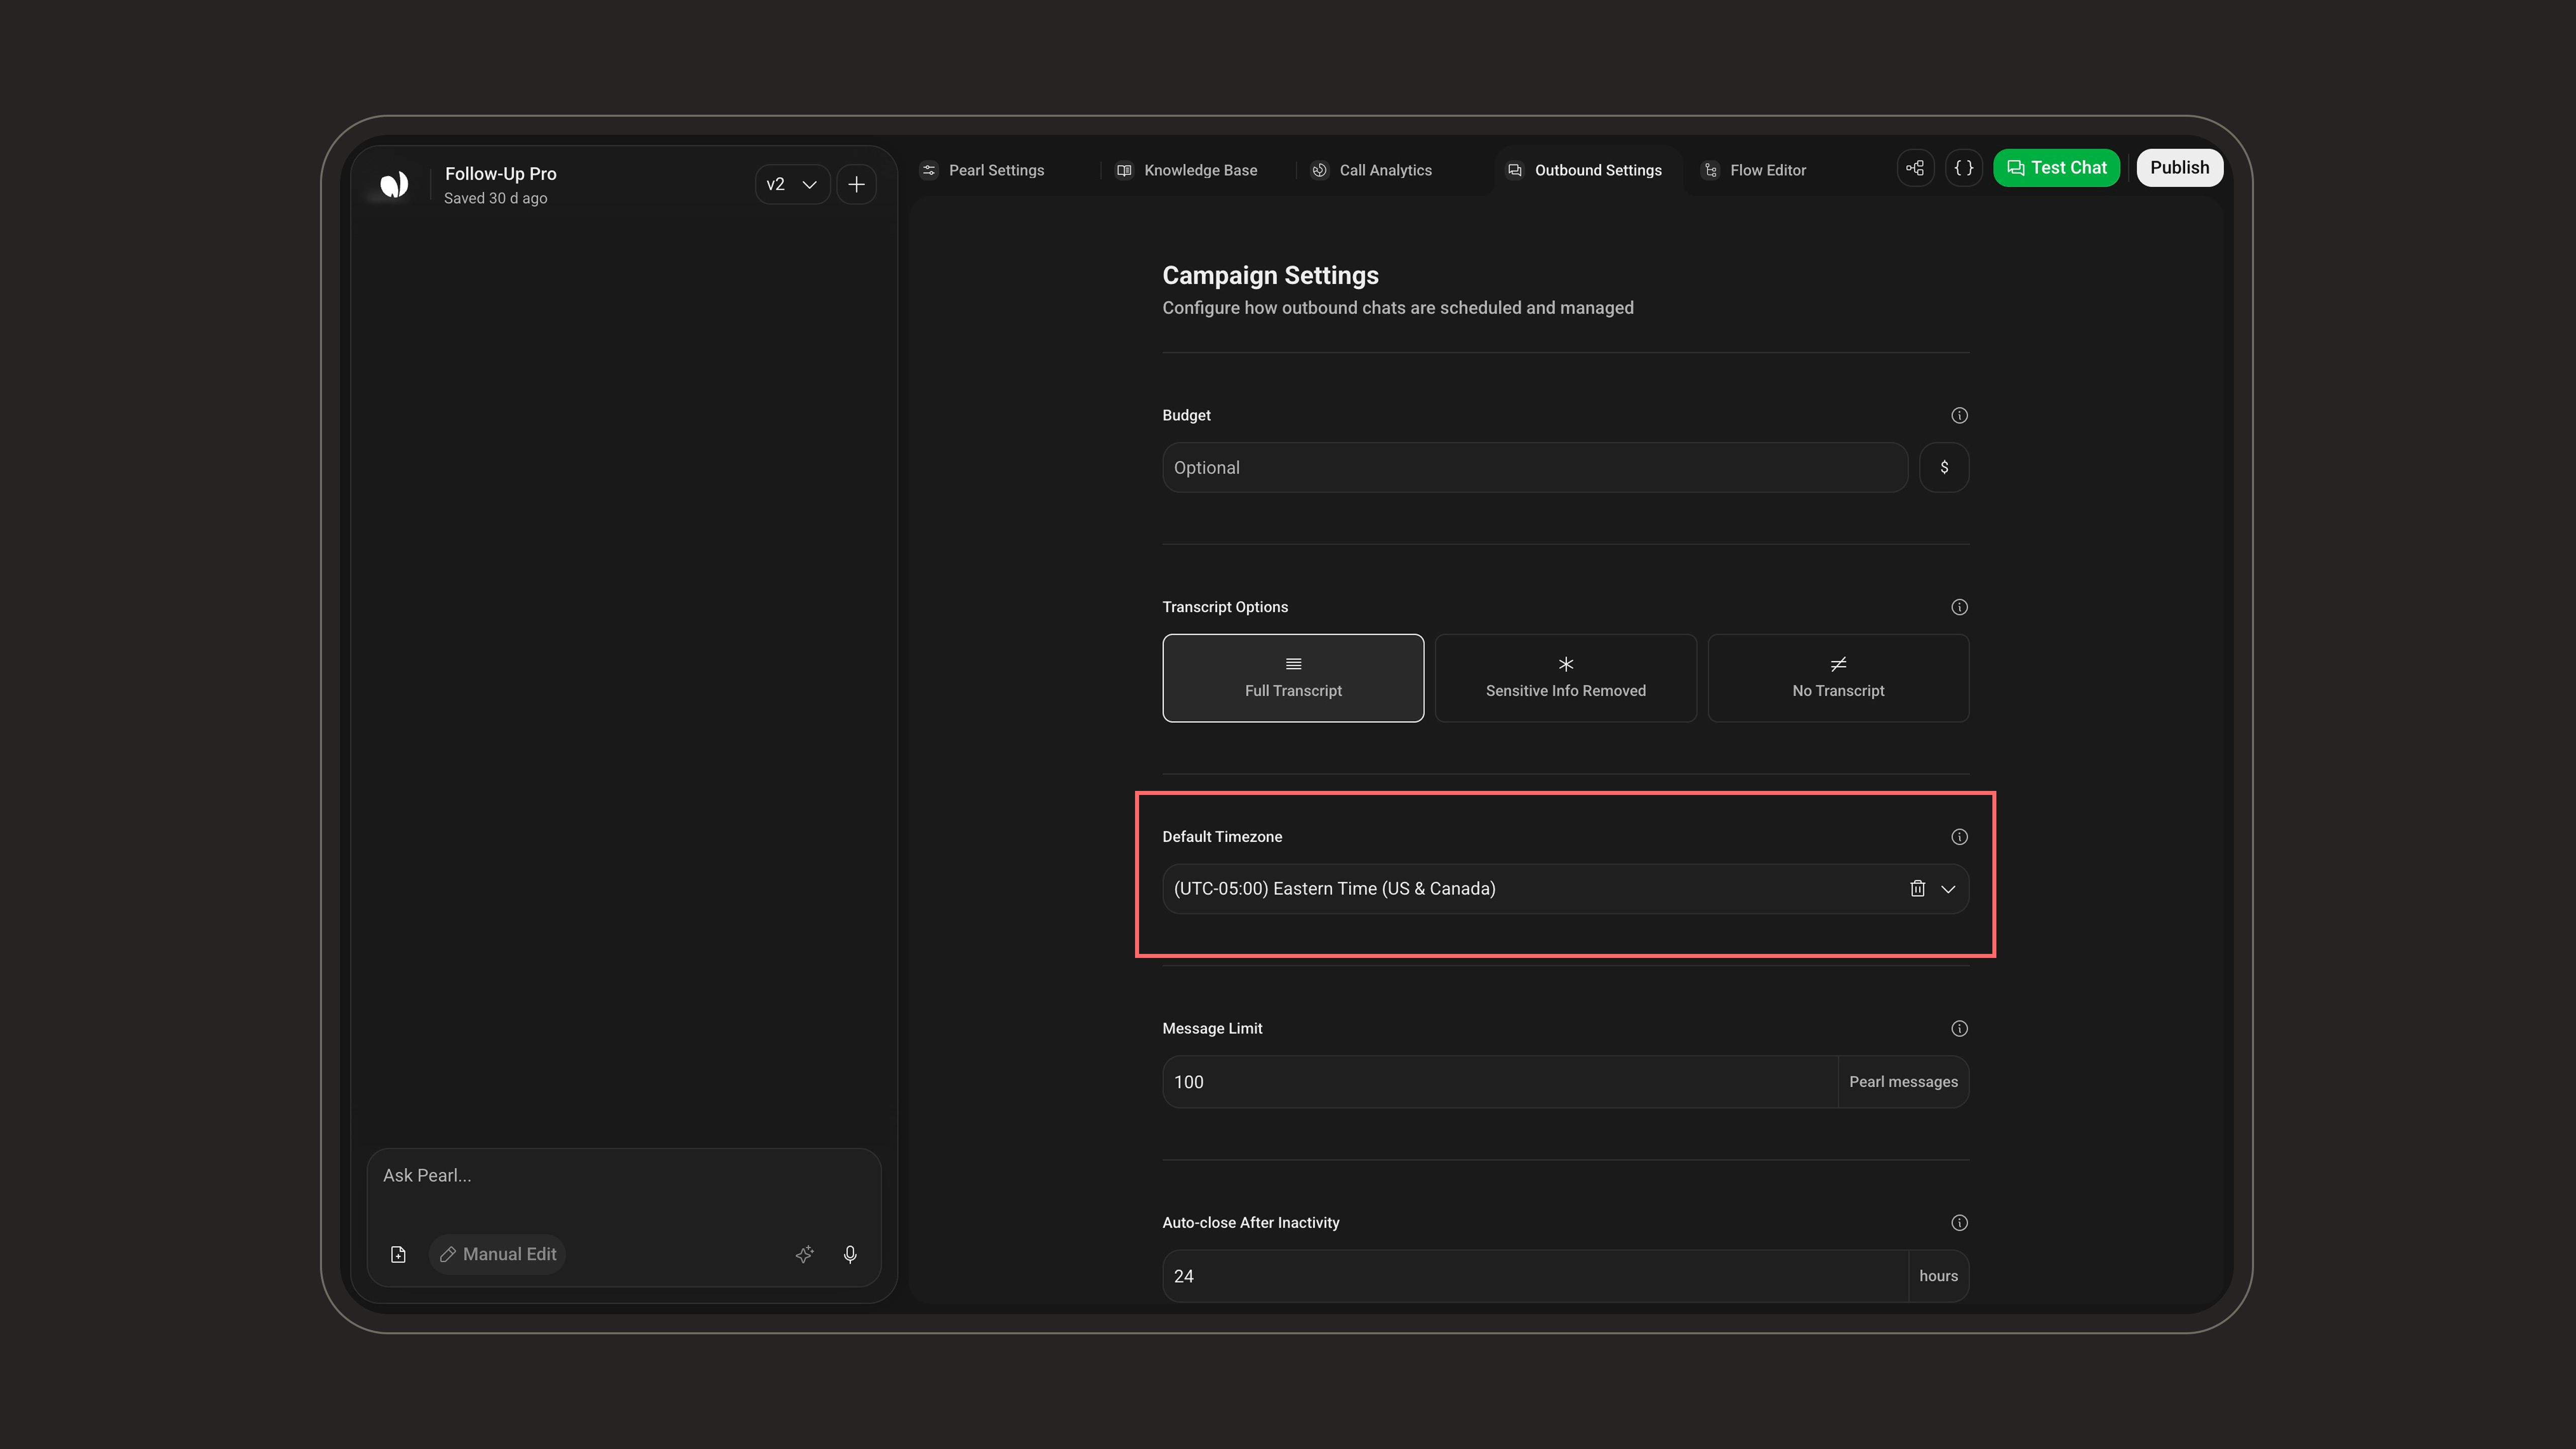
### Default Timezone
Set the timezone for the campaign so that calling hours and scheduling are applied at the right local time.
 ***
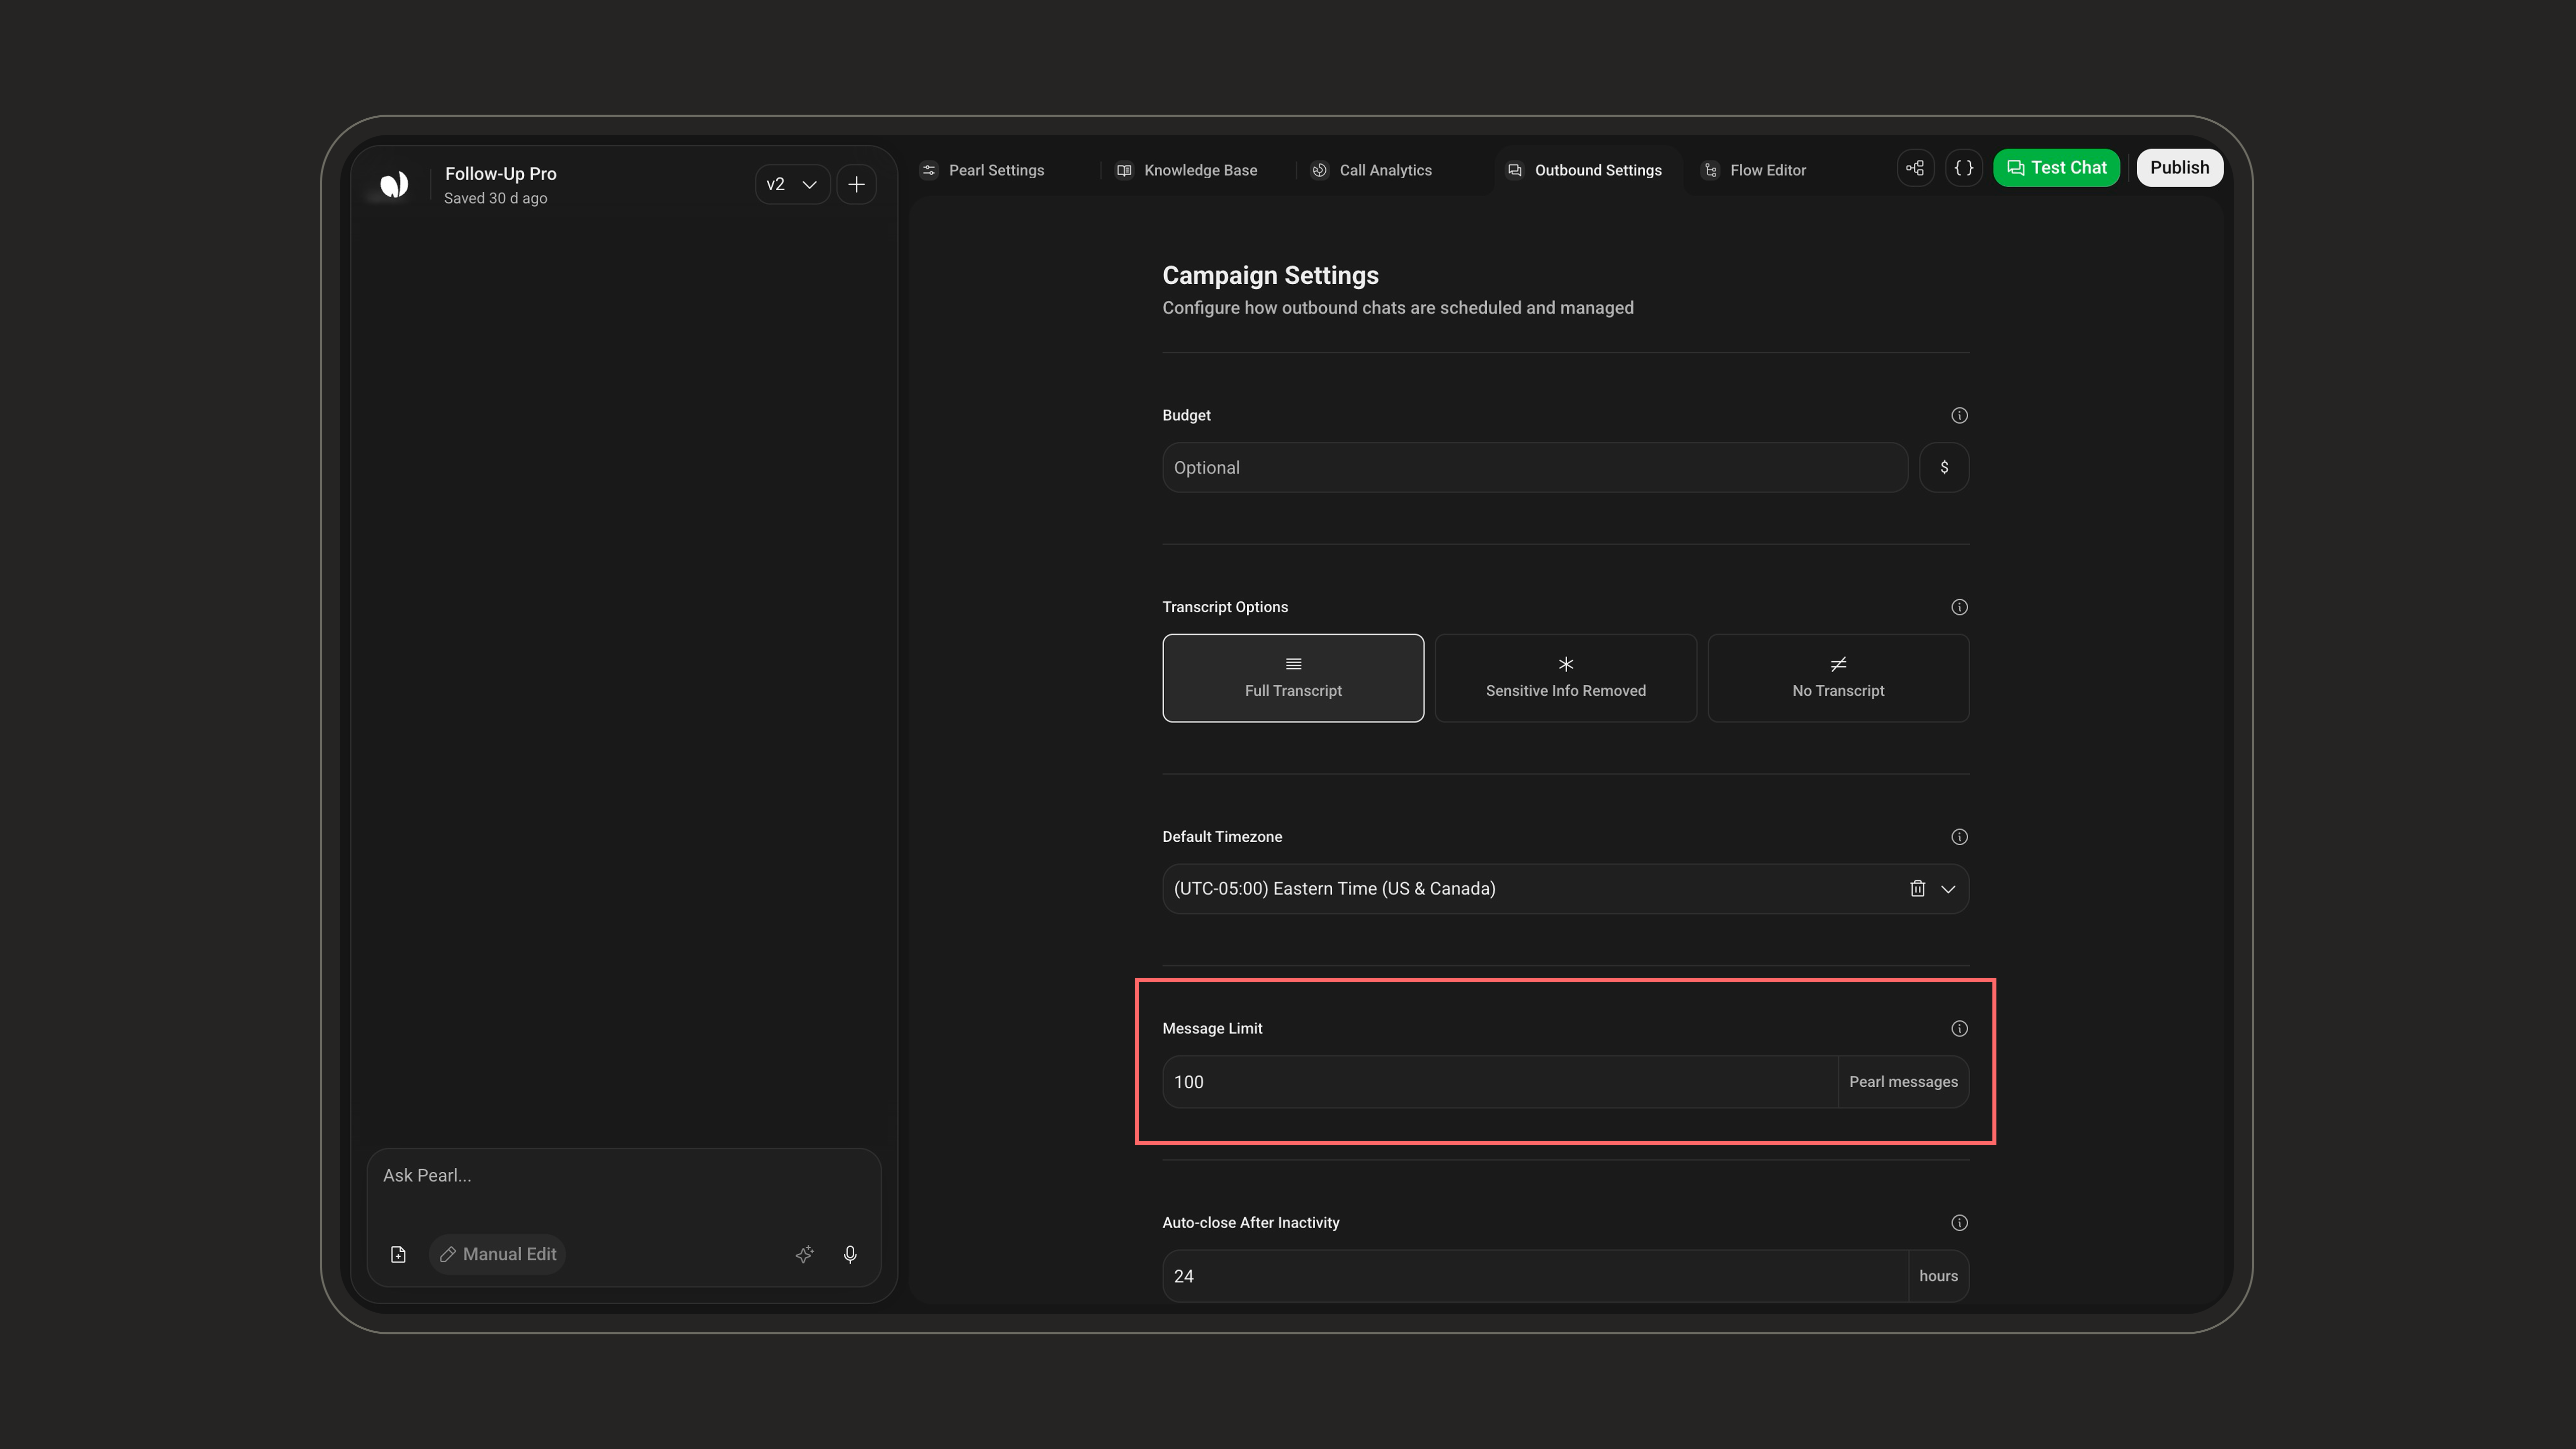
### Message Limit
The maximum number of messages Pearl sends before automatically handing the conversation off to a human. You can set between **5 and 1000** messages (default **100**).
***
### Message Limit
The maximum number of messages Pearl sends before automatically handing the conversation off to a human. You can set between **5 and 1000** messages (default **100**).
 ***
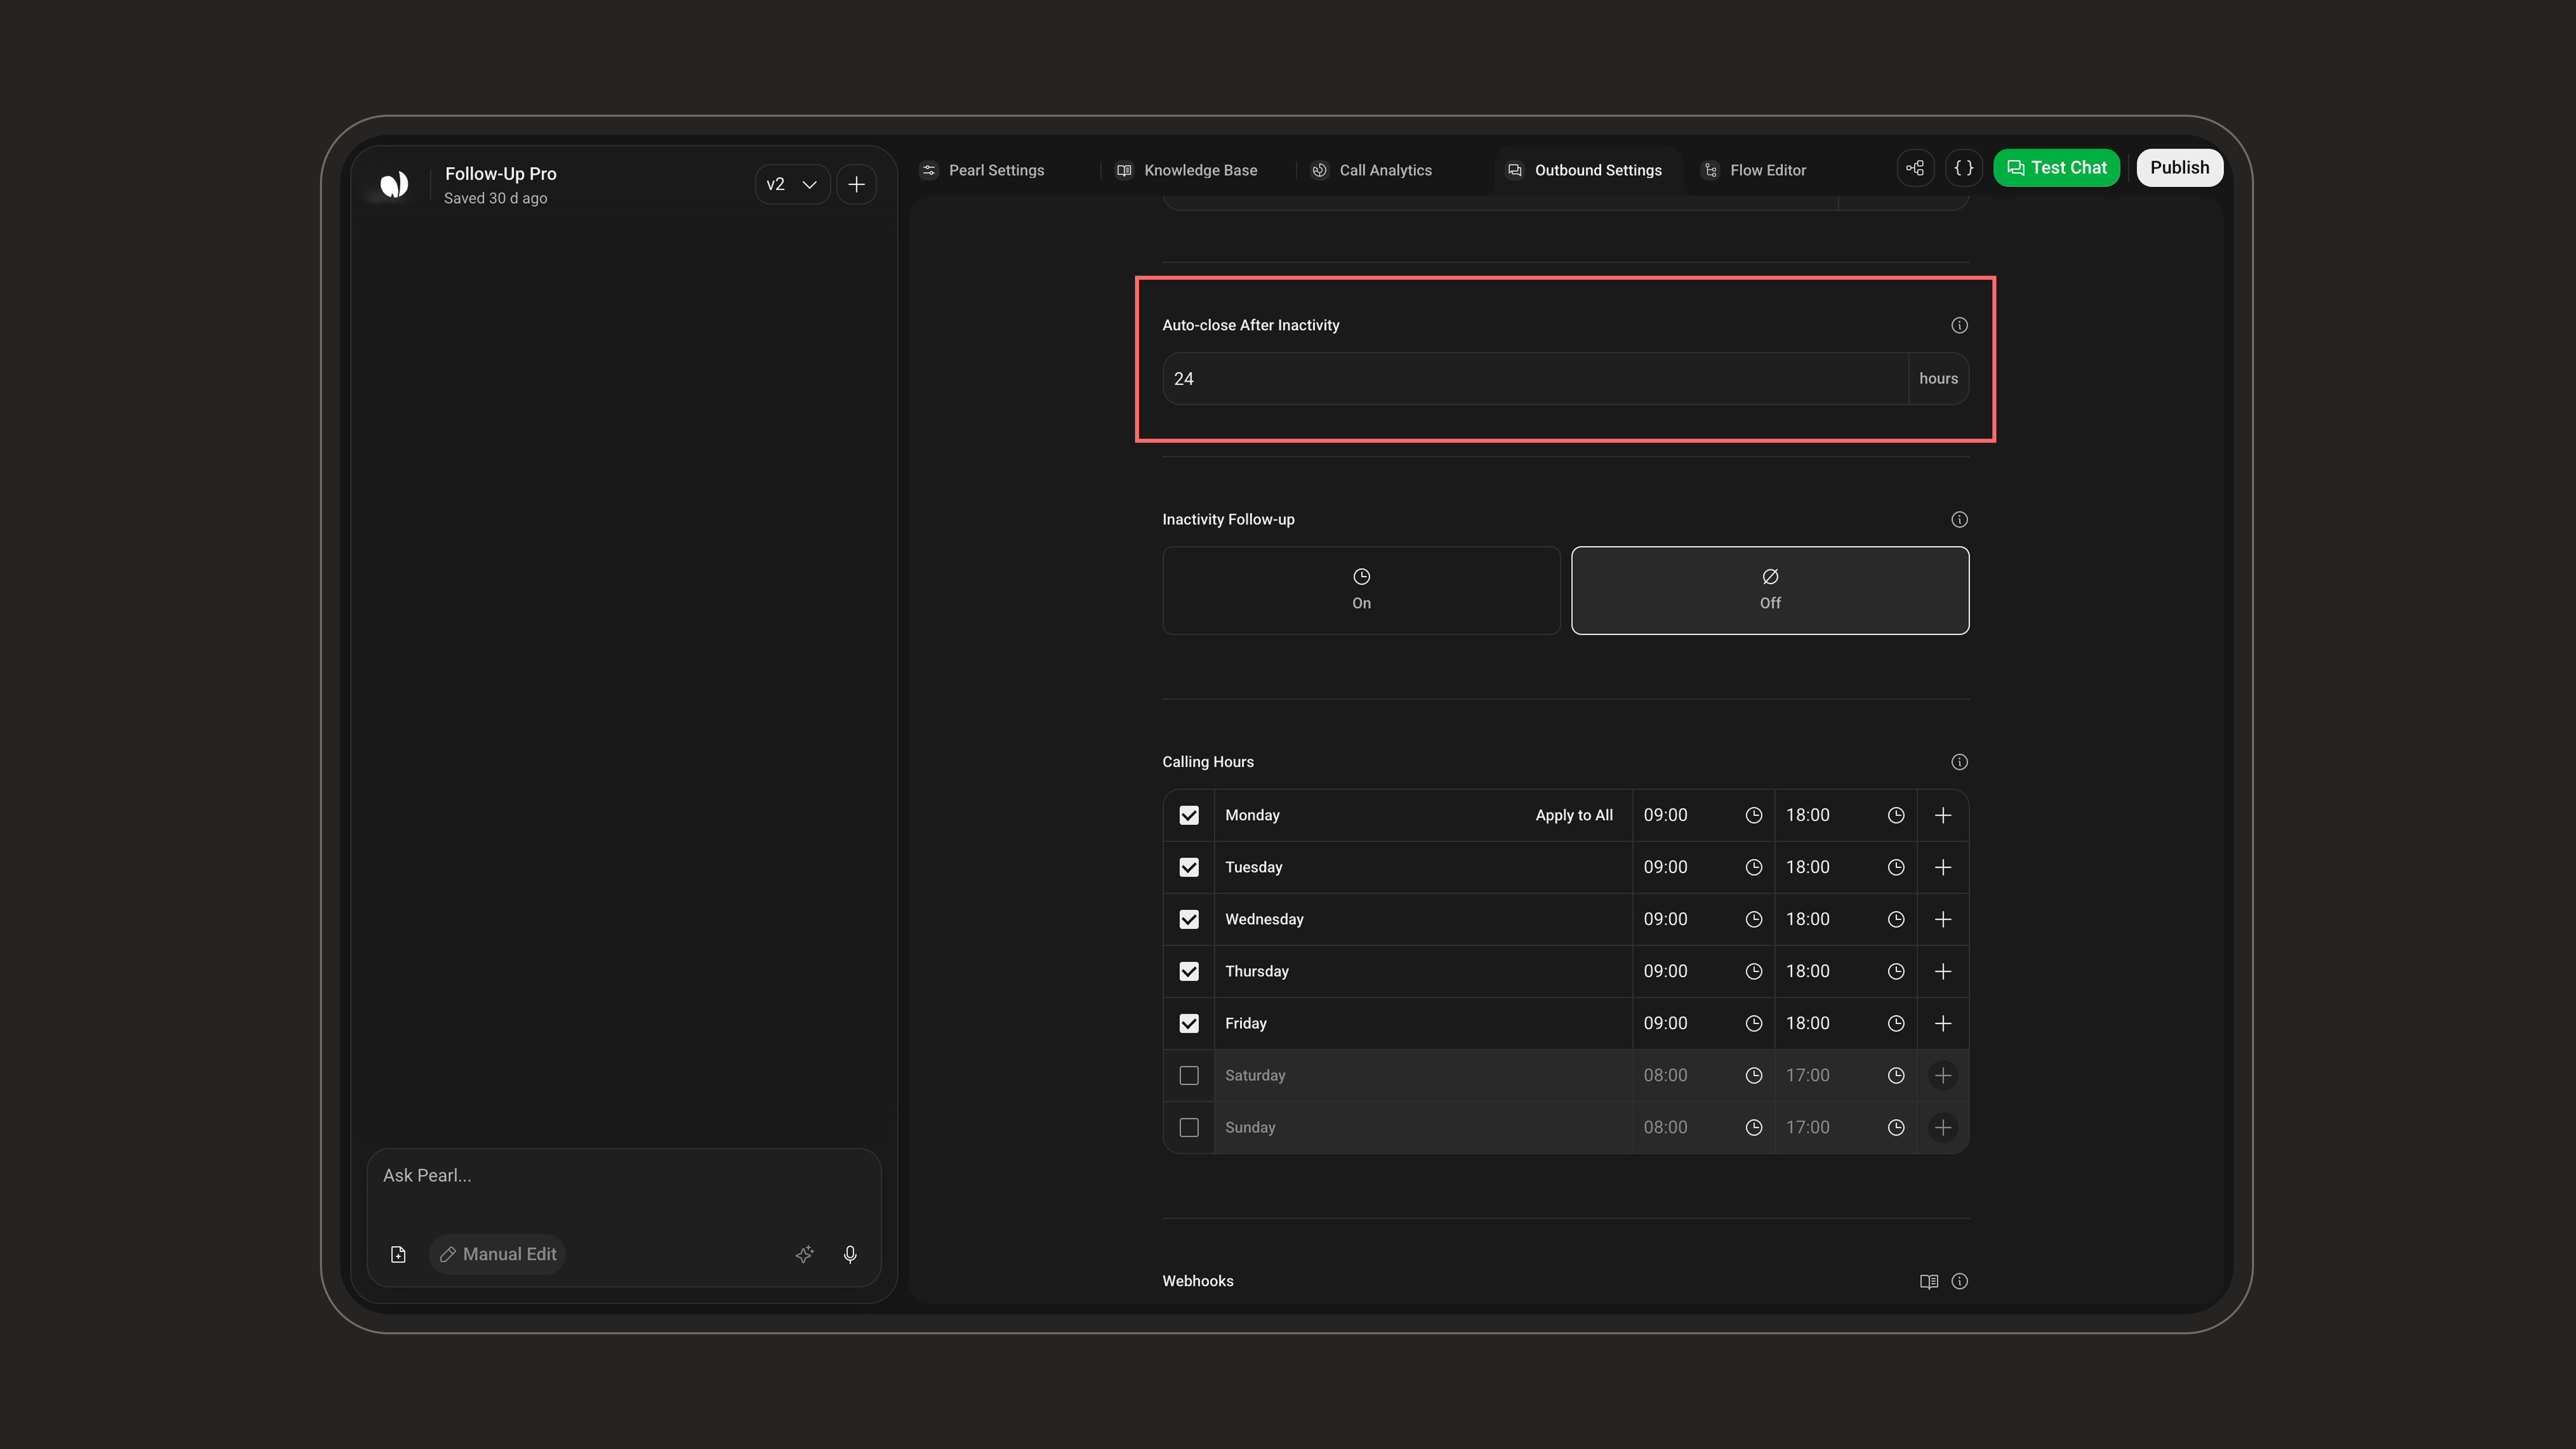
### Auto-close After Inactivity
How long a conversation can stay inactive before Pearl closes the chat and triggers the post-chat summary. You can set between **1 and 72 hours** (default **24 hours**).
***
### Auto-close After Inactivity
How long a conversation can stay inactive before Pearl closes the chat and triggers the post-chat summary. You can set between **1 and 72 hours** (default **24 hours**).
 ***
### Inactivity Follow-up
When enabled (on/off), Pearl sends follow-up messages when the lead stops replying after Pearl's last message, to re-engage the conversation.
***
### Inactivity Follow-up
When enabled (on/off), Pearl sends follow-up messages when the lead stops replying after Pearl's last message, to re-engage the conversation.
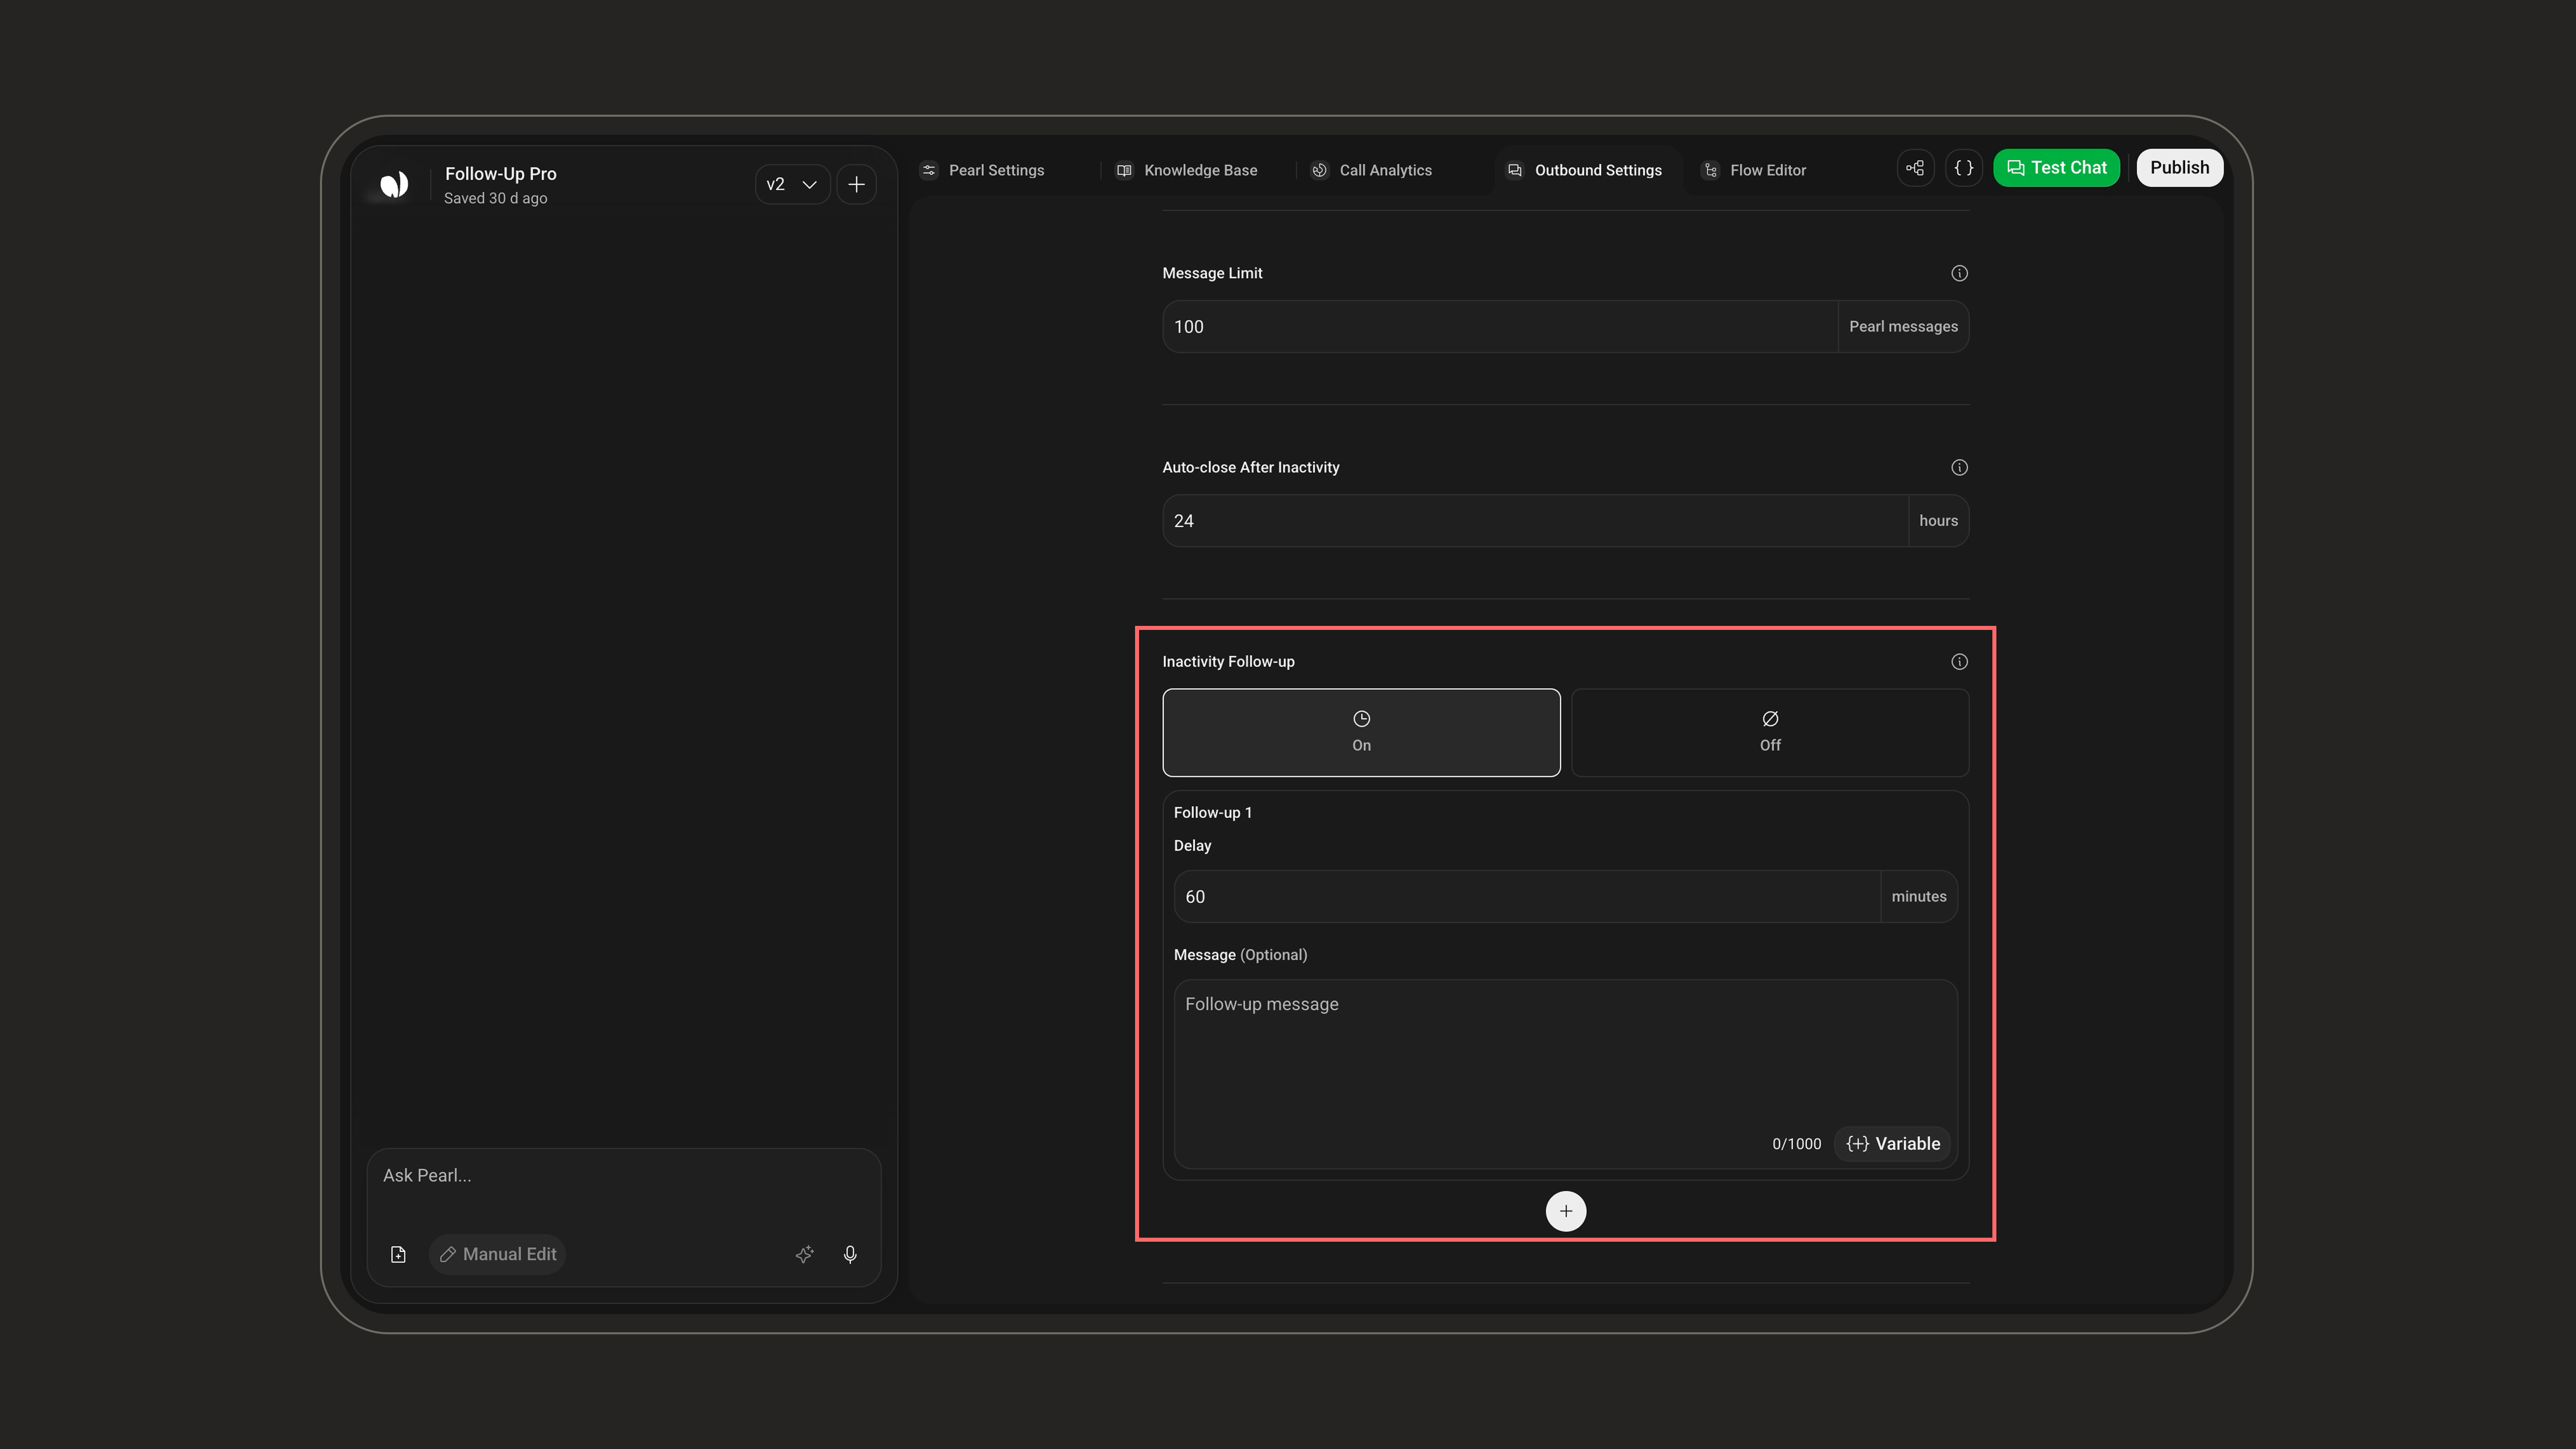 * **Up to 3 follow-ups**: each one is a **delay** plus an optional **message**.
* **Minimum delay**: at least **30 minutes** between follow-ups for outbound.
* **Default**: a single follow-up sent after **60 minutes**.
Follow-up messages can use **Pre-Call** variables (e.g. the lead's first name) to keep the re-engagement personal.
***
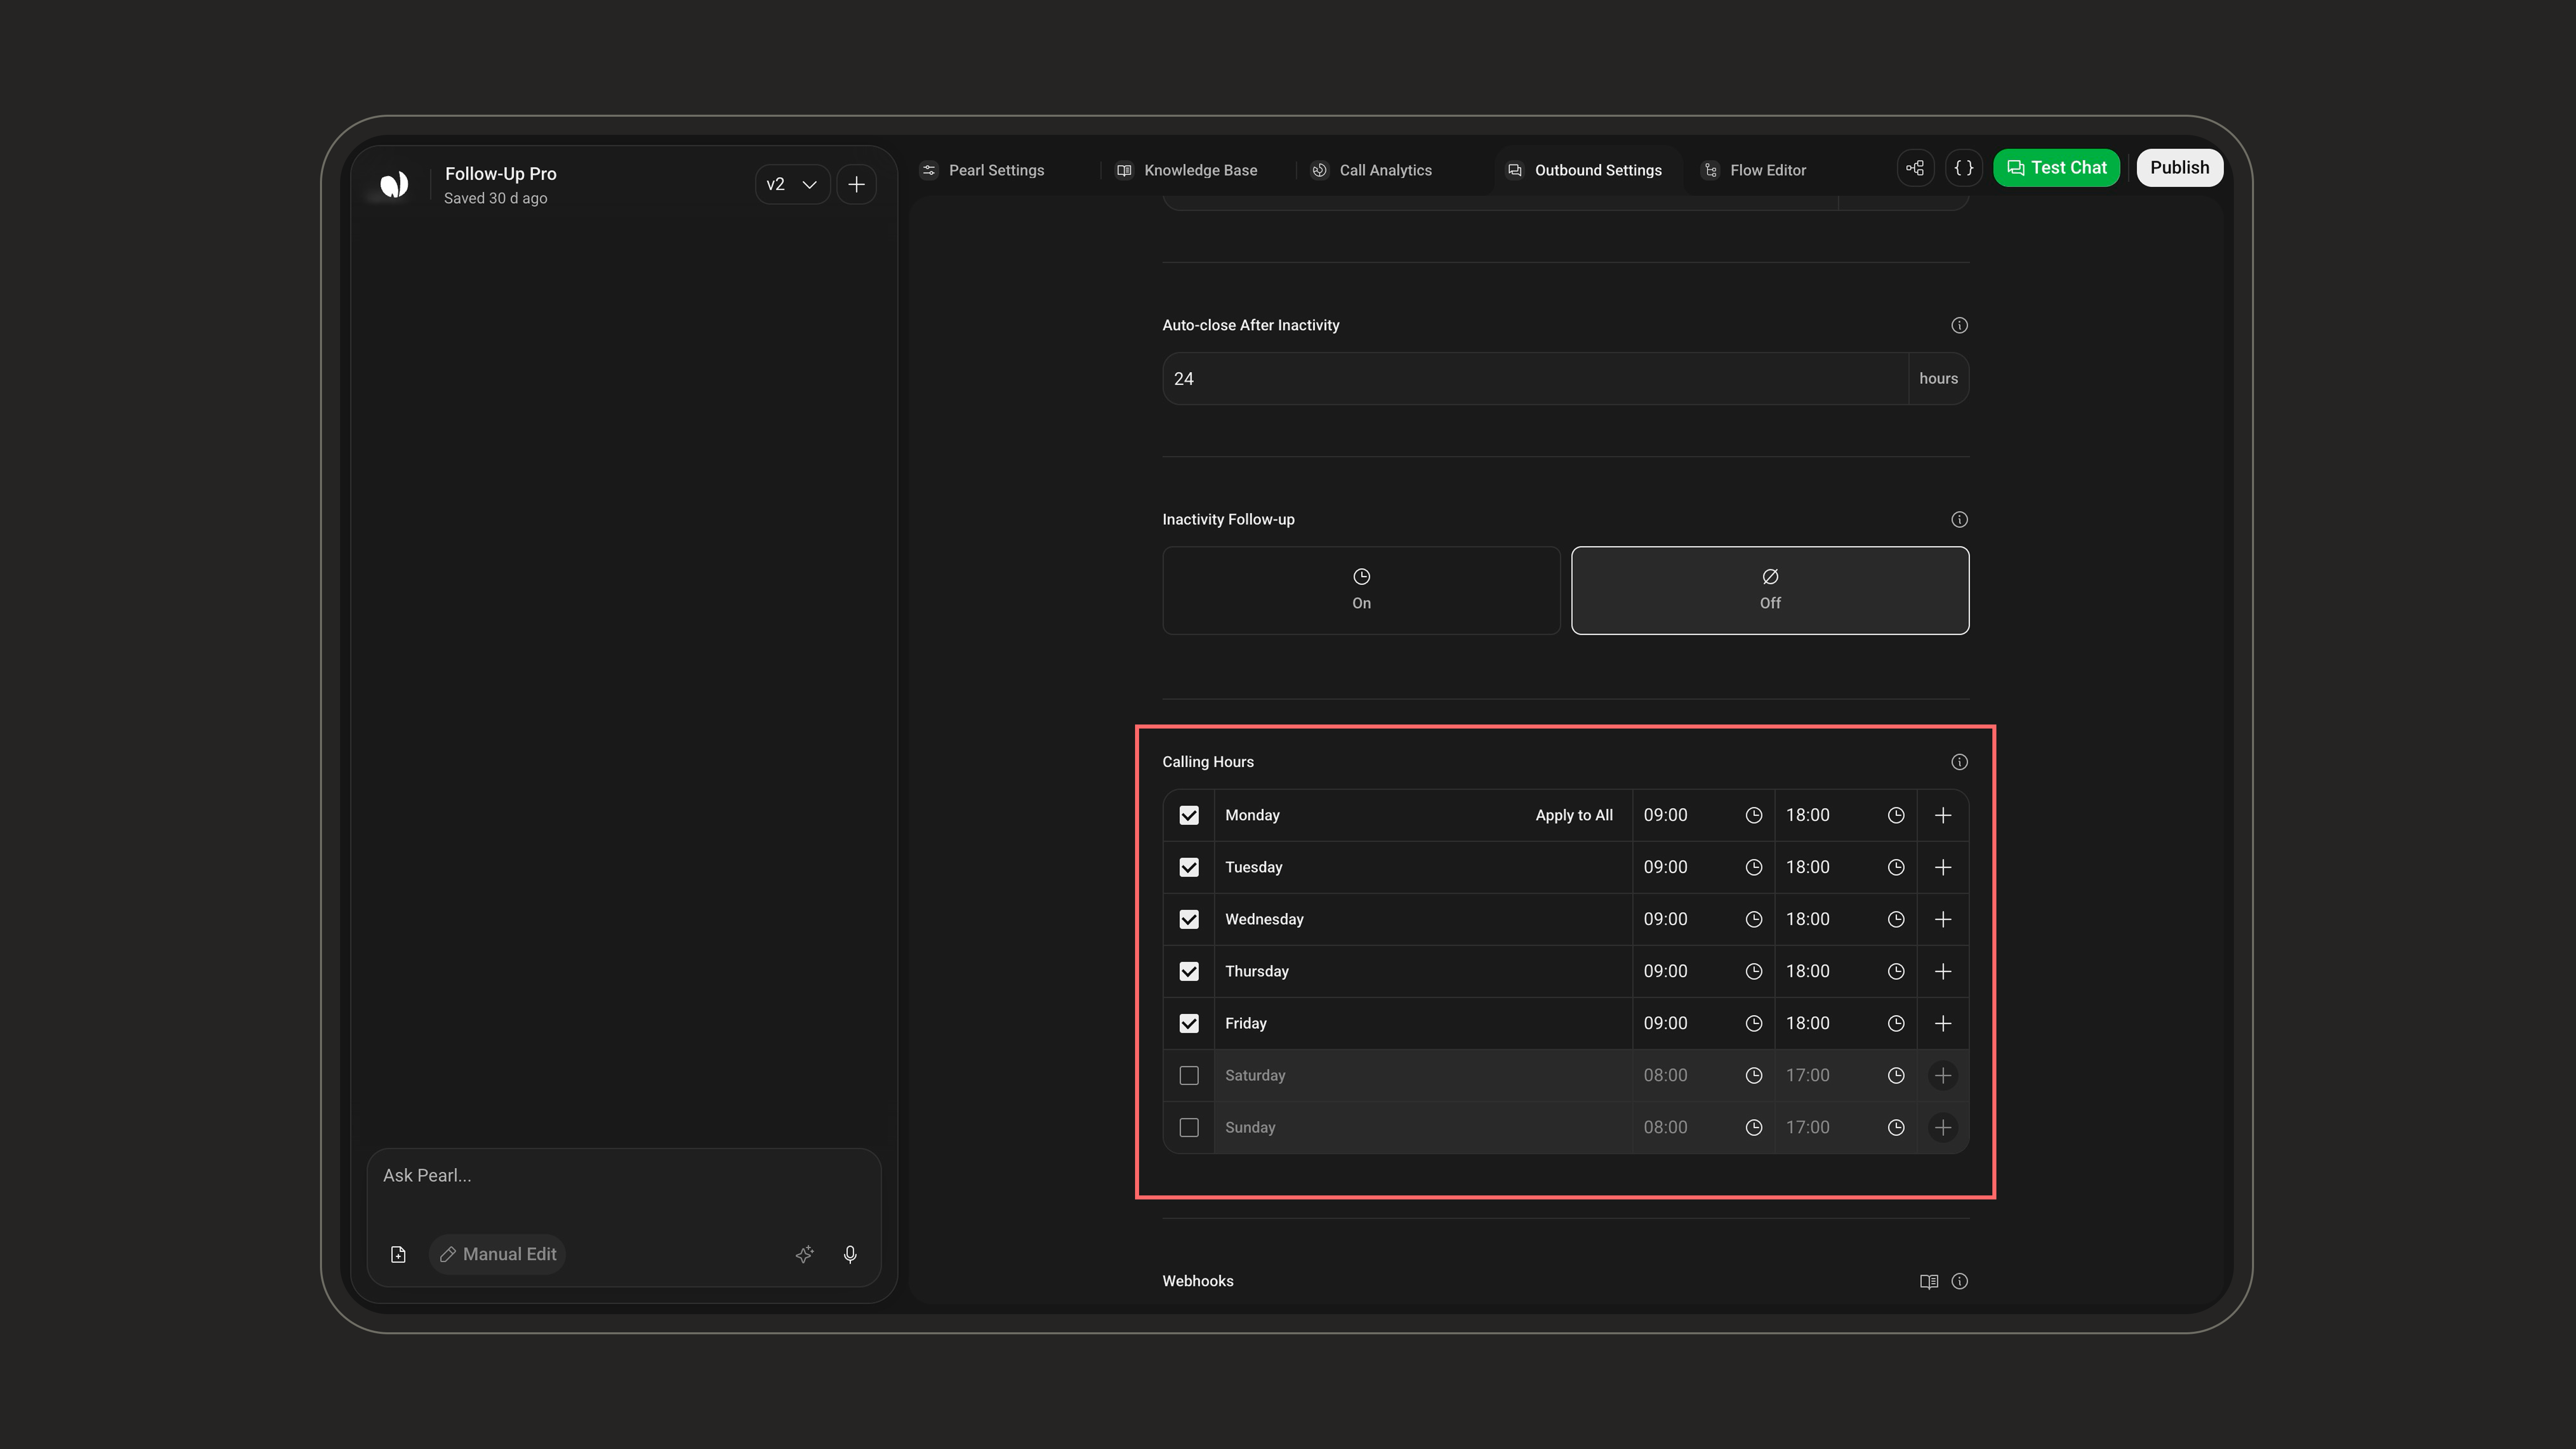
### Calling Hours
Define the hours during which Pearl is allowed to send outbound messages. By default, messages go out **Monday to Friday, 08:00–18:00**. Calling hours respect each lead's timezone, so everyone is contacted at an appropriate local time.
* **Up to 3 follow-ups**: each one is a **delay** plus an optional **message**.
* **Minimum delay**: at least **30 minutes** between follow-ups for outbound.
* **Default**: a single follow-up sent after **60 minutes**.
Follow-up messages can use **Pre-Call** variables (e.g. the lead's first name) to keep the re-engagement personal.
***
### Calling Hours
Define the hours during which Pearl is allowed to send outbound messages. By default, messages go out **Monday to Friday, 08:00–18:00**. Calling hours respect each lead's timezone, so everyone is contacted at an appropriate local time.
 ***
### Webhooks
Send conversation and lead events to an external endpoint, useful for tracking performance and keeping your CRM in sync.
***
### Webhooks
Send conversation and lead events to an external endpoint, useful for tracking performance and keeping your CRM in sync.
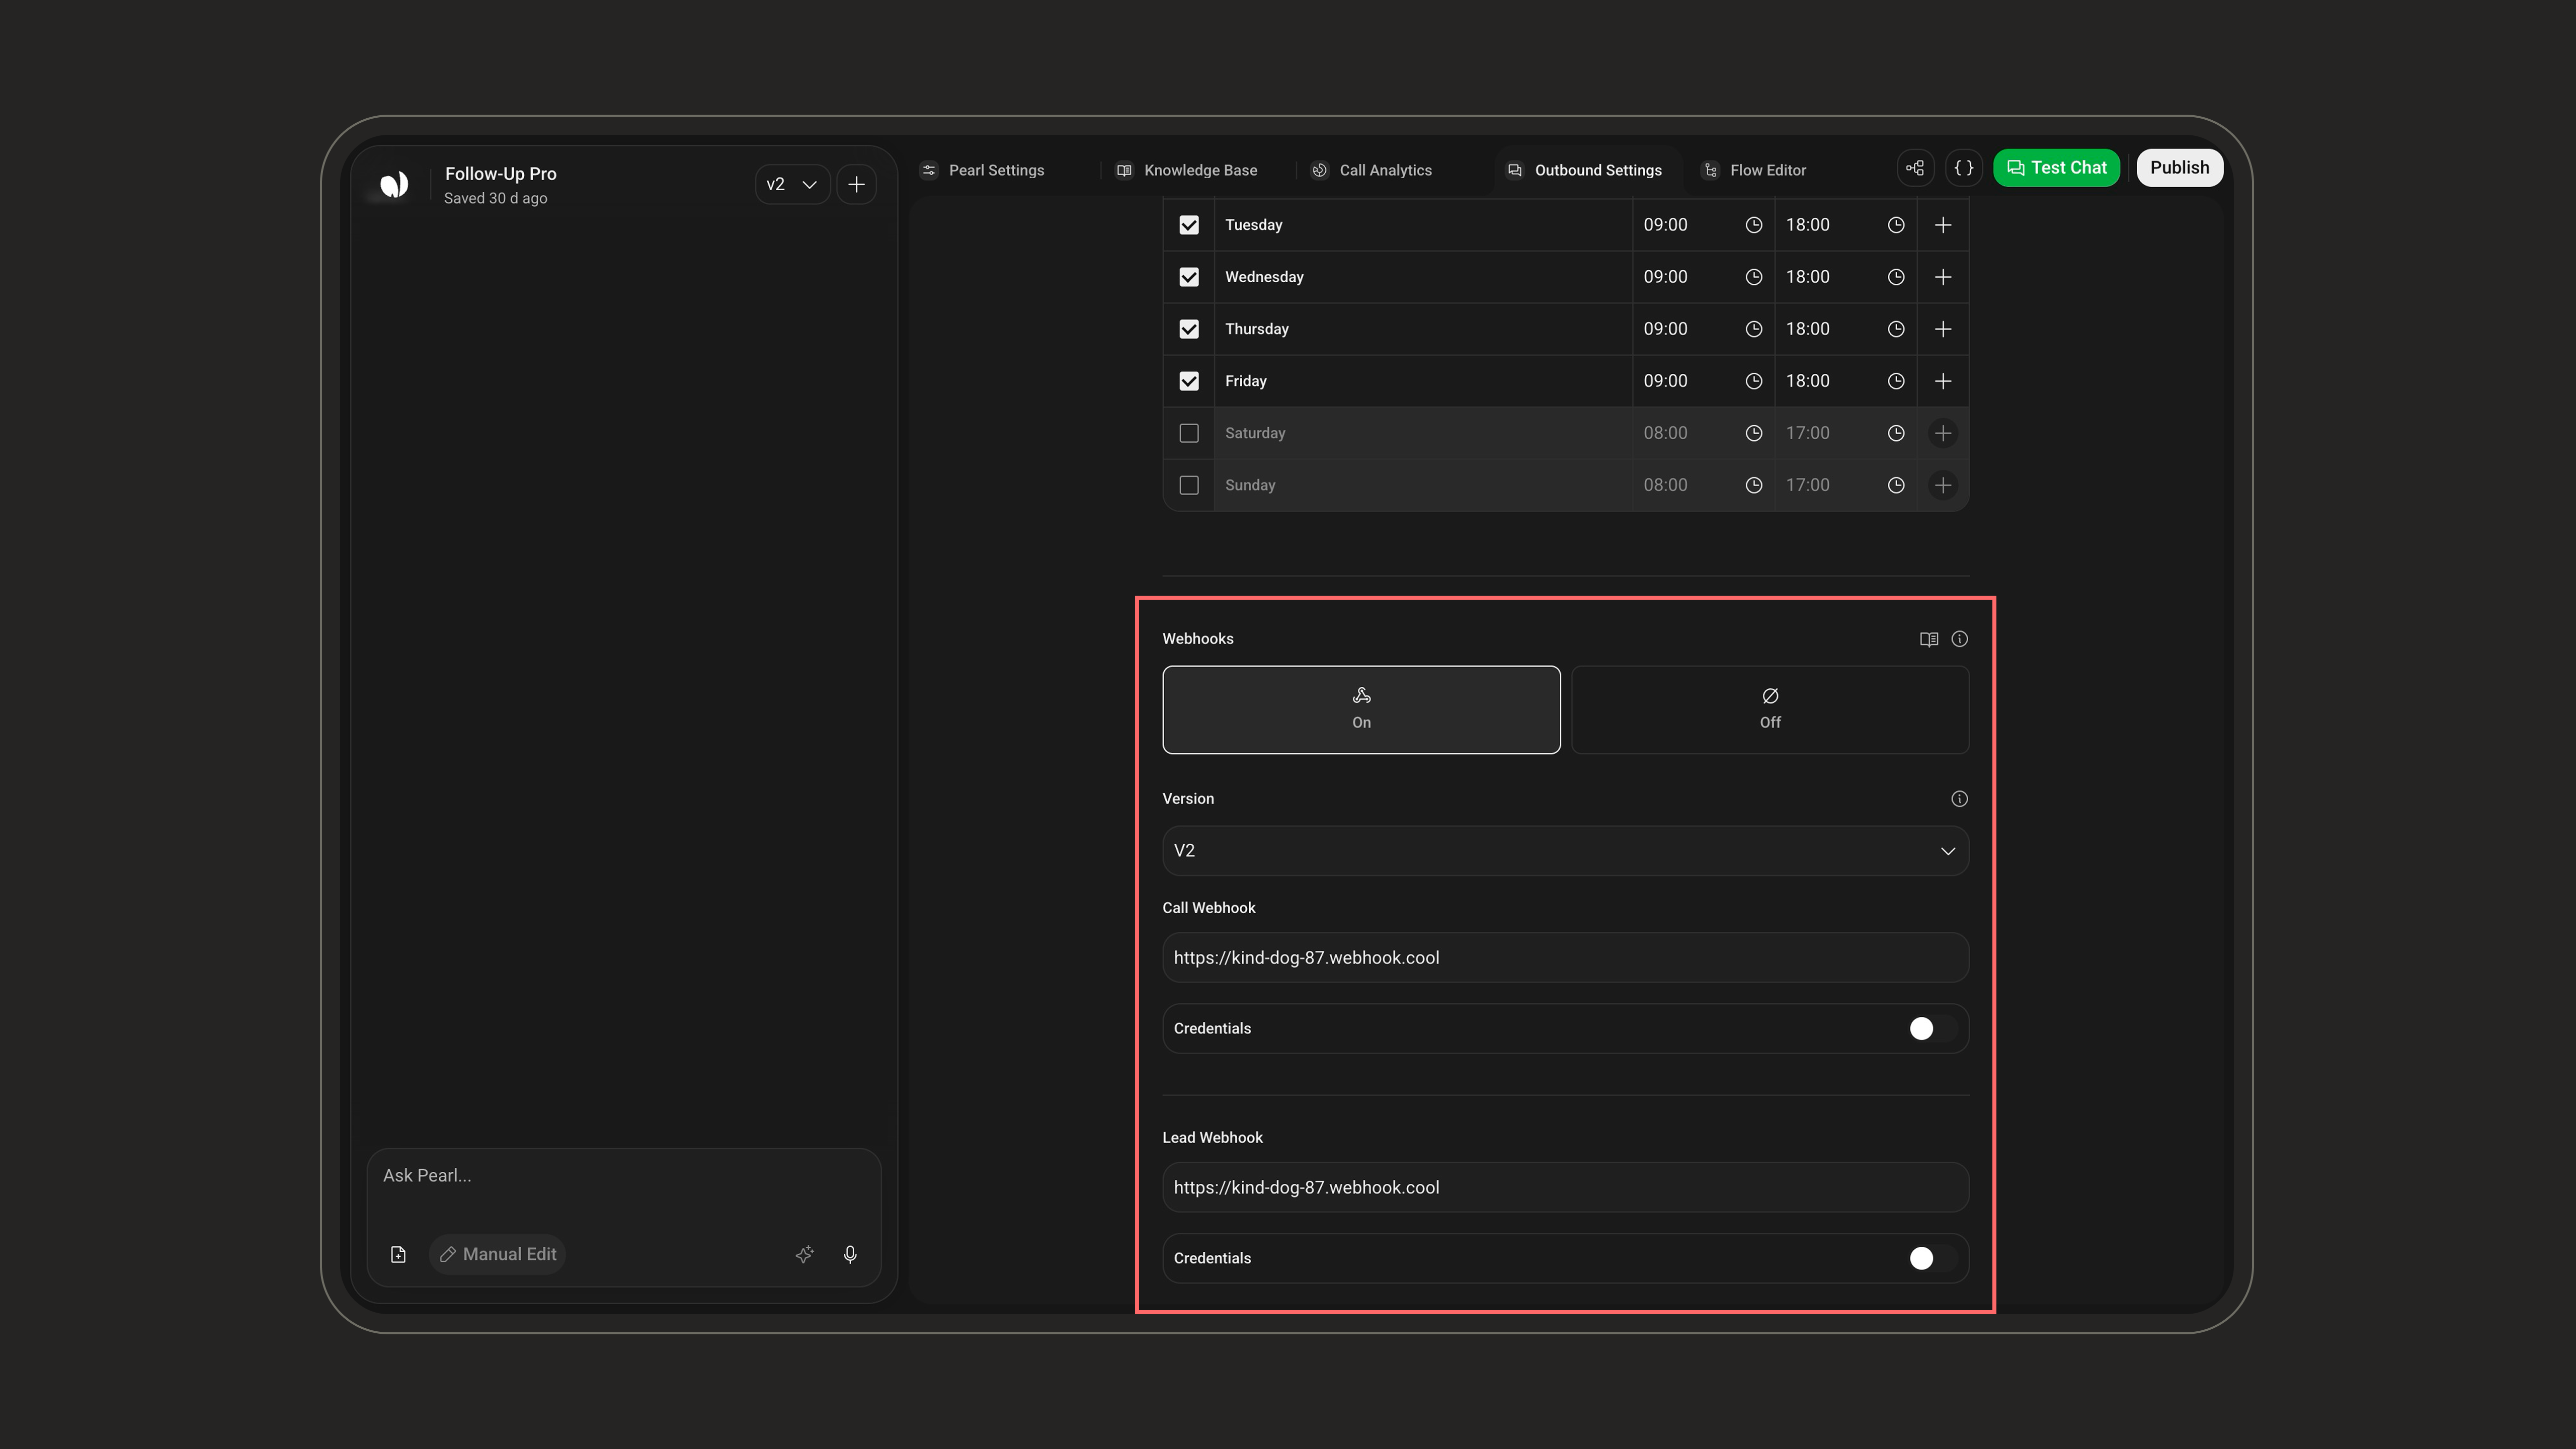 * **Chat Webhook**: fires at key points in the conversation lifecycle (when the chat starts and ends), sending details like the outcome and any data collected during the conversation.
* **Lead Webhook**: fires whenever a lead changes status (at the start and end of the conversation), sending the lead's full information and current status. Use it to update your CRM in real time.
Each webhook supports:
* **Version**: `V1` or `V2` (default **V2**).
* **Credentials**: optional authentication token attached to the requests so your endpoint can verify they come from NLPearl.
Use Webhooks only if external tools need event notifications. For actual automations, rely on **Post-Chat Actions** tied to how the conversation ended.
Learn how to configure webhooks, authenticate requests, and handle the events NLPearl sends.
***
## Project-Level Settings
A few settings live at the **Project** level rather than in the campaign settings screen. Open them from the settings popover on your Pearl.
### Agents
Sets how many **simultaneous agents** run this campaign, i.e. how many conversations can be handled at the same time, capped by your account's agent quota. A higher number allows faster outreach.
Learn how to manage the agents assigned to your inbound and outbound activities.
***
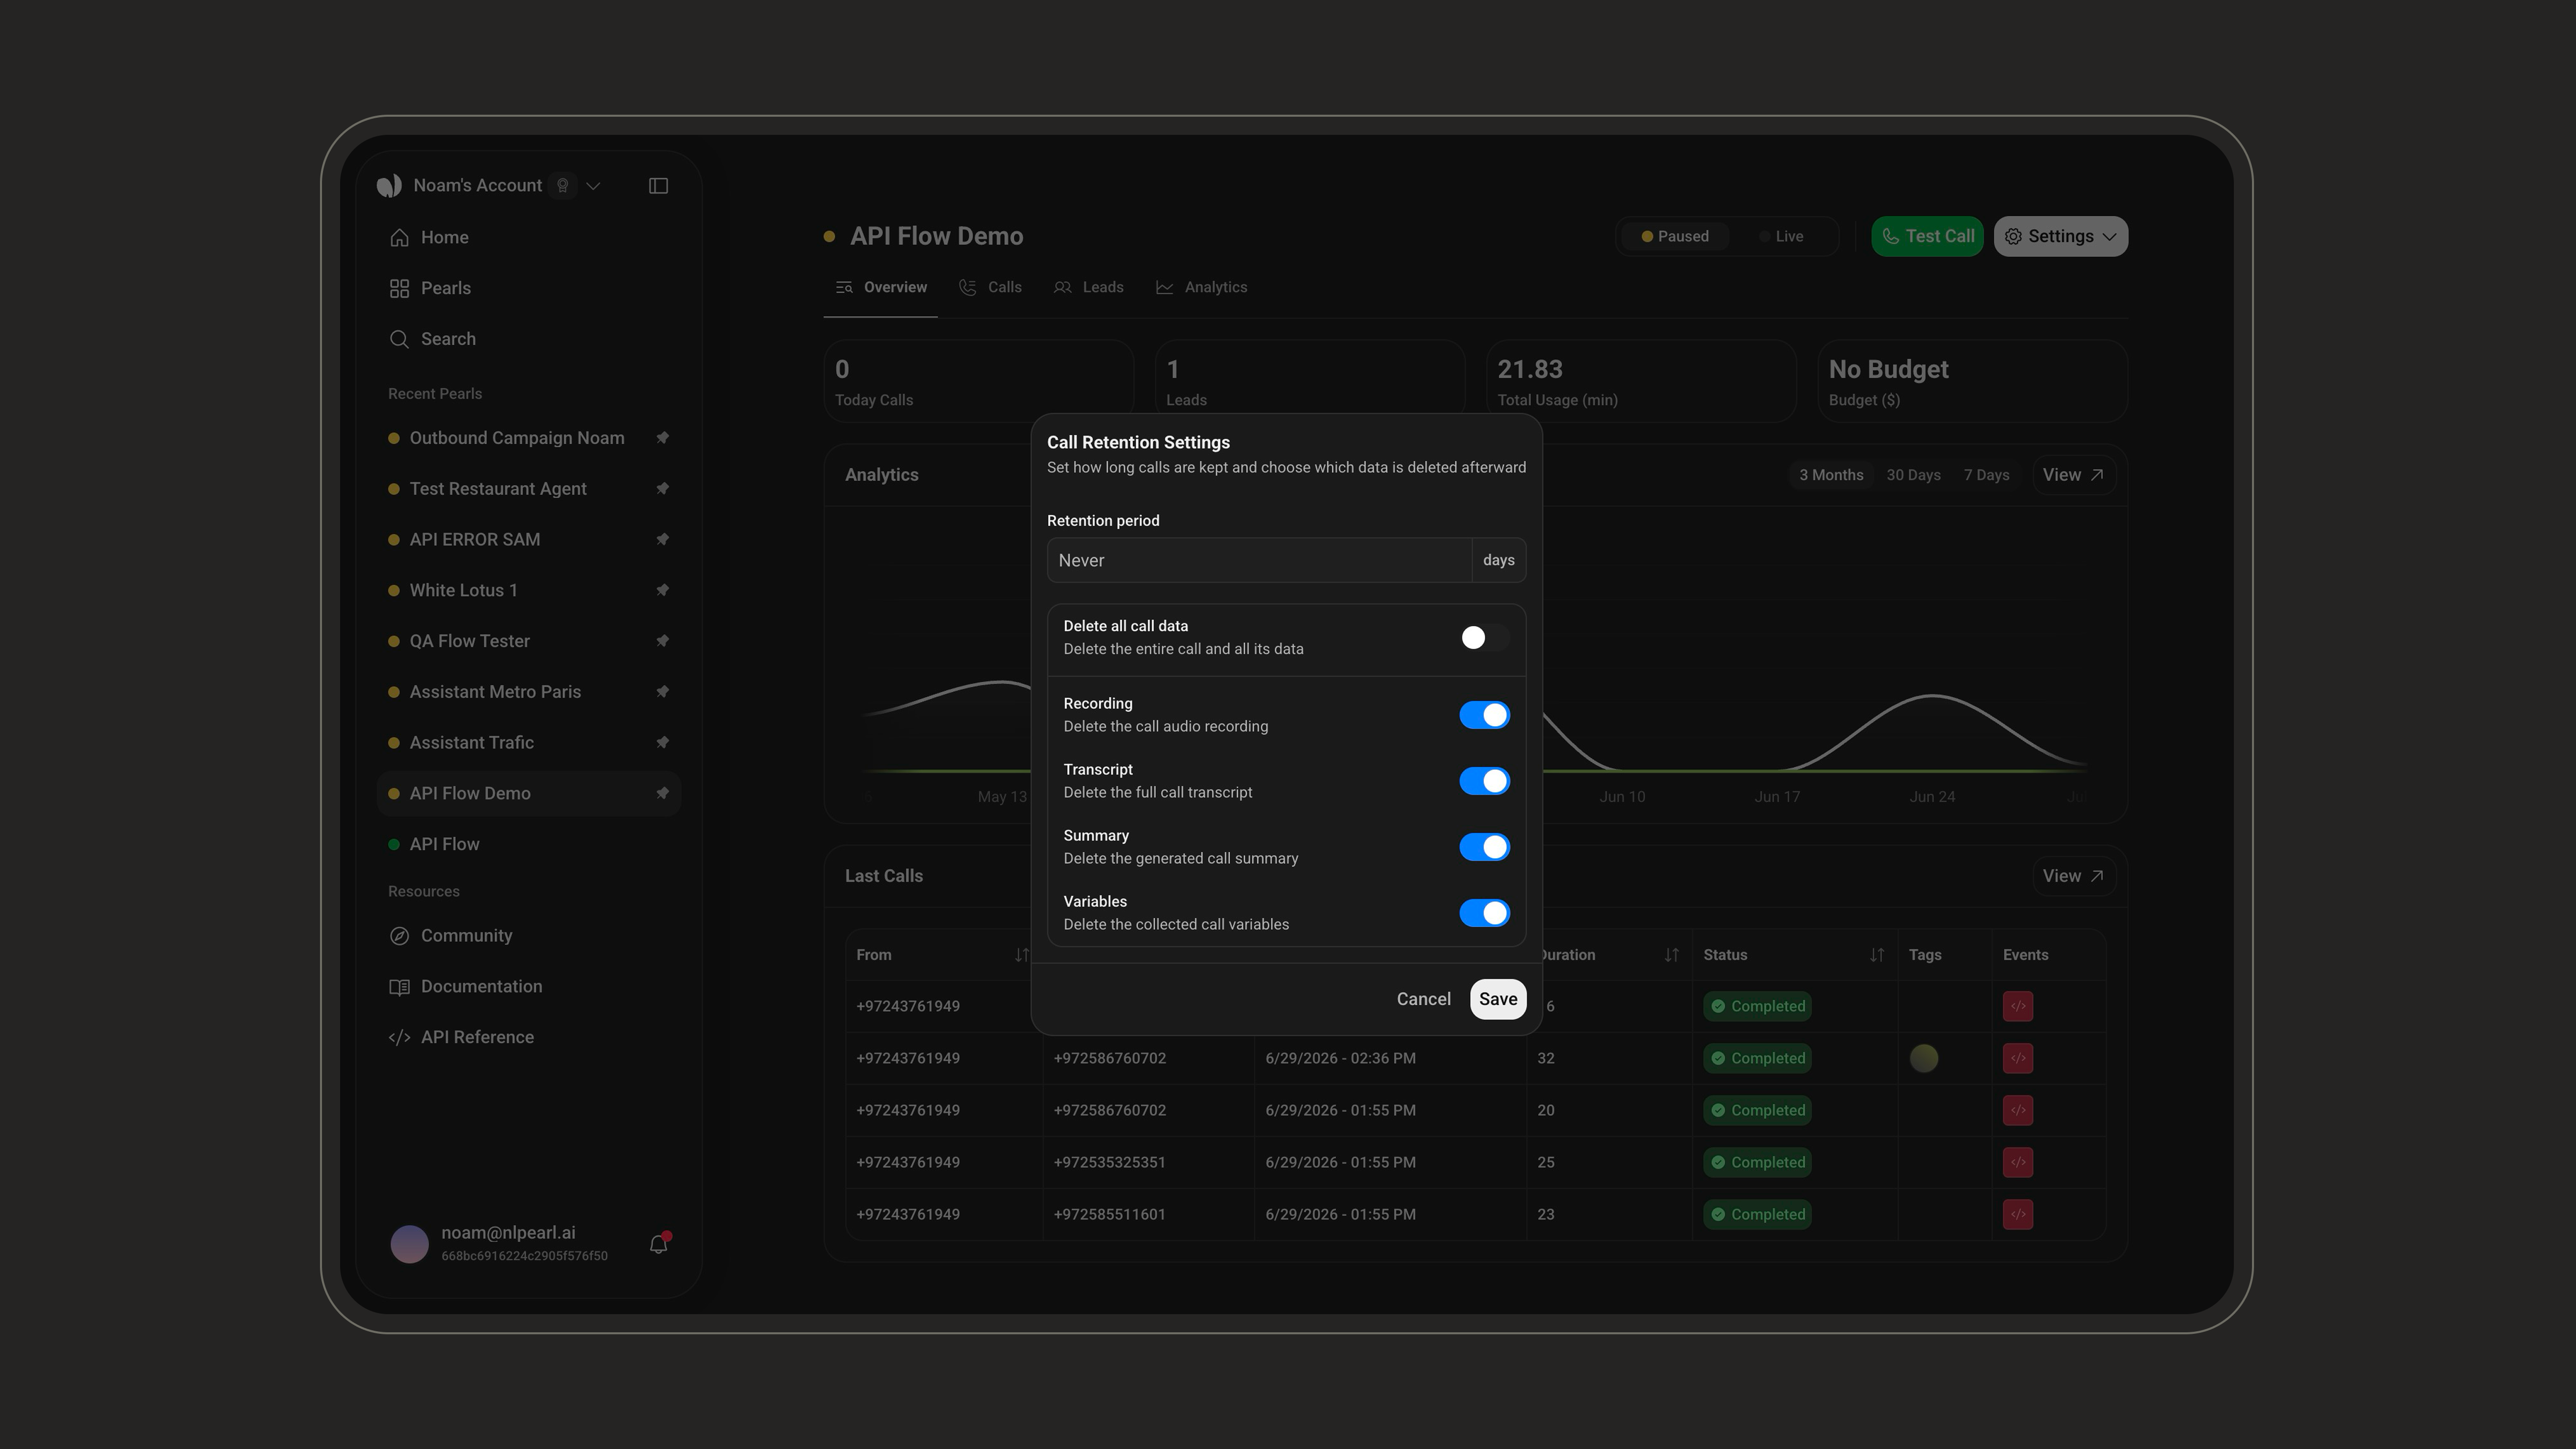
### Retention
Applies to **all conversations**. Set how long conversations are kept (a number of days, or leave empty to keep them indefinitely), then choose what is removed when they expire: delete all conversation data, or granularly the **Transcript**, **Summary**, or collected **Variables**.
* **Chat Webhook**: fires at key points in the conversation lifecycle (when the chat starts and ends), sending details like the outcome and any data collected during the conversation.
* **Lead Webhook**: fires whenever a lead changes status (at the start and end of the conversation), sending the lead's full information and current status. Use it to update your CRM in real time.
Each webhook supports:
* **Version**: `V1` or `V2` (default **V2**).
* **Credentials**: optional authentication token attached to the requests so your endpoint can verify they come from NLPearl.
Use Webhooks only if external tools need event notifications. For actual automations, rely on **Post-Chat Actions** tied to how the conversation ended.
Learn how to configure webhooks, authenticate requests, and handle the events NLPearl sends.
***
## Project-Level Settings
A few settings live at the **Project** level rather than in the campaign settings screen. Open them from the settings popover on your Pearl.
### Agents
Sets how many **simultaneous agents** run this campaign, i.e. how many conversations can be handled at the same time, capped by your account's agent quota. A higher number allows faster outreach.
Learn how to manage the agents assigned to your inbound and outbound activities.
***
### Retention
Applies to **all conversations**. Set how long conversations are kept (a number of days, or leave empty to keep them indefinitely), then choose what is removed when they expire: delete all conversation data, or granularly the **Transcript**, **Summary**, or collected **Variables**.
 ***
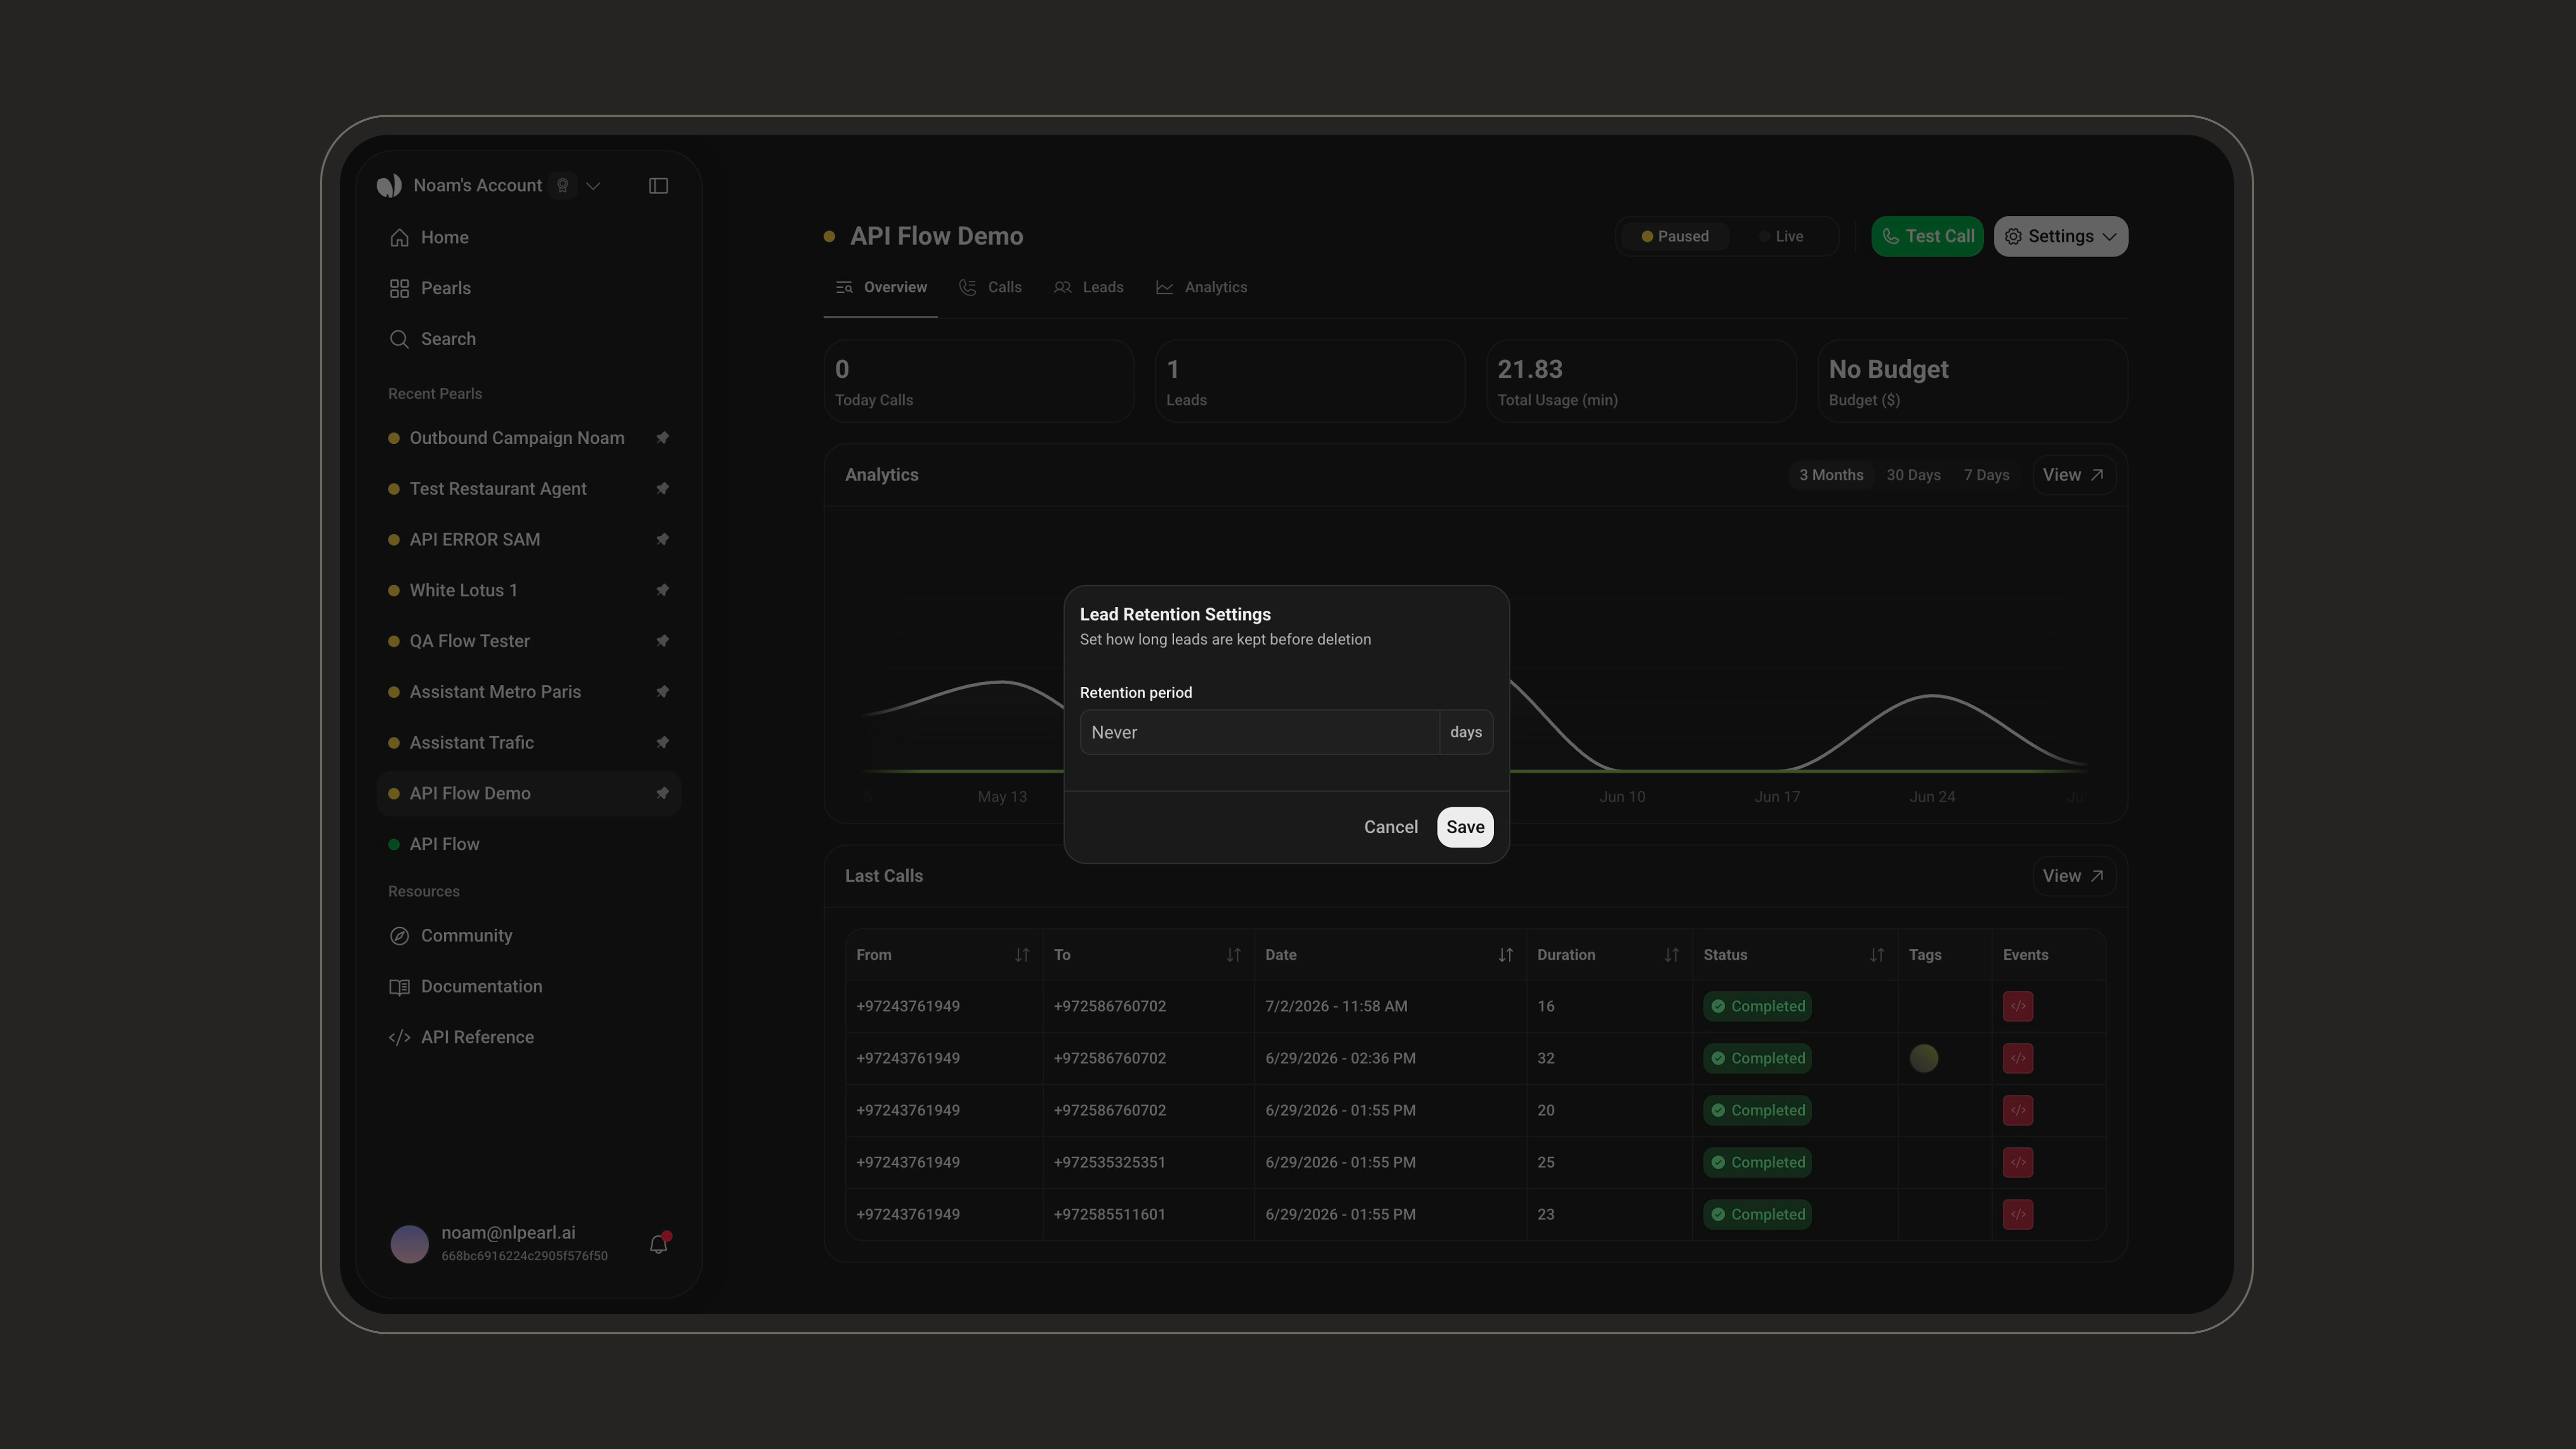
### Lead Retention
Outbound only. Set how long leads are kept before they are automatically deleted (a number of days, or leave empty to keep them indefinitely). This removes the entire lead.
***
### Lead Retention
Outbound only. Set how long leads are kept before they are automatically deleted (a number of days, or leave empty to keep them indefinitely). This removes the entire lead.
 ***
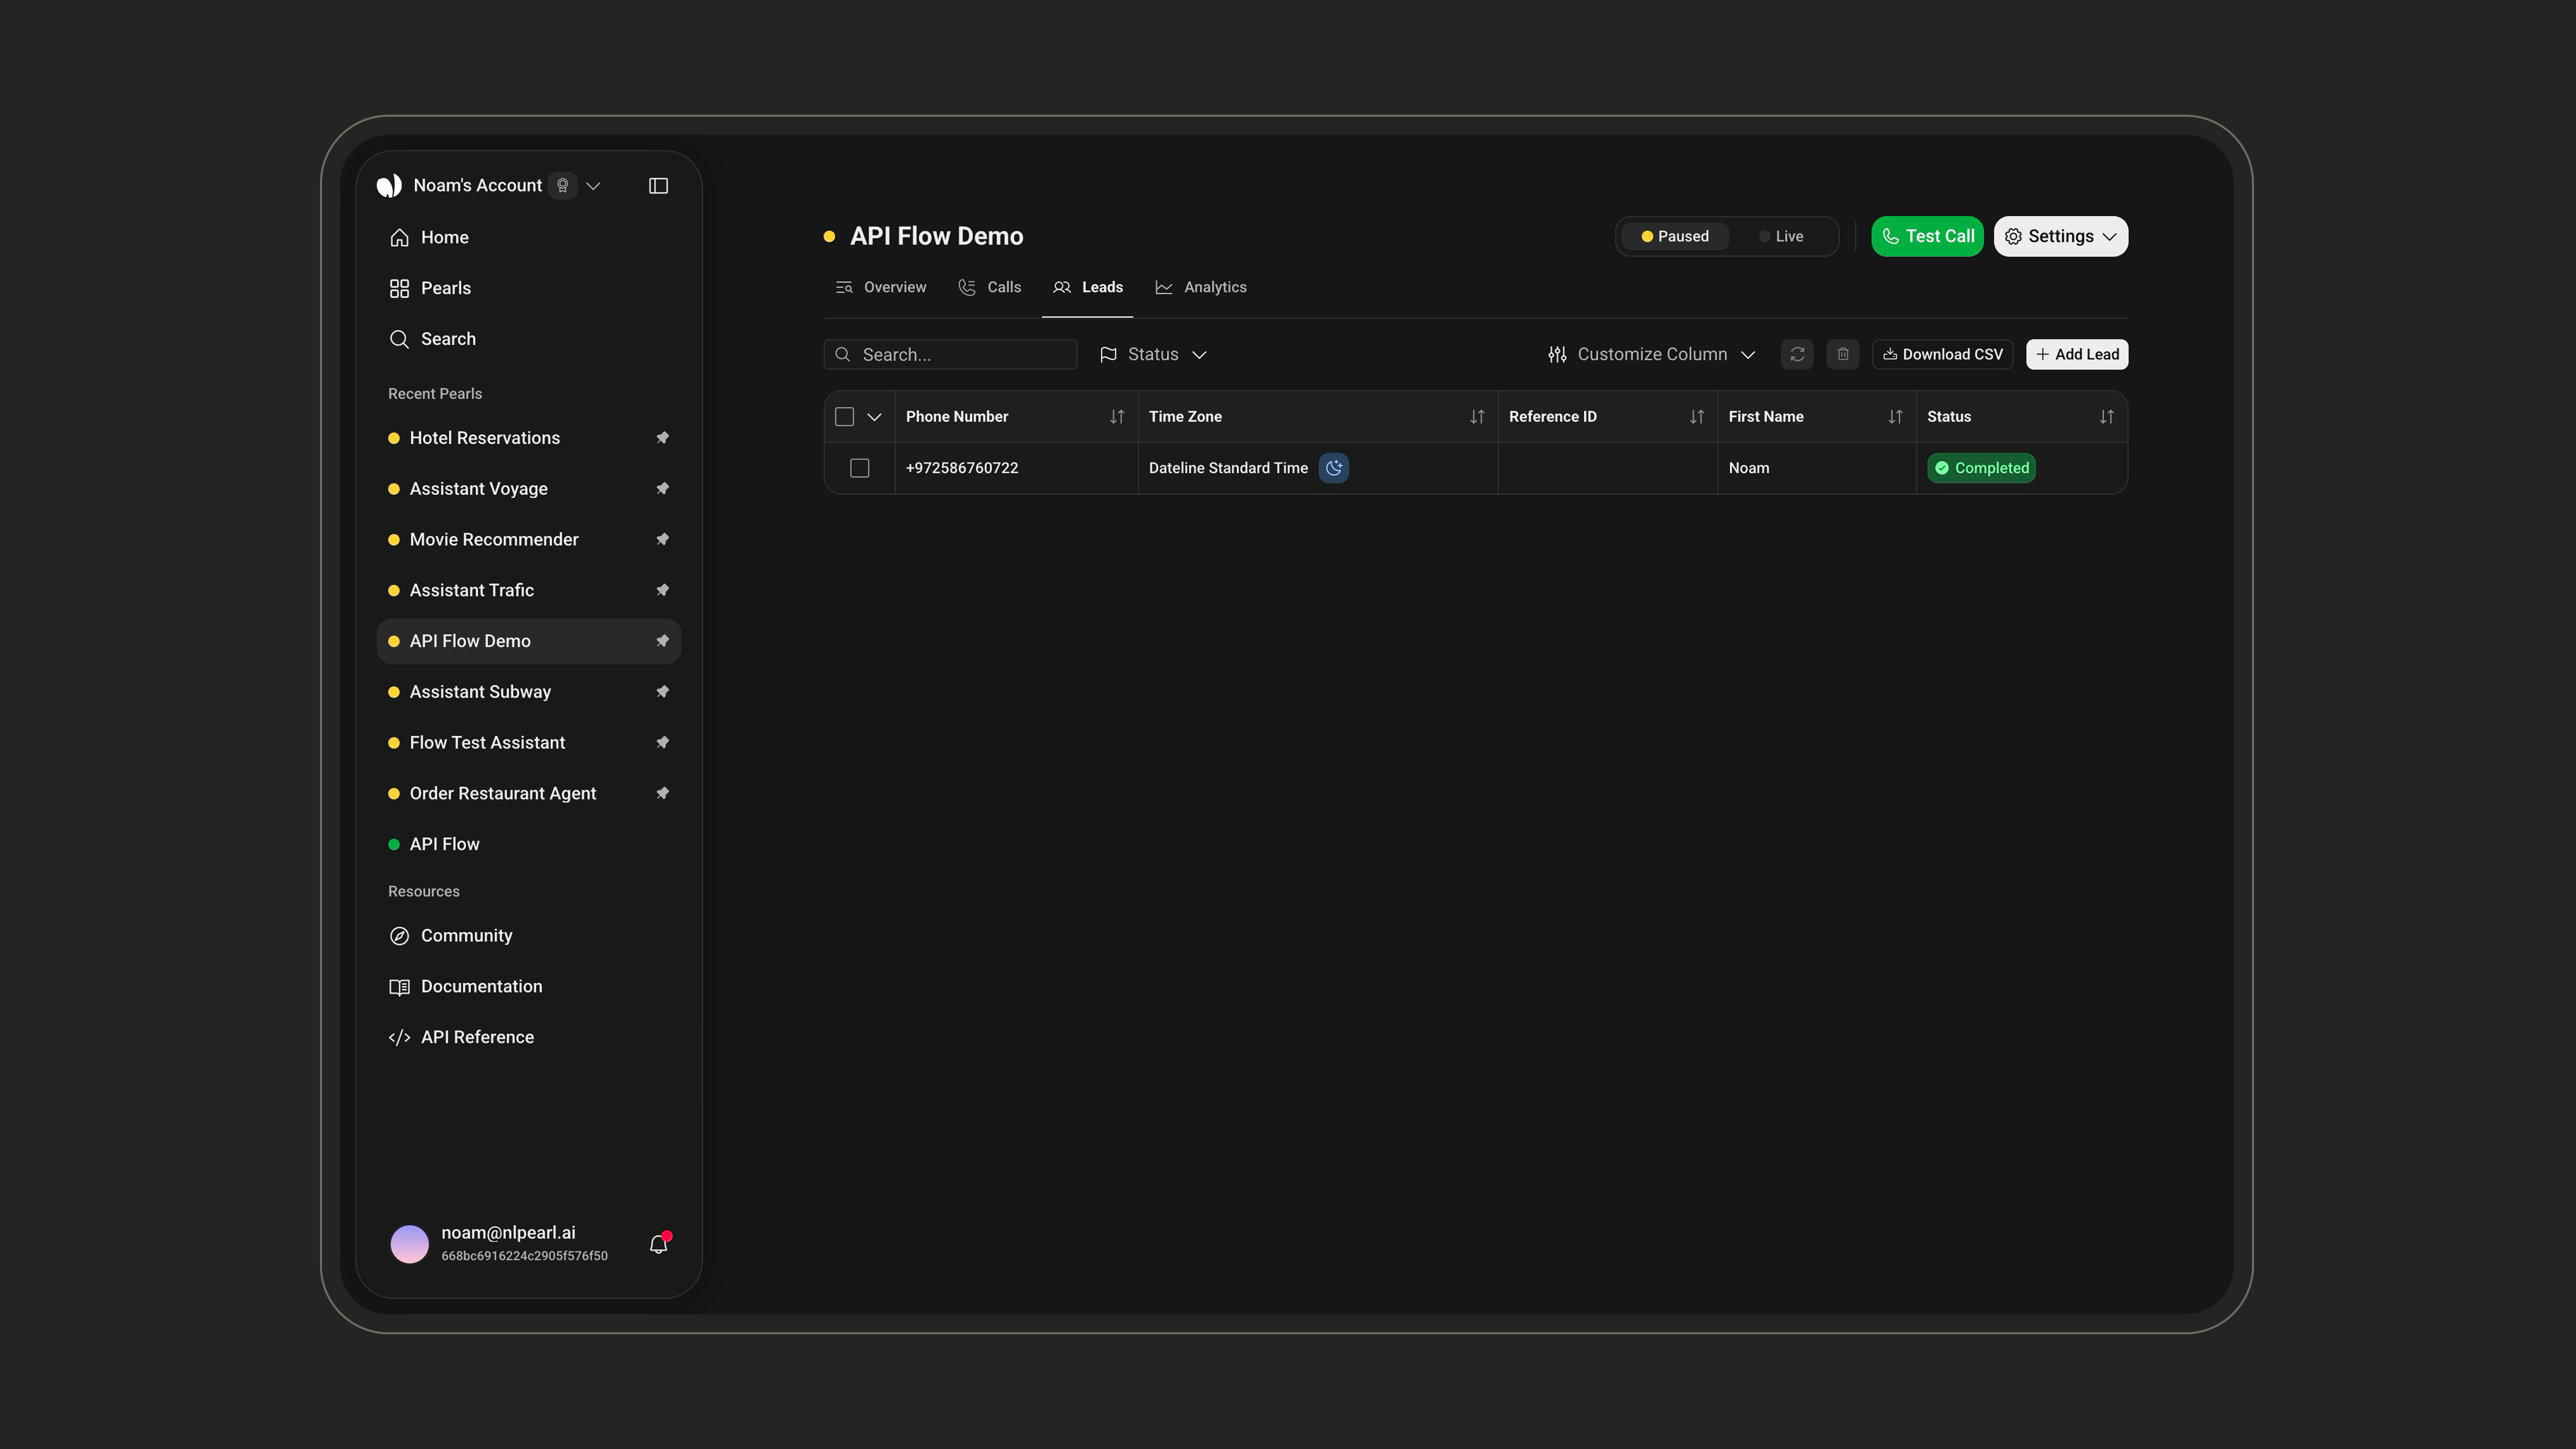
## Managing Leads
Open the **Leads** tab in your campaign to add, view, and manage the people Pearl will contact. Leads are shown in a searchable, paginated table with default columns **Created**, **Phone Number**, **Time Zone**, **Reference ID**, and **Status**, plus one column per variable used in your Pearl.
***
## Managing Leads
Open the **Leads** tab in your campaign to add, view, and manage the people Pearl will contact. Leads are shown in a searchable, paginated table with default columns **Created**, **Phone Number**, **Time Zone**, **Reference ID**, and **Status**, plus one column per variable used in your Pearl.
 ### Adding Leads
Click **Add Lead**, then choose how you want to add them.
### Adding Leads
Click **Add Lead**, then choose how you want to add them.
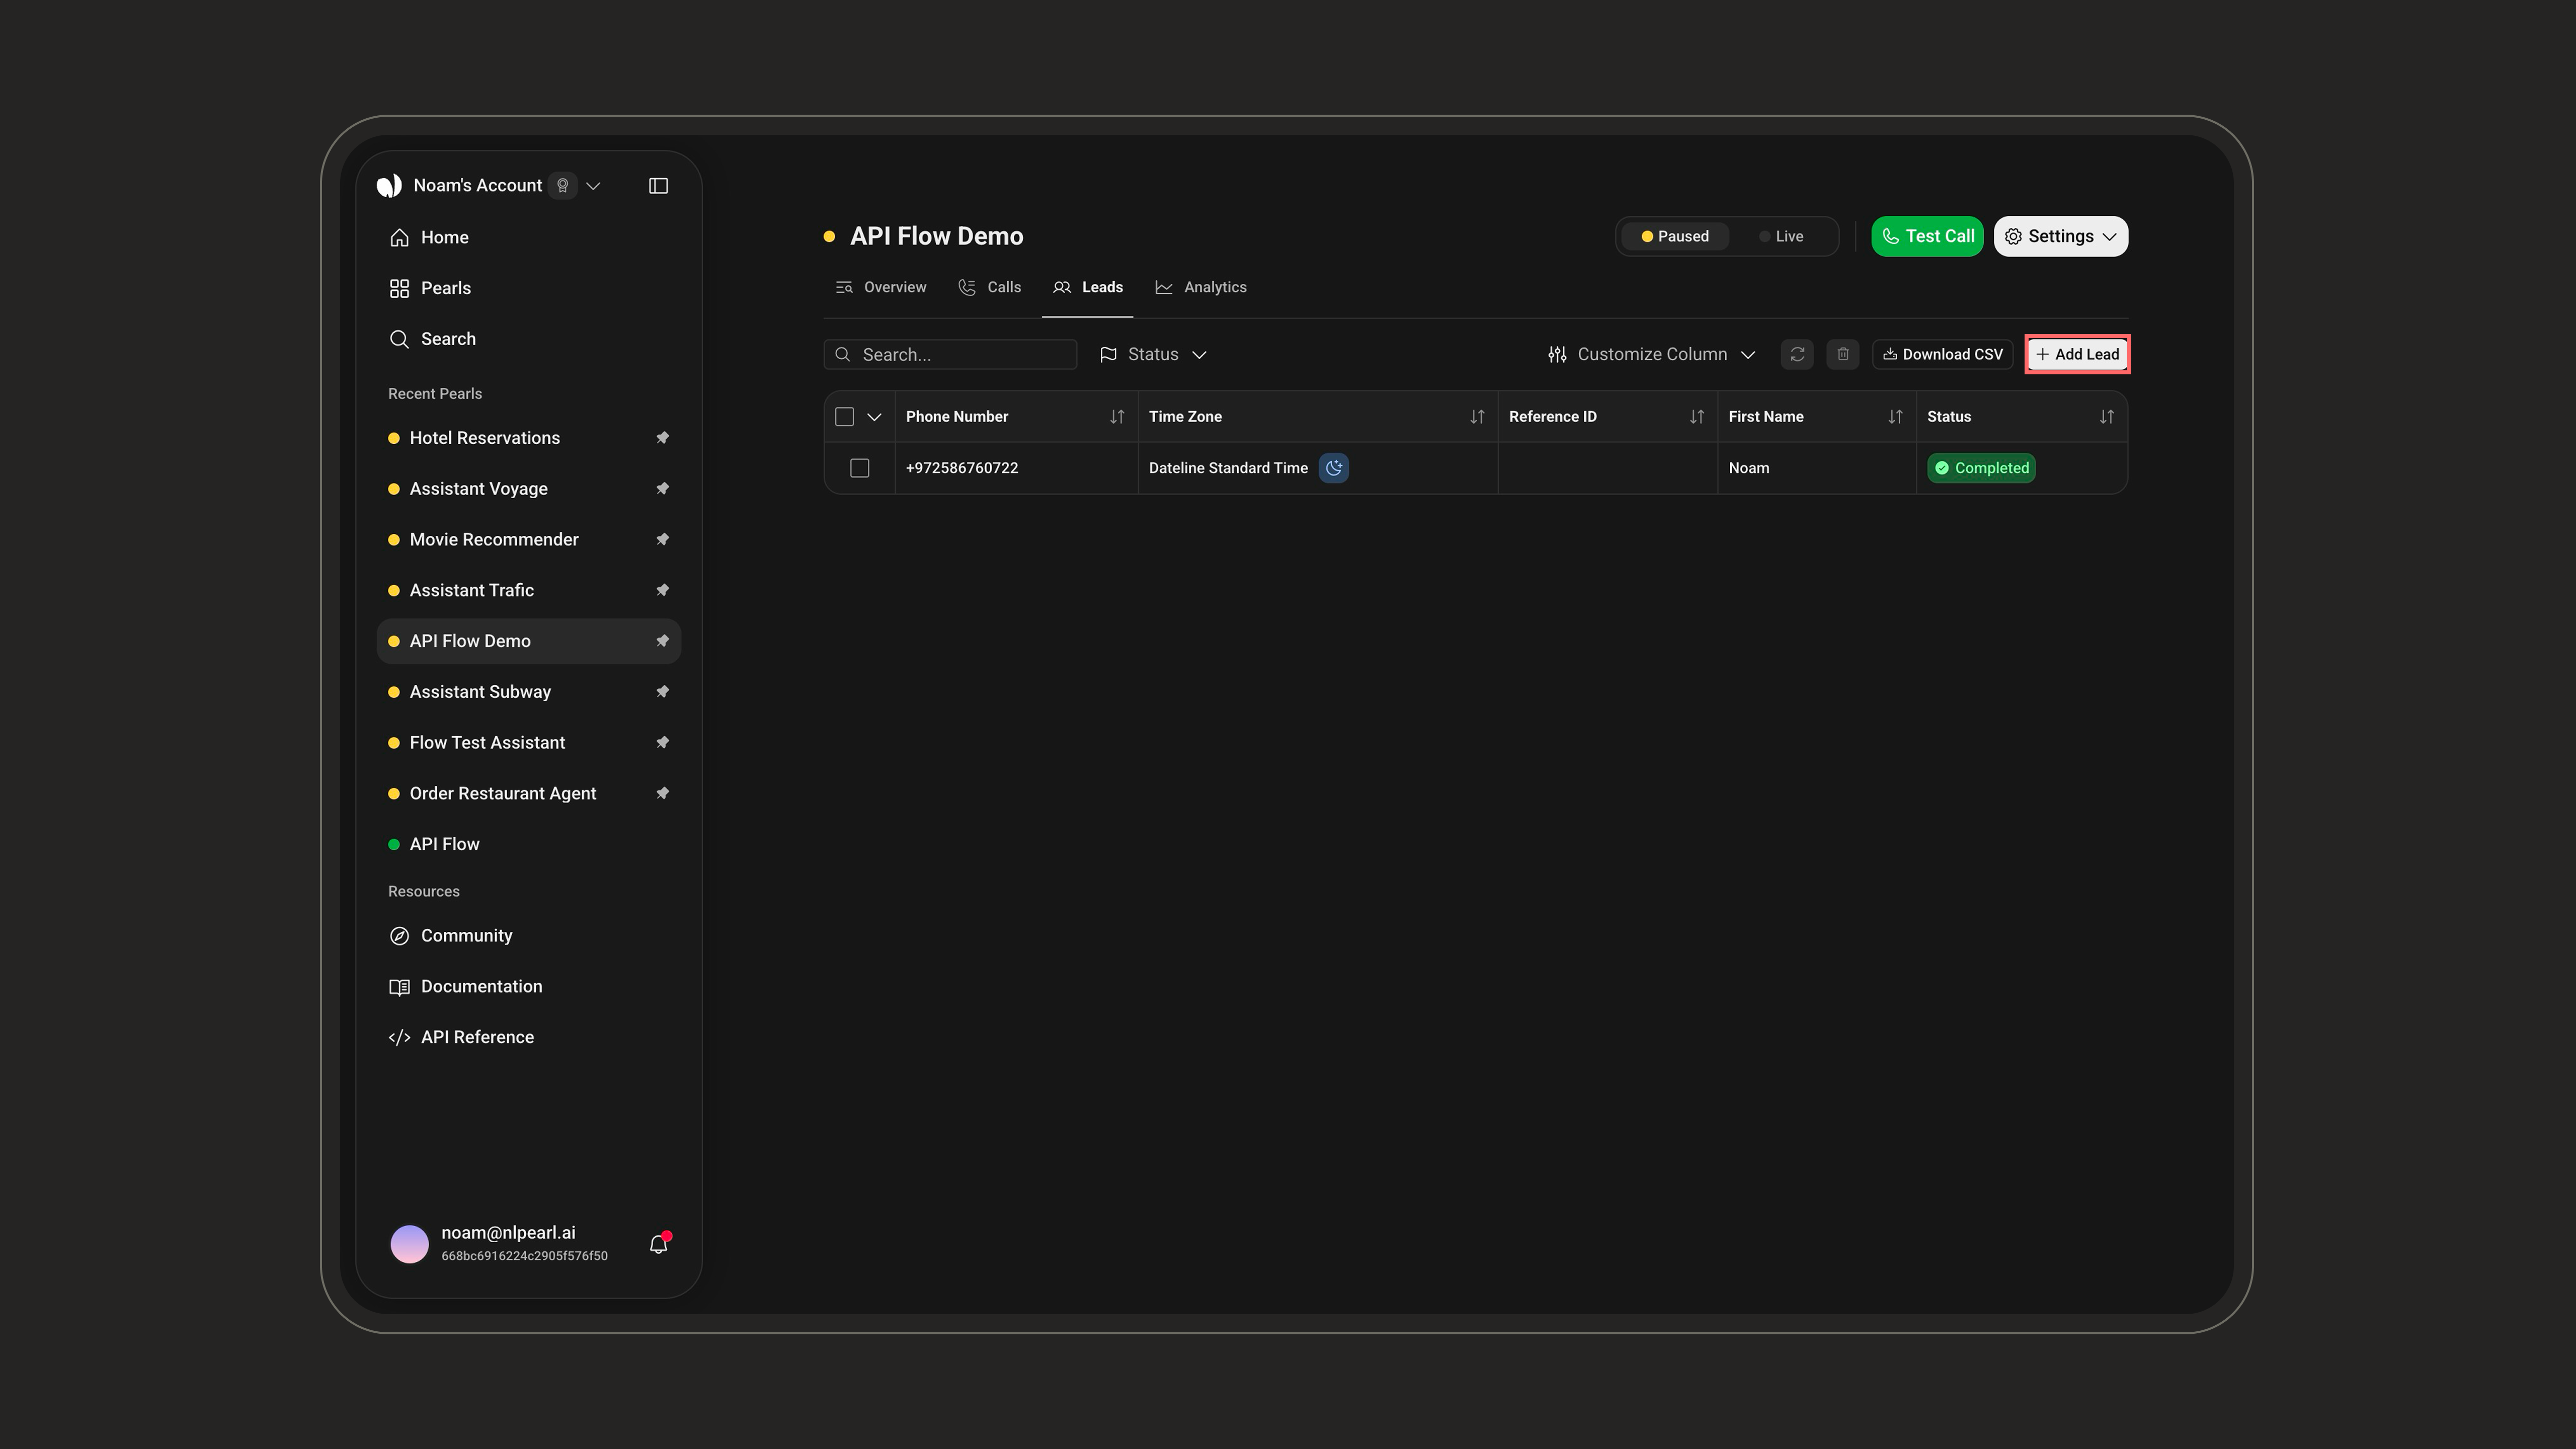 Download the **CSV** or **XLSX** template, fill it with your lead data, and upload it back. The template only includes the variables actually used in your Pearl (unused ones won't appear, and extra columns you add won't be recognized). You can also set a timezone for the file — if left empty, the campaign timezone is used. After the upload, a report shows how many leads were added and lets you download the list of any failed rows.
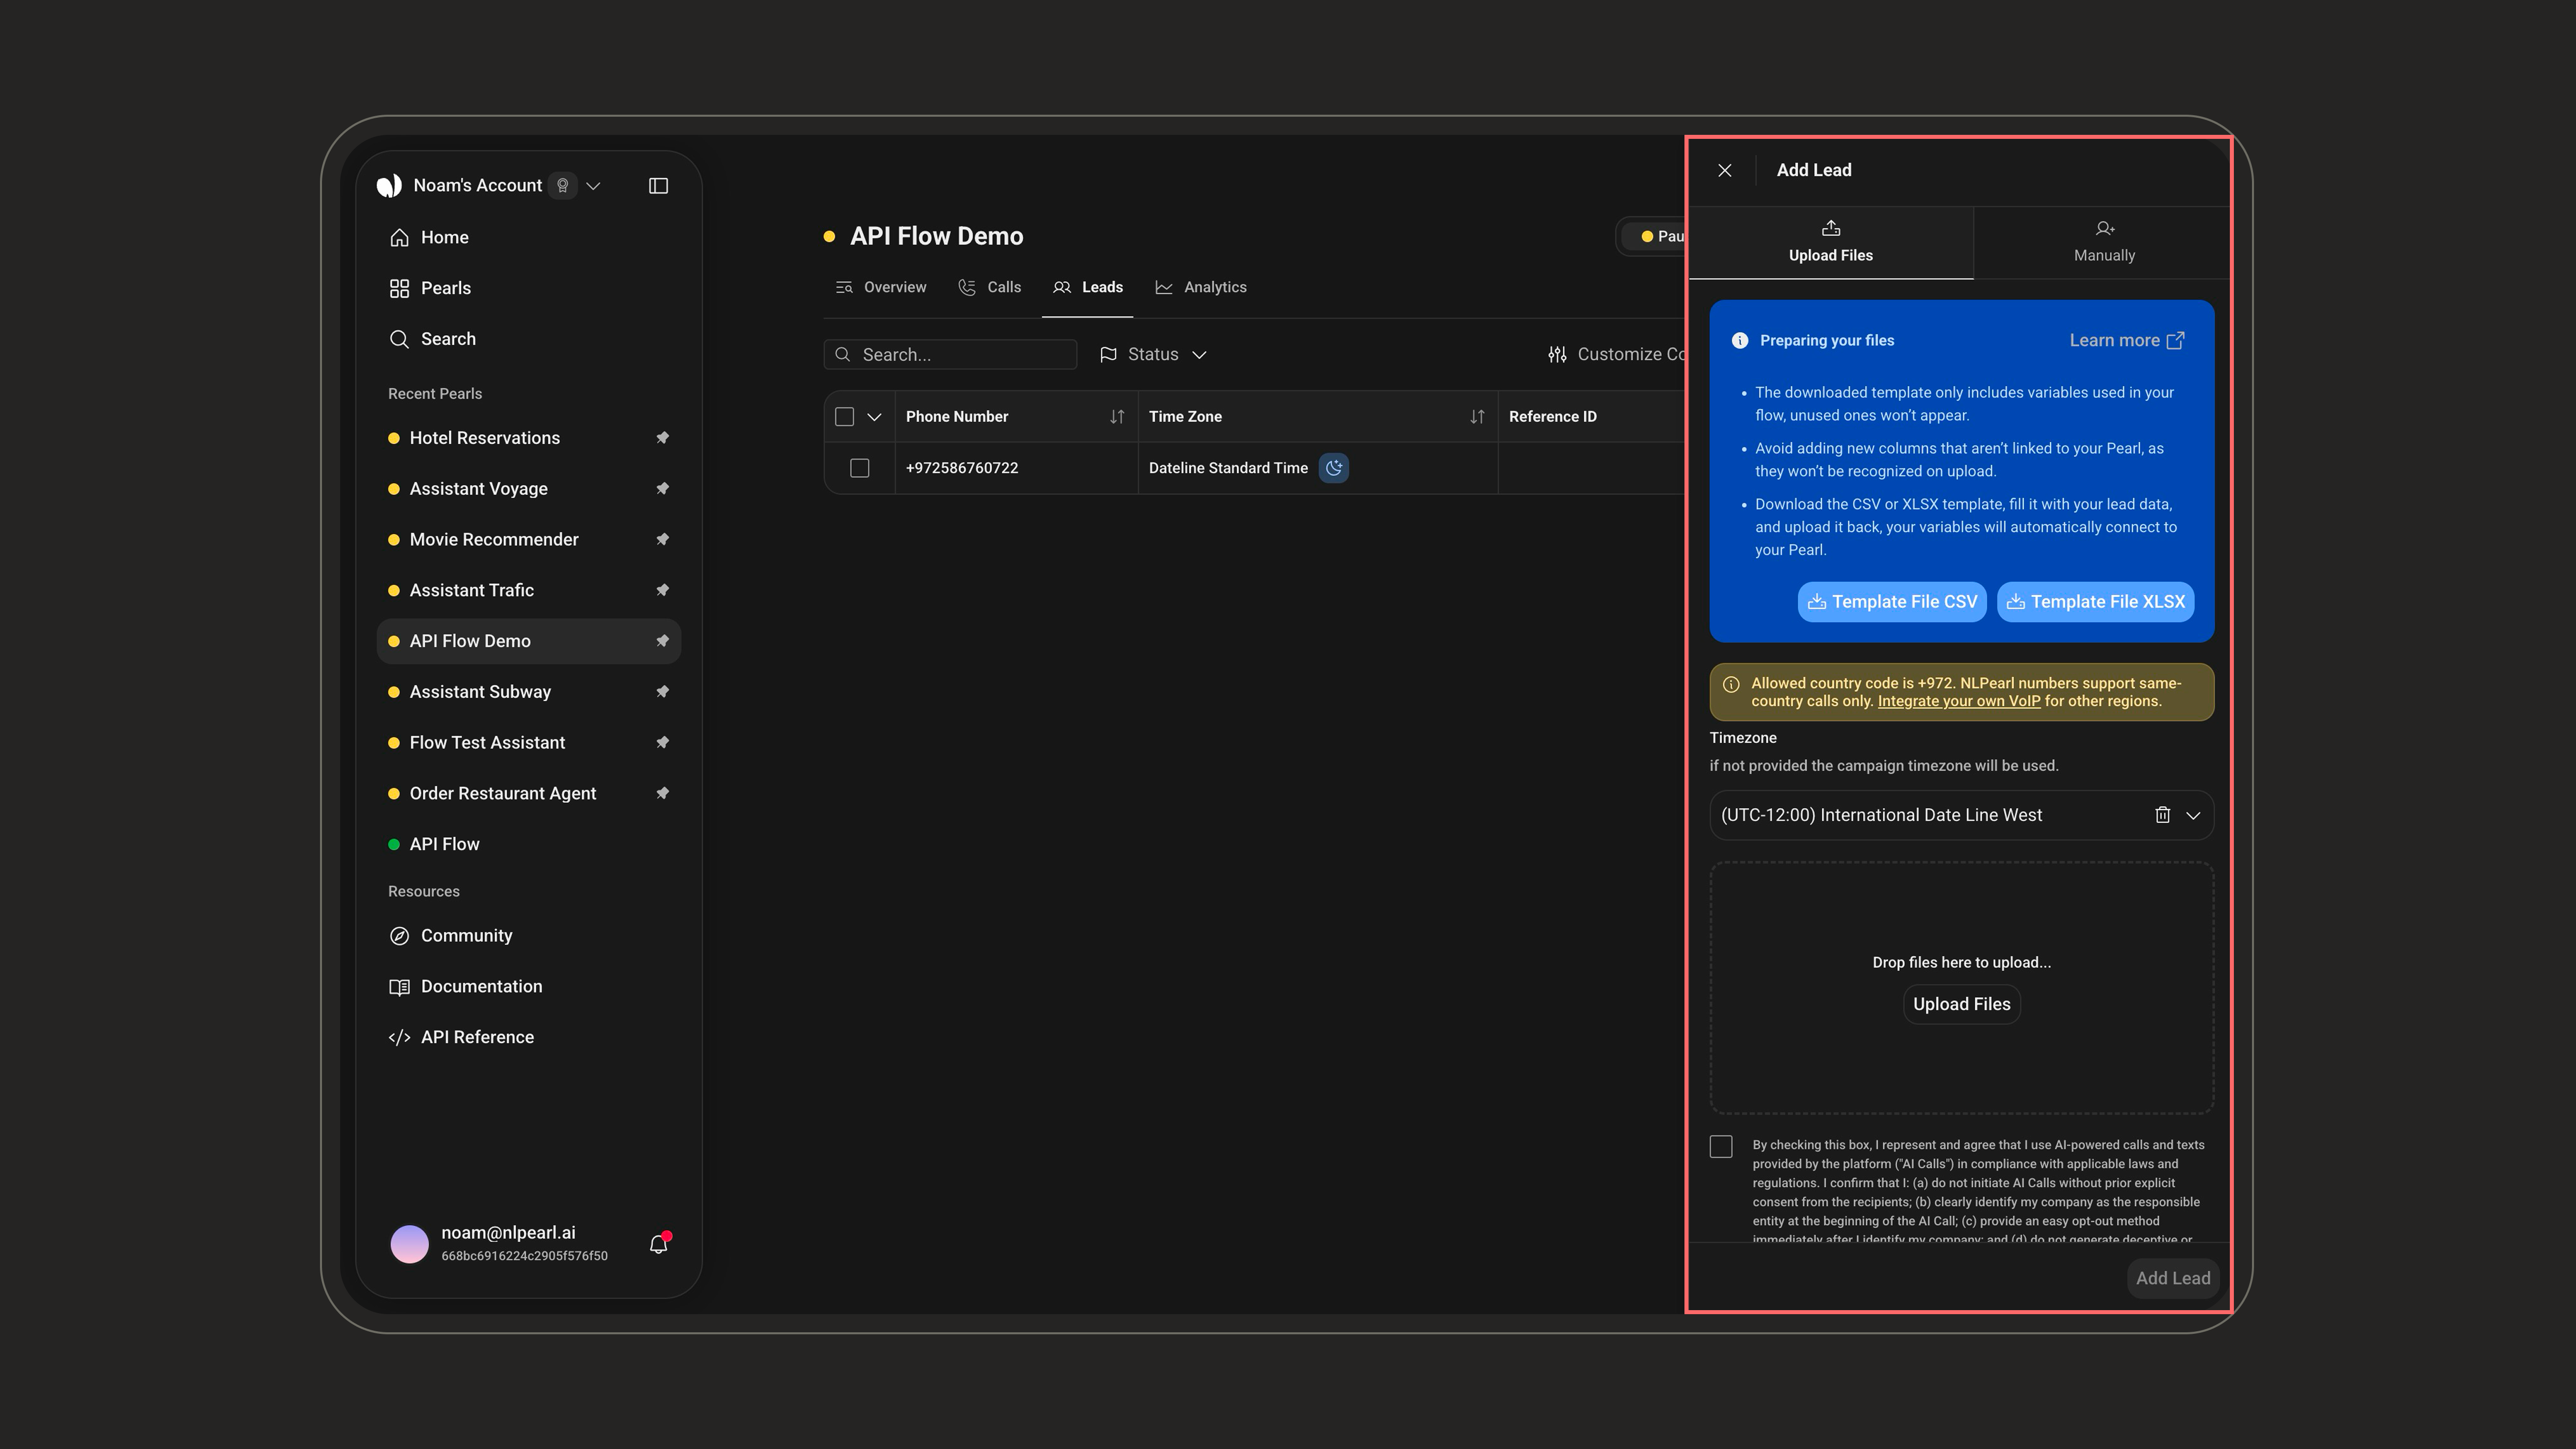 Enter a lead one by one: contact identifier (phone number or messaging handle), any variables your Pearl uses, an optional timezone, and an optional **Reference ID** (your own external identifier, up to 100 characters).
 Both methods require accepting the **AI-messaging compliance** checkbox.
***
### Customizing the View
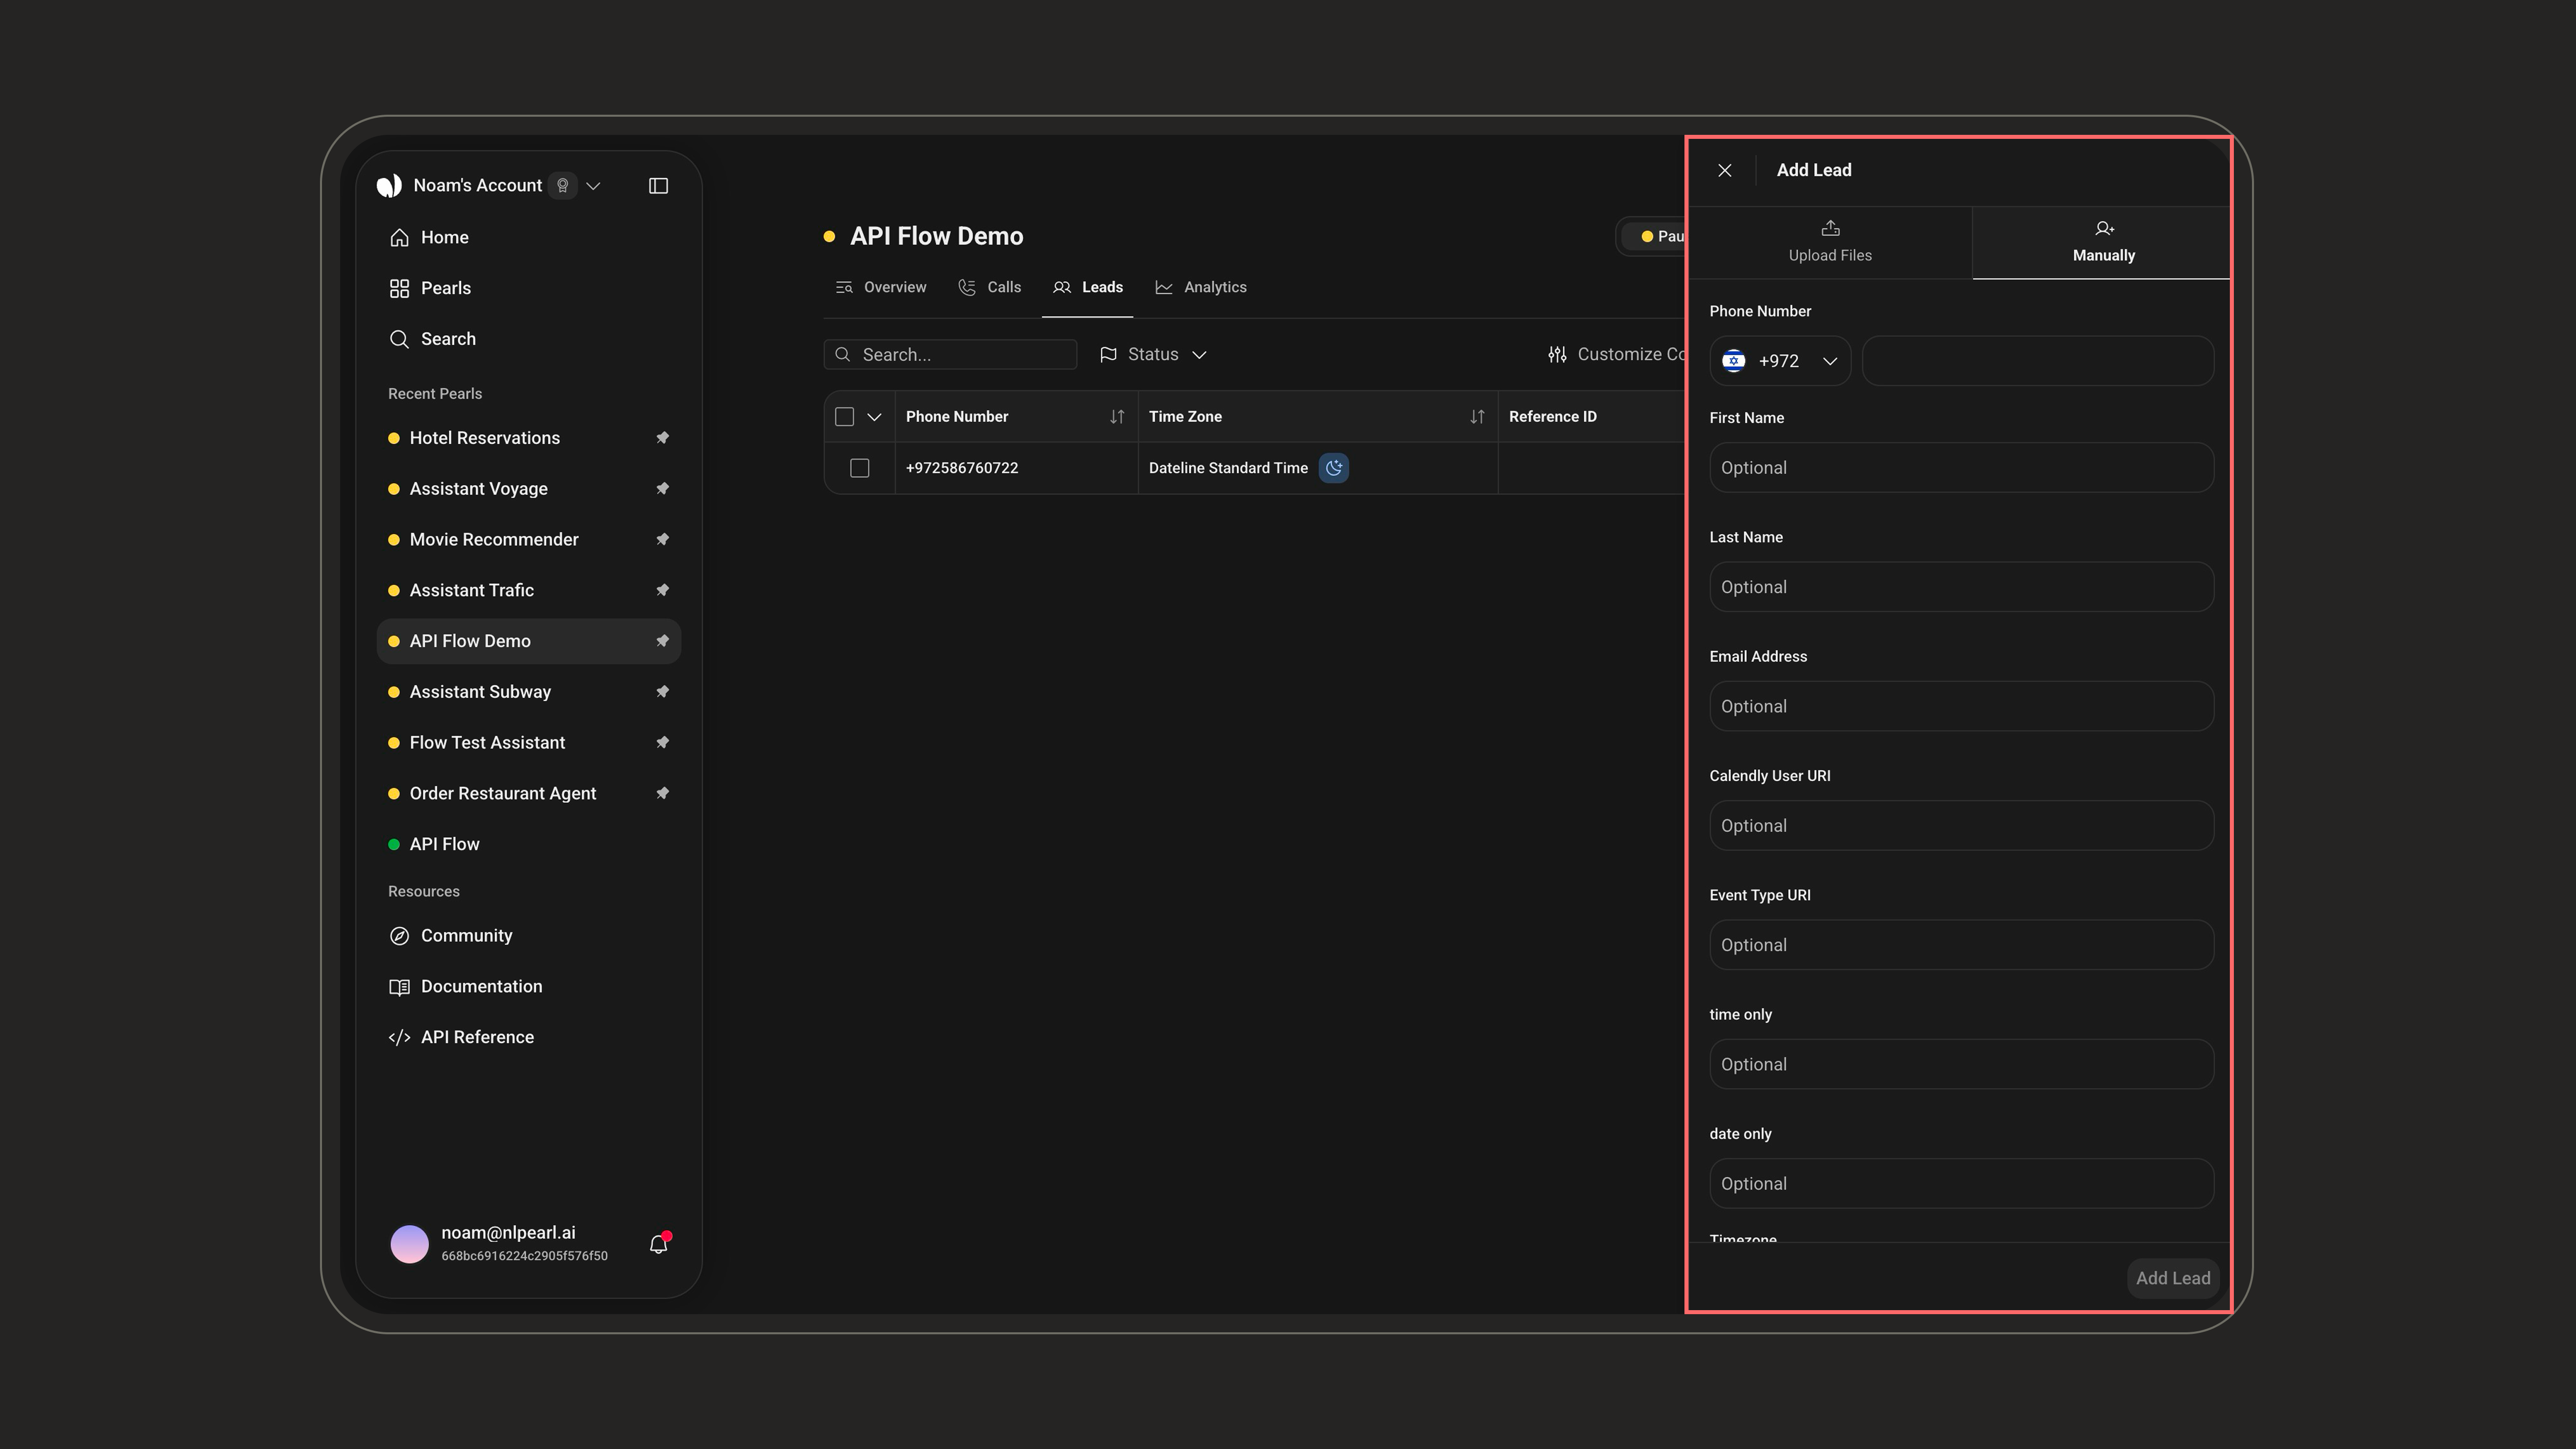
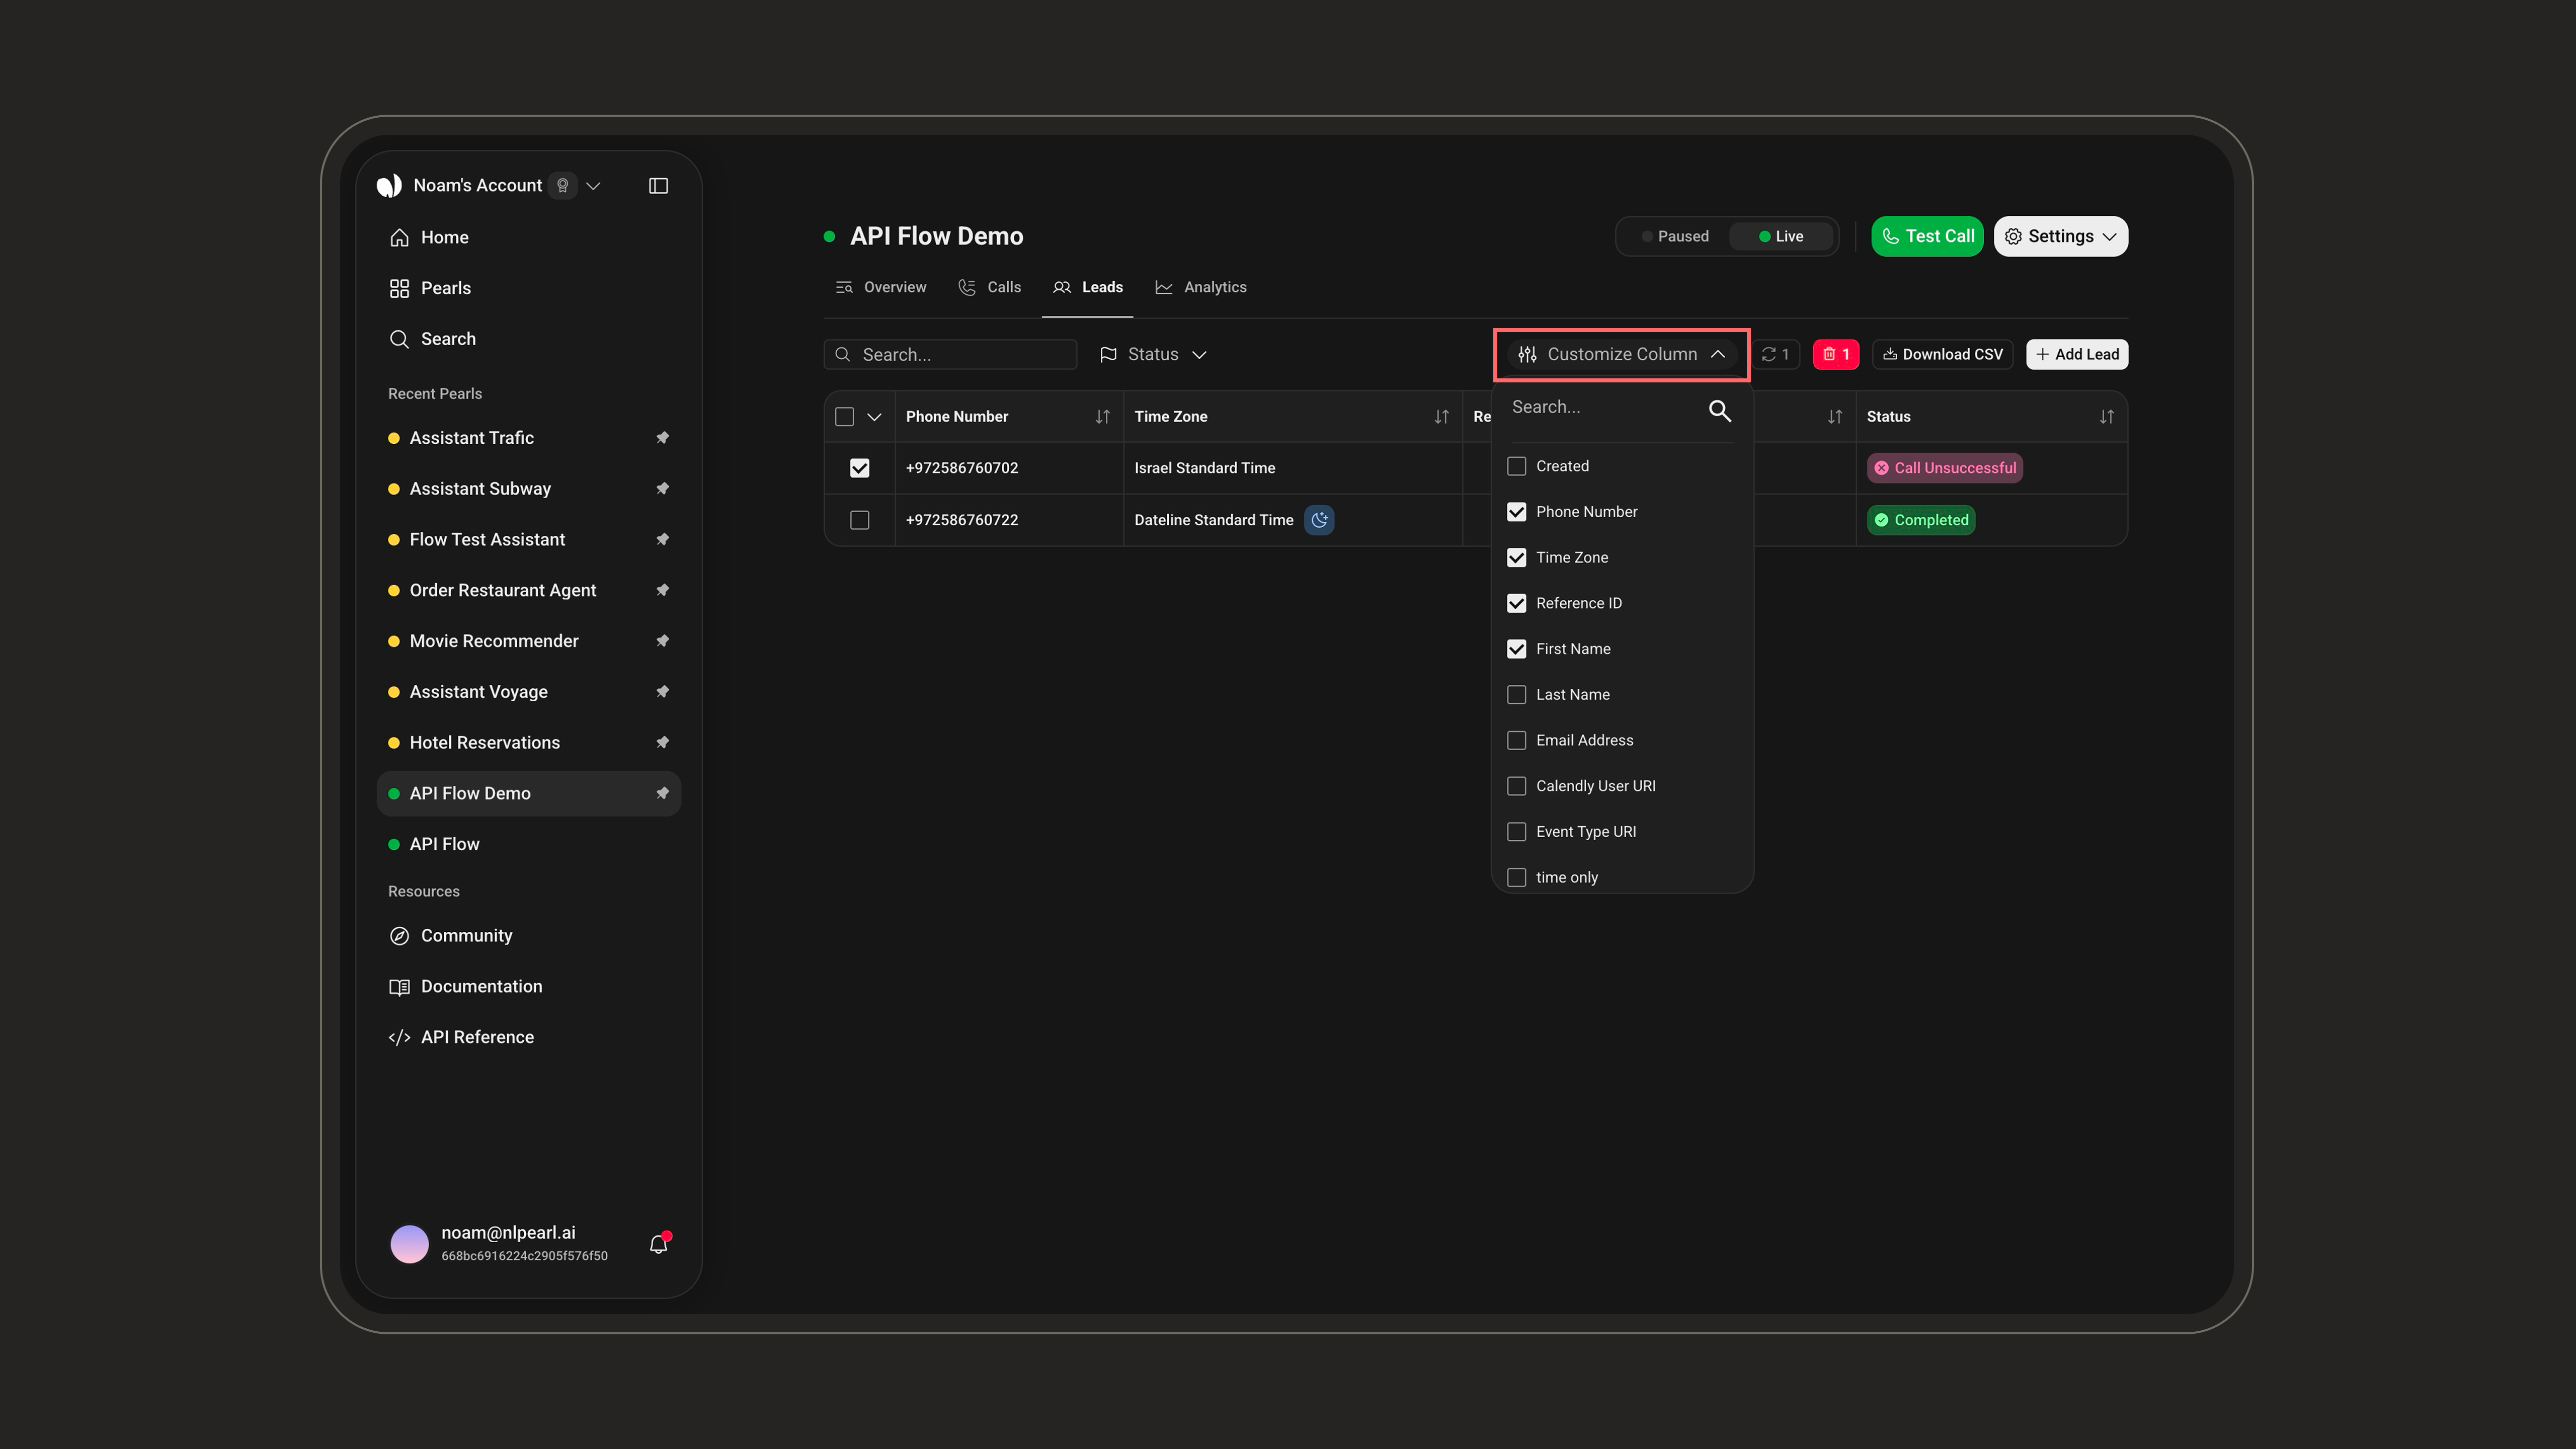
Use **Customize Column** to show or hide any column, including the per-variable columns (by default, only the last 3 variables are shown). Up to 50 columns can be visible at once, and your selection is saved locally in your browser.
Both methods require accepting the **AI-messaging compliance** checkbox.
***
### Customizing the View
Use **Customize Column** to show or hide any column, including the per-variable columns (by default, only the last 3 variables are shown). Up to 50 columns can be visible at once, and your selection is saved locally in your browser.
 ***
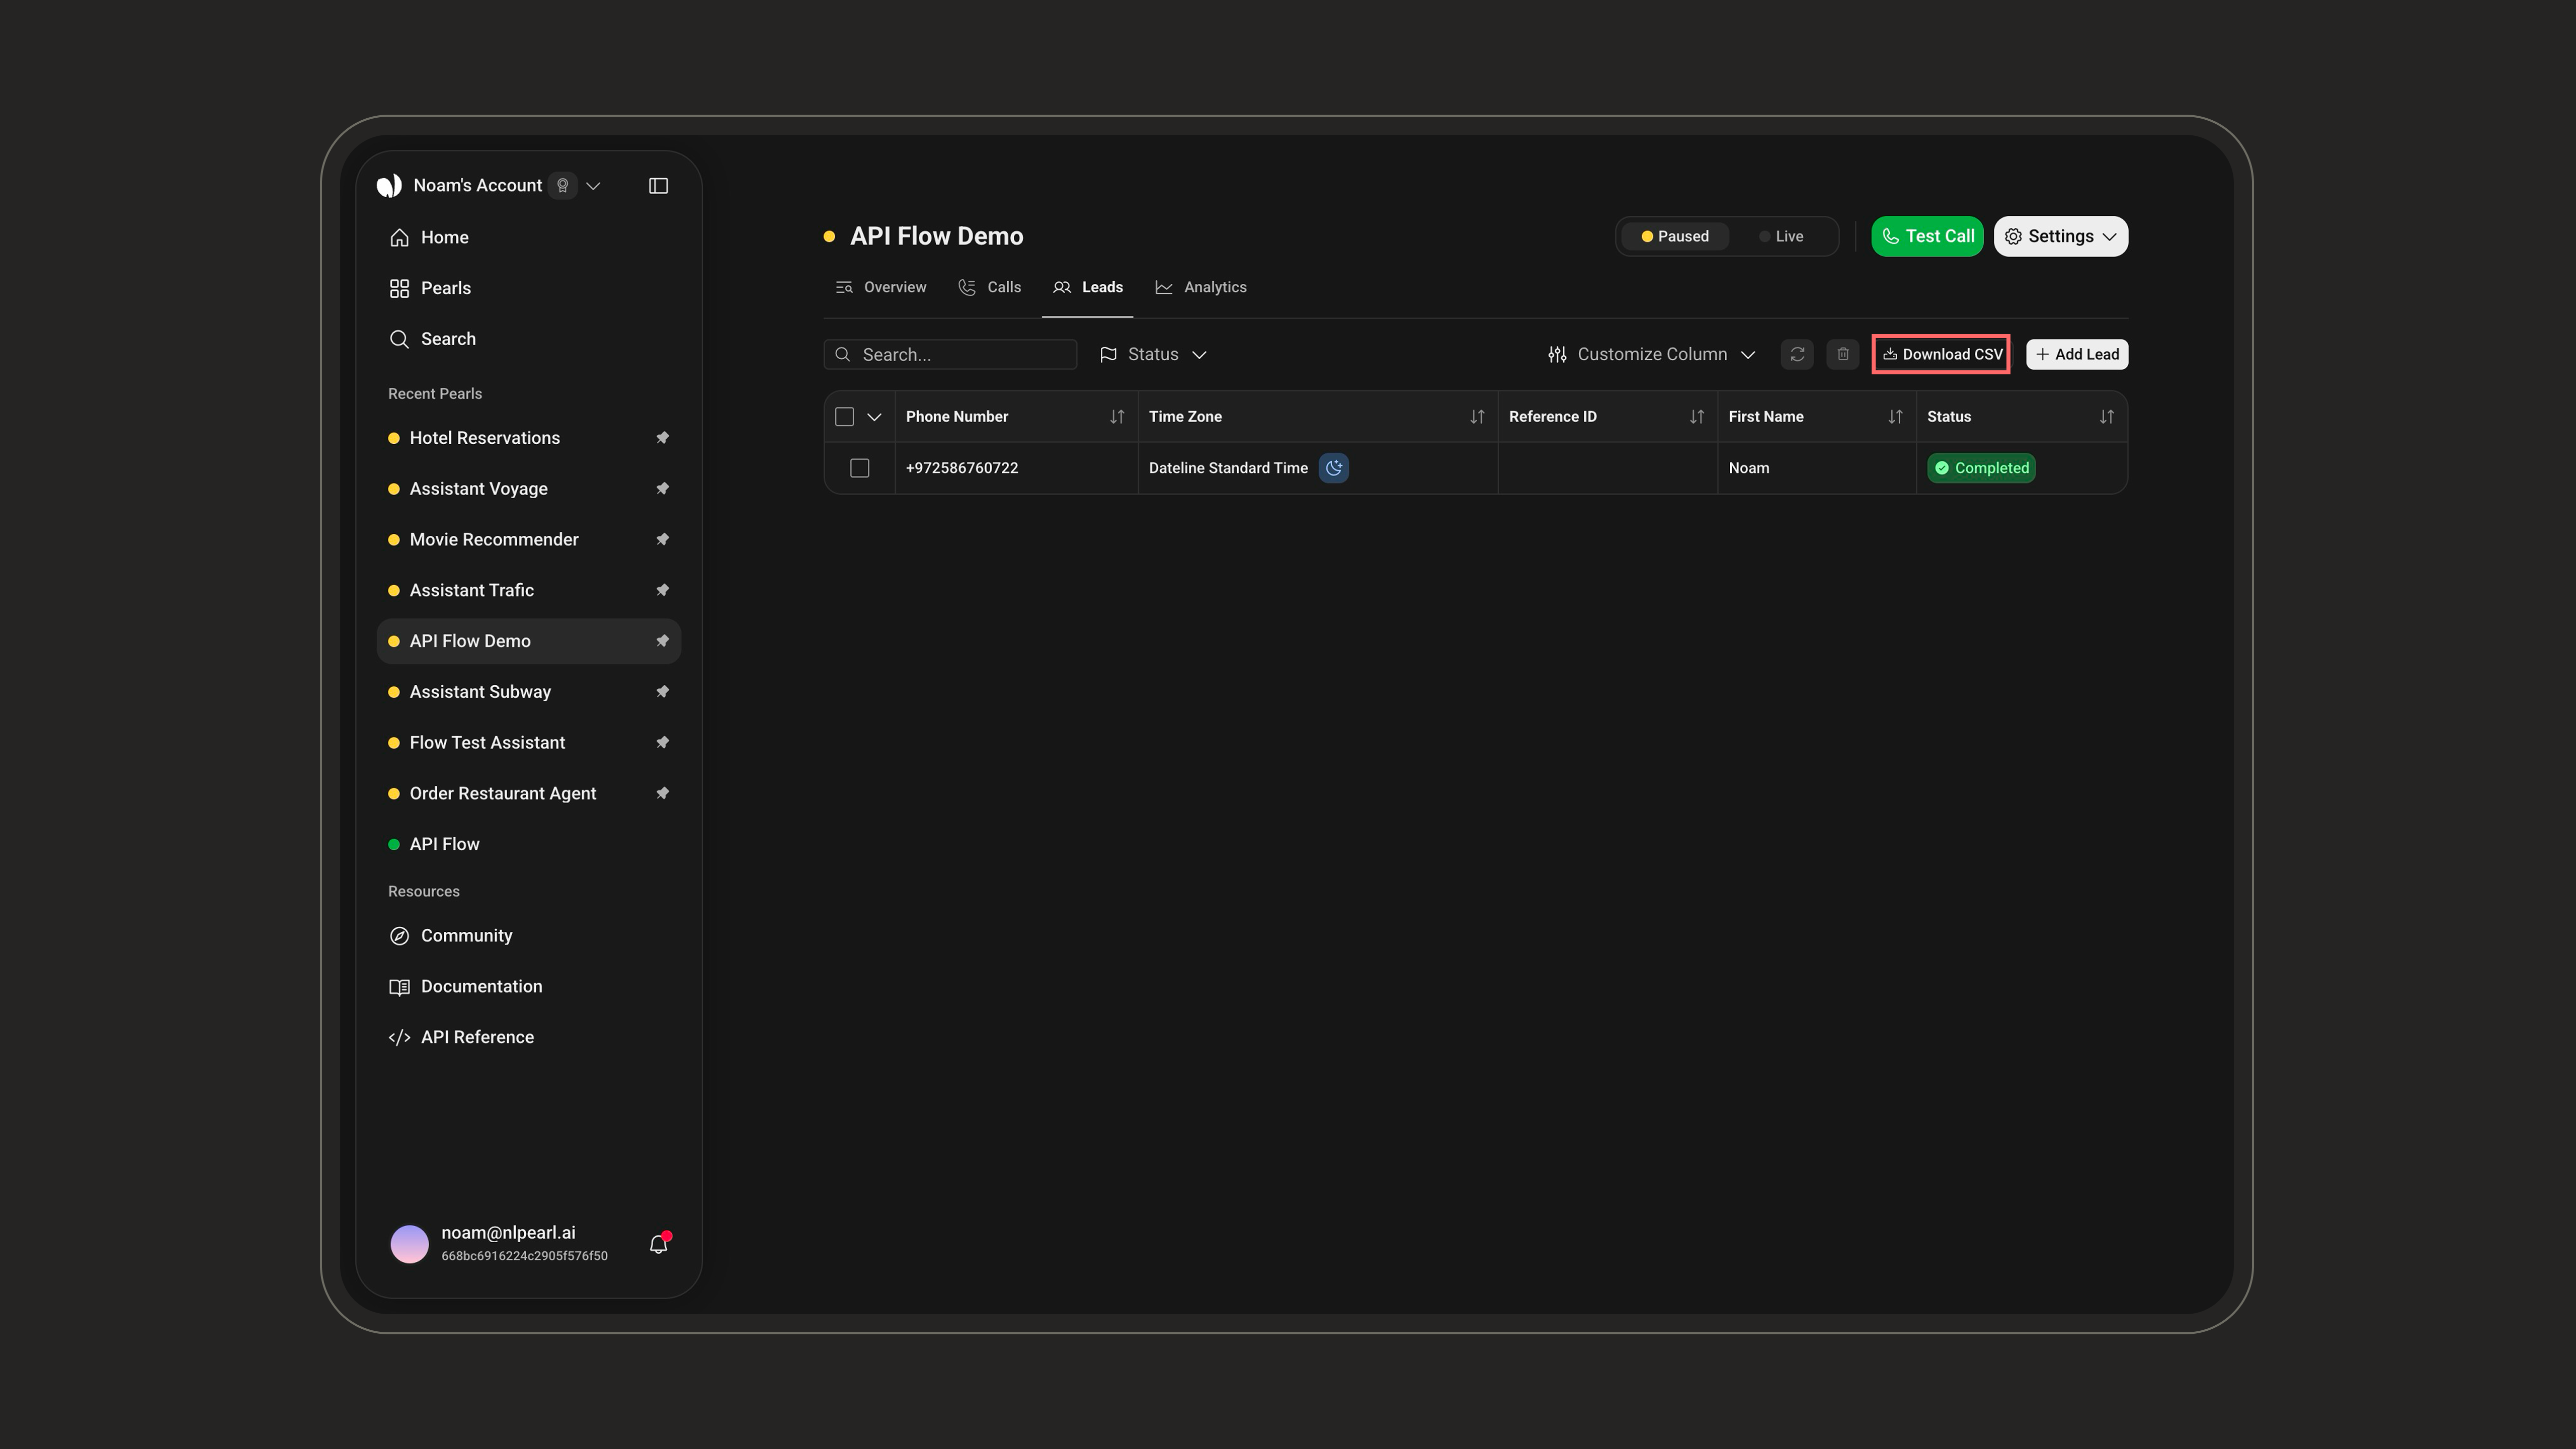
### Exporting Leads
Click **Download CSV** to export your leads together with their current statuses. The export respects the filters currently applied to the table.
***
### Exporting Leads
Click **Download CSV** to export your leads together with their current statuses. The export respects the filters currently applied to the table.
 ***
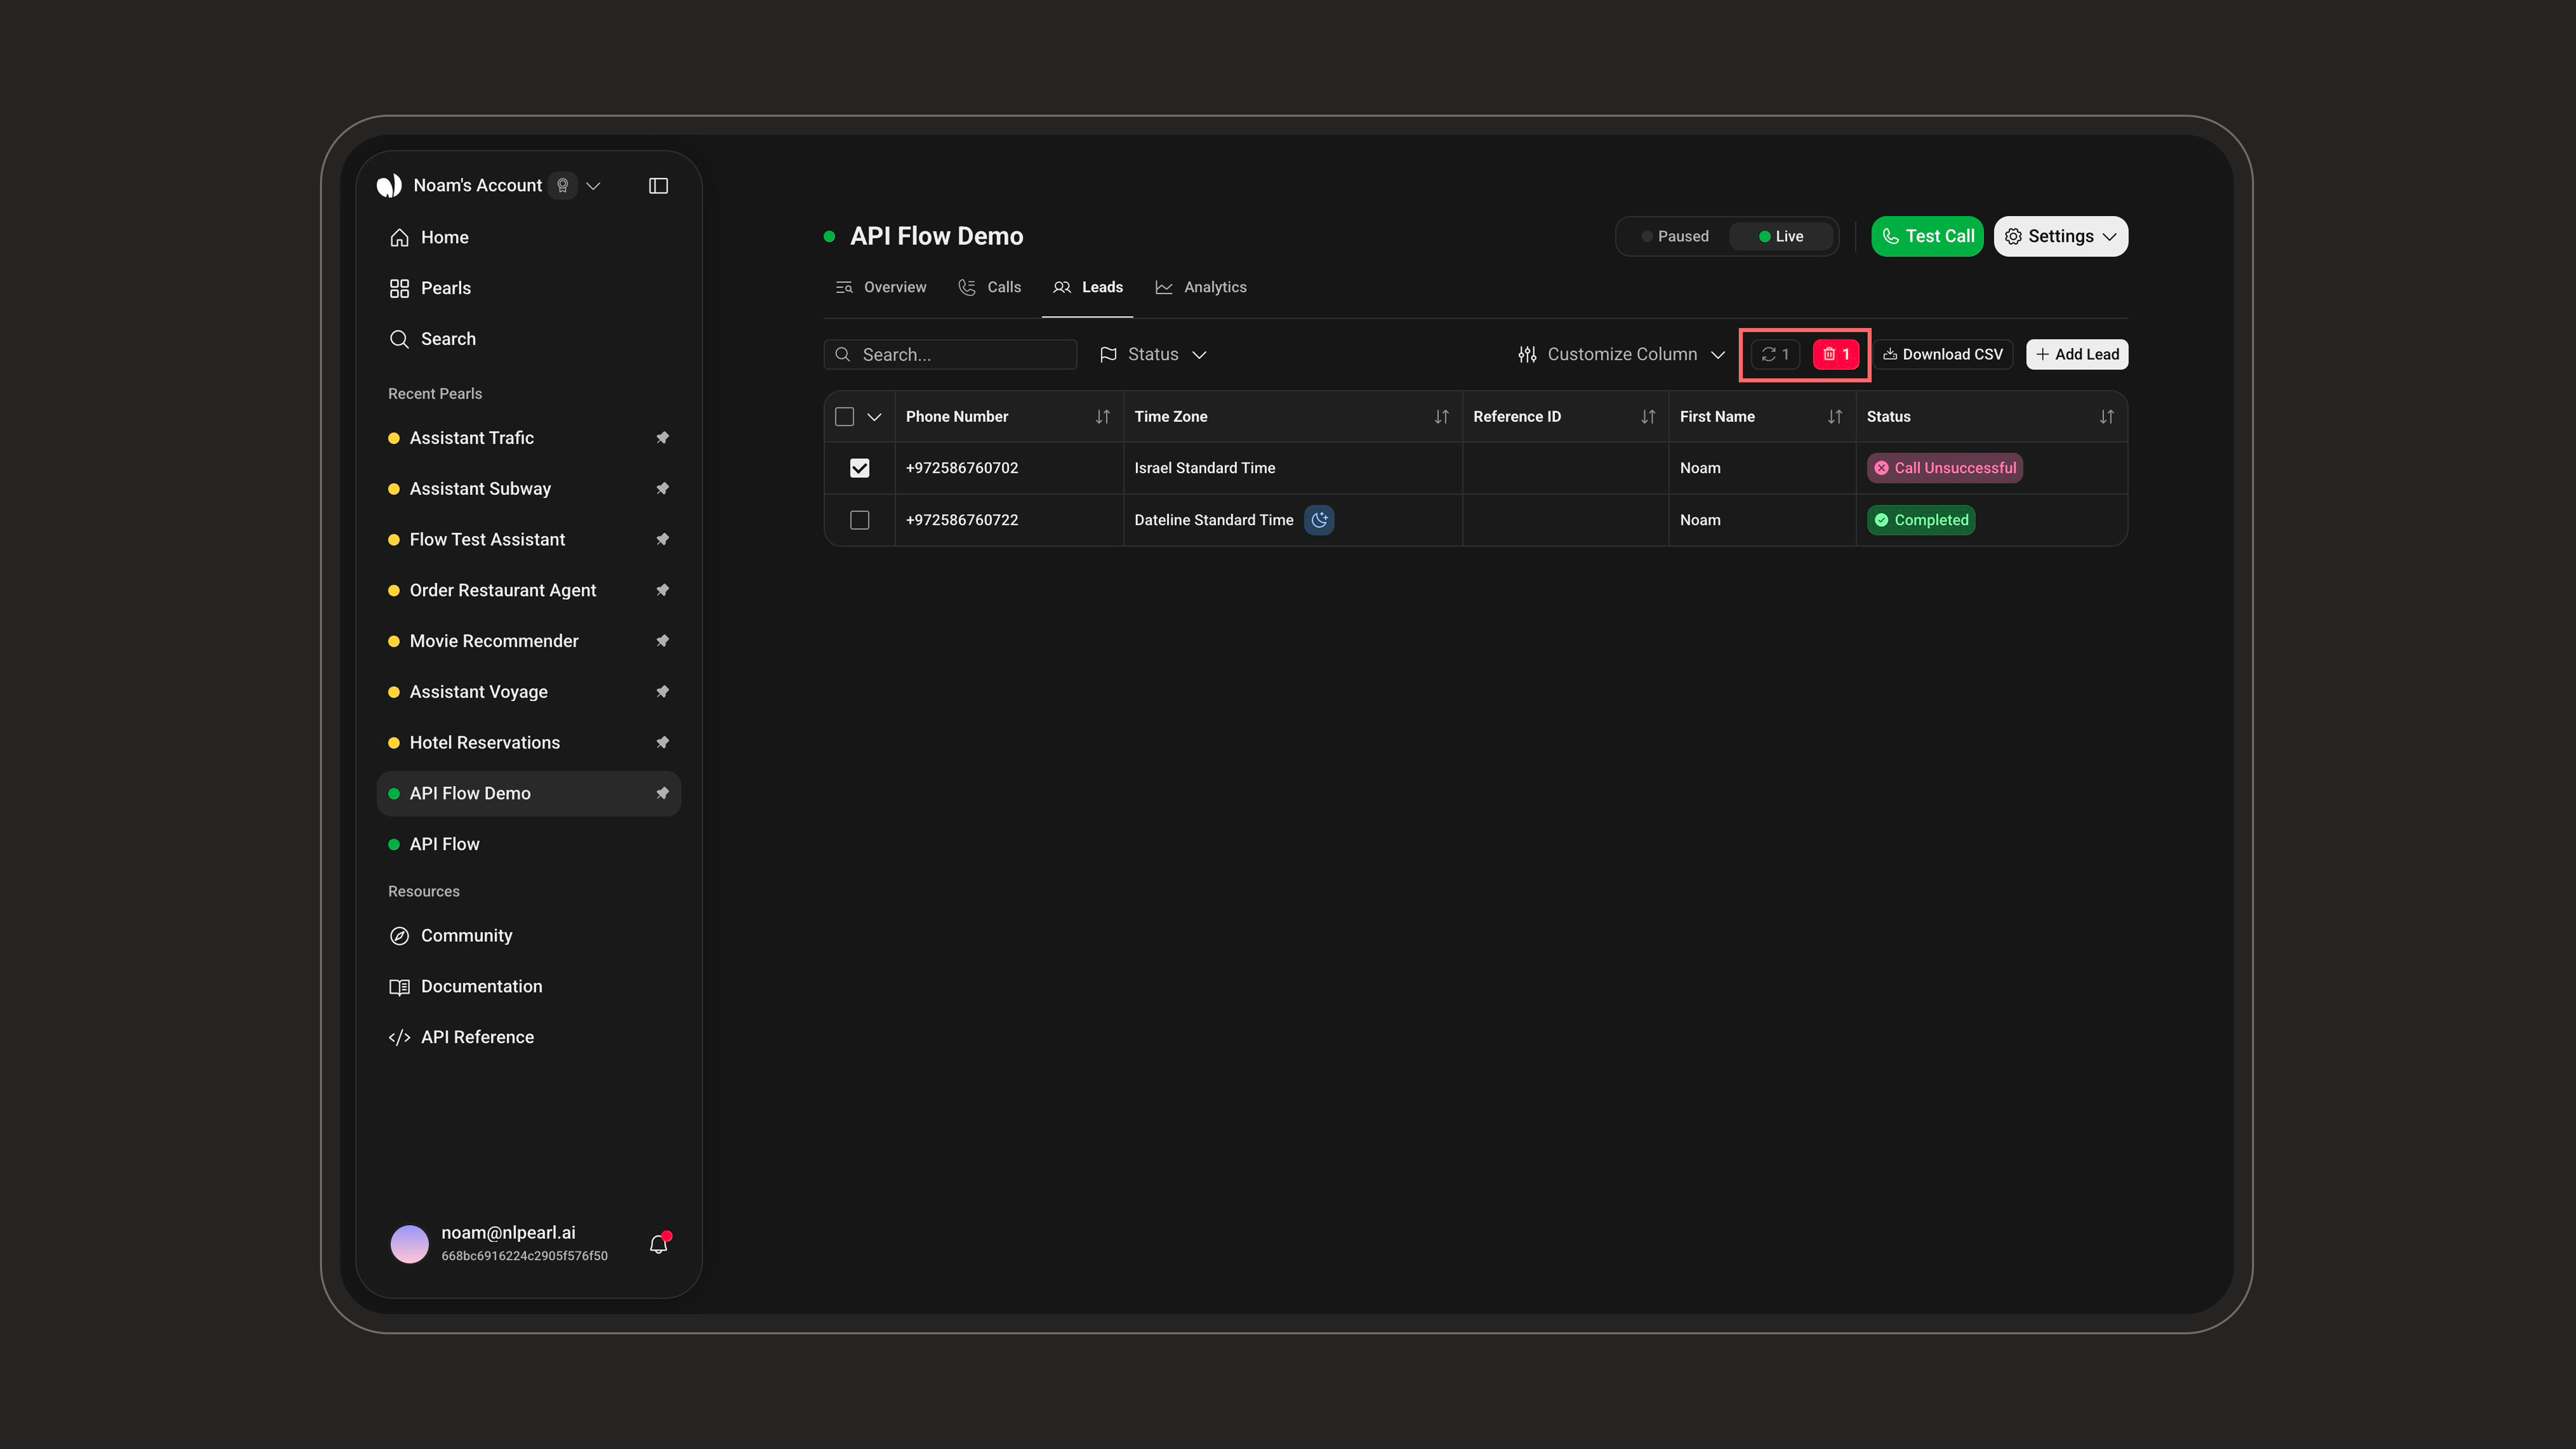
### Refreshing and Deleting
Select one or more leads (or select all across the current filter), then:
* **Refresh**: resets the leads to **New** so they re-enter the queue — handy to re-contact already-processed leads (Completed, Unsuccessful, etc.).
* **Delete**: permanently removes the selected leads, after a confirmation.
***
### Refreshing and Deleting
Select one or more leads (or select all across the current filter), then:
* **Refresh**: resets the leads to **New** so they re-enter the queue — handy to re-contact already-processed leads (Completed, Unsuccessful, etc.).
* **Delete**: permanently removes the selected leads, after a confirmation.
 ***
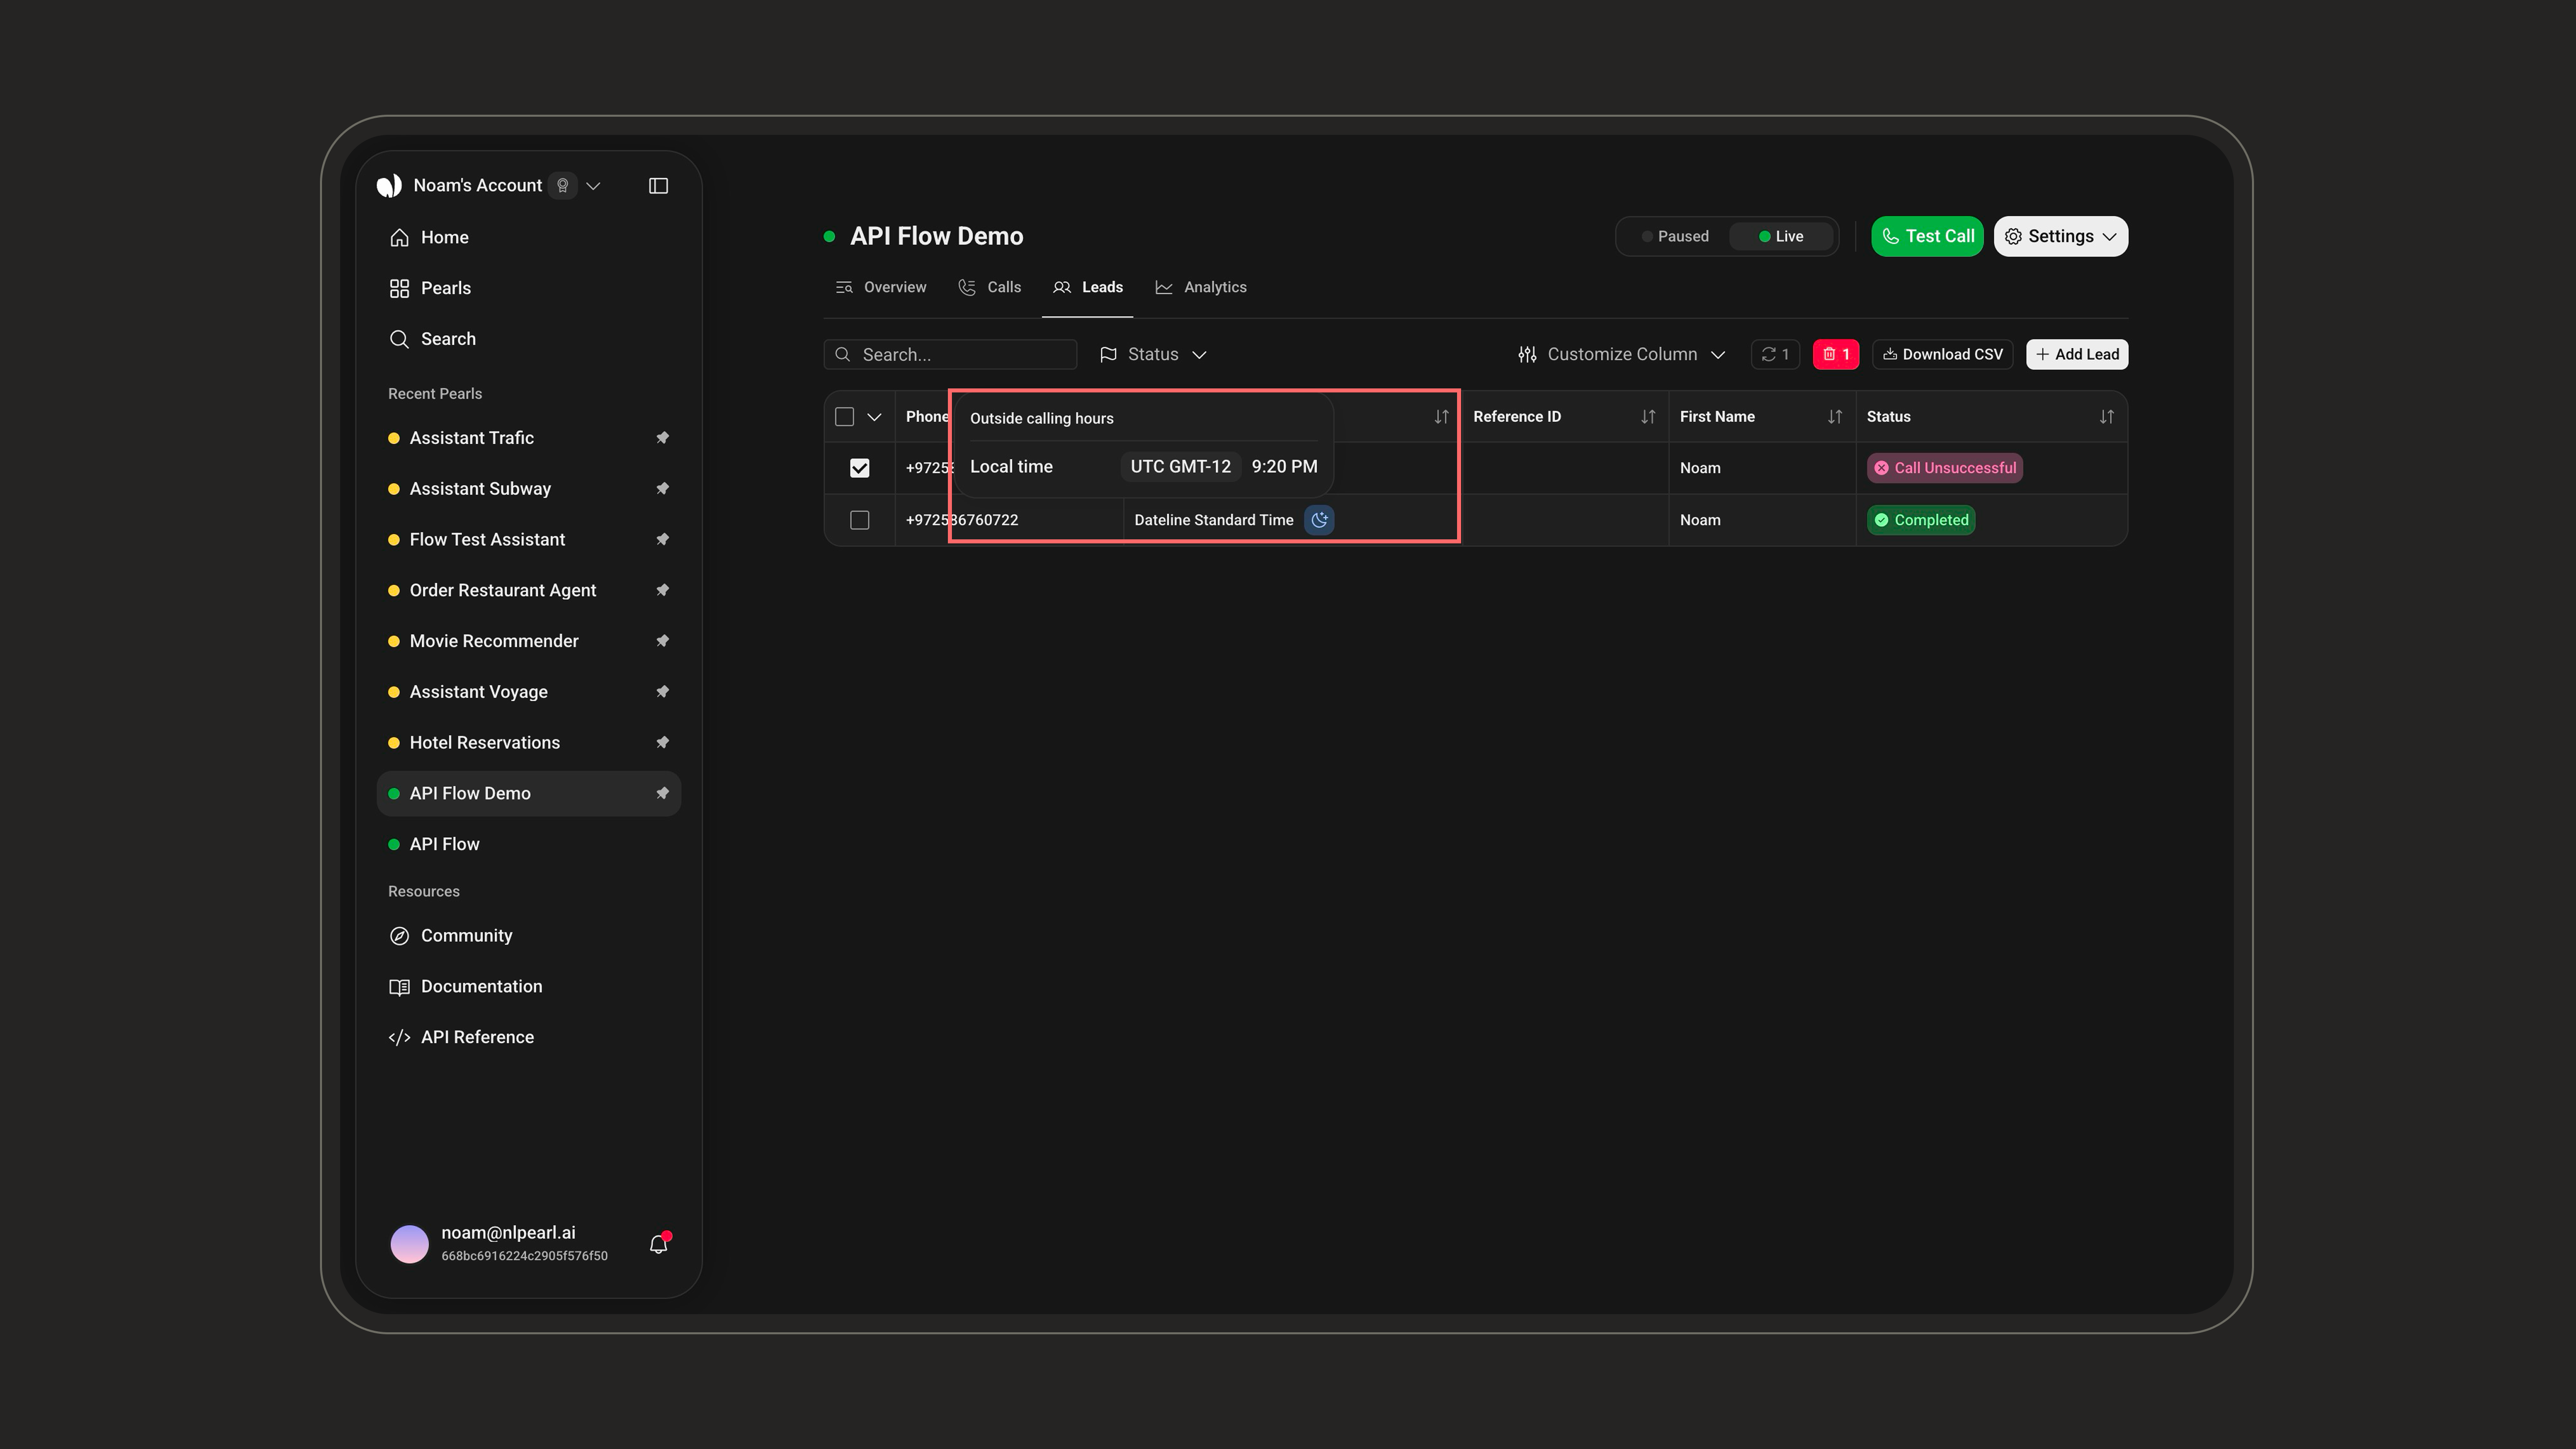
### Outside Calling Hours
When a lead's local time falls outside your campaign's [calling hours](#calling-hours), a **moon icon** appears on its Time Zone column — the lead is "sleeping" and won't be contacted until its window opens. Hover the icon to see the lead's local time and UTC offset.
***
### Outside Calling Hours
When a lead's local time falls outside your campaign's [calling hours](#calling-hours), a **moon icon** appears on its Time Zone column — the lead is "sleeping" and won't be contacted until its window opens. Hover the icon to see the lead's local time and UTC offset.
 ***
### Lead Details
Click a lead to open its details panel. Use the arrows or **↑/↓** keys to move between leads. The header shows the lead's name (or contact identifier), its **Lead ID** (copyable), and its status.
***
### Lead Details
Click a lead to open its details panel. Use the arrows or **↑/↓** keys to move between leads. The header shows the lead's name (or contact identifier), its **Lead ID** (copyable), and its status.
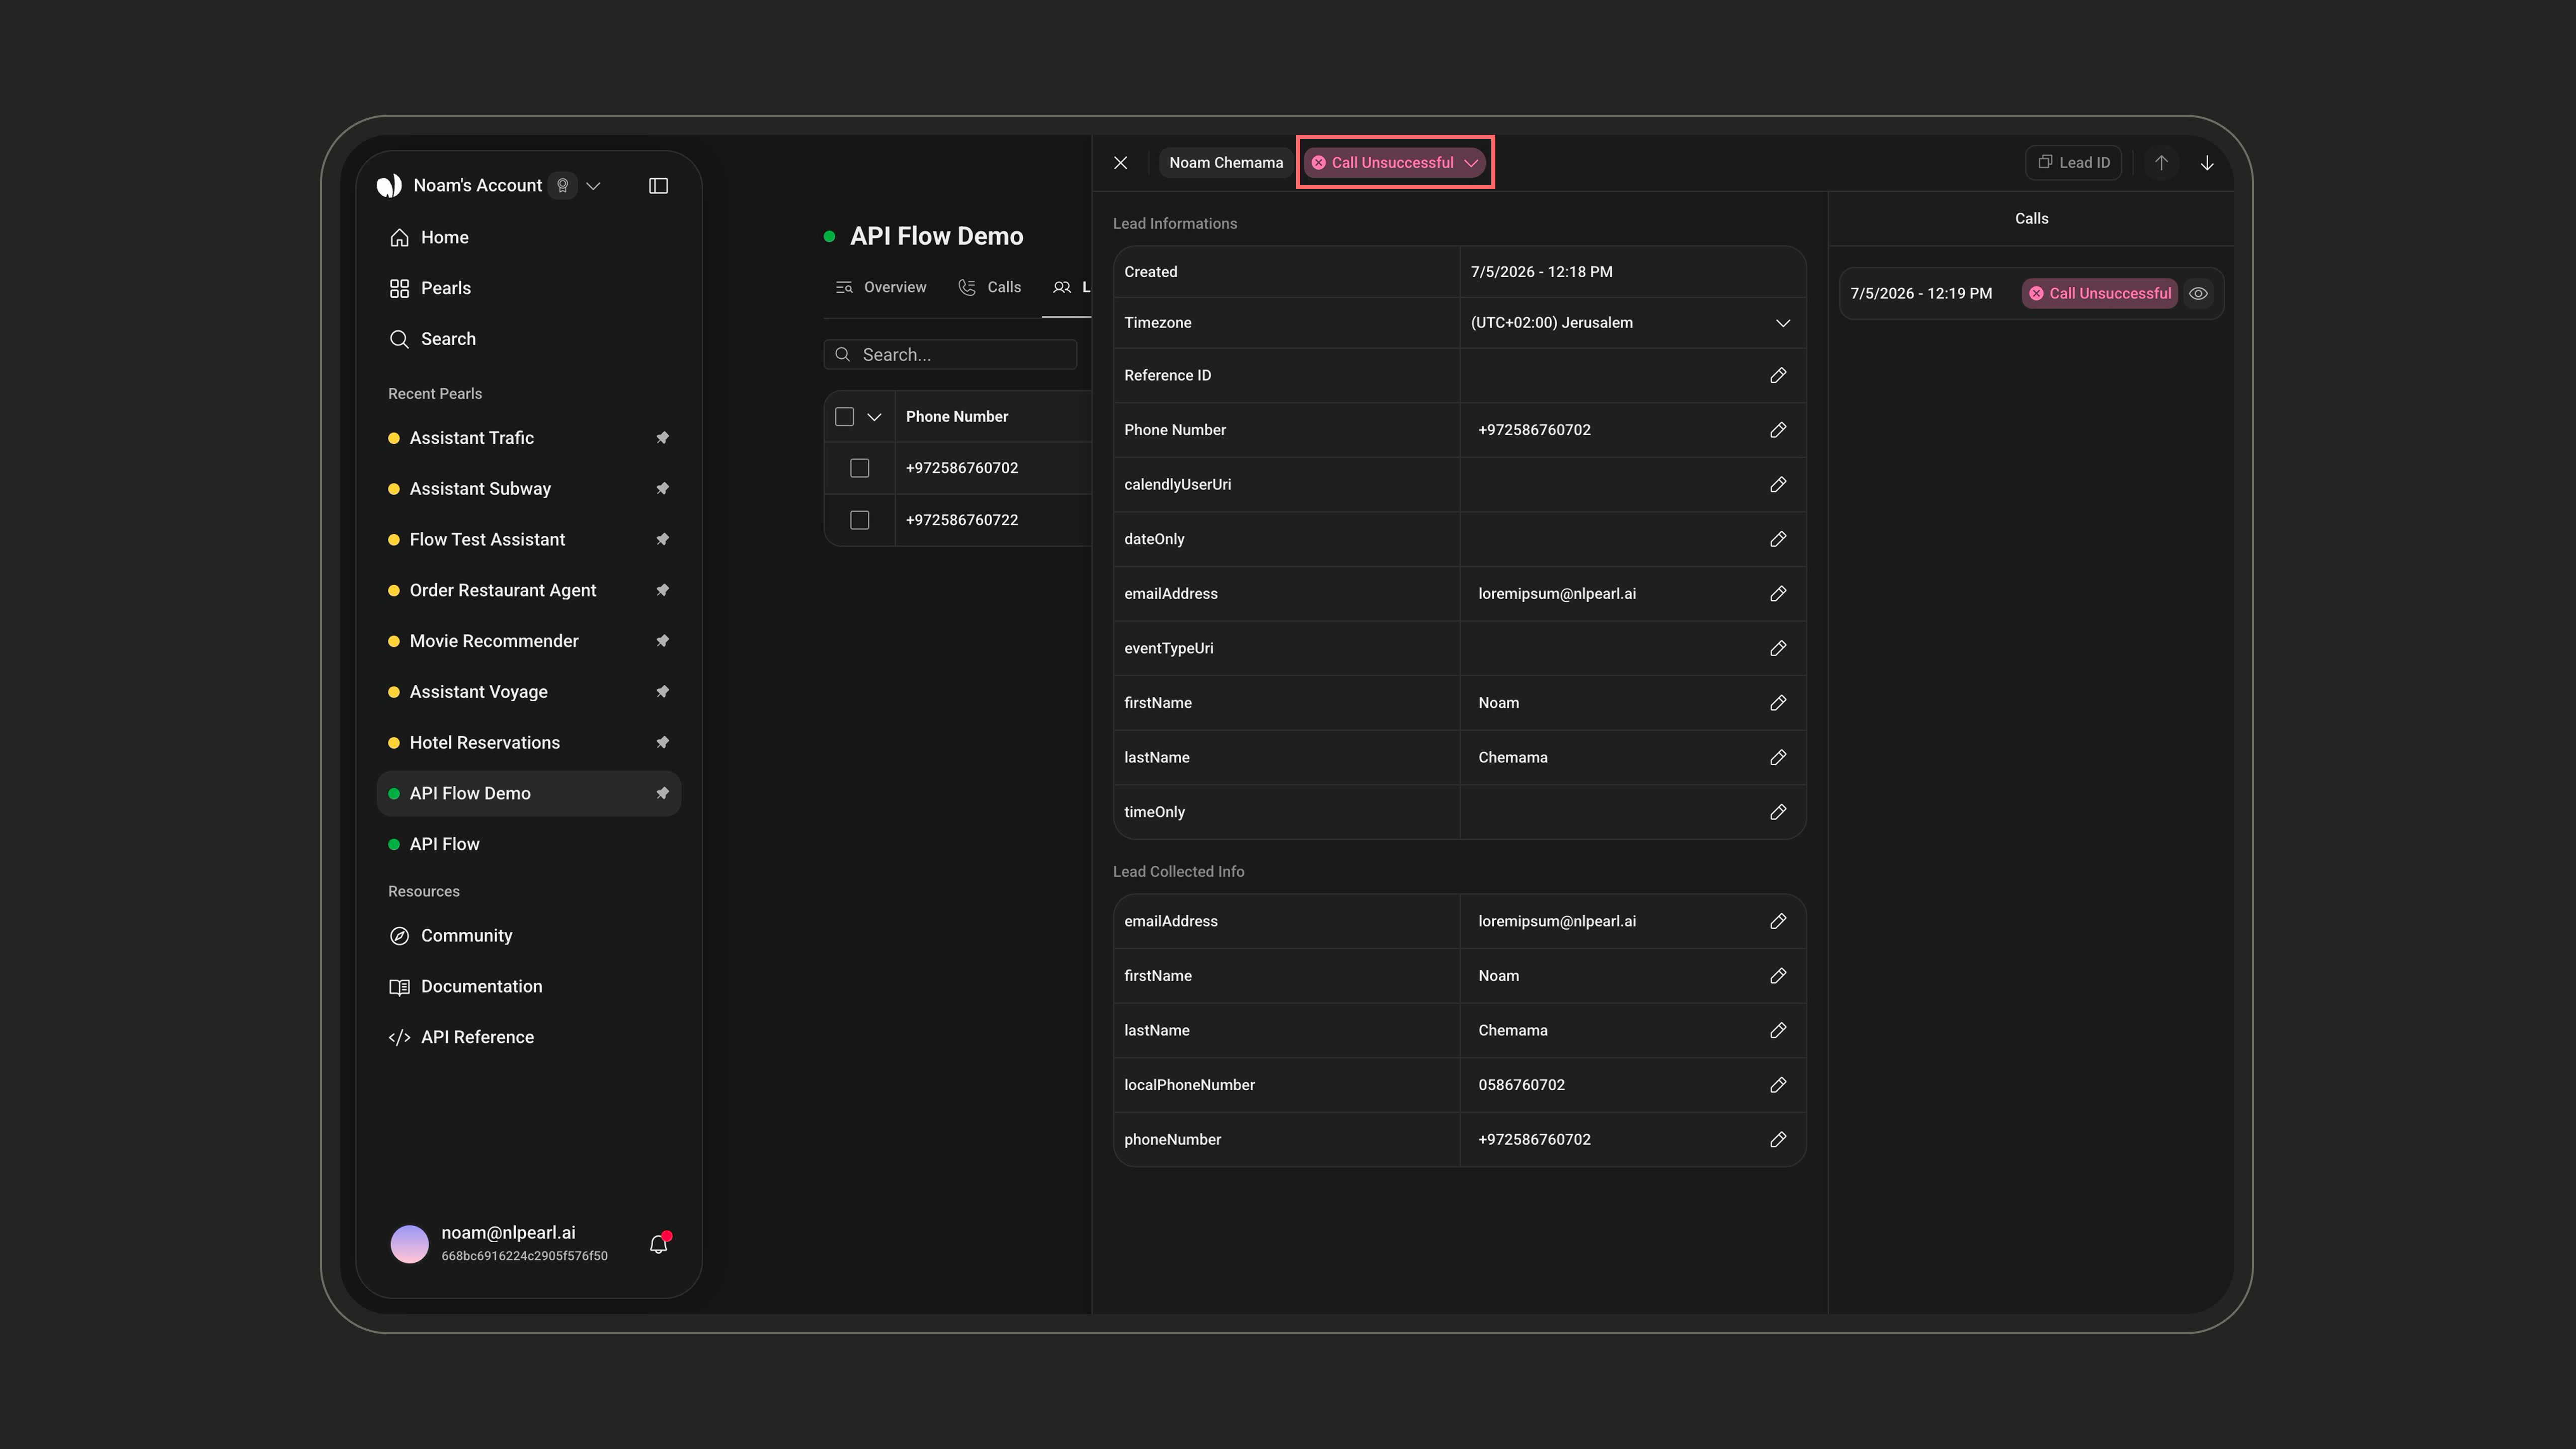
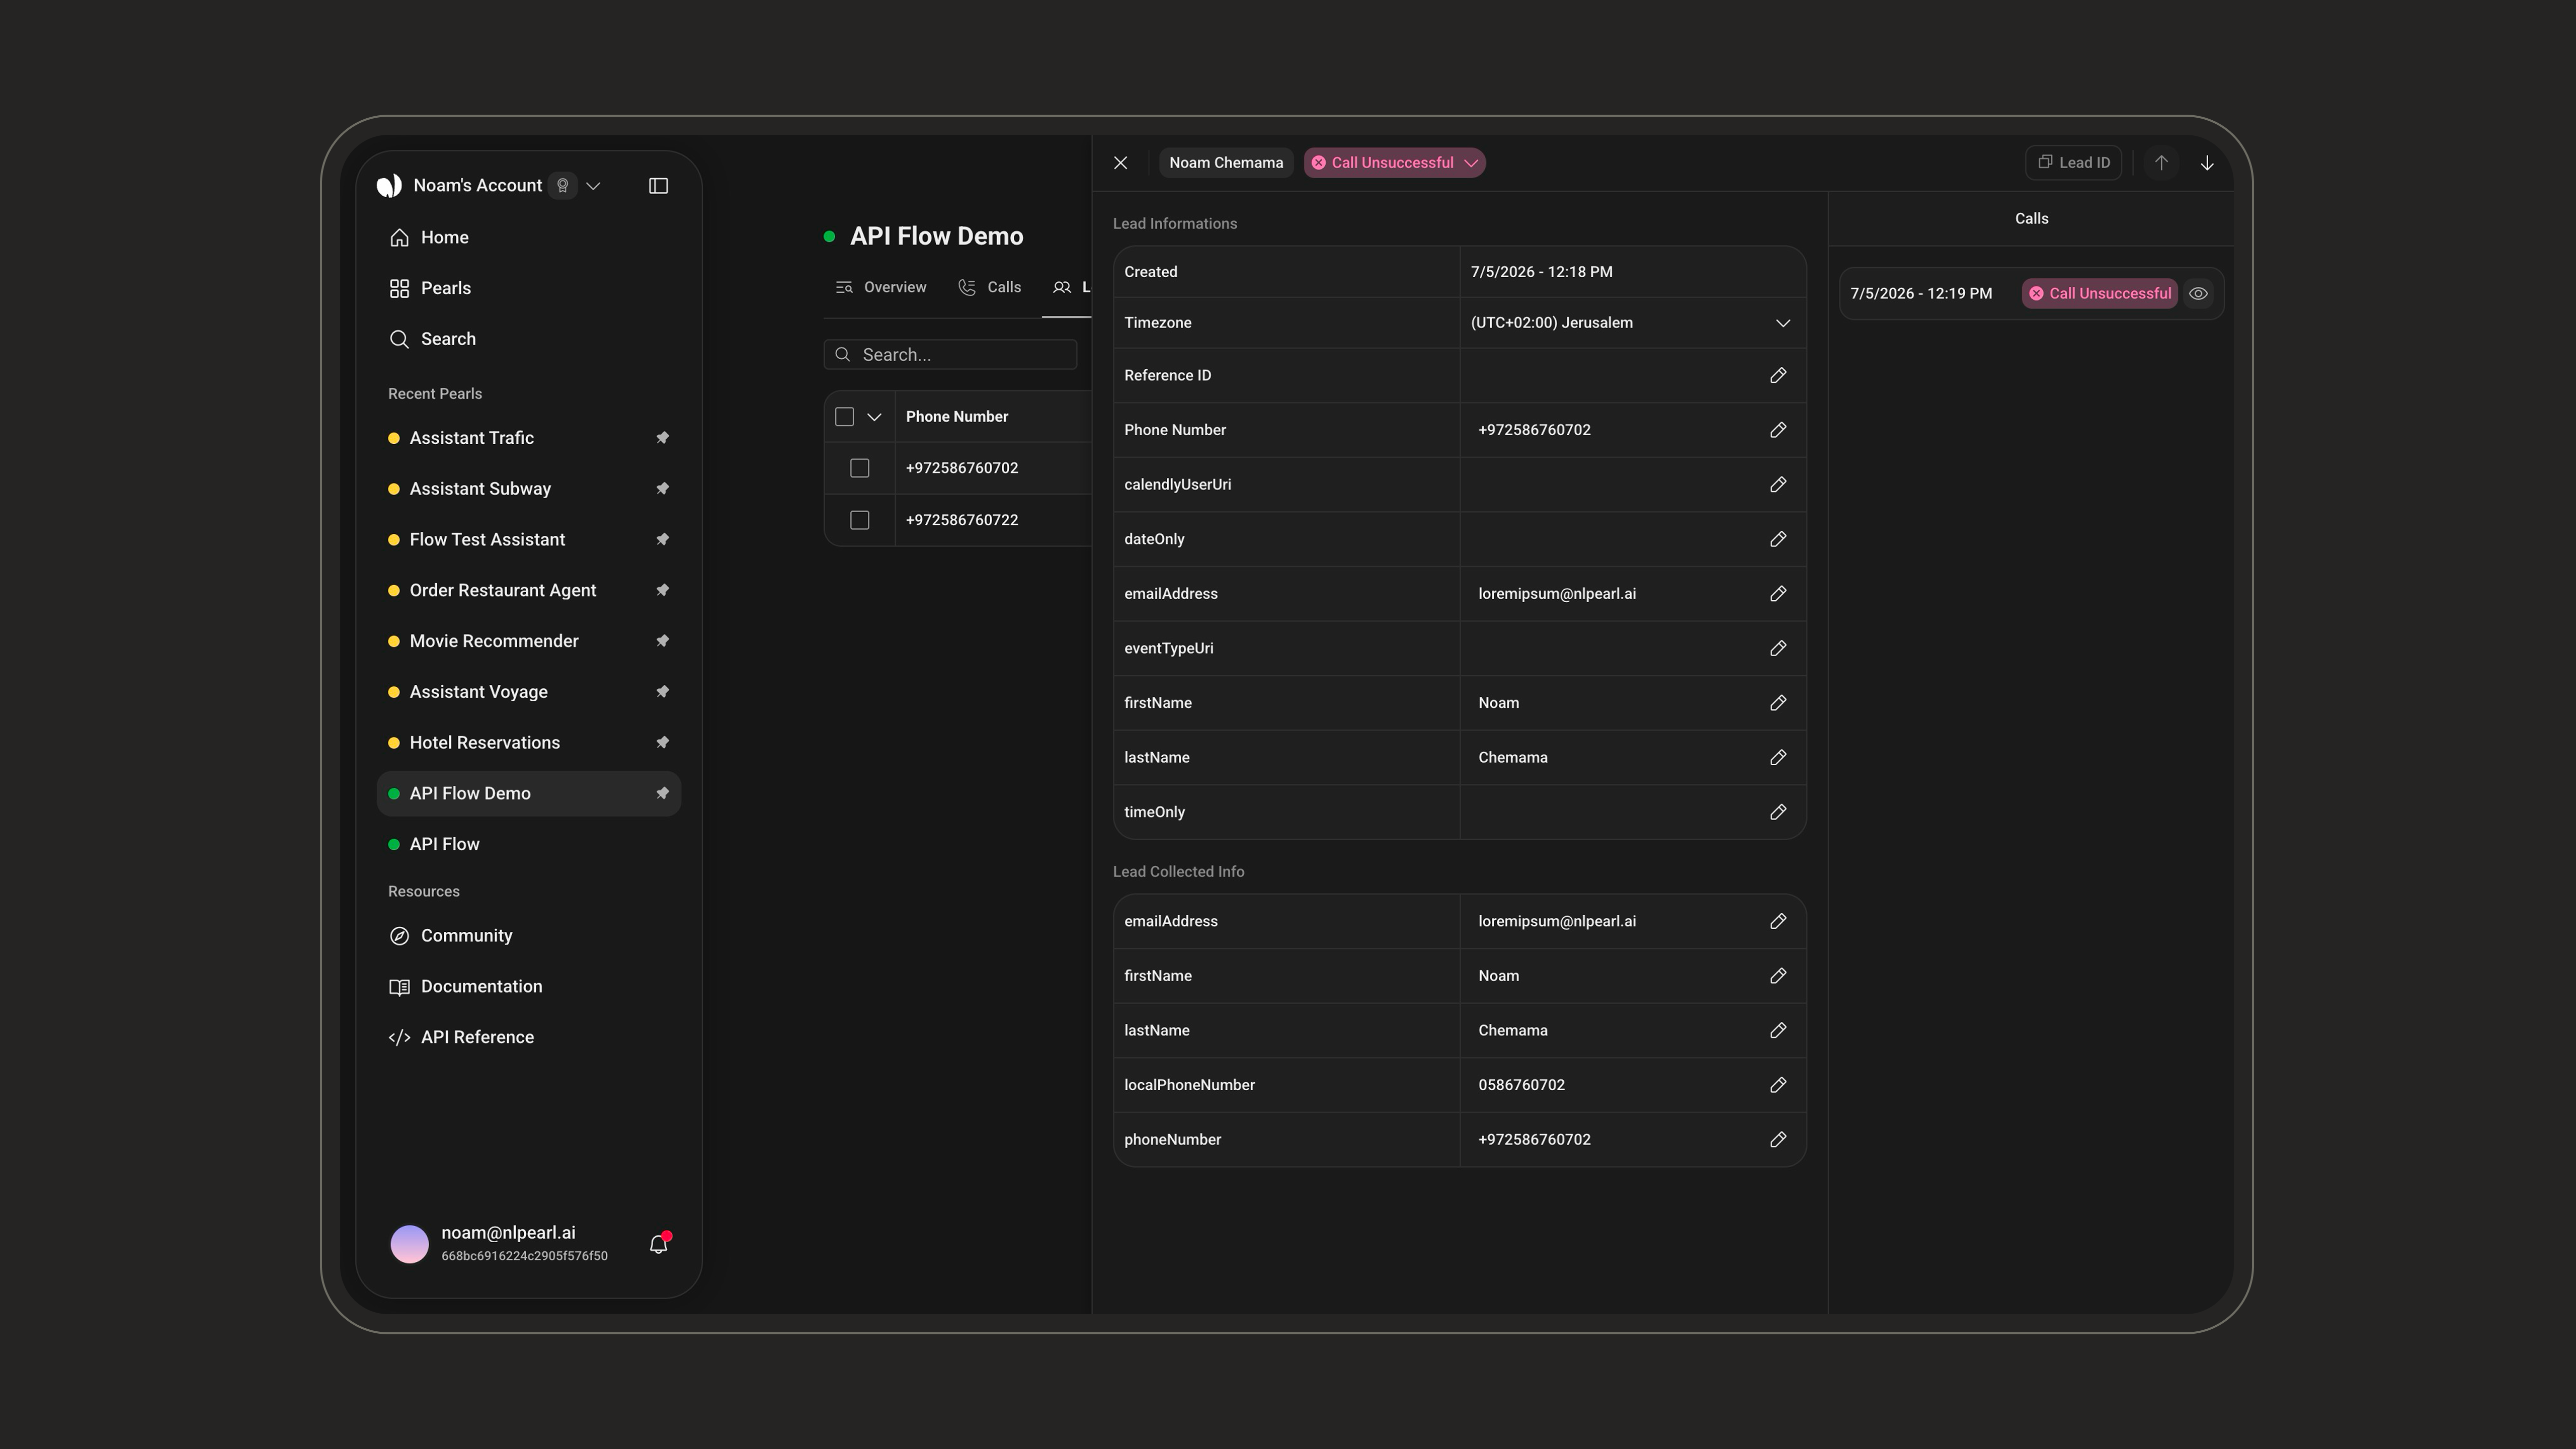 **Status** — change the lead's status from the editable dropdown; the change is applied instantly. This simply updates the lead's status label (e.g. **Chat Successful**, **Chat Unsuccessful**, **New**) — for example, set it back to **New** to re-contact the lead.
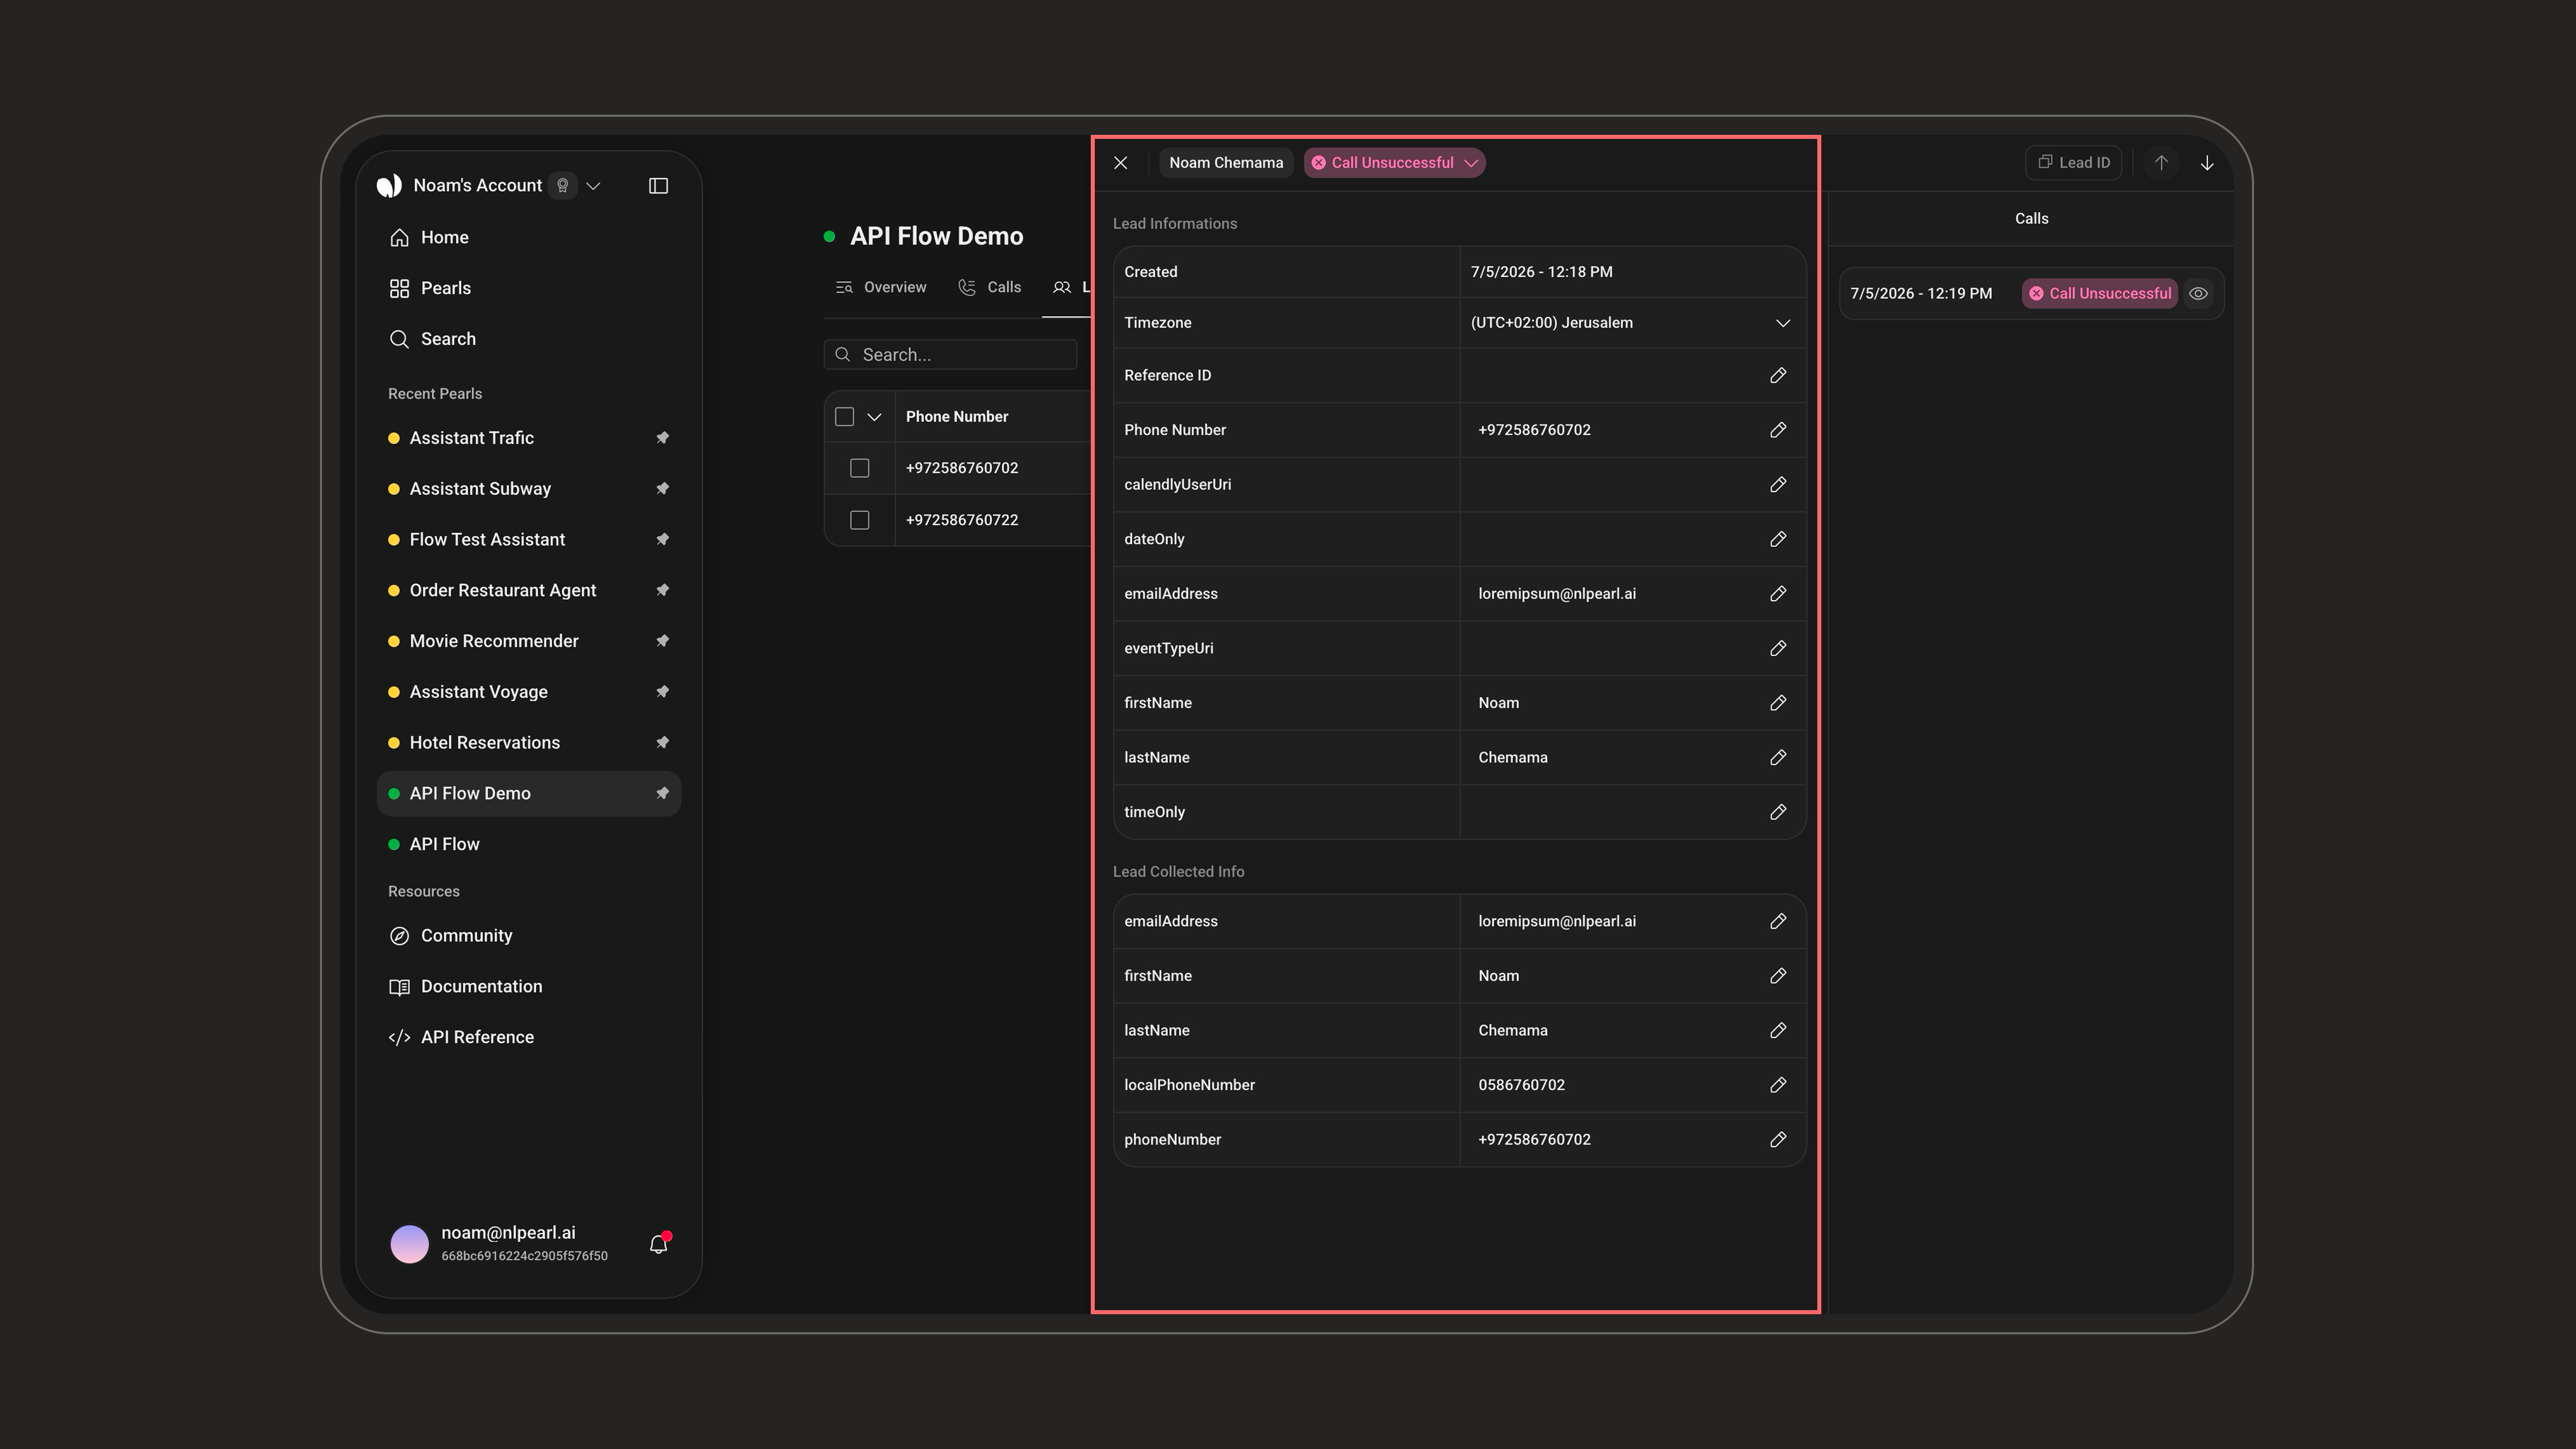
 **Lead information** — Timezone, Reference ID, contact identifier, and every Pearl variable are **editable inline**, and each change is saved immediately. The panel separates two groups:
* **Lead data**: values you provided up front (imported or entered variables).
* **Lead Collected Info**: values Pearl gathered during the conversation.
**Lead information** — Timezone, Reference ID, contact identifier, and every Pearl variable are **editable inline**, and each change is saved immediately. The panel separates two groups:
* **Lead data**: values you provided up front (imported or entered variables).
* **Lead Collected Info**: values Pearl gathered during the conversation.
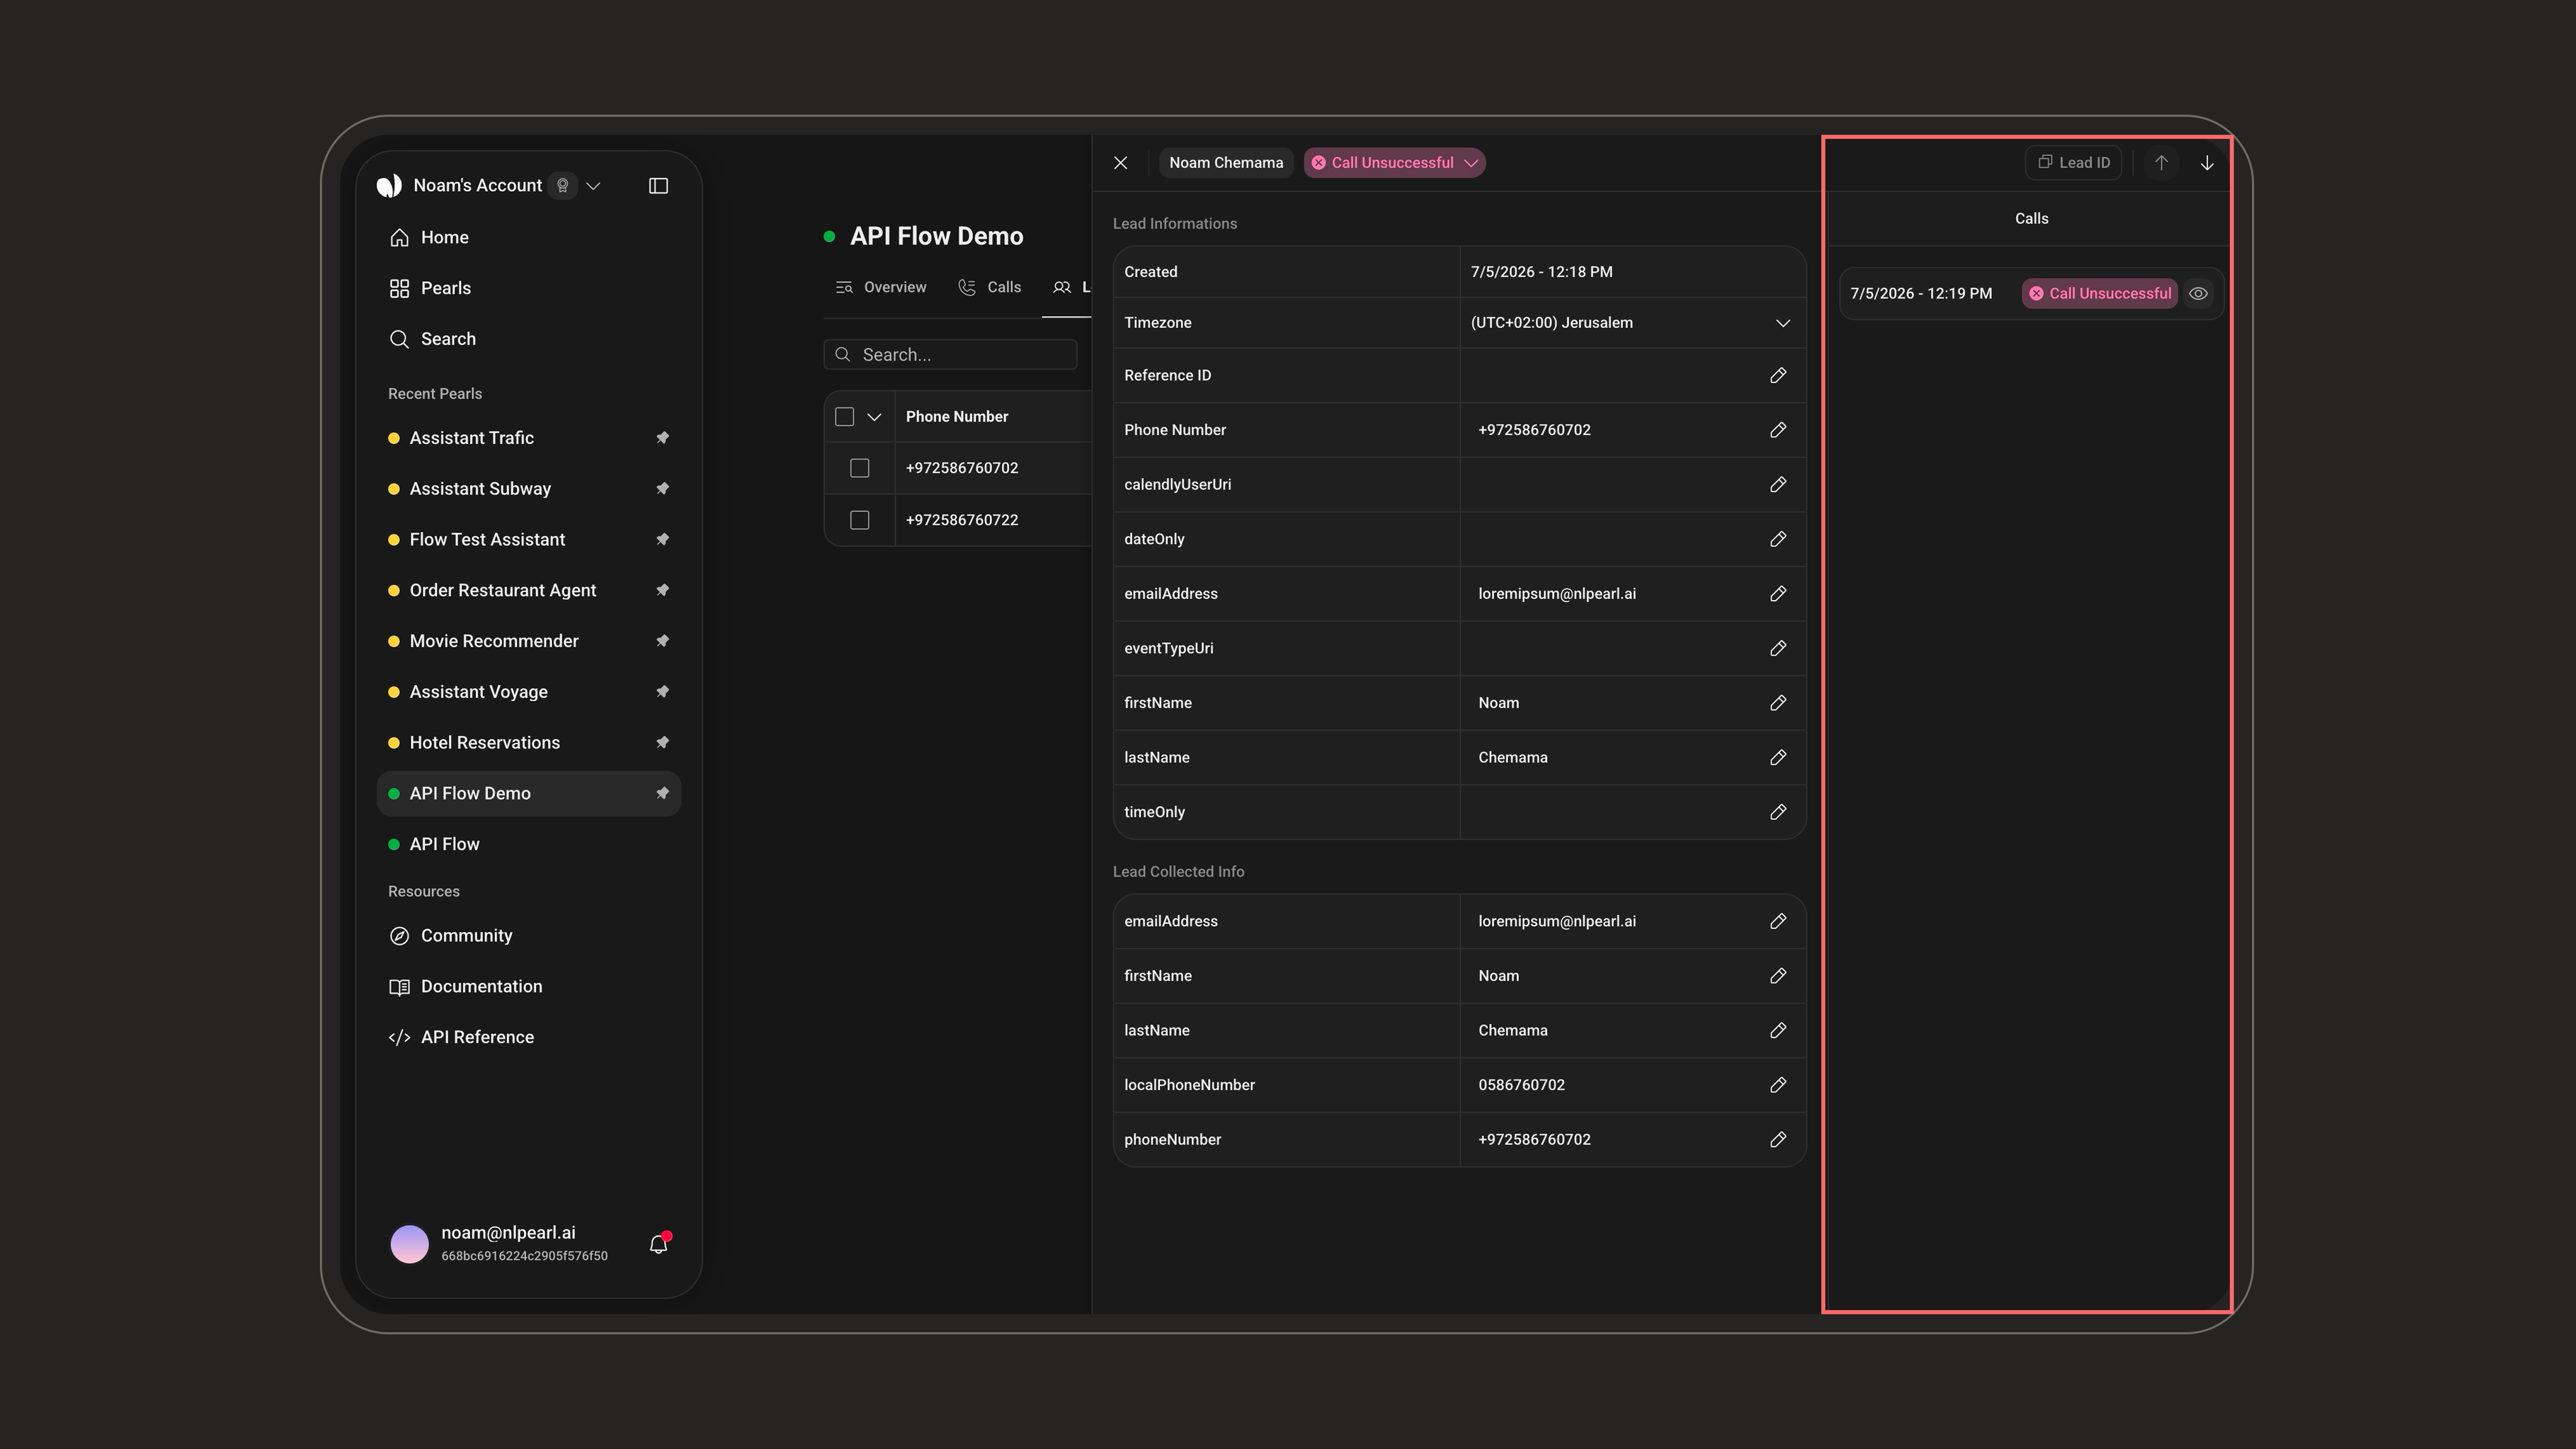
 **Chats** — the right column lists the lead's conversations with their time and status; click one to open its **Post-Chat** view.
 See everything captured after a conversation: outcome, transcript, summary, and collected data.