> ## Documentation Index
> Fetch the complete documentation index at: https://developers.nlpearl.ai/llms.txt
> Use this file to discover all available pages before exploring further.
# Send Email Node
The **Send Email** node lets your AI agent send an email automatically when a condition is met during (or after) a conversation, for example a confirmation, a quote, or follow-up information.
## Fields to configure
Open the node and fill in the fields below to define who receives the email and what it contains.
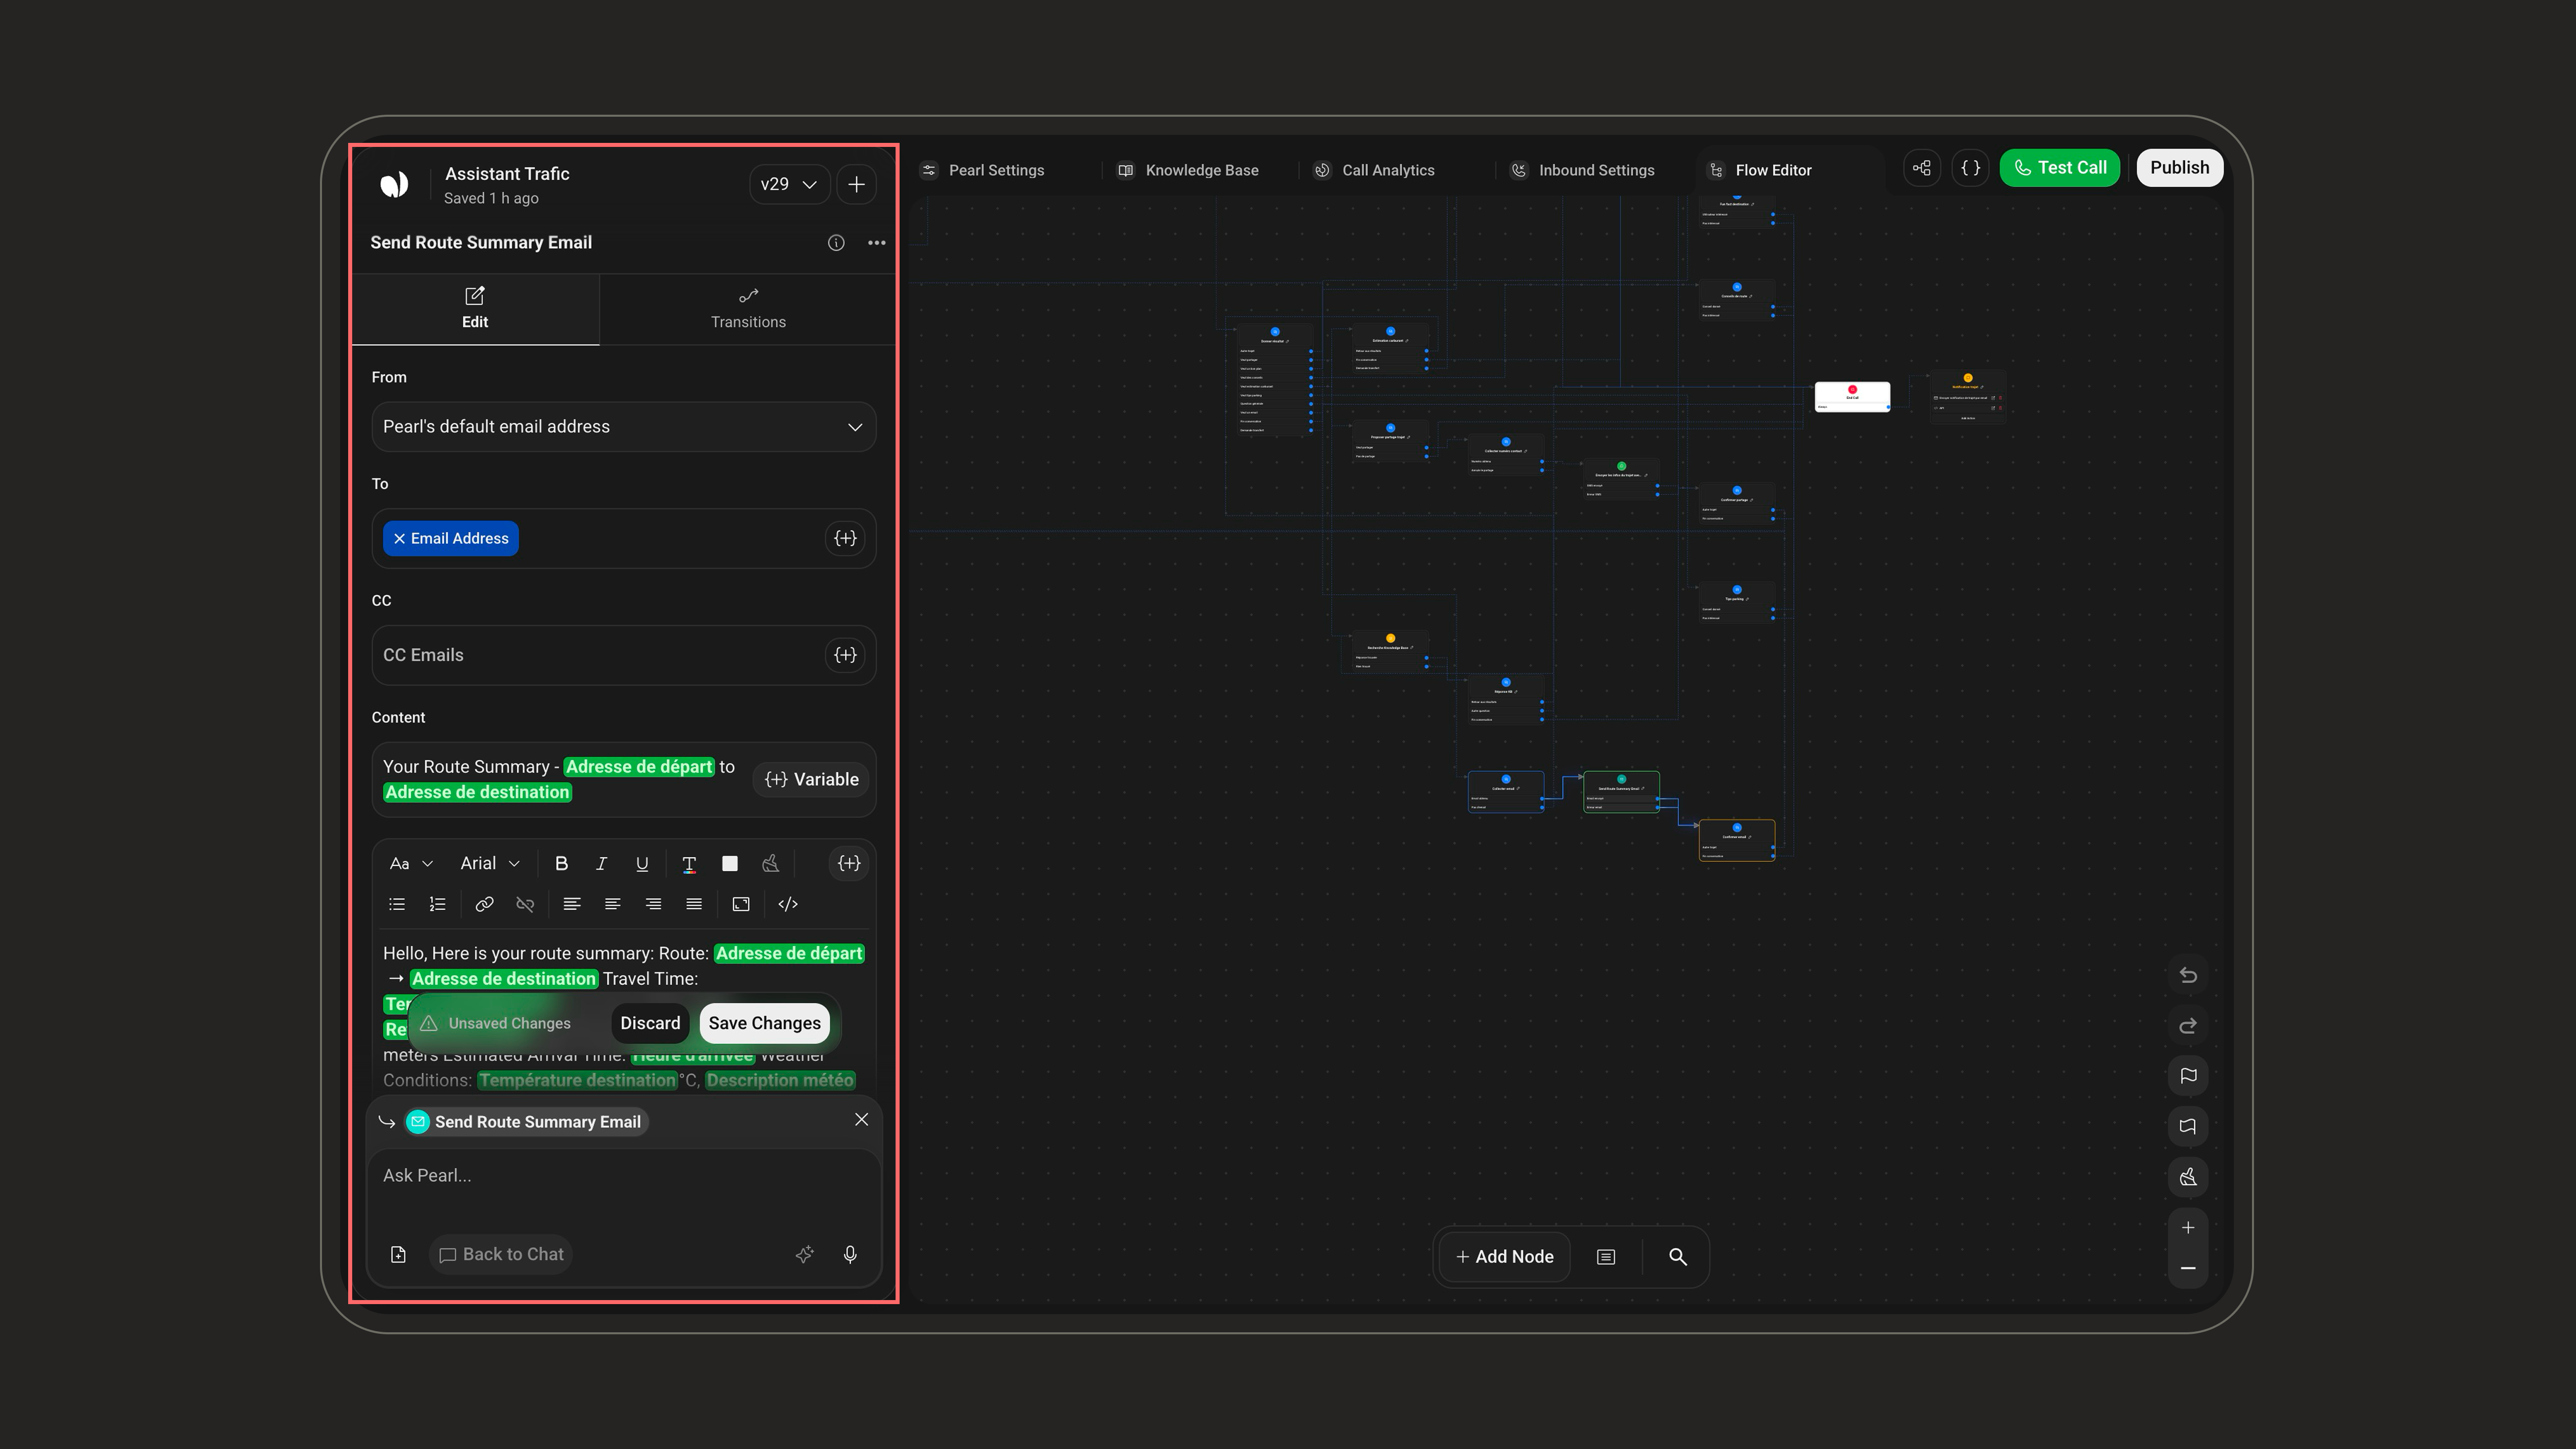 | Field | Description |
| ------------------ | ----------------------------------------------------------------------------------------------------------------------------------------------------------------------------------------------------------- |
| **From** | The sender account the email is sent from. Pick a connected account, click **Connect Email** to add one, or use **Edit** to update an existing connection. If none is selected, the default sender is used. |
| **To** | The recipient address(es). Type addresses directly or insert variables (for example an email collected earlier in the conversation). At least one recipient is required. |
| **CC** (optional) | Additional recipients in copy. Supports the same direct input and variables as **To**. |
| **Subject** | The subject line of the email. Insert variables to personalize it (for example the prospect's first name). |
| **Content (Body)** | The body of the email, using a rich text (HTML) editor. Insert variables to include details gathered during the conversation, such as a price quote or a meeting time. |
***
| Field | Description |
| ------------------ | ----------------------------------------------------------------------------------------------------------------------------------------------------------------------------------------------------------- |
| **From** | The sender account the email is sent from. Pick a connected account, click **Connect Email** to add one, or use **Edit** to update an existing connection. If none is selected, the default sender is used. |
| **To** | The recipient address(es). Type addresses directly or insert variables (for example an email collected earlier in the conversation). At least one recipient is required. |
| **CC** (optional) | Additional recipients in copy. Supports the same direct input and variables as **To**. |
| **Subject** | The subject line of the email. Insert variables to personalize it (for example the prospect's first name). |
| **Content (Body)** | The body of the email, using a rich text (HTML) editor. Insert variables to include details gathered during the conversation, such as a price quote or a meeting time. |
***
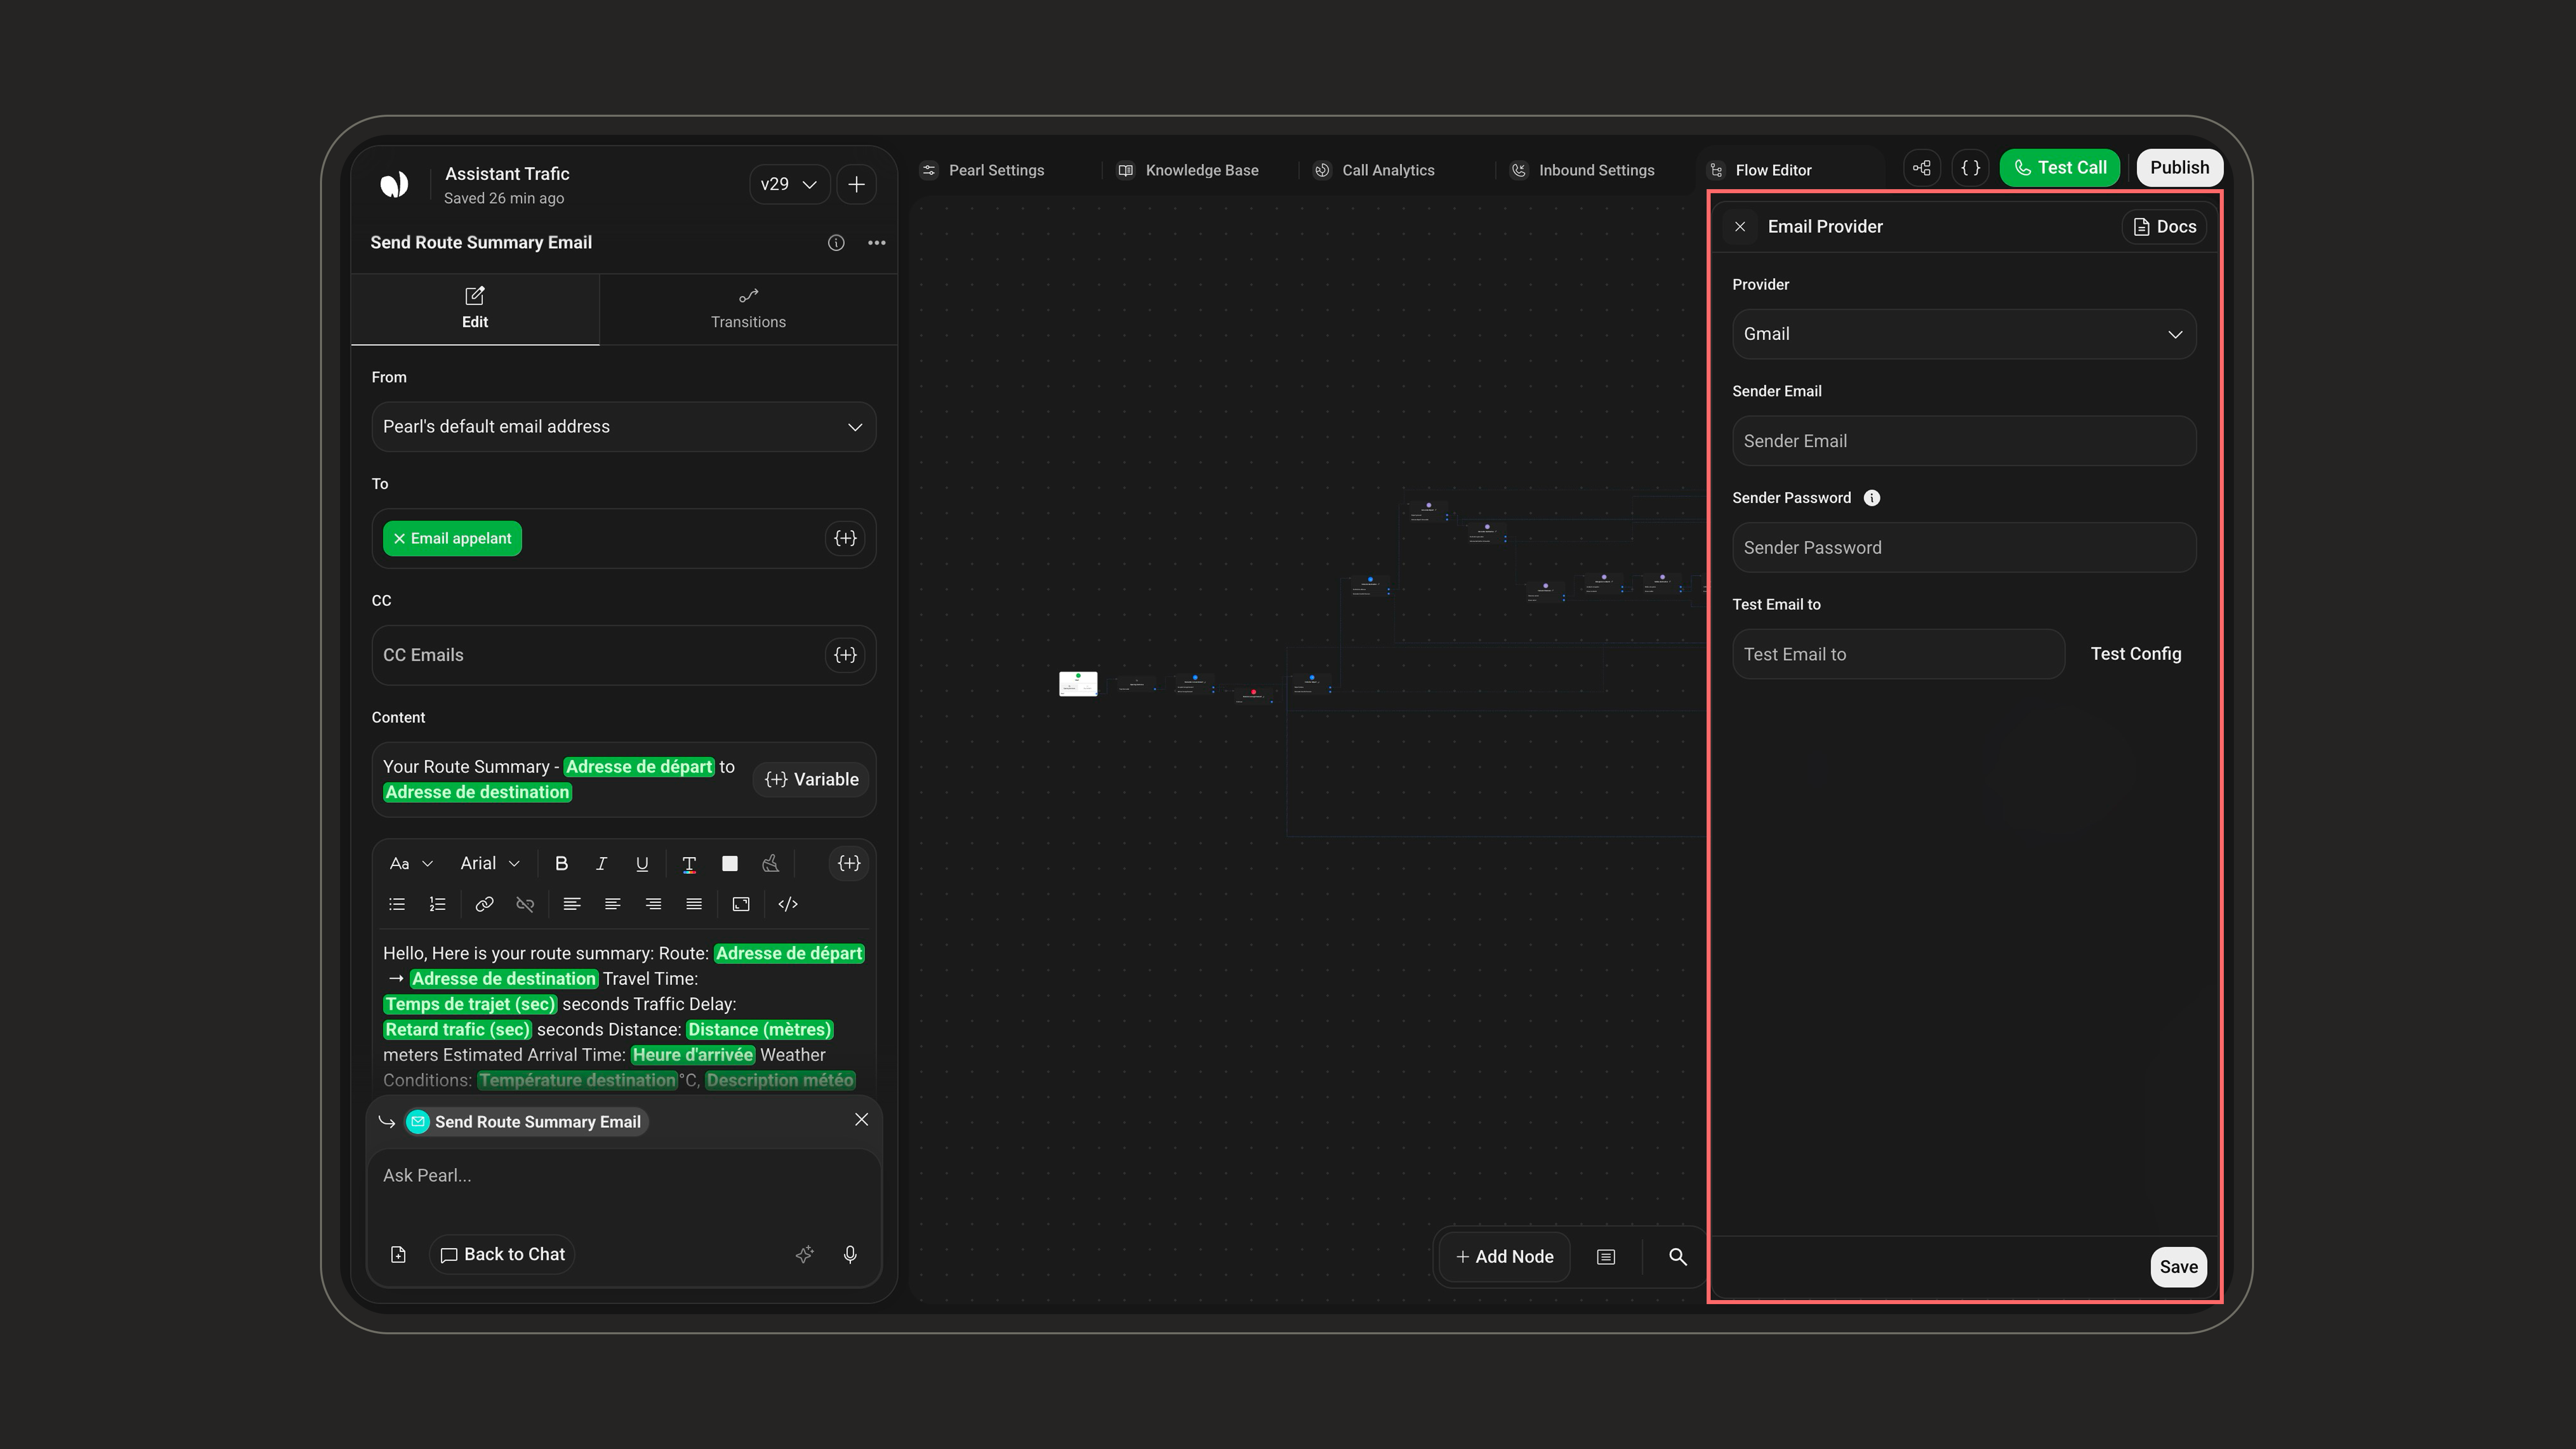
Pearl sends emails **from your own business address** using one of three providers. Pick the one that matches your setup.
 Send from your Gmail address
Choose **Gmail** from the provider list.
Enter your Gmail address in **Sender Email**.
Enter a **Gmail app-password**, not your normal password. [Learn how to generate one](https://support.google.com/accounts/answer/185833).
*(Optional)* Add an address under **Test Email to**, click **Test Config**, then **Save**.
Enable **2-factor authentication** on your Google account and use an **app-password**, not your main password.
 Send from your Microsoft 365 address
Choose **Office 365** from the provider list.
Enter your Microsoft address in **Sender Email**.
Enter an **Office 365 app-password** (see your Microsoft security settings).
*(Optional)* Add a **Test Email** address, click **Test Config**, then **Save**.
Office 365 may block basic SMTP by default. Make sure your tenant allows it and use an app-password where required.
 Send through any SMTP server
Choose **Custom** from the provider dropdown.
For example `smtp.gmail.com`, `smtp.office365.com`, or `mail.yourdomain.com`.
Enter the **Port**, usually **587** for TLS or **465** for SSL, then toggle **Enable SSL** (usually **On**).
Enter your **Sender Email** and its **SMTP account password**.
*(Optional)* Add a **Test Email** address under **Test Email to**, click **Test Config**, then **Save**.
If you're unsure about your SMTP details, check with your email hosting provider (Google Workspace, Outlook, Zoho, etc.).
## Variables
Personalize the **Subject** and **Content**, and set dynamic **To** and **CC** recipients using variables collected during the conversation.
Learn how to create and insert variables to tailor each email to the recipient.
